AllowMe
Visual aid for your users in giving you browser's permission such as cam or mic
Getting Started
**Step 1: Installation through bower **
bower install allow-me
or copy the following css and javascript to your html
<link rel="stylesheet" href="//cdnjs.cloudflare.com/ajax/libs/allow-me/0.1.1/allowMe.min.css">
<script src="//cdnjs.cloudflare.com/ajax/libs/allow-me/0.1.1/allowMe.min.js"></script>
Step 2: Add both allowMe.js and allowMe.css into your index.html
Step 3: Running allowMe
Inside your html, add a div with an id of your choice (eg. container)
<div id ="container"> </div>
var permission = new allowMe();
//container is the id of your div
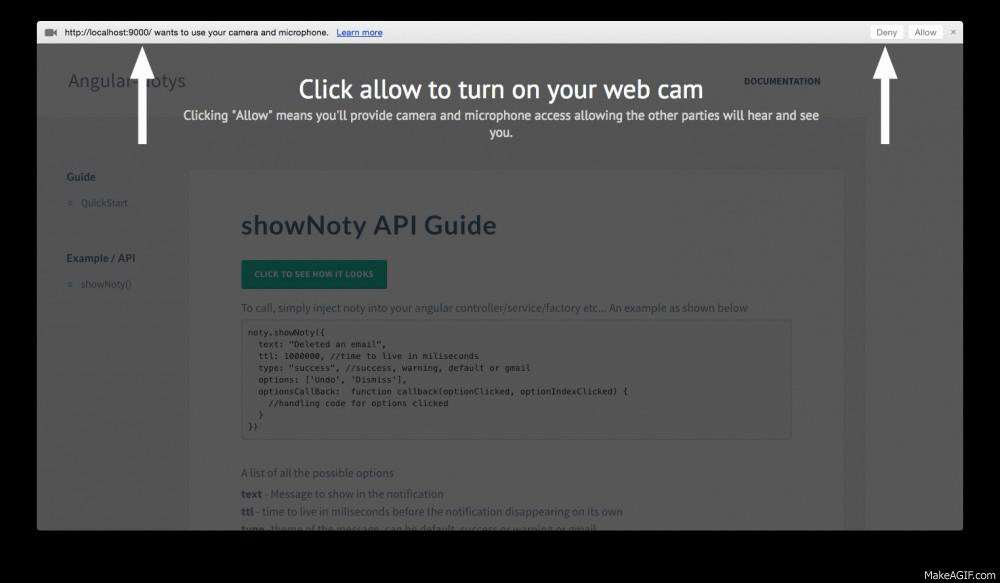
permission.show('container', {
headerText: "Click allow to turn on your web cam ",
headerFontSize: "40px",
headerFont: "PT Sans, serif",
captionText: "Clicking allow means you'll provide camera and microphone access allowing the other parties will hear and see you.",
captionFontSize: "20px",
captionFont: "PT Sans, serif",
backdropColor: '#000',
backdropOpacity: 0.7,
arrowColor: "#FFFFFF",
arrowSize: 1.5
});
//to hide
permission.hide();That's it!
Options
- headerText: your header text
- headerFontSize: (optional) font-size for your header text
- headerFont (optional) font for your header text
- captionText: (optional) your header text
- captionFontSize: (optional) font-size for your caption text
- captionFont: (optional) font for your caption text
- backdropColor: (optional), color of your backdrop in HEX, default #000 (black)
- backdropOpacity: (optional) opacity of your backdrop, default 0.5
- arrowColor: (optional) color of your arrow in hex, default "#FFFFFF" (white)
- arrowSize: (optional) size of your arrow, default 1