Azure IoT Edge Workshop: Visual Anomaly Detection over multiple cameras with NVIDIA Jetson Nano devices
In this workshop, you'll discover how to build a solution that can process several real-time video streams with an AI model on a $100 device, how to build your own AI model to detect custom anomalies and finally how to operate it remotely.
We'll put ourselves in the shoes of a soda can manufacturer who wants to improve the efficienty of its plant. An improvement that he'd like to make is to be able to detect soda cans that fell down on his production lines, monitor his production lines from home and be alerted when this happen. He has 3 production lines, all moving at a fairly quick speed.
To satisfy the real-time, multiple cameras, custom AI model requirements, we'll build this solution using NVIDIA Deepstream on a NVIDIA Jetson Nano device. We'll build our own AI model with Azure Custom Vision. We'll deploy and connect it to the Cloud with Azure IoT Edge and Azure IoT Central. Azure IoT Central will be used to do the monitoring and alerting.
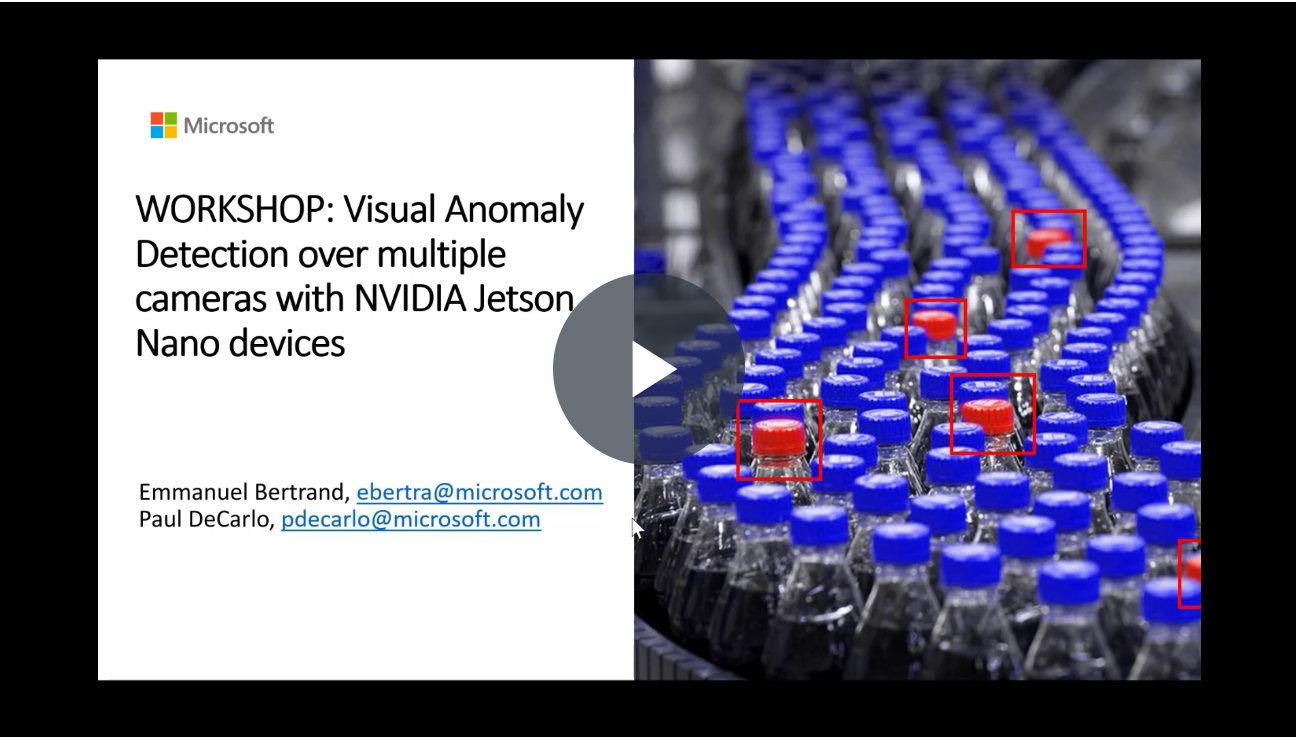
Check out this video recording to help you go through all the steps and concepts used in this workshop:
Prerequisites
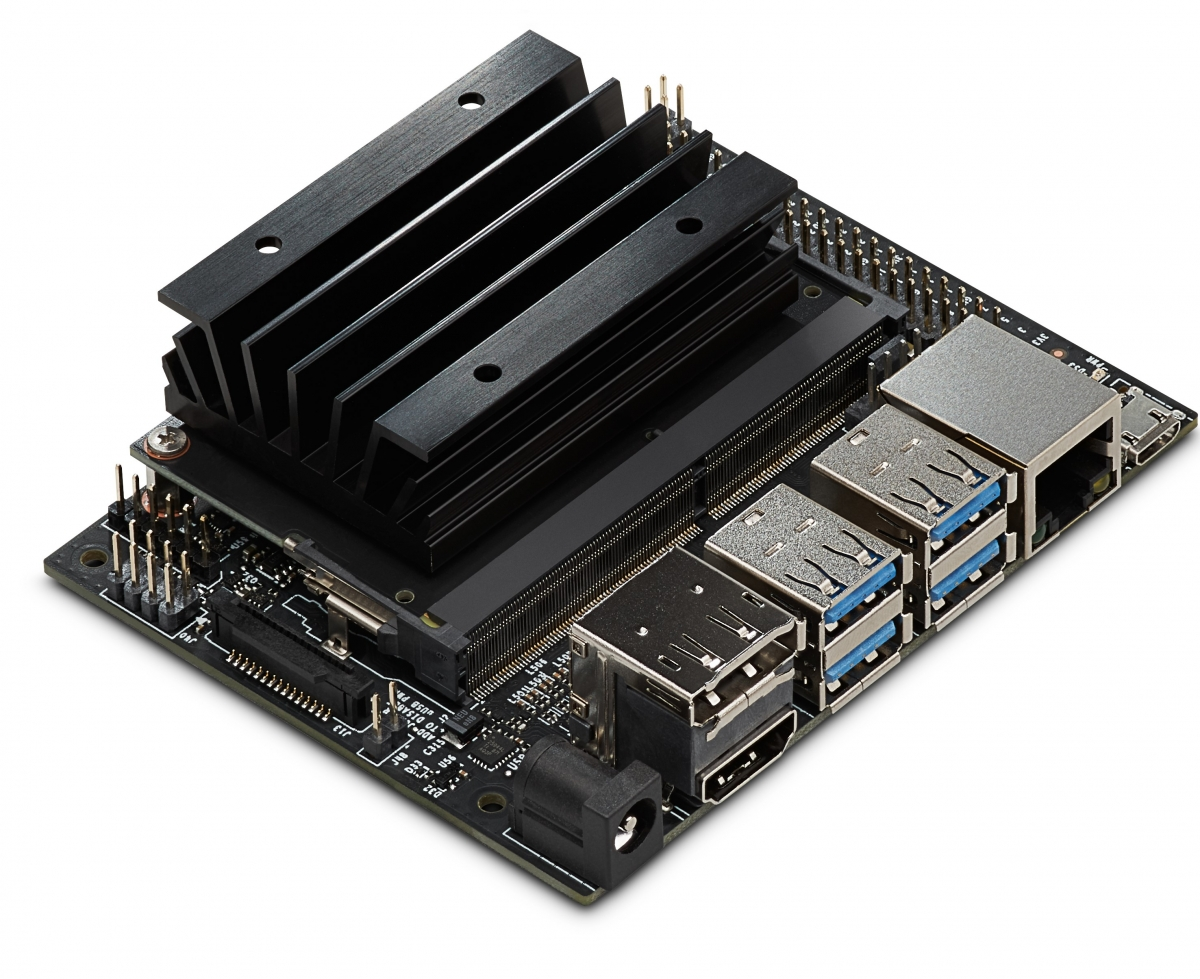
- Hardware: You need a NVIDIA Jetson Nano device with a 5V-4A barrel jack power supply like this one, which requires a jumper cable (such as these ones) on pins J48. See the Power Guide section of the Jetson Nano Developer Kit for more details. Alternatively, a 5V-2.5A Micro-USB power supply will work without a jumper cable but may limit the performance of your Deepstream application. In all cases, please make sure to use the default
Maxpower source mode (e.g. 10W).
- Flash your Jetson Nano SD Card: download and flash either this JetPack version 4.3 image if you have an HDMI screen or the image from this NVIDIA course otherwise (which is a great learning resource anyway!). The image from the course is also based on JetPack 4.3 but includes an USB Device Mode to use the Jetson Nano without HDMI screen. For the rest of this tutorial will assume that you use the device in USB Device Mode. In any cases, you can use BalenaEtcher tool to flash your SD card. Both of these images are based on Ubuntu 18.04 and already includes NVIDIA drivers version, CUDA and Nvidia-Docker. To double check your JetPack version, you can use the following command (JetPack 4.3 = Release 32, Revision 3):
head -n 1 /etc/nv_tegra_release-
A developer's machine: You need a developer's machine (Windows, Linux or Mac) to connect to your Jetson Nano device and see its results with a browser and VLC.
-
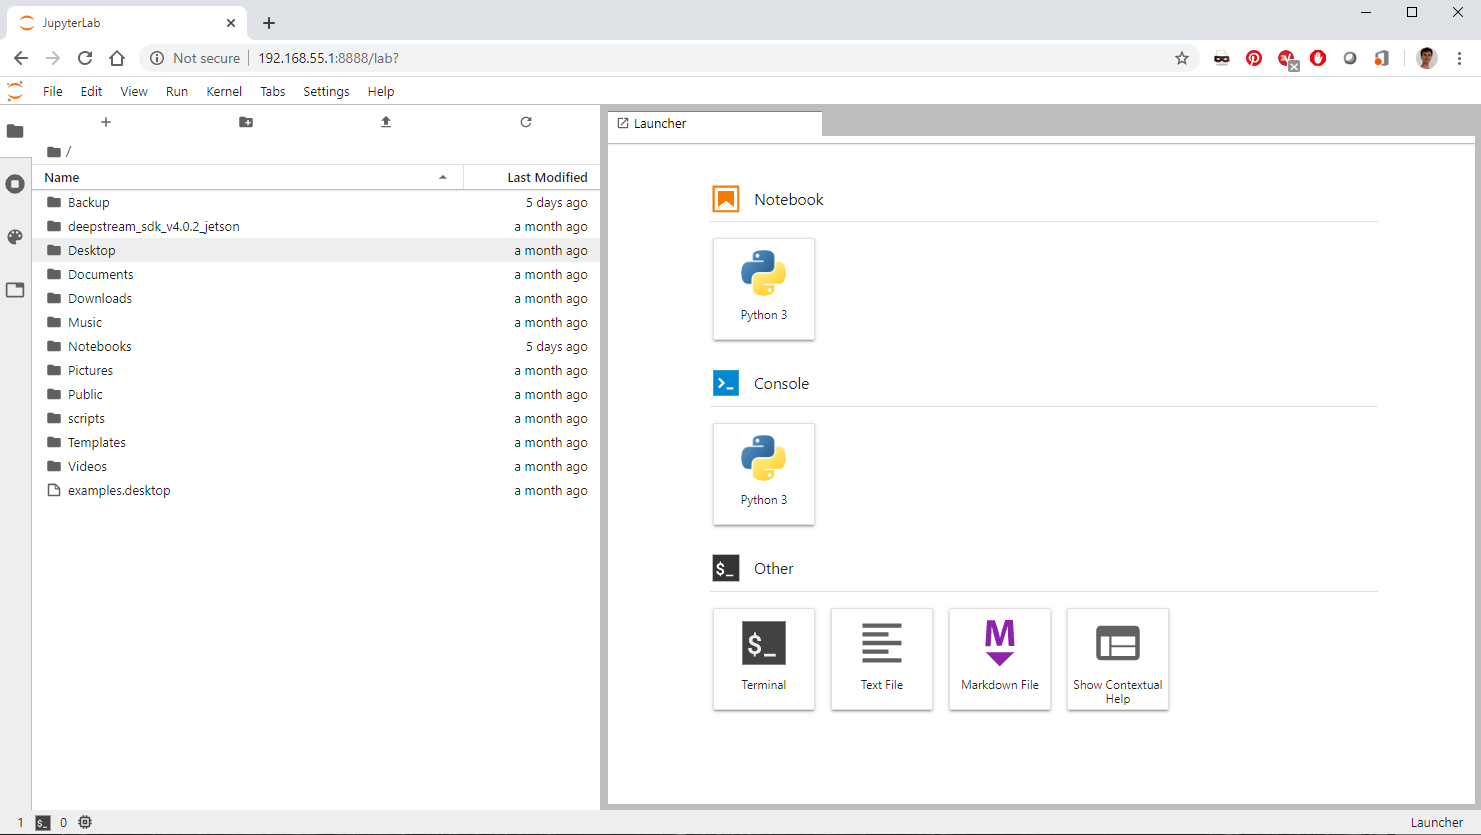
A USB cable MicroB to Type A to connect your Jetson Nano to your developer's machine with the USB Device Mode: we'll use the USB Device Mode provided in NVIDIA's course base image. With this mode, you do not need to hook up a monitor directly to your Jetson Nano. Instead, boot your device and wait for 30 seconds then open your favorite browser, go to http://192.168.55.1:8888 and enter the password
dlinanoto get access to a command line terminal on your Jetson Nano. You can use this terminal to run instructions on your Jetson Nano (Ctrl+V is a handy shortcut to paste instructions) or your favorite SSH client if you prefer (ssh dlinano@your-nano-ip-addresswhere password=dlinanoand your nano ip address can be found with the command/sbin/ifconfig eth0 | grep "inet" | head -n 1)
-
Connect your Jetson Nano to the internet: Either use an ethernet connection, in which case you can skip this section or if your device supports WiFi (which is not out-of-the-box for standard dev kits) connect it to WiFi with the following commands from the USB Device Mode terminal:
-
Re-scan available WiFi networks
nmcli device wifi rescan
-
List available WiFi networks, and find the
ssid_nameof your network.nmcli device wifi list
-
Connect to a selected WiFi network
nmcli device wifi connect <ssid_name> password <password>
-
-
VLC to view RTSP video streams: To visualize the output of the Jetson Nano without HDMI screen (there is only one per table), we'll use VLC from your laptop to view a RTSP video stream of the processed videos. Install VLC if you dont have it yet.
-
An Azure subscription: You need an Azure subscription to create an Azure IoT Central application.
A phone with IP Camera Lite app: To view & process a live video stream, you can use your phone with the IP Camera Lite app (iOS, Android) as an IP camera.
The next sections walks you step-by-step to deploy Deepstream on an IoT Edge device, update its configuration via a pre-built IoT Central application and build a custom AI model with Custom Vision. It explains concepts along the way.
Understanding the solution running at the Edge
The soda can manufucturer already asked a partner to build a first protoype solution that can analyze video streams with a given AI model and connect it to the cloud. The solution built by this partner is composed of two main blocks:
- NVIDIA DeepStream, which does all the video processing
DeepStream is an highly-optimized video processing pipeline, capable of running one ore more deep neural networks, e.g. AI models. It provides outstanding performances thanks to several techniques that we'll discover below. It is a must-have tool whenever you have complex video analytics requirements like real-time object detection or when employing cascading AI models.
DeepStream runs as a container, which can be deployed and managed by IoT Edge. It also is integrated with IoT Edge to send all its outputs to IoT Edge runtime.
The DeepStream application we are using was easy to build since we use the out-of the box once provided by NVIDIA in the Azure Marketplace here. We're using this module as-is and are only configuring it from the IoT Central bridge module.
- A bridge to IoT Central, which transforms telemetry sent by DeepStream into a format understood by IoT Central and configures DeepStream remotely.
It formats all telemetry, properties, and commands using IoT Plug and Play aka PnP, which is the declarative language used by IoT Central to understand how to communicate with a device.
Understanding NVIDIA DeepStream
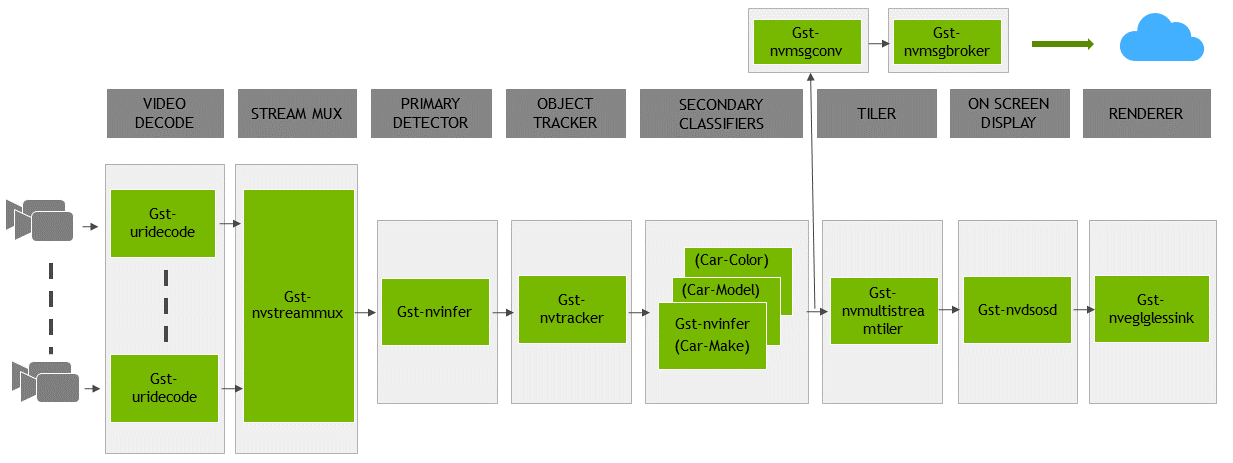
Deesptream is a SDK based on GStreamer, an open source, battle-tested platform to create video pipelines. It is very modular with its concepts of plugins. Each plugins have sinks and sources. NVIDIA provides several plugins as part of Deepstream which are optimized to leverage NVIDIA's GPUs or other NVIDIA hardware like dedicated encoding/decoding chips. How these plugins are connected with each others is defined in the application's configuration file.
Here is an example of what an end-to-end DeepStream pipeline looks like:
You can learn more about its architecture in NVIDIA's official documentation.
To better understand how NVIDIA DeepStream works, let's have a look at its default configuration file copied here in this repo (called Demo Mode in IoT Central UI later on).
Observe in particular:
- The
sourcessections: they define where the source videos are coming from. We're using local videos to begin with and will switch to live RTSP streams later on. - The
sinksections: they define where to output the processed videos and the output messages. We use RTSP to stream a video feed out and all out messages are sent to the Azure IoT Edge runtime. - The
primary-giesection: it defines which AI model is used to detect objects. It also defines how this AI model is applied. As an example, note theintervalproperty set to4: this means that inferencing is actually executed only once every 5 frames. Bounding boxes are displayed continuously though because a tracking algorithm, which is computationally less expensive than inferencing, takes over in between. The tracking algorithm used is set in thetrackingsection. This is the kind of out-of-the-box optimizations provided by DeepStream that enables us to process 240 frames per second on a $100 device. Other notable optimizations are using dedicated encoding/decoding hardware, only loading frames in memory once (zero in-memory copy), pushing the vast majority of the processing to GPUs, batching frames from multiple streams, etc.
Understanding the connection to IoT Central
IoT Edge connects to IoT Central with the regular Module SDK (you can look at the source code here). Telemetry, Properties and Commands that the IoT Edge Central bridge module receives/sends follow IoT Plug and Play aka PnP format, which is enforced in the Cloud by IoT Central. IoT Central enforces them against a Device Capability Model (DCM), which is a file that defines what this IoT Edge device is capable of doing.
- Click on
Devicesin the left nav of the IoT Central application - Observe the templates in the second column: they define all the devices that this IoT Central application understands. All the Jetson Nano devices of this workshop are using a version of the
NVIDIA Jetson Nano DCMdevice template. In the case of IoT Edge, an IoT Edge deployment manifest is also attached to a DCM version to create a device template. If you want to see the details on how the device template that we use look like, you can look at this Device Capability Model and at this IoT Edge deployment manifest.
Enough documentation! Let's now see the solution built by our partner in action.
Operating the solution with IoT Central app
Let's start by creating a new IoT Central app to remotely control the Jetson Nano.
Create a new IoT Central app
Warning
Steps to create an IoT Central application have changed compared to the recording because the IoT Central team deprecated the copy of an IoT Central application that containers IoT Edge devices. The following steps have thus been revised to create an IoT Central application from scratch and manually add and configure the Jetson Nano device as an IoT Edge device in IoT Central.
We'll start from a new IoT Central application, add an Device Capability Model and an IoT Edge deployment manifest that describe the video analytics solution running on the NVIDIA Jetson Nano and optionally customize our IoT Central application.
- Create a new IoT Centra application:
- From your browser, go to: https://apps.azureiotcentral.com/build
- Sign-in with your Azure account
- Click on
Custom apps - Give a name and URL to your application
- Select your Azure subscription (you can opt-in for a 7 day free trial)
- Select your location
- Click on
Create
- Create a new Device Template:
- Click on
Device templates - Click on
Azure IoT Edge - Click on
Next: Customize - Click on
Skip + Review - Click on
Create - Replace the title of the newly created device template NVIDIA Jetson Nano DCMto be
NVIDIA Jetson Nano DCMand hit Enter - Click on
Import capability model - Select a local copy of the file
NVIDIAJetsonNanoDcm.jsonfrom this repo
- Click on
- Configure your device dashboard:
- Click on
Views - Click on
Visualizing the device - Rename this View
Dashboard - From the
Telemetrysection, selectPrimary Detection Countand click onAdd tile - Click on the
Settingsbutton of thePrimary Detection Counttile - Click on the
Settingsbutton of thePrimary Detection Count, selectCountinstead ofAverageand click onUpdate - From the
Telemetrysection, selectSecondary Detection Countand click onAdd tile - Click on the
Settingsbutton of theSecondary Detection Counttile - Click on the
Settingsbutton of theSecondary Detection Count, selectCountinstead ofAverageand click onUpdate - From the
Telemetrysection, selectFree MemoryandSystem Heartbeatand click onAdd tile - From the
Telemetrysection, selectChange Video Model,Device Restart,Processing Started,Processing Stoppedand click onAdd tile - From the
Telemetrysection, selectPipeline Stateand click onAdd tile - Optionally, rearrange the tiles to your taste
- Hit
Save
- Click on
- Configure your device properties:
- Click on
Views - Click on
Visualizing the device - Rename this View
Device - From the
Propertiessection, selectDevice model,Manufacturer,Operating system name,Processor architecture,Processor manufacturer,Software version,Total memory,Total storage,RTSP Video Urland click onAdd tile - Resize the tile appropriately
- Hit
Save
- Click on
- Optionally, add an
Aboutview to give a description of your device - Optionally, white label your IoT Central application by going to
Administration > Your ApplicationandAdministration > Customize your application - Upload your IoT Edge deployment manifest:
- Click on
Replace manifest - Click on
Upload - Select a local copy of the file
deployment.jsonin theconfigfolder of this repo - Click on
Replace
- Click on
- Finally, publish your device template so that it can be used:
- Click on
Publishand confirm
- Click on
Create an IoT Edge device from your IoT Central app
We'll create a new IoT Edge device in your IoT Central application with the device template created above that will enable the NVIDIA Jetson Nano to connect to IoT Central.
- Go to the
Devicestab - Select the
NVIDIA Jetson Nano DCMdevice template - Click on
New - Give a name to your device by editing the
Device IDand theDevice namefields (let's use the same name for both of these fields in this workshop) - Click on
Create - Click on your new device
- Click on the
Connectbutton in the top right corner - Copy your
ID Scopevalue,Device IDvalue andPrimary keyvalue and save them for later.
Setting up your device to be used with your IoT Central application
We'll start from a blank Jetson installation (Jetpack v4.3), copy a few files locally that are needed for the application such as video files to simulate RTSP cameras and deepstream configuration files, install IoT Edge and configure it to connect to your IoT Central instance.
-
On your Jetson Nano create a folder name
dataat the root:sudo mkdir /data
-
Download and extra setup files in the
datadirectory:cd /data sudo wget -O setup.tar.bz2 --no-check-certificate "https://onedrive.live.com/download?cid=0C0A4A69A0CDCB4C&resid=0C0A4A69A0CDCB4C%21588625&authkey=ACUlRaKkskctLOA" sudo tar -xjvf setup.tar.bz2
-
Make the folder accessible from a normal user account:
sudo chmod -R 777 /data
-
Install IoT Edge (instructions copied from here for convenience):
curl https://packages.microsoft.com/config/ubuntu/18.04/multiarch/prod.list > ./microsoft-prod.list
sudo cp ./microsoft-prod.list /etc/apt/sources.list.d/
curl https://packages.microsoft.com/keys/microsoft.asc | gpg --dearmor > microsoft.gpg
sudo cp ./microsoft.gpg /etc/apt/trusted.gpg.d/
sudo apt-get update
sudo apt-get install iotedge
-
Connect your device to your IoT Central application by editing IoT Edge configuration file:
- Use your favorite text editor to edit IoT Edge configuration file:
sudo nano /etc/iotedge/config.yaml
- Comment out the "Manual provisioning configuration" section so it looks like this:
# Manual provisioning configuration
#provisioning:
#  source: "manual"
#  device_connection_string: ""
- Uncomment the "DPS symmetric key provisioning configuration" (not the TPM section but the symmetric key one) and add your IoT Central app's scope id, registration_id which is your device Id and its primary symmetric key:
⚠️ Beware of spaces since YAML is space sensitive. In YAML exactly 2 spaces = 1 identation and make sure to not have any trailing spaces.# DPS symmetric key provisioning configuration provisioning: source: "dps" global_endpoint: "https://global.azure-devices-provisioning.net" scope_id: "<ID Scope>" attestation: method: "symmetric_key" registration_id: "<Device ID>" symmetric_key: "<Primary Key>"
-
Save and exit your editor (Ctrl+O, Ctrl+X)
-
Now Restart the Azure IoT Edge runtime with the following command:
sudo systemctl restart iotedge
- And let's verify that the connection to the cloud has been correctly established. If it isn't the case, please check your IoT Edge config file.
sudo systemctl status iotedge
As you can guess from this last step, behind the scenes IoT Central is actually using Azure Device Provisioning Service to provision devices at scale.
With the IoT Edge device connected to the cloud, it can now report back its IP address to IoT Central. Let's verify that it is the case:
- Go to your IoT Central application
- Go to
Devicestab from the left navigation - Click on your device
- Click on its
Devicetab - Verify that the
RTSP Video URLstarts with the IP address of your device
After a minute or so, IoT Edge should have had enough time to download all the containers from the Cloud per IoT Central's instructions and DeepStream should have had enough time to start the default video pipeline, called Demo mode in IoT Central UI. Let's see how it looks like:
- In IoT Central, copy the
RTSP Video URLfrom theDevicetab - Open VLC and go to
Media>Open Network Streamand paste theRTSP Video URLcopied above as the network URL and clickPlay - In IoT Central, go to to the
Dashboardtab of your device (e.g. from the left nav:Devices>your-device>Dashboard) - Verify that active telemetry is being sent by the device to IoT Central. In particular, the number of primary detections which are set to
carby default should map to the objects detected by the 4 cameras.
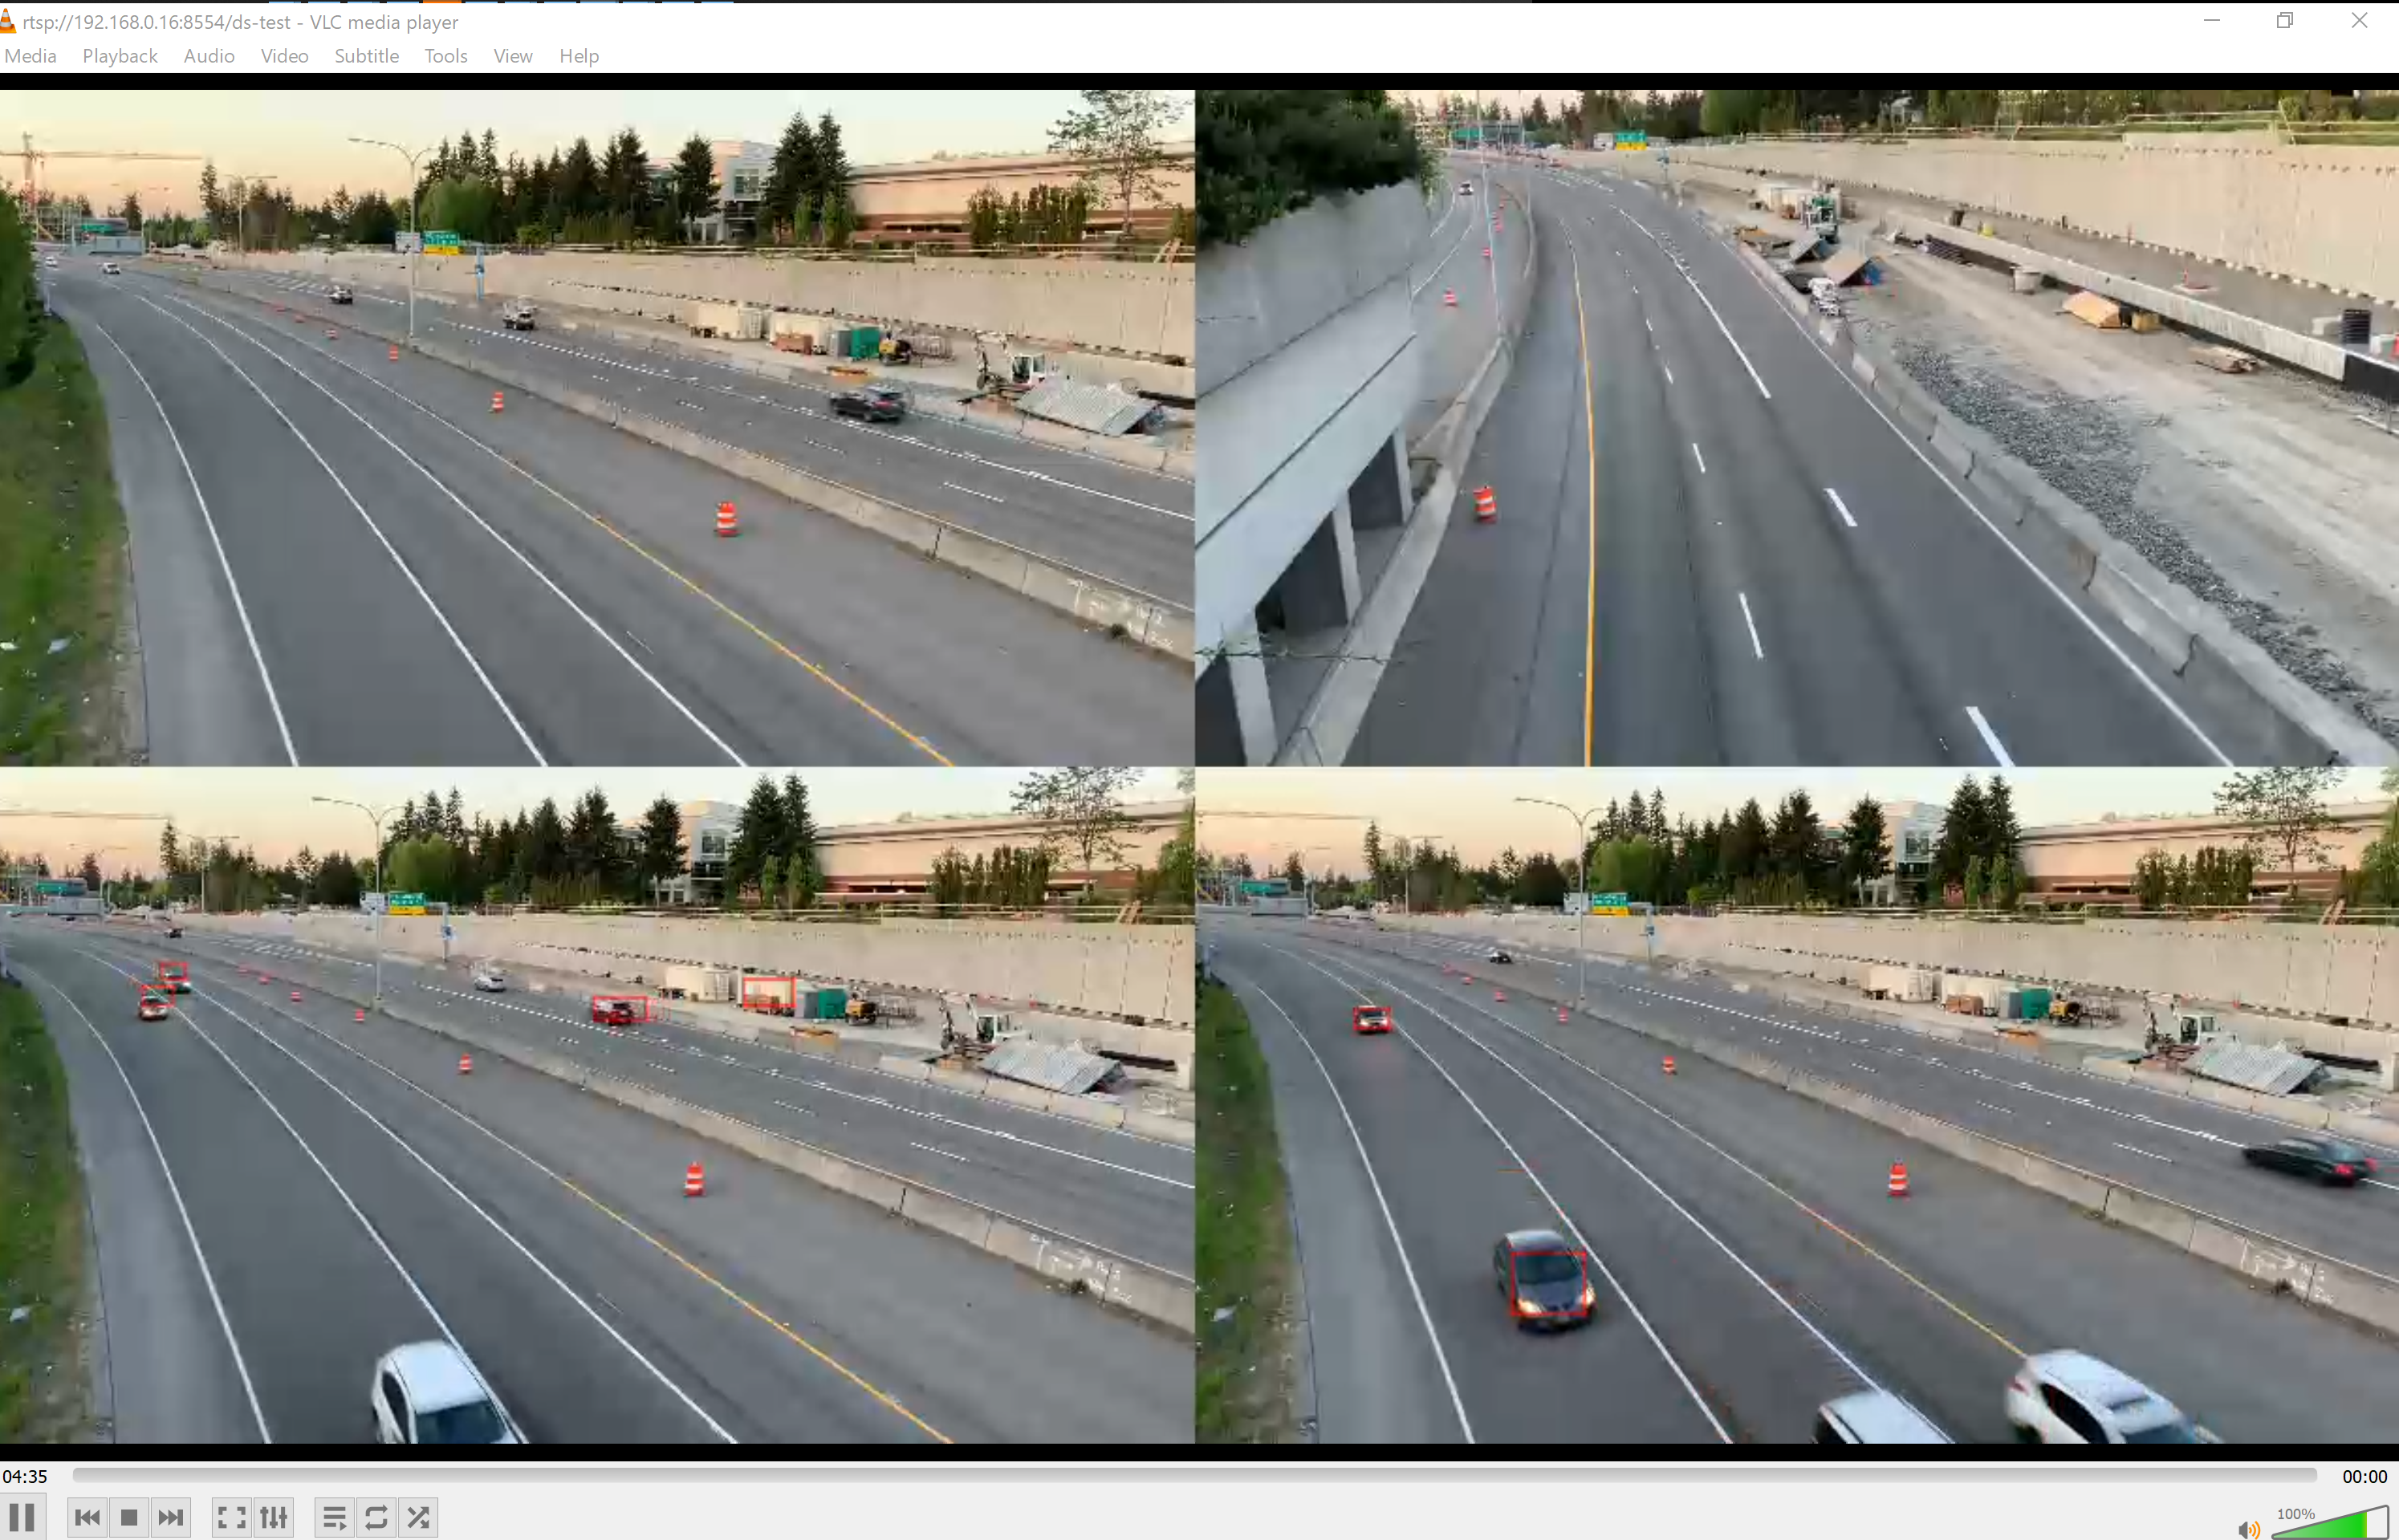
At this point, you should see 4 real-time video streams being processed to detect cars and people with a Resnet 10 AI model.
Operating the solution
To demonstrate how to remotely manage this solution, we'll send a command to the device to change its input cameras. We'll use your phone as an RTSP camera as a new input camera.
Changing input cameras
Let's first verify that your phone works as an RTSP camera properly:
- Open the the IP Camera Lite
- Go to Settings and remove the User and Password on the RTSP feed
- Click on
Turn on IP Camera Server
Let's just verify that the camera is functional. With VLC:
- Go to
Media>Open Network Stream - Paste the following
RTSP Video URL:rtsp://your-phone-ip-address:8554/live - Click
Playand verify that phone's camera is properly displaying.
Let's now update your Jetson Nano to use your phone's camera. In IoT Central:
- Go to the
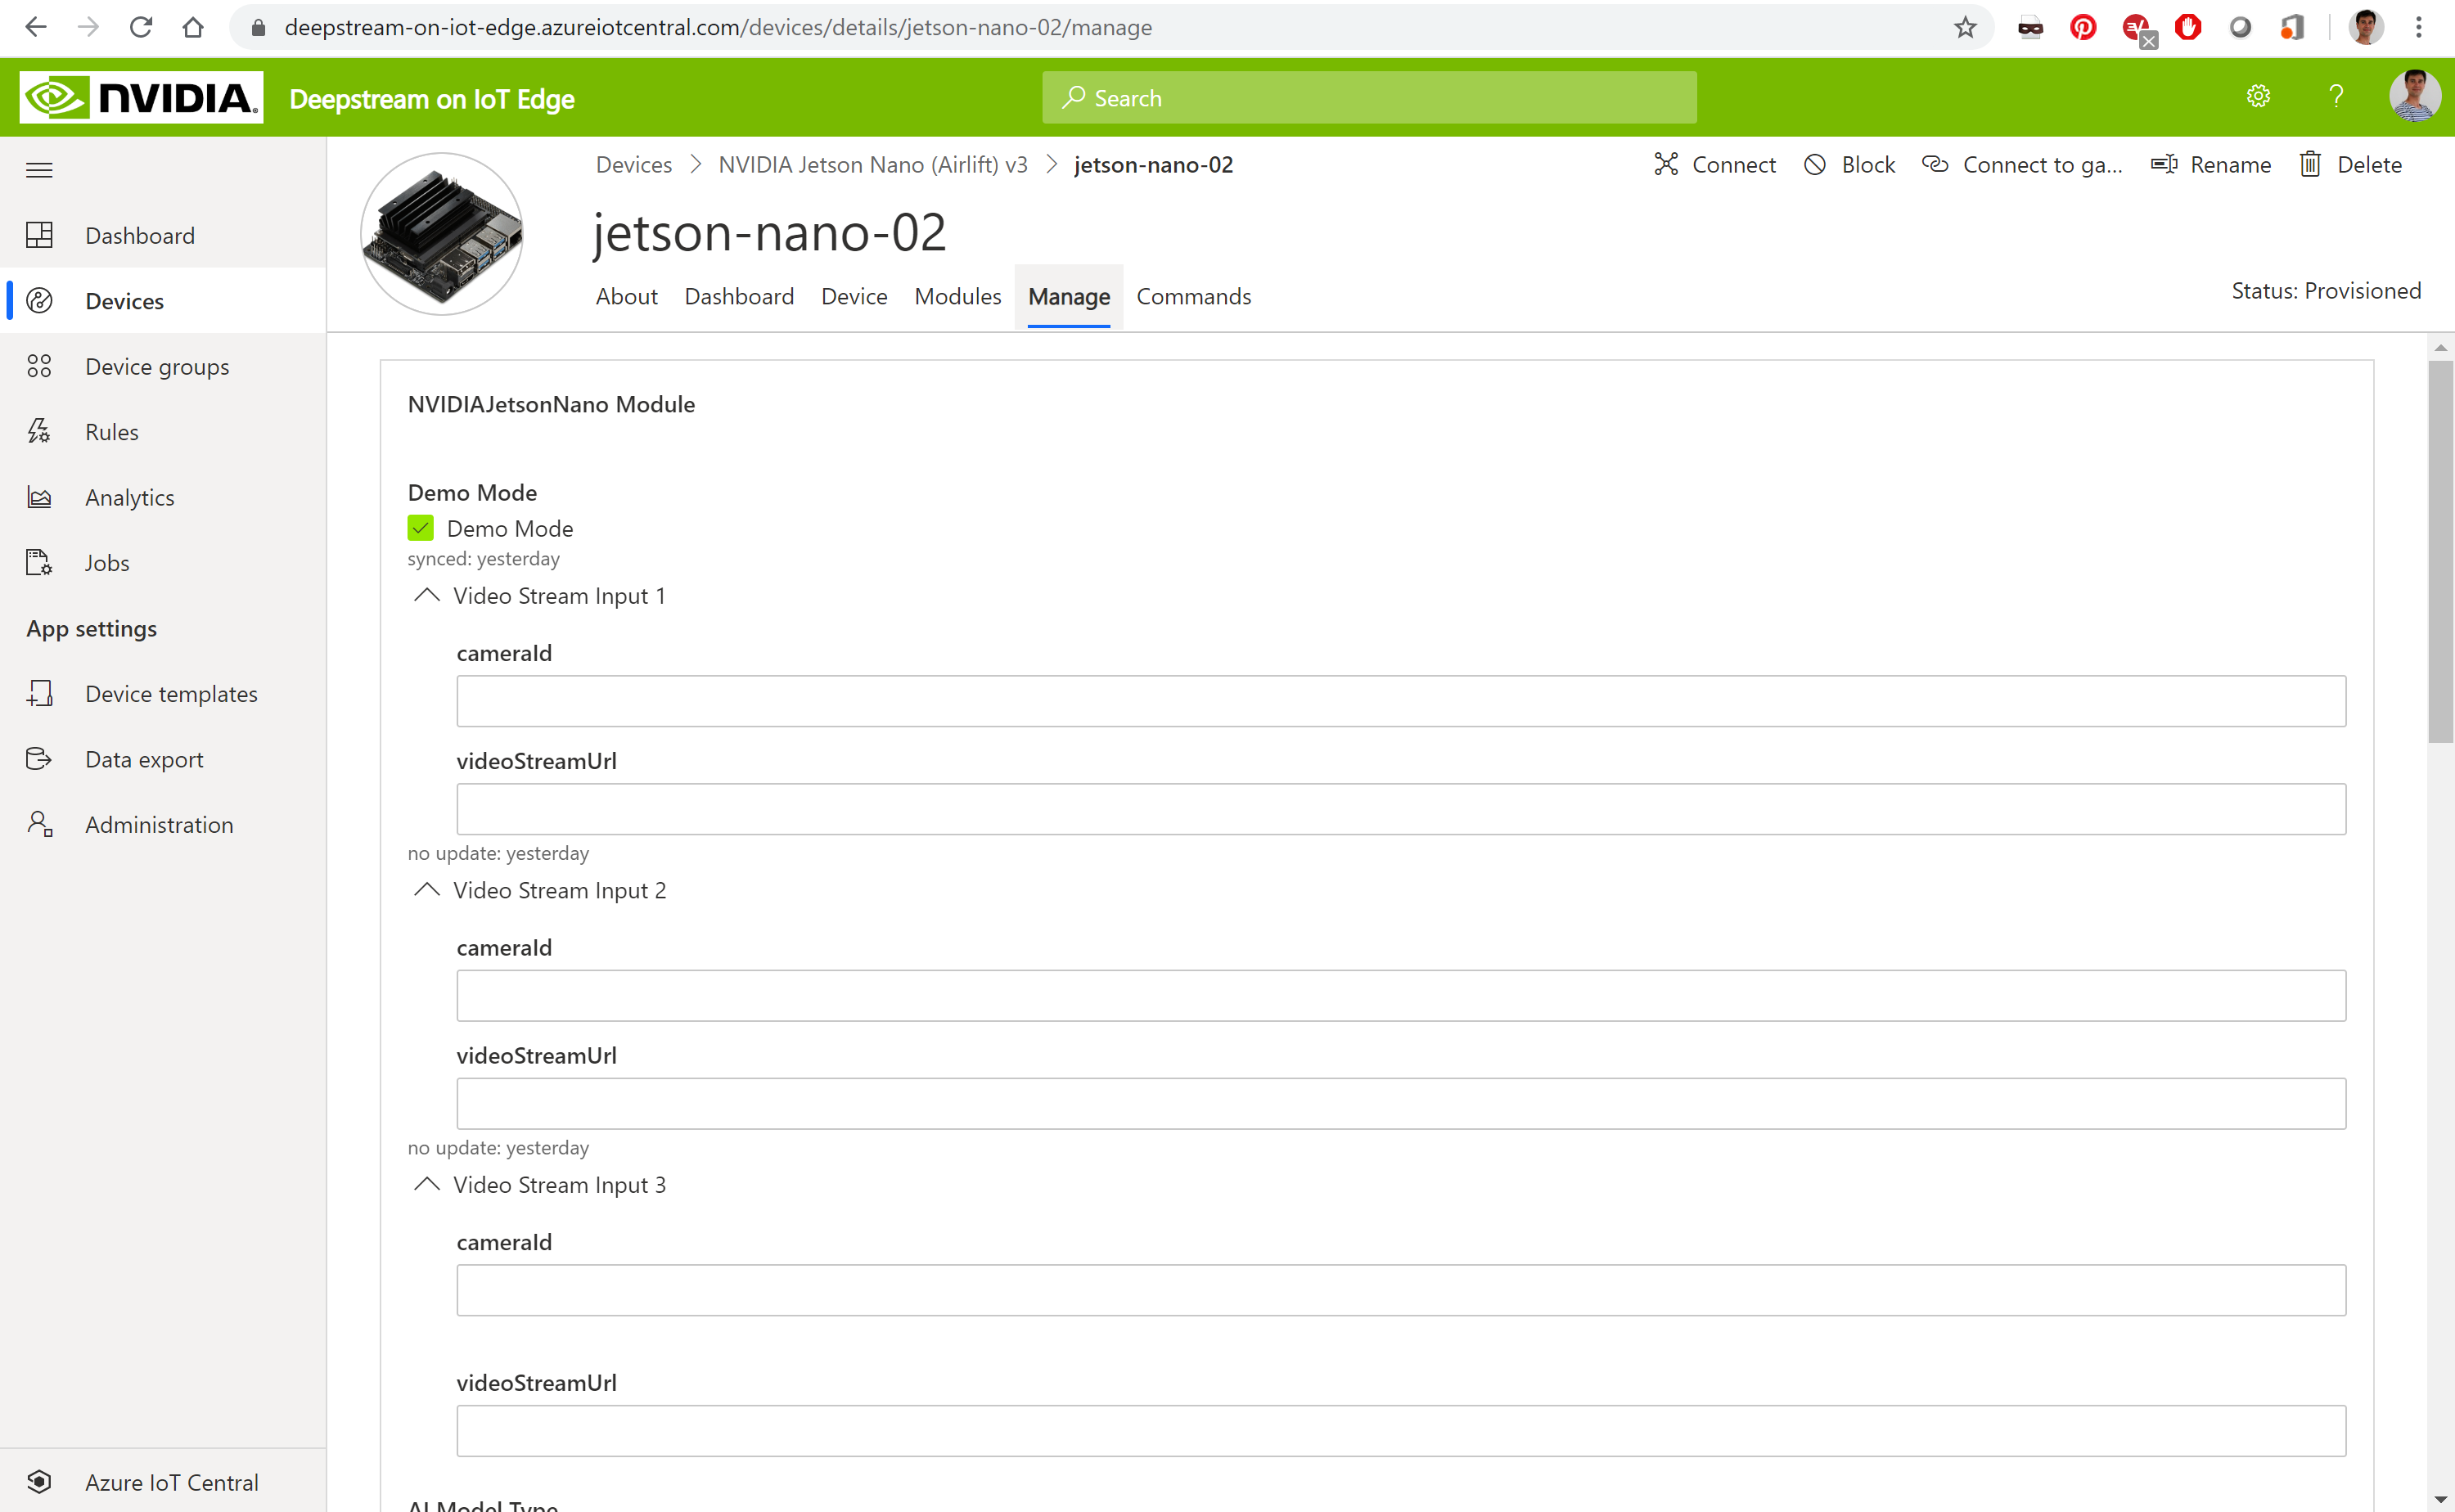
Managetab - Unselect the
Demo Mode, which uses several hardcoded video files as input of car traffic - Update the
Video Stream 1property:- In the
cameraId, name your camera, for instanceMy Phone - In the
videoStreamUrl, enter the RTSP stream of this camera:rtsp://your-phone-ip-address:8554/live
- In the
- Keep the default AI model of DeepStream by keeping the value
DeepStream ResNet 10as theAI model type. - Keep the default
Secondary Detection Classasperson - Hit
Save
This sends a command to the device to update its DeepStream configuration file with these new properties and to restart DeepStream. If you were still streaming the output of the DeepStream application, this stream will be taken down as DeepStream will restart.
Let's have a closer look at DeepStream configuration to see what has changed compared to the initial Demo Mode configuration which is copied here. From a terminal connected to your Jetson Nano:
-
Open up the default configuration file of DeepStream to understand its structure:
nano /data/misc/storage/DSConfig.txt
-
Look after the first
sourceand observe how parameteres provided in IoT Central UI got copied here.
Within a minute, DeepStream should restart. You can observe its status in IoT Central via the Modules tab. Once deepstream module is back to Running, copy again the RTSP Video Url field from the Device tab and give it to VLC (Media > Open Network Stream > paste the RTSP Video URL > Play).
You should now detect people from your phone's camera. The count of Person in the dashboard tab of your device in IoT Central should go up. We've just remotely updated the configuration of this intelligent video analytics solution!
Use an AI model to detect custom visual anomalies
We'll use simulated cameras to monitor each of the soda cans production lines and we'll collect images and build a custom AI model to detects cans that are up or down. We'll then deploy this custom AI model to DeepStream via IoT Central. To do a quick Proof Of Concept, we'll use the Custom Vision service, a no-code computer vision AI model builder.
As a pre-requisite, let's create a new Custom Vision project in your subscription:
- Go to http://customvision.ai
- Sign-in
- Create a new Project
- Give it a name like
Soda Cans Down - Pick up your resource, if none select
create newand selectSKU - F0or (S0) - Select
Project Type=Object Detection - Select
Domains=General (Compact)
We then need to collect images to build a custom AI model. In the interest of time, here is a set of images that have already been captured for you that you can upload to Custom Vision. Download it, unzip it and upload all the images into your Custom Vision project.
We then need to label our images:
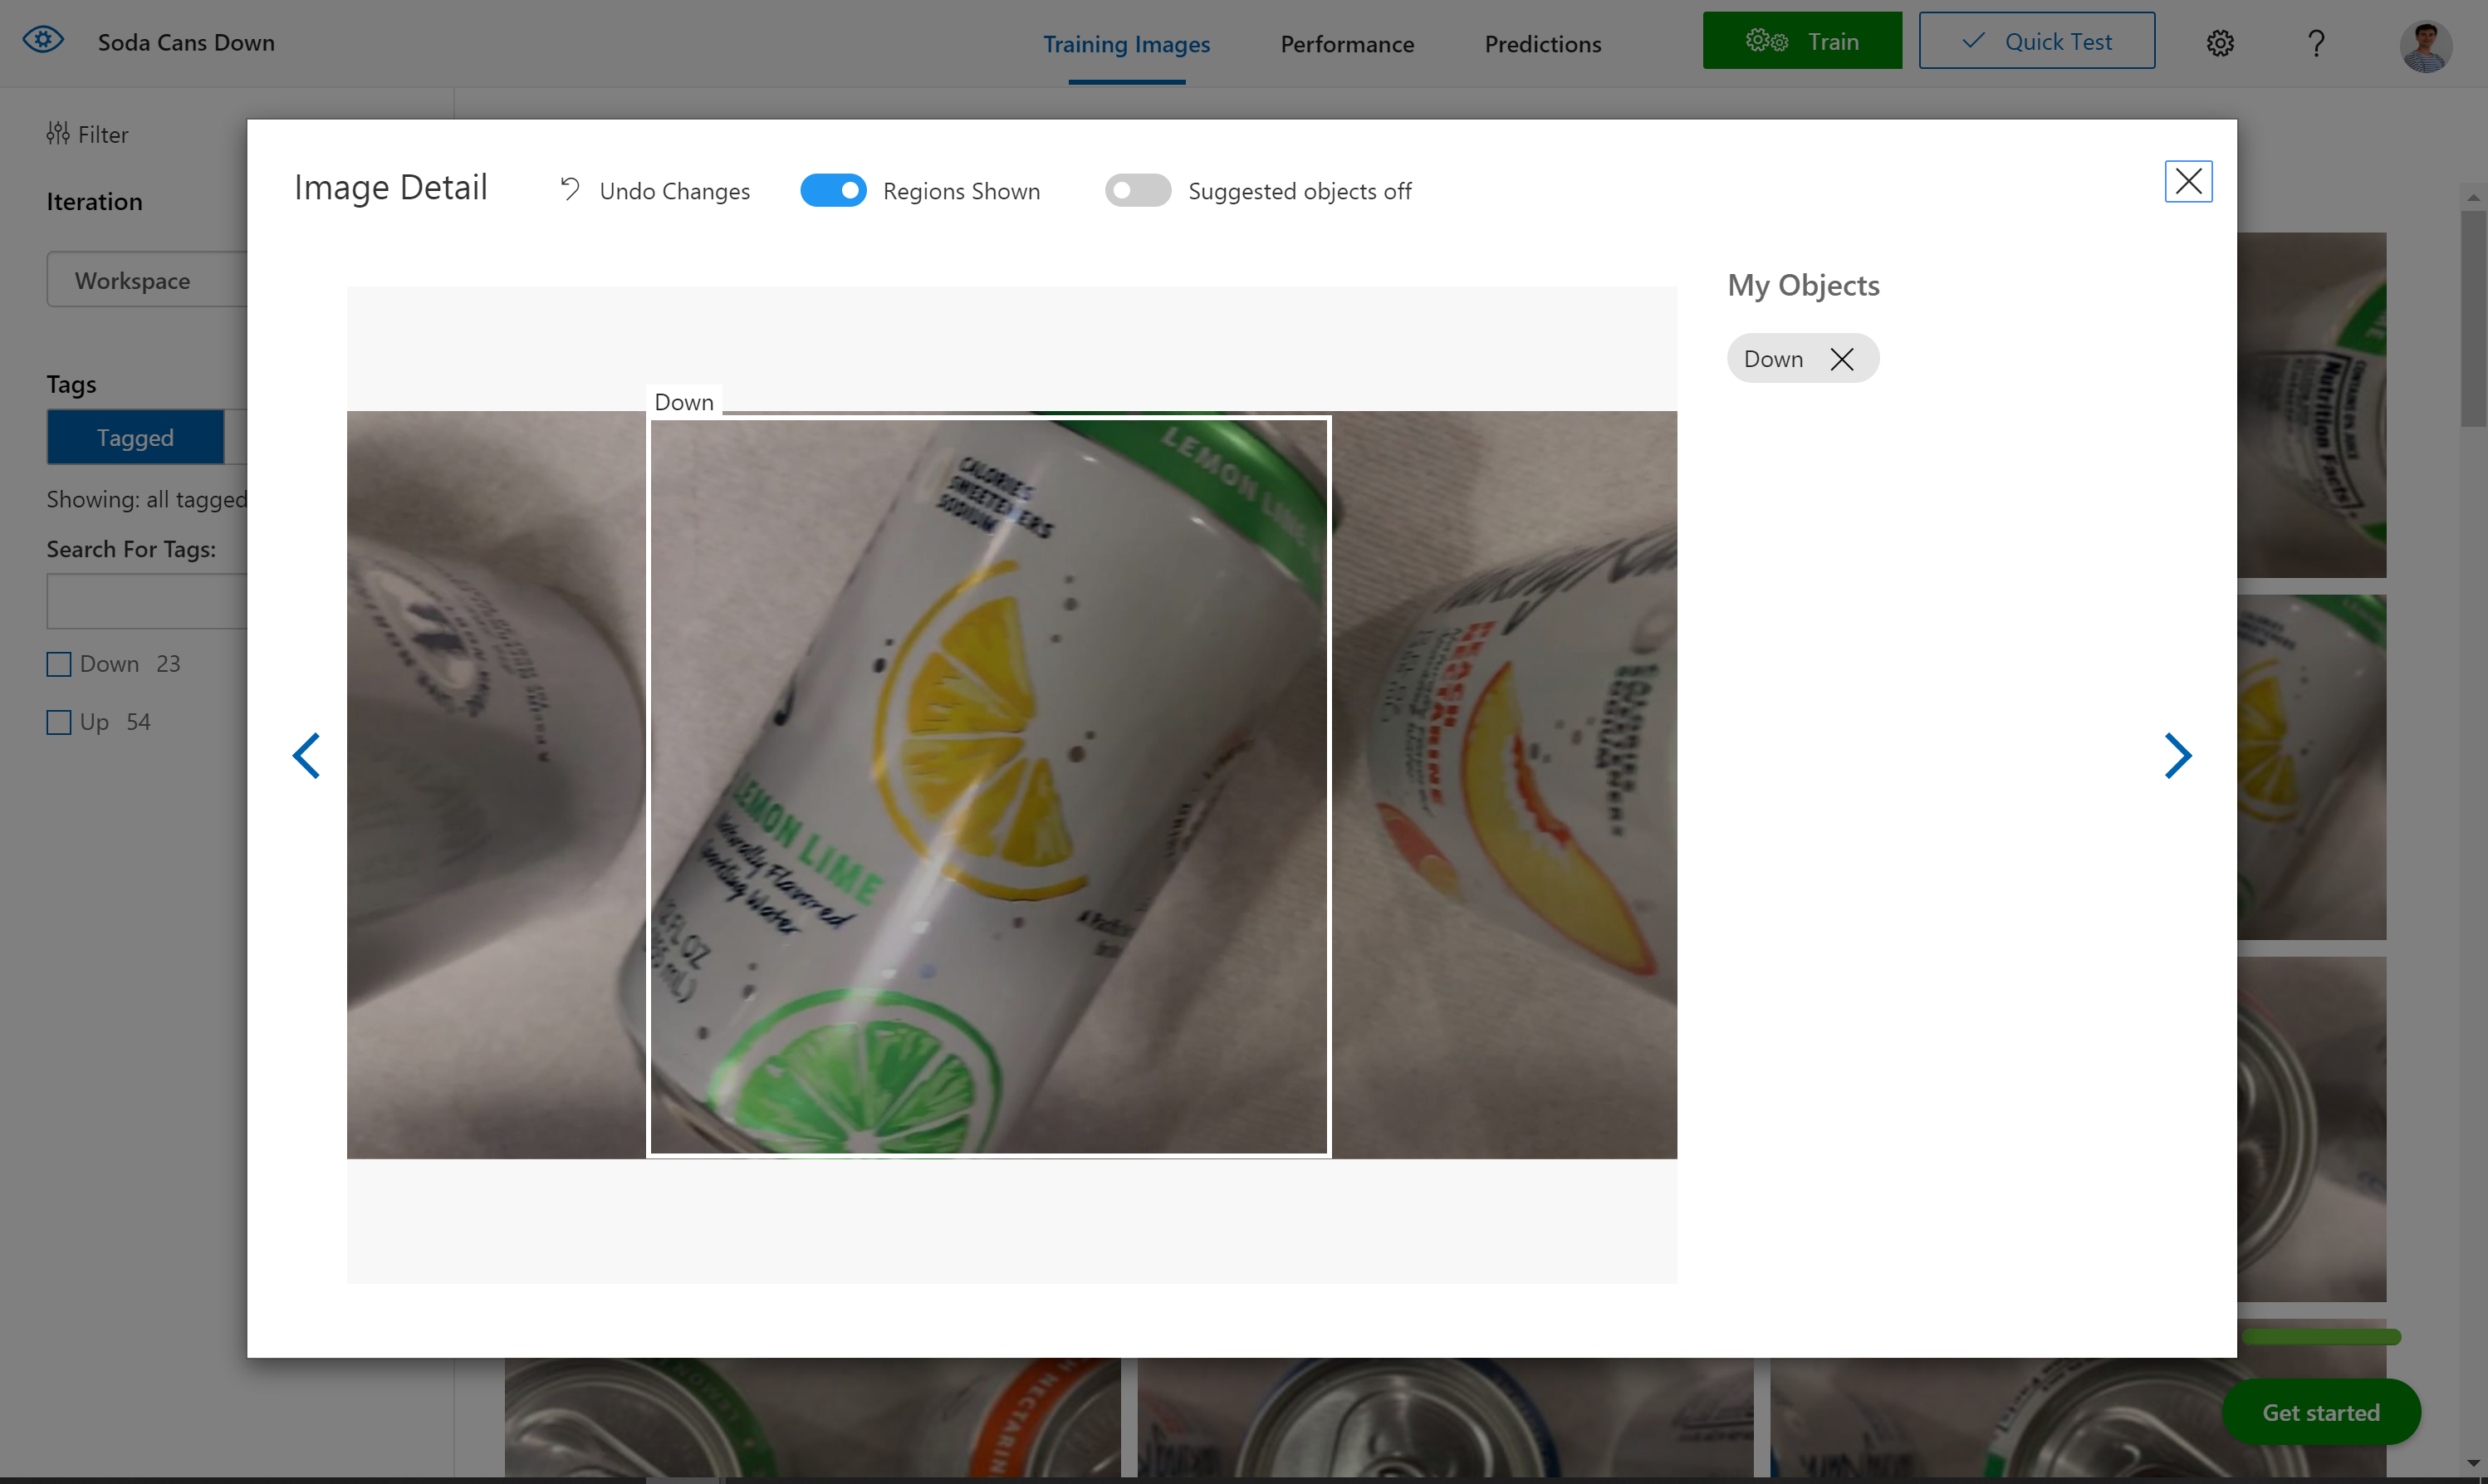
- Click on an image
- Label the cans that are up as
Upand the ones that are down asDown - Hit the right arrow to move on to the next image and label the remaining 70+ images...or read below to use a pre-built model with this set of images
Once you're done labeling, let's train and export your model:
- Train your model by clicking on
Train - Export it by going to the
Performancetab, clicking onExportand choosingONNX - Right-click on the
Downloadbutton and selectcopy link addressto copy the anonymous location of a zip file of your ccustom model
In the interest of time, you can also use this link to a pre-built Custom Vision model.
Finally, we'll deploy this custom vision model to the Jetson Nano using IoT Central. In IoT Central:
- Go to the
Managetab (beware of the sorting o f the fields) - Make sure the
Demo Modeis unchecked - Update the first three
Video Stream Inputto the following values:Video Stream Input 1>CameraId=Cam01Video Stream Input 1>videoStreamUrl=file:///data/misc/storage/sampleStreams/cam-cans-00.mp4Video Stream Input 2>CameraId=Cam02Video Stream Input 2>videoStreamUrl=file:///data/misc/storage/sampleStreams/cam-cans-01.mp4Video Stream Input 3>CameraId=Cam03Video Stream Input 3>videoStreamUrl=file:///data/misc/storage/sampleStreams/cam-cans-02.mp4
- Select
Custom Visionas theAI model Type - Paste the URI of your custom vision model in the
Custom Vision Model Url, for instancehttps://onedrive.live.com/download?0C0A4A69A0CDCB4C&resid=0C0A4A69A0CDCB4C%21587636&authkey=AOCf3YsqcZM_3WMfor the pre-built one. - Update the detection classes:
Primary Detection Class=UpSecondary Detection Class=Down
- Hit
Save
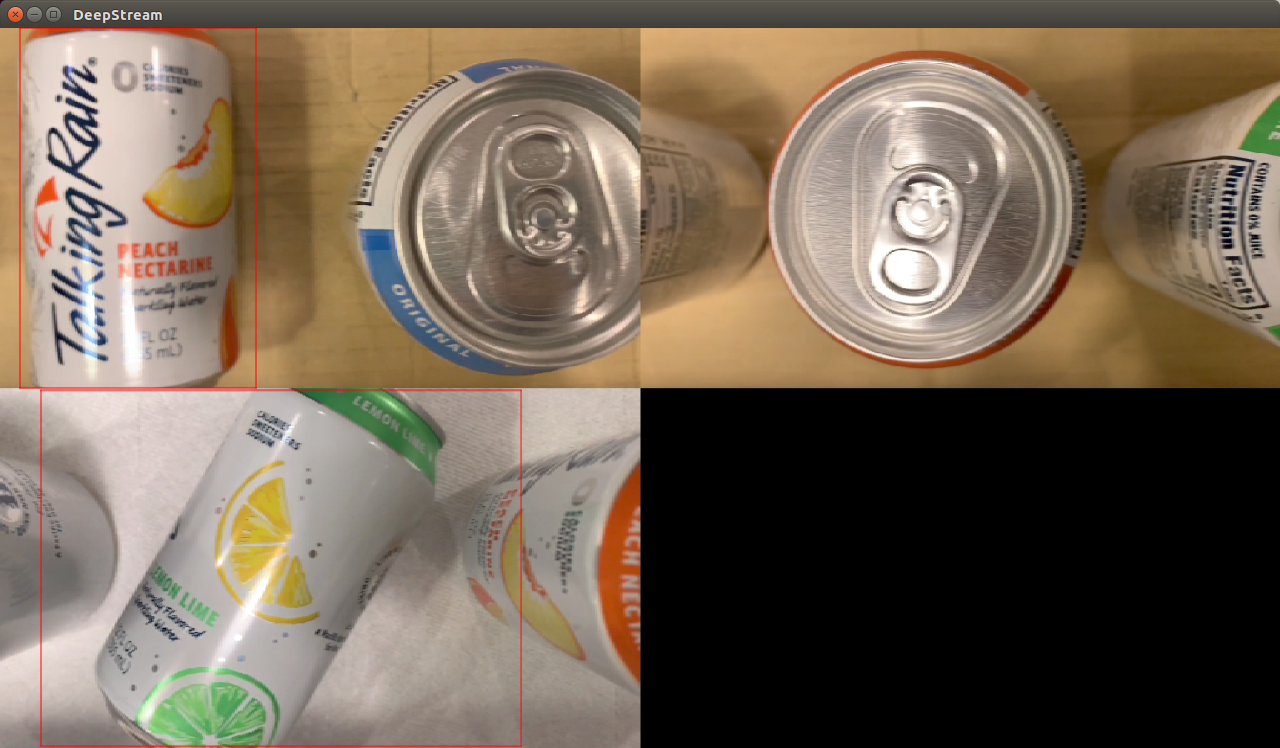
After a few moments, the deepstream module should restart. Once it is in Running state again, look at the output RTSP stream via VLC (Media > Open Network Stream > paste the RTSP Video URL that you got from the IoT Central's Device tab > Play).
We are now visualizing the processing of 3 real time (e.g. 30fps 1080p) video feeds with a custom vision AI models that we built in minutes to detect visual anomalies!
Creating an alert
To be alerted as soon as a soda can is down, we'll set up an alert to send an email whenever a new soda is detected as being down.
With IoT Central, you can easily define rules and alerts based on the telemetry received by IoT Central. Let's create one whenever a soda can is down.
- Go to the
Rulestab in the left nav - Click on
New - Give it a name like
Soda can down! - Select your device template
NVIDIA Jetson Nano DCM - Create a Condition with the following attributes:
- Telemetry =
Secondary Detection Count - Operator =
Is greater than - Value =
1and hit Enter
- Telemetry =
- Create an
emailAction with the following attributes:- Display name =
Soda can down - To = your email address used to login to your IoT Central application
- hit
Done
- Display name =
Save
In a few seconds, you should be receiving some mails :)
Clean-up
This is the end of the workshop. Because there will be another session that uses the same device and azure account after you, please clean up the resources you've installed to let others start fresh:
-
Clean up on the Jetson Nano, via a terminal connected to your Jetson Nano:
sudo rm -r /data
sudo apt-get remove --purge -y iotedge
-
Deleting your IoT Central application, from your browser:
- Go to your IoT Central application
- Click on the
Administrationtab from the left nav - Click on
Deletethe application and confirm
-
Deleting your Custom Vision project, from your browser:
- Go to Custom Vision
- Click on
Deleteyour Custom Vision project and confirm
Going further
Thank you for going through this workshop! We hope that you enjoyed it and found it valuable.
There are other content that you can try with your Jetson Nano at http://aka.ms/jetson-on-azure!
