JTAG related things about Chipbox
This repository is an overloaded mirror in both github and gitlab
I did this trick via:
- Create both repositories under both github and gitlab with exactly same name
- Then after cloning from one repo, I did below:
git remote set-url –add origin https://github.com/user/repo.git
- When I push, it goes to both repos
Chipbox has a Macronix mx29gl256eht2I-90q CFI compliant NOR Flash (32megabytes)
The chipset (CelestialSemi CSM1203) supports programming that flash via JTAG interface.
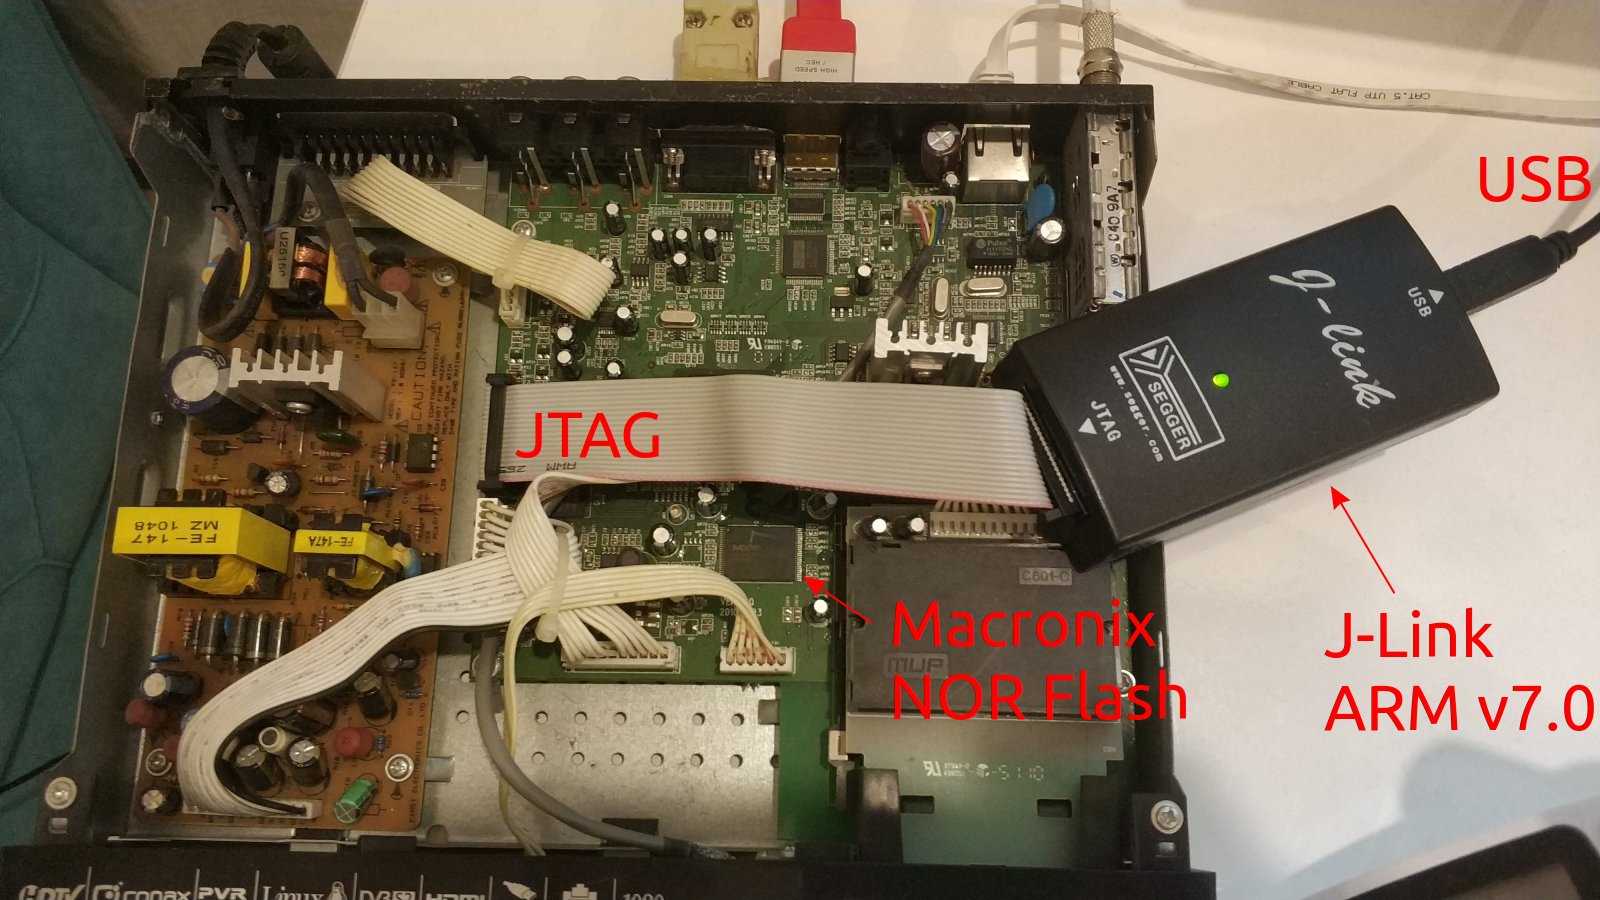
This is done as shown in the following photo:
After many years, I found this J-Link JTAG programmer from my warehouse and decided to give a try.
Good news-1: It was working Good news-2: Segger had JFlash tools for linux ( As a deb package)
Bad news-1: My J-Link turned out to be a clone, and JFlashExe was allways complaining about it. Bad news-2: Probably because of BN-1 above, I could newer be able to read NOR Flash completely (Neighter in Linux nor in Windows ).
But I was consistently be able to read partially ( about 4Megabytes was possible).
Then I realized that, I could run JFlash via commandline under linux, so I decided to write a bash script for it:
Note the trick: The cmdline arguments to JFlash is ordered !! This caused me to loose at least 2 days. When you write --readrange after --saveas it just doesn't save the file !!!
As you will see, this script uses a file called jflash-chipbox-project.21.12.2021.jflash
Enter BN-3:
Bad news-3: Back in 2011, I have been able to read / write NOR Flash consistently via my Windows PC's in the lab. And I remember that I had a jflash project file for it. But since I lost all these data, I had to write my own jflash project.
It wasn't too complicated to find out how to setup this project file. But there were two big questions:
- Since CSM1203 was not in the supported chips, I had to select one ARM926EJ-S based ones, but which one?
- Selecting right external flash was easy ( I had Chipbox at hand, and opened top cover, read the Flash IC part no). But what was the offset value ? By reading terrible howto.txt files from my archieves and via trial and error, I found that the offset was 0x38000000
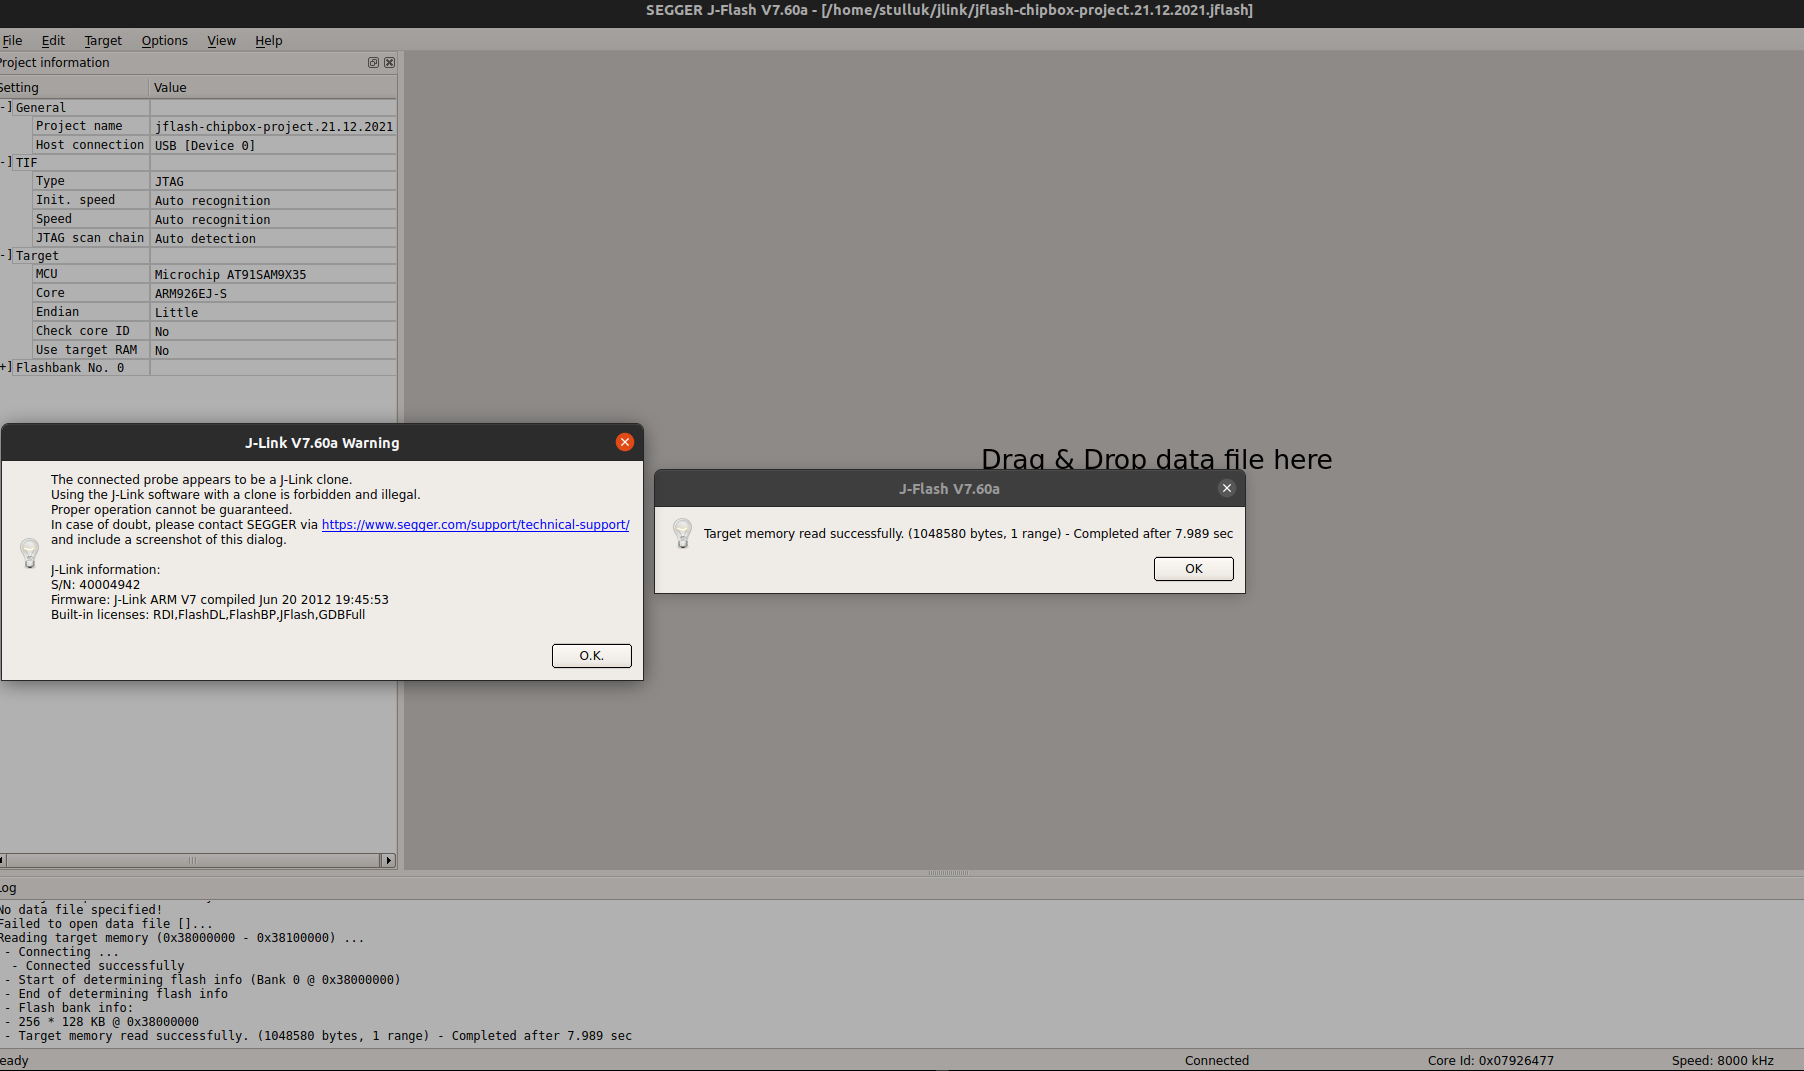
So in overall, my Jflash UI was looking like this:
Some notes here:
- J-Link allways pops up this warning that jtag is a clone ! As I said above, I suspect that this is the reason why I can't read all of the Flash at once. I tried to read all sectors one by one, and it just can read without any issues.
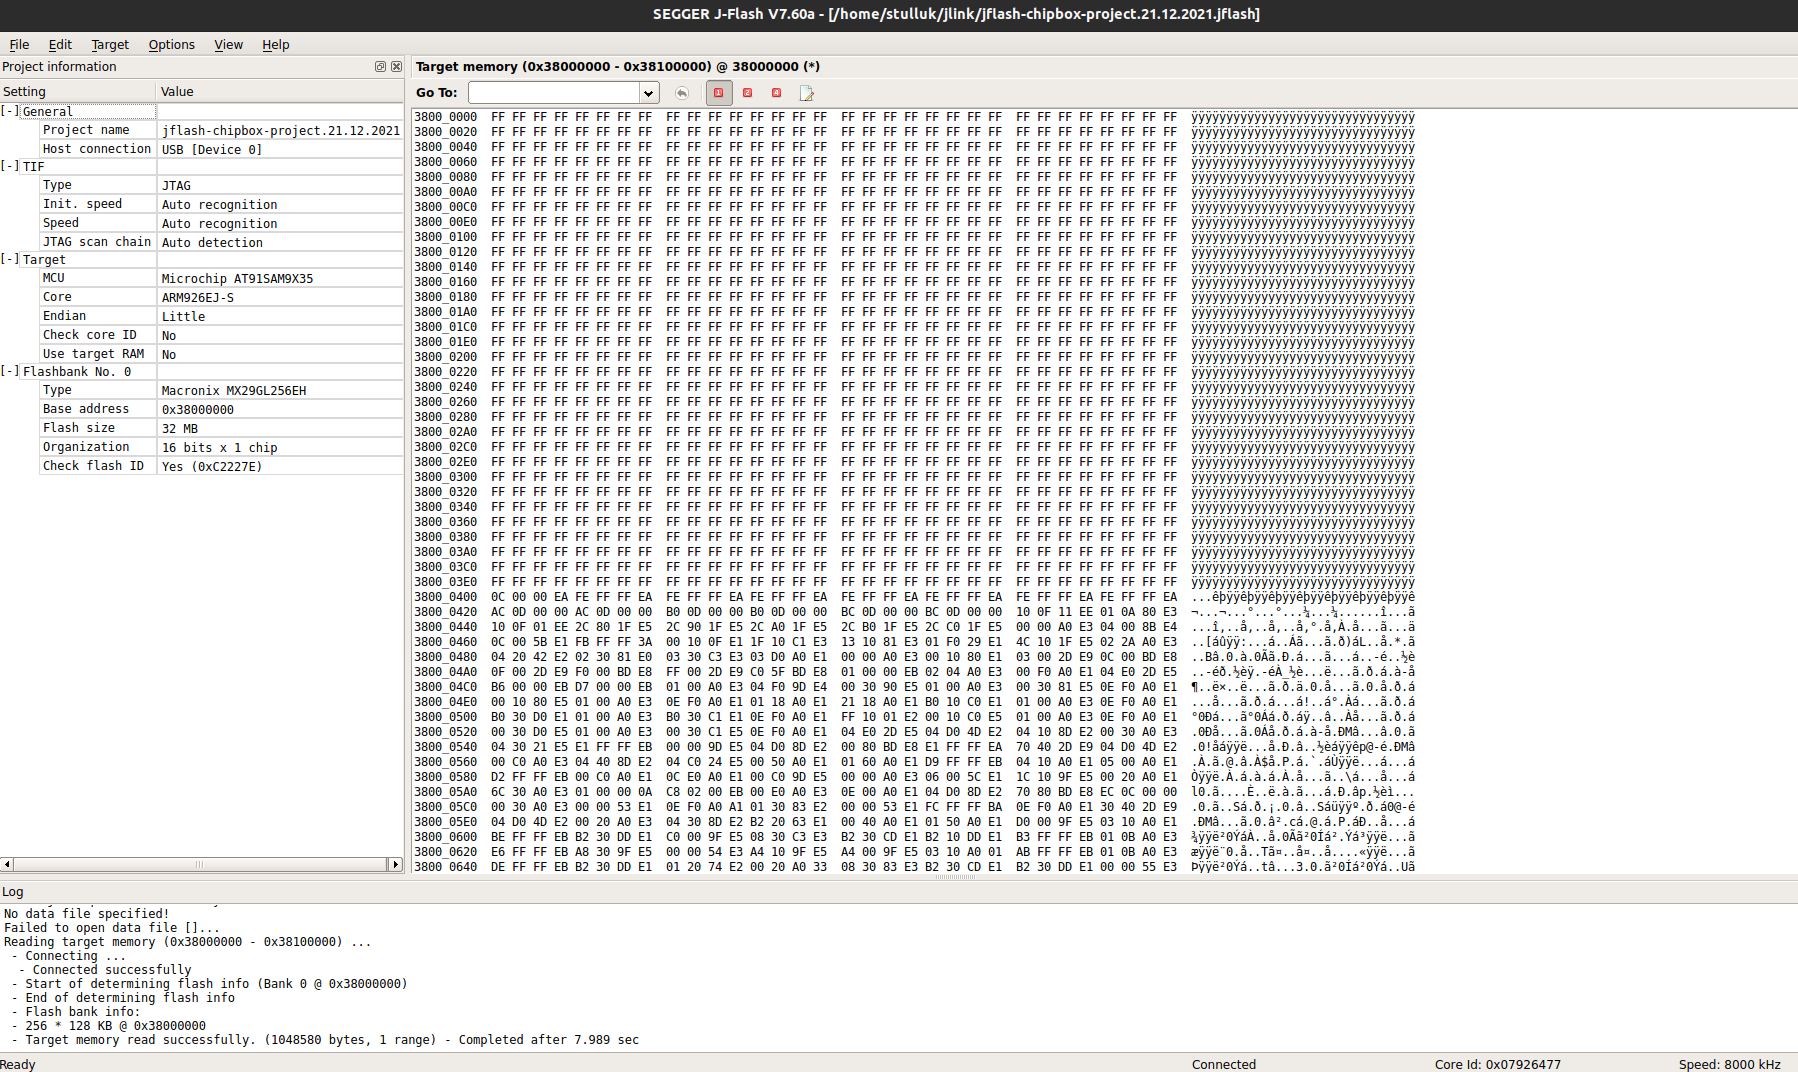
- Uboot starts at 0x38000400 !!!
I know nobody will read here, but let me save if anyone get benefit from it:
colordiff -y <(xxd All32m.bin) <(xxd selected.bin) | less -R
Now it gets complicated... Since the built-in storage of Chipbox was a CFI compliant NOR Flash, linux treats this as a MTD device.
MTD device is neighter block nor character device. Linux kernel has a module called mtdblock, so it somehow translates those MTD devices like block devices in the userspace.
Anyway, during Chipbox kernel booting, we see some interesting messages:
...
RAMDISK driver initialized: 1 RAM disks of 16384K size 1024 blocksize
loop: loaded (max 8 devices)
ORION eth0: 0x41400000 IRQ 24 MAC:02:03:04:61:72:a8
Not SST flash.<5>physmap flash device: 2000000 at 38000000
phys_mapped_flash: Found 1 x16 devices at 0x0 in 16-bit bank
 Amd/Fujitsu Extended Query Table at 0x0040
phys_mapped_flash: CFI does not contain boot bank location. Assuming top.
number of CFI chips: 1
cfi_cmdset_0002: Disabling erase-suspend-program due to code brokenness.
10 cmdlinepart partitions found on MTD device phys_mapped_flash
Creating 10 MTD partitions on "phys_mapped_flash":
0x00000000-0x000a0000 : "u-boot0"
0x000a0000-0x00260000 : "kernel"
0x00260000-0x00800000 : "fs"
0x00800000-0x00860000 : "u-boot1"
0x00860000-0x00d60000 : "plugin"
0x00d60000-0x01000000 : "appl"
0x01000000-0x01060000 : "uboot2"
0x01060000-0x01800000 : "work0"
0x01800000-0x01860000 : "uboot3"
0x01860000-0x02000000 : "work1"
No NAND device found!!!
No NAND device - returning -ENXIO
orion socket ci module initializing!!!
.......
Waww!!! Basically, add 0x38 to the header of those adresses, and we will get whole raw flash layout !!
Let me add some more useful data here:
# cat /proc/cmdline
root=/dev/mtdblock/2 rootfstype=jffs2 mem=146M console=ttyS0,115200 mtdparts=phys_mapped_flash:640k(u-boot0),1792k(kernel),5760k(fs),384k(u-boot1),5120k(plugin),2688k(appl),384k(uboot2),7808k(work0),384k(uboot3),7808k(work1) ethaddr=02:03:04:61:72:A8

# cat /proc/partitions
major minor  #blocks  name

  31     0        640 mtdblock0
  31     1       1792 mtdblock1
  31     2       5760 mtdblock2
  31     3        384 mtdblock3
  31     4       5120 mtdblock4
  31     5       2688 mtdblock5
  31     6        384 mtdblock6
  31     7       7808 mtdblock7
  31     8        384 mtdblock8
  31     9       7808 mtdblock9
# cat /proc/mtd
dev:    size   erasesize  name
mtd0: 000a0000 00020000 "u-boot0"
mtd1: 001c0000 00020000 "kernel"
mtd2: 005a0000 00020000 "fs"
mtd3: 00060000 00020000 "u-boot1"
mtd4: 00500000 00020000 "plugin"
mtd5: 002a0000 00020000 "appl"
mtd6: 00060000 00020000 "uboot2"
mtd7: 007a0000 00020000 "work0"
mtd8: 00060000 00020000 "uboot3"
mtd9: 007a0000 00020000 "work1"
# cat /proc/mounts
rootfs / rootfs rw 0 0
/dev/root / jffs2 rw,noatime 0 0
none /proc proc rw,nodiratime 0 0
none /sys sysfs rw 0 0
none /dev tmpfs rw 0 0
devpts /dev/pts devpts rw 0 0
/dev/mtdblock/4 /usr/plugin jffs2 rw,noatime 0 0
/dev/mtdblock/5 /application jffs2 rw,noatime 0 0
/dev/mtdblock/7 /usr/work0 jffs2 rw,noatime 0 0
/dev/mtdblock/9 /usr/work1 jffs2 rw,noatime 0 0
tmpfs /tmp tmpfs rw 0 0
#
JFlash -openprj"jflash-chipbox-project.21.12.2021.jflash" -readrange"0x38000000","0x380a0000" -saveas"uboot-0.bin" -readrange"0x38800000","0x38860000" -saveas"uboot-1.bin" -readrange"0x39000000","0x39060000" -saveas"uboot-2.bin" -readrange"0x39800000","0x39860000" -saveas"uboot-3.bin" -save -exit
This allows me to download 4 ( four - yes, I remember back then 10 years ago, while I was talking with KB, he also didn't knew why we needed 4x u-boot partitions in the NOr Flash... Blame long-dead CelestialSemi) u-boot partitions from the NOR Flash.
final interesting status:
The size of u-boot0 partition is different than other three. When I used above one-liner to dump other u-boot partitions, basically I found them to be empty. Then I wonder, if I could use those space ???


