Implementation of Neural Style Transfer from the paper A Neural Algorithm of Artistic Style in Keras 1.0.8.
INetwork implements and focuses on certain improvements suggested in Improving the Neural Algorithm of Artistic Style.
Uses the VGG-16 model as described in the Keras example below : https://github.com/fchollet/keras/blob/master/examples/neural_style_transfer.py
Uses weights from Keras Deep Learning Models : https://github.com/fchollet/deep-learning-models
Neural Doodles is a modification of the example script available at Keras : https://github.com/fchollet/keras/blob/master/examples/neural_doodle.py
See the guide for details regarding how to use the script to acheive the best results
It also explains how to setup Theano (with GPU support) on both Windows and Linux. Theano on Windows is a long and tedious process, so the guide can speed up the process by simply letting you finish all the steps in the correct order, so as not to screw up the finicky Theano + Windows setup.
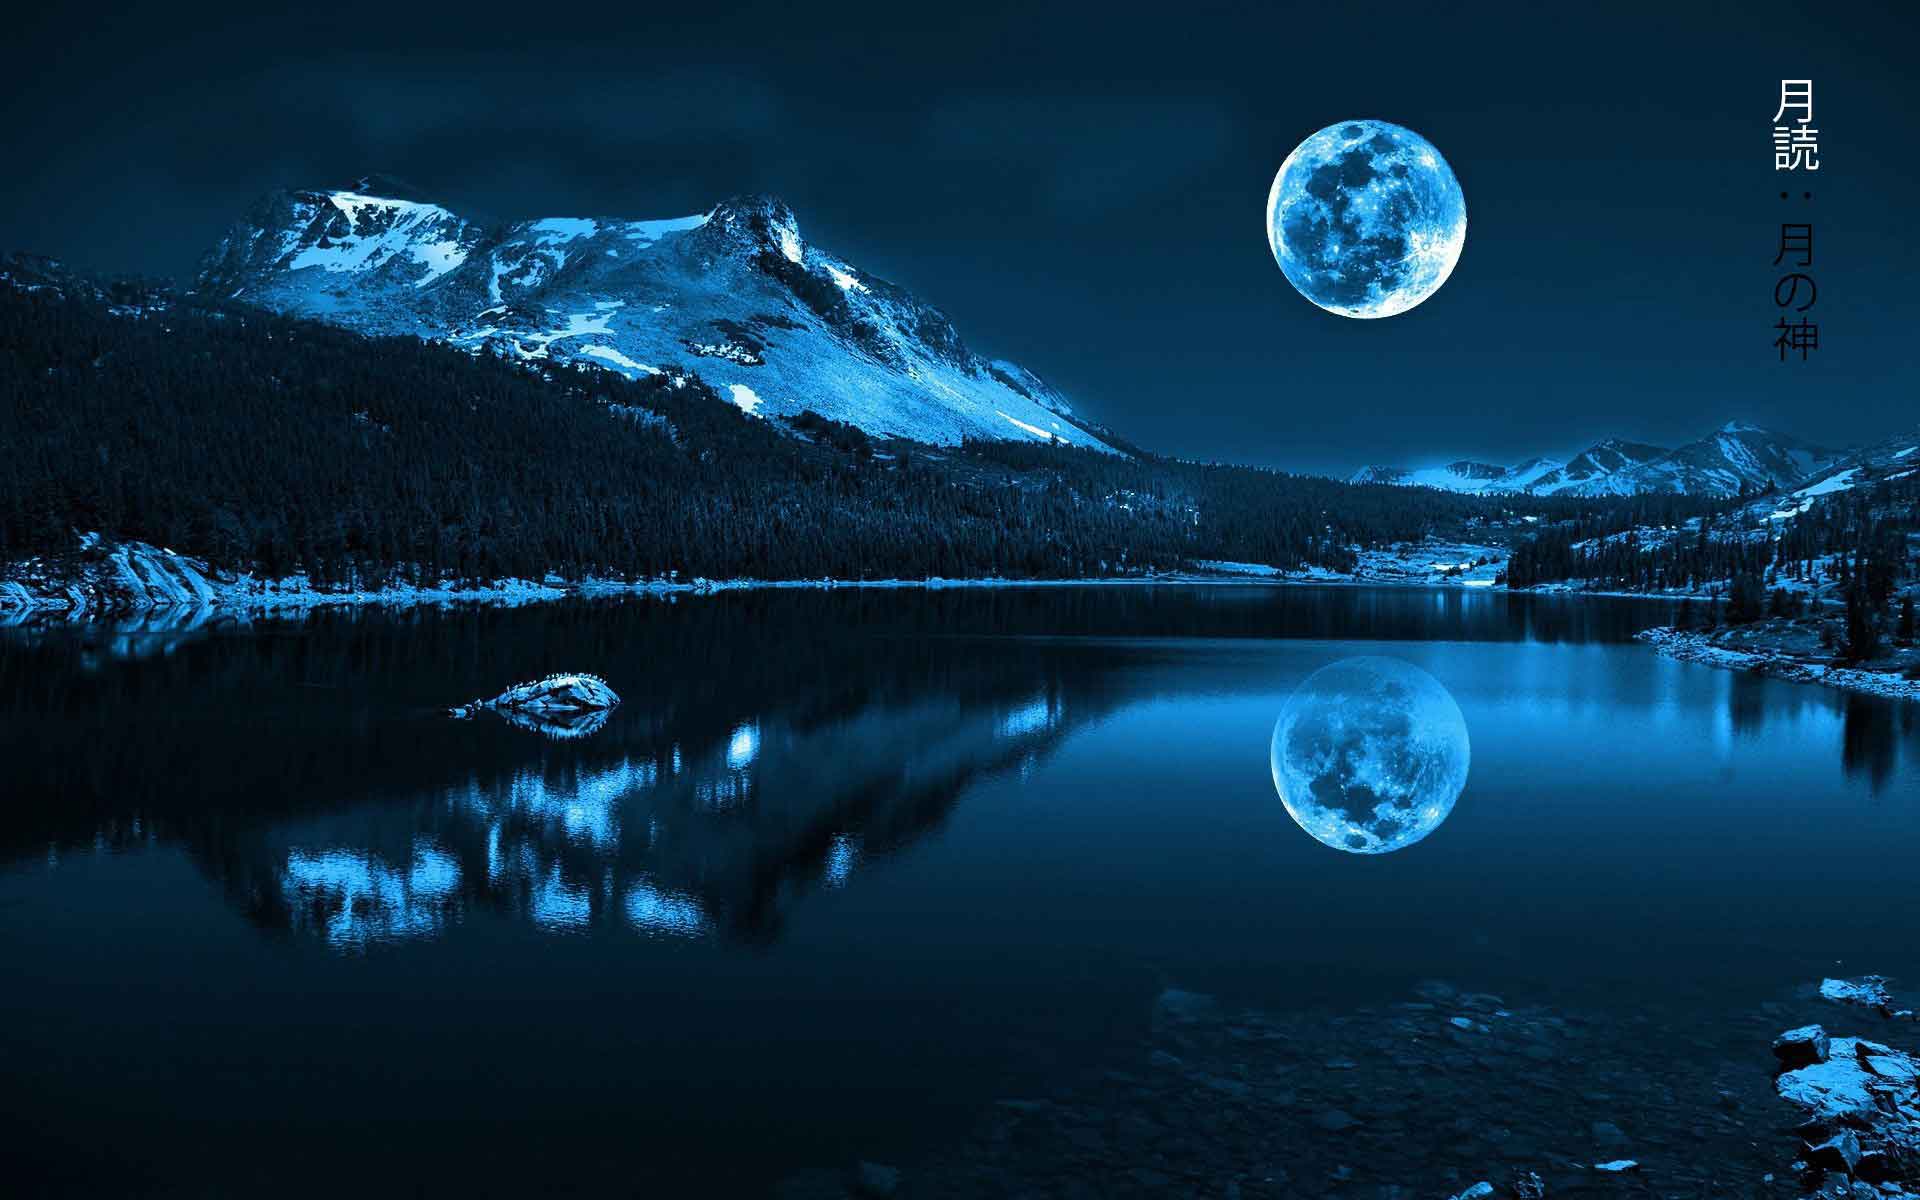
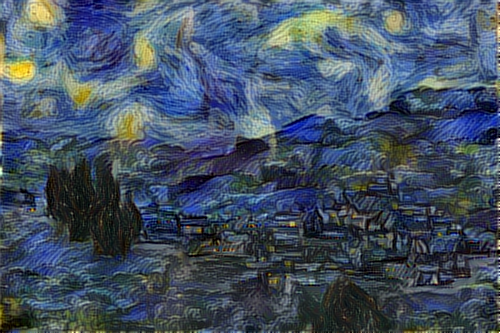
Result after 50 iterations (Average Pooling)

For comparison, results after 50 iterations (Max Pooling)

For comparison, results after 50 iterations using the INetwork. Notice that in comparison to Max Pooling results, it is far more detailed in the mountain peaks and colours are more natural

DeepArt.io result (1000 iterations and using improvements such as Markov Random Field Regularization)

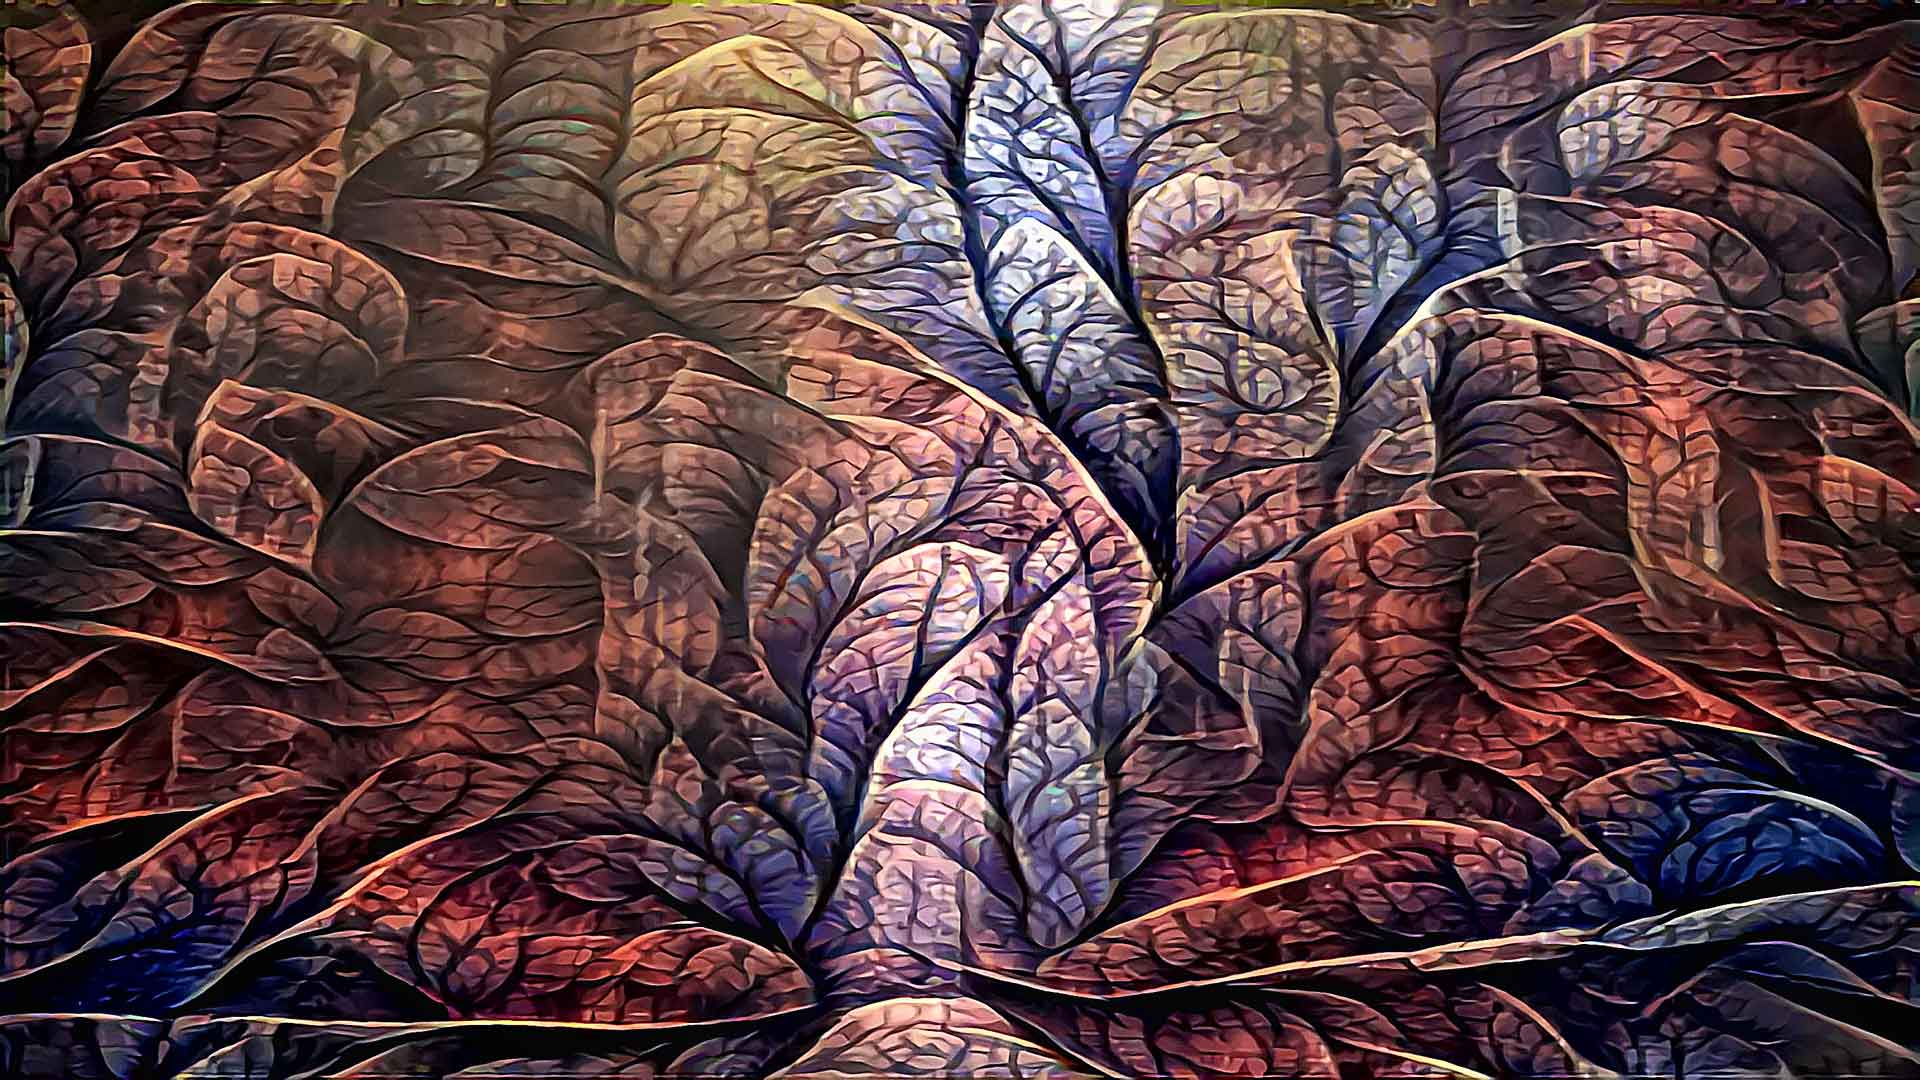
For reference, the same image with Color Preservation

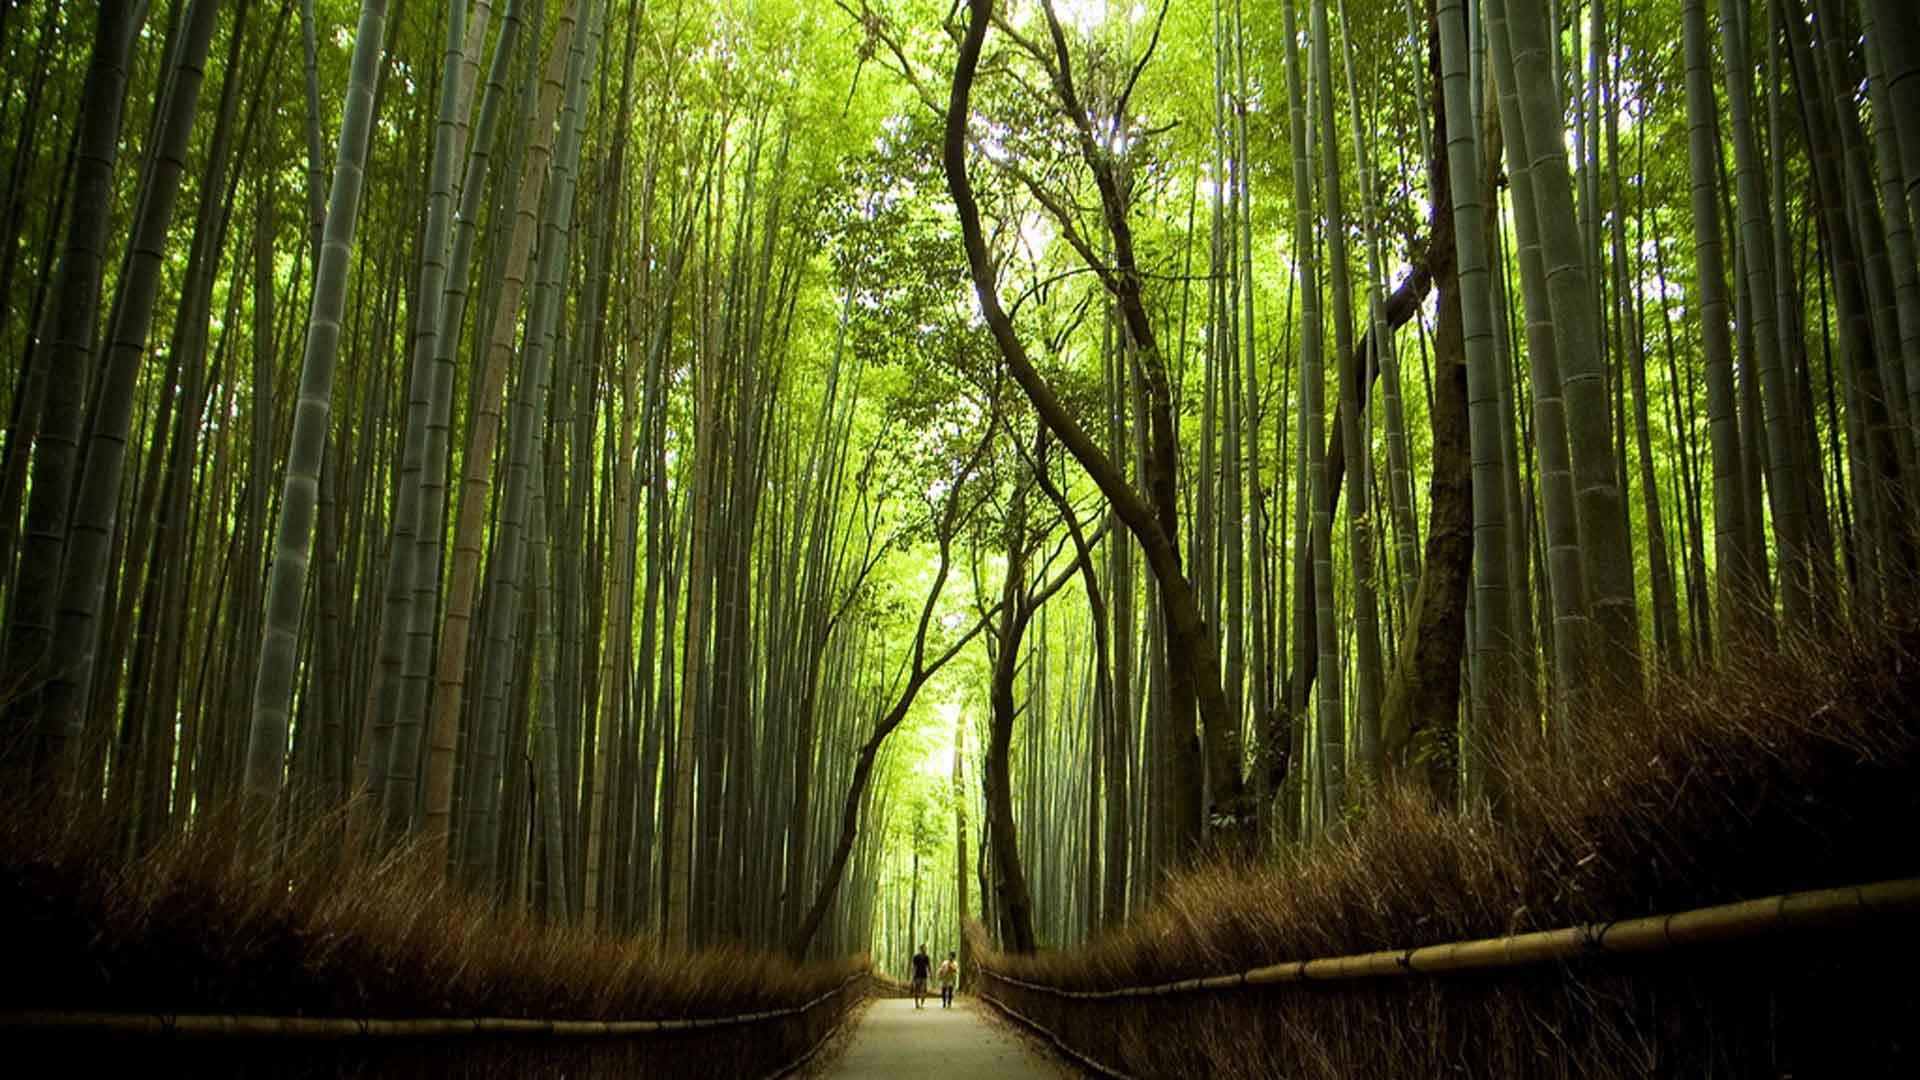
As an example, here are two images of the Sagano Bamboo Forest with the "pattened-leaf" style, with and without color preservation


Renoit Style + Content Image

Monet Style + Doodle Creation

Van Gogh + Doodle Creation
Weights are now automatically downloaded and cached in the ~/.keras (Users//.keras for Windows) folder under the 'models' subdirectory. The weights are a smaller version which include only the Convolutional layers without Zero Padding Layers, thereby increasing the speed of execution.
Note: Requires the latest version of Keras (1.0.7+) due to use of new methods to get files and cache them into .keras directory.
-
Uses 'conv5_2' output to measure content loss. Original paper utilizes 'conv4_2' output
-
Initial image used for image is the base image (instead of random noise image) This method tends to create better output images, however parameters have to be well tuned. Therefore their is a argument 'init_image' which can take the options 'content' or 'noise'
-
Can use AveragePooling2D inplace of MaxPooling2D layers The original paper uses AveragePooling for better results, but this can be changed to use MaxPooling2D layers via the argument
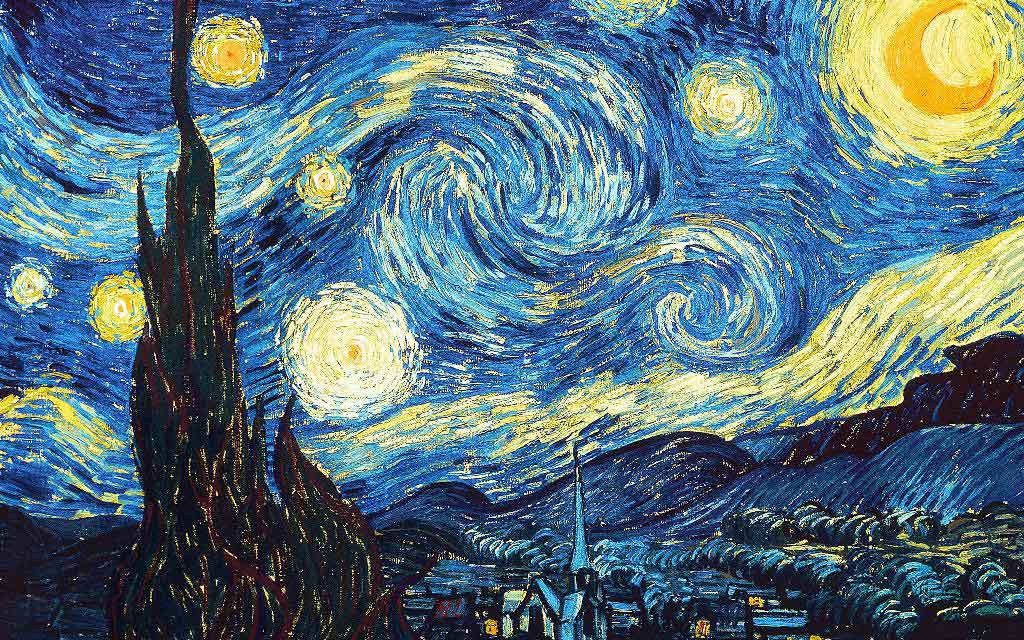
--pool_type="max". By default MaxPoooling is used, since if offers sharper images, but AveragePooling applys the style better in some cases (especially when style image is the "Starry Night" by Van Goph. -
Style weight scaling
-
Rescaling of image to original dimensions, using lossy upscaling present
-
Maintain aspect ratio of intermediate and final stage images, using lossy upscaling
- Improvement 3.1 in paper : Geometric Layer weight adjustment for Style inference
- Improvement 3.2 in paper : Using all layers of VGG-16 for style inference
- Improvement 3.3 in paper : Activation Shift of gram matrix
- Improvement 3.5 in paper : Correlation Chain
These improvements are almost same as the Chain Blurred version, however a few differences exist :
- Blurring of gram matrix G is not used, as in the paper the author concludes that the results are often not major, and convergence speed is greatly diminished due to very complex gradients.
- Only one layer for Content inference instead of using all the layers as suggested in the Chain Blurred version.
- Does not use CNN MRF network, but applies these modifications to the original algorithm.
- All of this is applied on the VGG-16 network, not on the VGG-19 network. It is trivial to extrapolate this to the VGG-19 network. Simply adding the layer names to the
feature_layerslist will be sufficient to apply these changes to the VGG-19 network.
It is a C# program written to more easily generate the arguments for the python script Network.py or INetwork.py (Using Neural Style Transfer tab) and neural_doodle.py or improved_neural_doodle.py script (Using Neural Doodle Tab)

- Upon first run, it will request the python path. Traverse your directory to locate the python.exe of your choice (Anaconda is tested)
- Automatically executes the script based on the arguments.
- Easy selection of images (Content, Style, Output Prefix)
- Easy parameter selection
- Easily generate argument list, if command line execution is preferred.
- Allows usage of both Neural Style Transfer as well as Neural Doodles
Both Network.py and INetwork.py have similar usage styles, and share all parameters.
Network.py
python network.py "/path/to/content image" "path/to/style image" "result prefix or /path/to/result prefix"
INetwork.py
python inetwork.py "/path/to/content image" "path/to/style image" "result prefix or /path/to/result prefix"
There are various parameters discussed below which can be modified to alter the output image. Note that many parameters require the command to be enclosed in double quotes ( " " ).
Example:
python inetwork.py "/path/to/content image" "path/to/style image" "result prefix or /path/to/result prefix" --preserve_color "True" --pool_type "ave" --rescale_method "bicubic" --content_layer "conv4_2"
Both the neural_doodle.py and improved_neural_doodle.py script share similar usage styles.
neural_doodle.py & improved_neural_doodle.py
python neural_doodle.py --nlabels -style-image --style-mask --target-mask --content-image --target-image-prefix
Example 1 : Doodle using a style image, style mask and target mask (from keras examples)
python neural_doodle.py --nlabels 4 --style-image Monet/style.png \
    --style-mask Monet/style_mask.png --target-mask Monet/target_mask.png \
    --target-image-prefix generated/monet
Example 2: Doodle using a style image, style mask, target mask and an optional content image.
 python neural_doodle.py --nlabels 4 --style-image Renoir/style.png \
    --style-mask Renoir/style_mask.png --target-mask Renoir/target_mask.png \
    --content-image Renoir/creek.jpg \
    --target-image-prefix generated/renoir
Multiple phases Example : Doodle using a style image, style mask, target mask and using it multiple times to acheive better results.
- Assume that an image has a size (400 x 600).
- Divide the image size by 4 (100 x 125)
- Create 1st doodle according to the below script #1 (--img_size 100)
- Create 2nd doodle according to the below script #2 (Note that we pass 1st doodle as content image here) (--img_size 200)
- Create 3rd and last doodle acc to below script #3 (Note we pass 2nd doodle as content image here) (Do not put img_size parameter)
# Script 1
python improved_neural_doodle.py --nlabels 4 --style-image srcl.jpg --style-mask srcl-m.png --target-mask dst-m.png  --target-image-prefix ./doodle3-100 --num_iter 50 --img_size 100 --min_improvement 5.0

# Script 2
python improved_neural_doodle.py --nlabels 4 --style-image srcl.jpg --style-mask srcl-m.png --target-mask dst-m.png  --target-image-prefix ./doodle3-200 --num_iter 50 --content-image ./doodle3-100_at_iteration_XXXX.png --img_size 200 --min_improvement 2.5

############# Replace XXXX by last iteration number ################

# Script 3
python improved_neural_doodle.py --nlabels 4 --style-image srcl.jpg --style-mask srcl-m.png --target-mask dst-m.png  --target-image-prefix ./doodle3-500 --num_iter 50 --content-image ./doodle3-200_at_iteration_XXXX.png

############# Replace XXXX by last iteration number ################
--image_size : Allows to set the Gram Matrix size. Default is 400 x 400, since it produces good results fast.
--num_iter : Number of iterations. Default is 10. Test the output with 10 iterations, and increase to improve results.
--init_image : Can be "content" or "noise". Default is "content", since it reduces reproduction noise.
--pool_type : Pooling type. MaxPooling ("max") is default. For smoother images, use AveragePooling ("ave").
--preserve_color : Preserves the original color space of the content image, while applying only style. Post processing technique on final image, therefore does not harm quality of style.
--min_improvement : Sets the minimum improvement required to continue training. Default is 0.0, indicating no minimum threshold. Advised values are 0.05 or 0.01

--content_weight : Weightage given to content in relation to style. Default if 0.025
--style_weight : Weightage given to style in relation to content. Default is 1.
--style_scale : Scales the style_weight. Default is 1.
--total_variation_weight : Regularization factor. Smaller values tend to produce crisp images, but 0 is not useful. Default = 8.5E-5

--rescale_image : Rescale image to original dimensions after each iteration. (Bilinear upscaling)
--rescale_method : Rescaling algorithm. Default is bilinear. Options are nearest, bilinear, bicubic and cubic.
--maintain_aspect_ratio : Rescale the image just to the original aspect ratio. Size will be (gram_matrix_size, gram_matrix_size * aspect_ratio). Default is True
--content_layer : Selects the content layer. Paper suggests conv4_2, but better results can be obtained from conv5_2. Default is conv5_2.
--nlabels : Number of colors or labels in mask image
--image_size : Allows to set the Gram Matrix size. Default is -1, which means that it uses style image size automatically.
--num_iter : Number of iterations. Default is 10. Test the output with 10 iterations, and increase to improve results.
--preserve_color : Preserves the original color space of the content image, while applying only style. Post processing technique on final image, therefore does not harm quality of style. Works only when using content image for guided style transfer
--min_improvement : Minimum improvement in percentage required to continue training. Set to 0.0 to disable.

--content_weight : Weightage given to content in relation to style. Default if 0.1
--style_weight : Weightage given to style in relation to content. Default is 1.
--total_variation_weight : Regularization factor. Smaller values tend to produce crisp images, but 0 is not useful. Default = 8.5E-5
--region_style_weight : Weight for region style regularization. Keep it set to 1.0 unless testing for experimental purposes.

- Theano / Tensorflow
- Keras
- CUDA (GPU) -- Recommended
- CUDNN (GPU) -- Recommended
- Scipy + PIL
- Numpy
On a 980M GPU, the time required for each epoch depends on mainly image size (gram matrix size) :
For a 400x400 gram matrix, each epoch takes approximately 8-10 seconds.
For a 512x512 gram matrix, each epoch takes approximately 15-18 seconds.
For a 600x600 gram matrix, each epoch takes approximately 24-28 seconds.
- Due to usage of content image as initial image, output depends heavily on parameter tuning.
Test to see if the image is appropriate in the first 10 epochs, and if it is correct, increase the number of iterations to smoothen and improve the quality of the output. - Due to small gram sizes, the output image is usually small.
To correct this, use the implementations of this paper "Image Super-Resolution Using Deep Convolutional Networks" http://arxiv.org/abs/1501.00092 to upscale the images with minimal loss.
Some implementations of the above paper for Windows : https://github.com/lltcggie/waifu2x-caffe/releases
(Download the waifu2x-caffe.zip and extract, program supports English) - Implementation of Markov Random Field Regularization and Patch Match algorithm are currently being tested. MRFNetwork.py contains the basic code, which need to be integrated to use MRF and Patch Match as in Image Analogies paper Combining Markov Random Fields and Convolutional Neural Networks for Image Synthesis