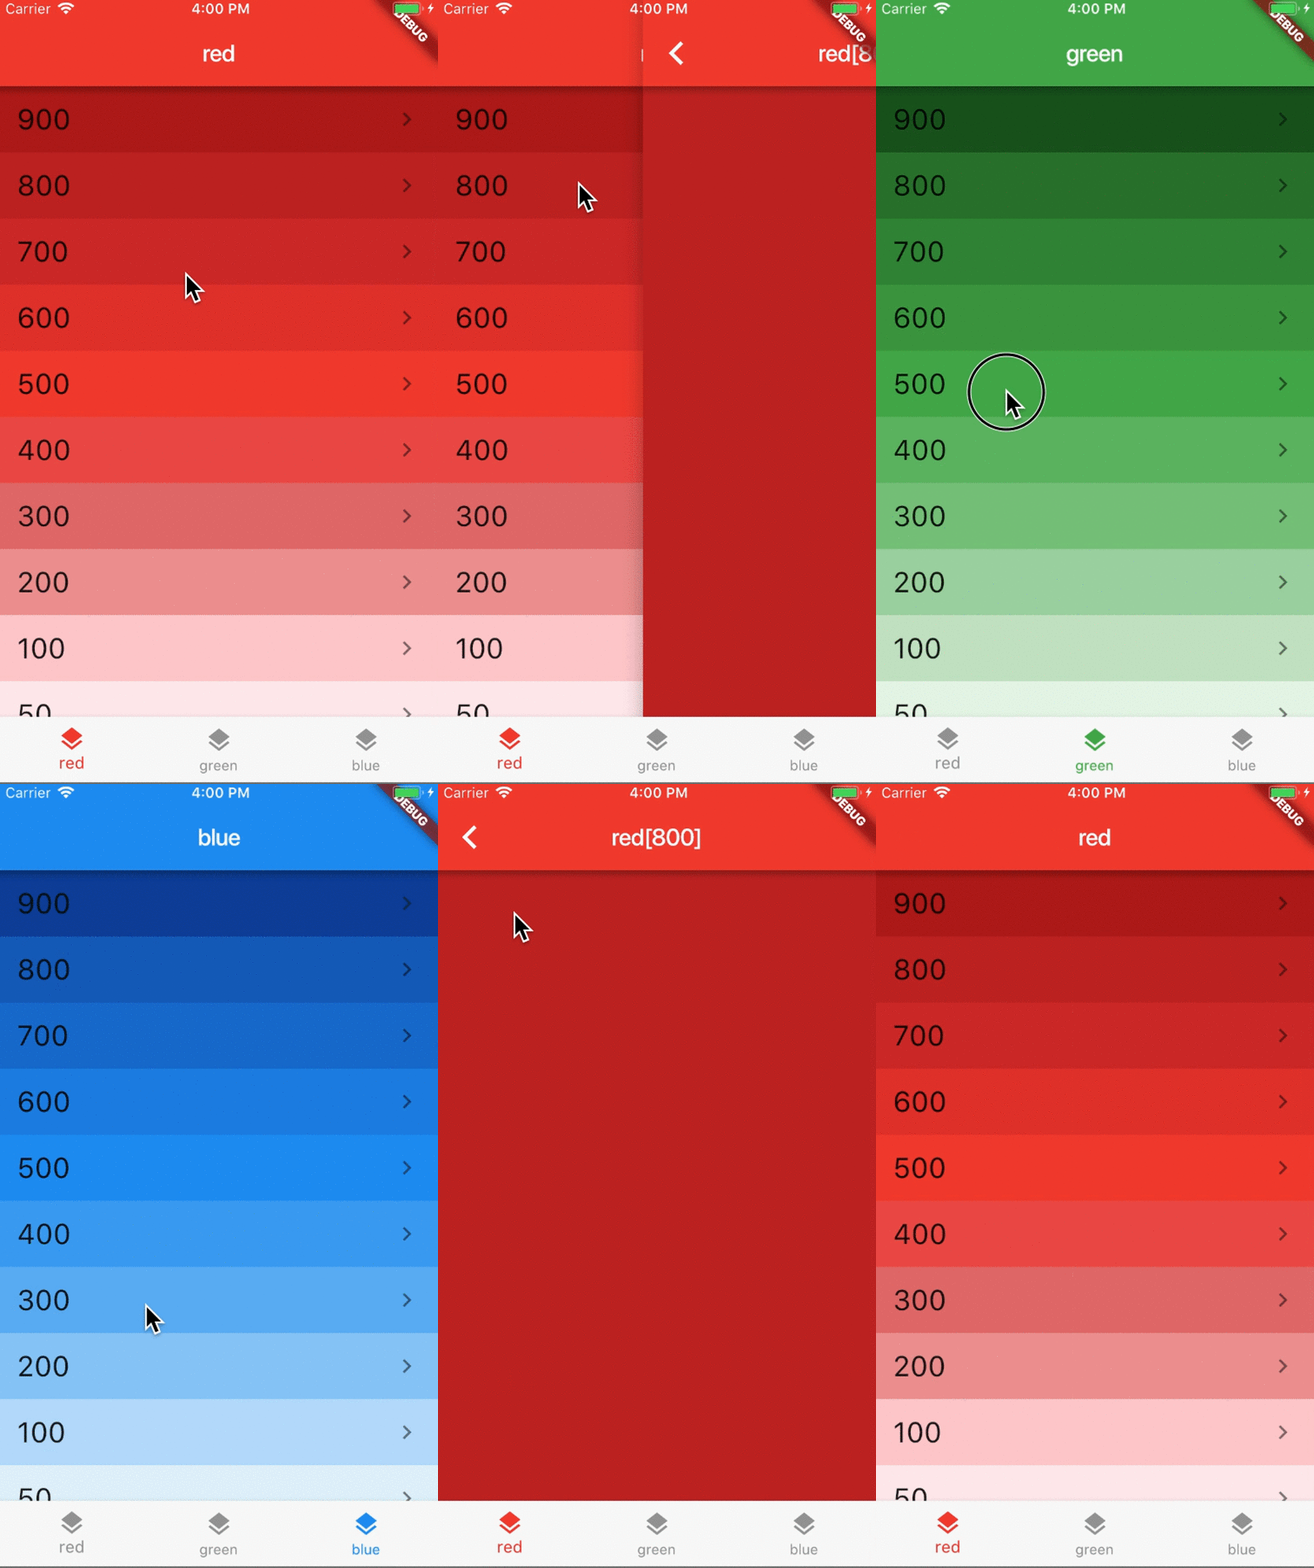
- Callback function
- setState 를 했을 때 각 Widget 들의 build 함수들 계속 새로 만들어짐
- TabItem 으로 Map 을 이용해서 탭 이름과 탭 컬러를 정하는 함수
- Map 사용법
- List 사용법
- enum class 사용법
- Navigator 사용법
- WillPopScope 사용법
- Stack 과 Offset 사용법
- final VoidCallback callback : 그냥 부모의 프린트문을 실행하도록 하고자 할 때. 실행시 그냥 callback;
- final Function(int) callback : 부모에게 값을 넘겨주어서 부모가 실행하도록 할 때. 실행시 그냥 callback(3);
- Functional callback using typedef
typedef void CallBackFunction(int);// child widgetfinal CallBackFunction callback;// 부모에서 선언하고, callback 으로 넘기고this.callback으로 자식이 받고,callback(1);부모에게 1을 인자로 넘겨서 부모쪽에서 실행하도록 하고.
- 위의 Functional callback 이 이미 typedef 형태로 플러터에 만들어져 있다.
- final
ValueChanged<int>? onPush;// callback function - 사용할 때
onTap: () => onPush?.call(materialIndex),// 해당 인덱스를 이용해서 콜백함수를 실행시킬 거다.
- final
실험을 해봤지.. hashCode 를 이용해서 setState 가 실행될 때마다 자식으로 있는 BottomNavigation 의 주소값을 체크했는데 누를때마다 계속 바뀐다. 그말은 계속 새롭게 객체를 생성한다는 뜻 또 그말은 객체를 생성하기 위해서 계속 currentTab 과 selectedTab 의 값이 계속 넘어와야 한다는 것 How setState() works Flutter key when to use Flutter key. What is it GlobalKeys. What is it
class AppState extends State<App> {
  var _currentTab = TabItem.red; // 여기보이는 변수들은 Stateful 안의 State 이므로 값이 보존된 상태에서 새롭게 만들어진다.
  final _navigatorKeys = {
    TabItem.red: GlobalKey<NavigatorState>(),
    TabItem.green: GlobalKey<NavigatorState>(),
    TabItem.blue: GlobalKey<NavigatorState>(),
  };

  void _selectTab(TabItem tabItem) {
    if (tabItem == _currentTab) {
      // pop to first route
      _navigatorKeys[tabItem]!.currentState!.popUntil((route) => route.isFirst);
    } else {
       setState(() => _currentTab = tabItem);
       // 값이 그대로다. 안바뀐다. 오마이캇
       print("_currentTab 값은 계속 setState 할때 변경될까? ${_currentTab.hashCode}");
    }
  }

  @override
  Widget build(BuildContext context) {
return WillPopScope();enum TabItem { red, green, blue } // TabItem 을 만들어놓고
const Map<TabItem, String> tabName = { // 그 TabItem 으로 맵을 통해서 탭 이름을 알아내고
TabItem.red: 'red',
TabItem.green: 'green',
TabItem.blue: 'blue',
};
const Map<TabItem, MaterialColor> activeTabColor = { // 그 TabItem 으로 맵을 통해서 탭 칼러를 정하고
TabItem.red: Colors.red,
TabItem.green: Colors.green,
TabItem.blue: Colors.blue,
}; selectedItemColor: activeTabColor[currentTab]!, final List<int> materialIndices = [ 900,800,700,600,500,400,300,200,100,50 ];enum TabItem { red, green, blue } // TabItem 을 만들어놓고
onTap: (index) => onSelectTab(
TabItem.values[index], // 야! 이걸 몰라서 찾아봤었는데 enum values[index] 로 한다고?
),
currentIndex: currentTab.index, // 야! 이것도 index 를 이용했구나. static const String root = '/'; // 이렇게 루트를 static 으로 정하고
static const String detail = '/detail'; void _push(BuildContext context, {int materialIndex: 500}) { // 말그대로 detail 로 가는 함수이다.
var routeBuilders = _routeBuilders(context, materialIndex: materialIndex); // 이런식으로 materialIndex 를 넣어서 루트를 다시 만들었다.
Navigator.push(
context,
MaterialPageRoute(
builder: (context) =>
routeBuilders[TabNavigatorRoutes.detail]!(context), // 기억나나? 이것때메 3시간을 허비했다. 아니 하루를 허비했지. ! 하나때메
),
);
}
Map<String, WidgetBuilder> _routeBuilders(BuildContext context,
{int materialIndex: 500}) {
return {
TabNavigatorRoutes.root: (context) => ColorsListPage(
color: activeTabColor[tabItem]!,
title: tabName[tabItem]!,
onPush: (materialIndex) =>
_push(context, materialIndex: materialIndex),
),
TabNavigatorRoutes.detail: (context) => ColorDetailPage(
color: activeTabColor[tabItem]!,
title: tabName[tabItem]!,
materialIndex: materialIndex,
),
};
} @override
Widget build(BuildContext context) {
final routeBuilders = _routeBuilders(context); // 루트 빌더 가지고 있으면서
return Navigator(
key: navigatorKey,
initialRoute: TabNavigatorRoutes.root, // 맨처음에는 root 로 시작한다.
onGenerateRoute: (routeSettings) { // initialRoute 의 TabNavigatorRoutes.root 를 routeSettings 로 넘겨준다. 아규먼트도 설정가능하다.
return MaterialPageRoute(
builder: (context) => routeBuilders[routeSettings.name!]!(context),
// builder: (context) => routeBuilders[TabNavigatorRoutes.root]!(context), // 이거랑 똑같았네.
);
},
);
} // 솔직히 이부분은 패스했다. ㅠㅠ
return WillPopScope(
onWillPop: () async {
final isFirstRouteInCurrentTab =
!await _navigatorKeys[_currentTab]!.currentState!.maybePop();
if (isFirstRouteInCurrentTab) {
// if not on the 'main' tab
if (_currentTab != TabItem.red) {
// select 'main' tab
_selectTab(TabItem.red);
// back button handled by app
return false;
}
}
// let system handle back button if we're on the first route
return isFirstRouteInCurrentTab;
},
      child: Scaffold(
        body: Stack(children: <Widget>[ // 전체로 되나????
          _buildOffstageNavigator(TabItem.red),
          _buildOffstageNavigator(TabItem.green),
          _buildOffstageNavigator(TabItem.blue),
        ]),
        bottomNavigationBar: _bottomNavigation(),
      ),
 Widget _buildOffstageNavigator(TabItem tabItem) {
    return Offstage( // OffState 가 Navigator 를 자식으로 가지고 있고 Navigator build 가 가야할 곳을 정한다.
      // 그런데 GlobalKey 를 가지고 있기 때문에 다른데로 갔다가 오더라도 값이 유지되고 있는거다.
      offstage: _currentTab != tabItem,
      child: TabNavigator(
        // NavigatorKey has type GlobalKey<NavigatorState>. We need this to uniquely identify the navigator across the entire app
        navigatorKey: _navigatorKeys[tabItem],
        tabItem: tabItem,
      ),
    );
  }
}This is the source code for my article:
In this example each tab has its own navigation stack. This is so that we don’t lose the navigation history when switching tabs.
This is a very common use case for a lot of apps.
How is it built?
- Create an app with a
Scaffoldand aBottomNavigationBar. - In the
Scaffoldbody, create aStackwith one child for each tab. - Each child is an
Offstagewidget with a childNavigator. - Don't forget to handle Android back navigation with
WillPopScope.
Read the full story on my article:
- Brian Egan: for suggesting to use
Stack+Offstage&Navigatorwidgets.
