


- Hello World
- 快速Web开发
- Spring Data JPA 的使用
- 模板引擎Thymeleaf
- JPA 和 Thymeleaf 实践
- 使用Swagger2构建RESTful API 文档
- Spring Boot 集成 MyBatis
- 集成 MyBatis Druid 数据源
- 集成 Redis 实现数据缓存和 Session 共享
- 集成dubbo和zookeeper
- 集成 RabbitMQ
- 集成 MongoDB
- Spring Boot 发送邮件
- 集成 quartz
- Spring Boot 集成测试和部署运维
- 测试用的类,需要在类的头部添加
@RunWith(SpringRunner.class)和@SpringBootTest注解。@RunWith(SpringRunner.class) @SpringBootTest public class TestUserService { }
- 测试常用的注解和类:
@Test:Junit 常用注解,这个大家都经常用。Assert:中文翻译“断言”、“断定”,它断定某一个实际的运行值和预期想一样,否则就抛出异常。@Test public void testAssert() { //验证结果是否为空 Assert.assertNotNull(userService.getUser()); //验证结果是否相等 Assert.assertEquals("I am leeyom", userService.getUser()); //验证条件是否成立 Assert.assertFalse(1 + 1 > 3); //验证对象是否相等 Assert.assertSame(userService, userService); int status = 404; //验证结果集,提示 Assert.assertFalse("错误,正确的返回值为200", status != 200); String[] expectedOutput = {"apple", "mango", "grape"}; String[] methodOutput = {"apple", "mango", "grape1"}; //验证数组是否相同 Assert.assertArrayEquals(expectedOutput, methodOutput); }
MockMvc:方便对 web 接口进行测试,不需要用 postman 这类工具:@RunWith(SpringRunner.class) @SpringBootTest public class TestMockMvc { private MockMvc mockMvc; @Before public void setUp() throws Exception { mockMvc = MockMvcBuilders.standaloneSetup(new HelloWorldHandler()).build(); } @Test public void getHello() throws Exception { mockMvc.perform(MockMvcRequestBuilders.get("/hello") .param("name", "leeyom") .accept(MediaType.APPLICATION_JSON_UTF8)) .andExpect(status().isOk()) .andDo(MockMvcResultHandlers.print()) .andReturn(); } }
- 对应批量的启动服务的脚本,可以参考:service.sh
- 正式环境部署,所有的服务的jar部署在
/application/provider目录下,该文件夹下有个service.sh脚本,用于启动,停止,重启服务。- 启动所有jar程序:
sh service.sh start all - 停止所有jar程序:
sh service.sh stop all - 重启所有jar程序:
sh service.sh restart all - 单独启动、停止、重启某个jar程序:把最后面的all替换为某个jar程序的代码即可,比如:
sh service.sh restart advertising
- 启动所有jar程序:
- 正式环境部署,所有的服务的jar部署在
- 内置的定时只需要引入
Spring Boot Starter即可,该包中内置了定时:<dependency> <groupId>org.springframework.boot</groupId> <artifactId>spring-boot-starter</artifactId> </dependency>
- 启动类使用注解
@EnableScheduling开启定时:@SpringBootApplication @EnableScheduling public class SpringBootQuartzApplication { public static void main(String[] args) { SpringApplication.run(SpringBootQuartzApplication.class, args); } }
- 创建定时任务实现类,使用
@Scheduled注解设置定时,process()方法每隔6秒执行一次:当然,还有另外一种设置方式:@Component public class SchedulerTask { private int count = 0; /** * 每隔6秒打印一次 */ @Scheduled(cron = "*/6 * * * * ?") public void process() { System.out.println("this is scheduler task runing " + (count++)); } }
@Scheduled(fixedRate = 6000)
  public void reportCurrentTime() {
      System.out.println("date:" + dateFormat.format(new Date()));
  }
@Scheduled注解属性说明:@Scheduled(fixedRate = 6000):上一次开始执行时间点之后 6 秒再执行。@Scheduled(fixedDelay = 6000):上一次执行完毕时间点之后 6 秒再执行。@Scheduled(initialDelay=1000, fixedRate=6000):第一次延迟 1 秒后执行,之后按 fixedRate 的规则每 6 秒执行一次。@Scheduled(cron="*/6 * * * * ?"):cron 表达式一共7位,最后一位是年,Spring Boot 只需要设置6位:- 第一位,表示秒,取值 0-59;
- 第二位,表示分,取值 0-59;
- 第三位,表示小时,取值 0-23;
- 第四位,日期天/日,取值 1-31;
- 第五位,日期月份,取值 1-12;
- 第六位,星期,取值 1-7,星期一、星期二…;
- 第七位,年份,可以留空,取值 1970-2099。
cron表达式 中,还有一些特殊的符号,含义如下:- (*)星号:可以理解为每的意思,每秒、每分、每天、每月、每年……。
- (?)问号:问号只能出现在日期和星期这两个位置,表示这个位置的值不确定,每天 3 点执行,所以第六位星期的位置是不需要关注的,就是不确定的值。
- (-)减号:表达一个范围,如在小时字段中使用“10-12”,则表示从 10~12 点,即 10、11、12。
- (,)逗号:表达一个列表值,如在星期字段中使用“1、2、4”,则表示星期一、星期二、星期四。
- (/)斜杠:如 x/y,x 是开始值,y 是步长,比如在第一位(秒) 0/15 就是,从 0 秒开始,每 15 秒,最后就是 0、15、30、45、60。
- 示例代码:spring-boot-quartz
- Spring Boot 2.0 版本才开始支持 quartz 组件,引入 quartz 组件依赖:
<dependency>
    <groupId>org.springframework.boot</groupId>
    <artifactId>spring-boot-starter-quartz</artifactId>
</dependency>
- 创建一个 job(任务),该 job 继承
QuartzJobBean,在重写executeInternal(JobExecutionContext context)方法中可以写需要处理的定时任务代码 :public class SampleJob extends QuartzJobBean { private String name; public void setName(String name) { this.name = name; } @Override protected void executeInternal(JobExecutionContext jobExecutionContext) throws JobExecutionException { System.out.println(String.format("Hello %s!", this.name)); } }
- 构建
JobDetail、JobTrigger、scheduleBuilder,最后使用Scheduler启动定时任务:@Configuration public class SampleScheduler { @Bean public JobDetail sampleJobDetail() { return JobBuilder.newJob(SampleJob.class).withIdentity("sampleJob") .usingJobData("name", "World").storeDurably().build(); } @Bean public Trigger sampleJobTrigger() { SimpleScheduleBuilder scheduleBuilder = SimpleScheduleBuilder.simpleSchedule() .withIntervalInSeconds(2).repeatForever(); return TriggerBuilder.newTrigger().forJob(sampleJobDetail()) .withIdentity("sampleTrigger").withSchedule(scheduleBuilder).build(); } }
- 启动项目后每隔两秒输出:Hello World!
- 示例代码:spring-boot-quartz-advance
平常我们都是用 JavaMail 相关 API 发送邮件,但是 spring boot 给我们封装了更为便利的 API 用于邮件发送,其中有个组件是 spring-boot-starter-mail ,下面简单的理一下怎么用它的 API 发送邮件。
- pom 文件中添加
spring-boot-starter-mail依赖:<!--邮件发送--> <dependency> <groupId>org.springframework.boot</groupId> <artifactId>spring-boot-starter-mail</artifactId> </dependency>
- 配置发送邮箱的账号和授权密码以及host,其中密码一般不是邮件的授权密码,而不是登录密码。
# 163 email
spring.mail.host=smtp.163.com
spring.mail.username=xxxx@163.com
spring.mail.password=你的邮箱授权密码,不是登录密码
spring.mail.default-encoding=UTF-8
spring.mail.properties.mail.smtp.auth=true
spring.mail.properties.mail.smtp.starttls.enable=true
spring.mail.properties.mail.smtp.starttls.reuired=true
- 编写邮件发送类:
MailServiceImpl,在该类中注入JavaMailSender,这个类封装了常用的邮件发送API。@Component public class MailServiceImpl implements MailService { private final Logger logger = LoggerFactory.getLogger(this.getClass()); @Autowired private JavaMailSender javaMailSender; @Value("${spring.mail.username}") private String from; /** * 发送简单的文本邮件 * @param to 接收人 * @param subject 主题 * @param content 内容 */ @Override public void sendSimpleMail(String to, String subject, String content) { SimpleMailMessage simpleMailMessage = new SimpleMailMessage(); simpleMailMessage.setFrom(from); simpleMailMessage.setTo(to); simpleMailMessage.setSubject(subject); simpleMailMessage.setText(content); try { javaMailSender.send(simpleMailMessage); logger.info("发送成功!"); } catch (Exception e) { logger.error("发送失败!", e); } } /** * 发送html格式的邮件 * @param to 接收人 * @param subject 主题 * @param content 内容 */ @Override public void sendHtmlMail(String to, String subject, String content) { MimeMessage message = javaMailSender.createMimeMessage(); try { MimeMessageHelper messageHelper = new MimeMessageHelper(message, true); messageHelper.setTo(to); messageHelper.setSubject(subject); messageHelper.setText(content, true); messageHelper.setFrom(from); javaMailSender.send(message); logger.info("html邮件发送成功"); } catch (Exception e) { logger.error("发送失败~~~", e); } } /** * 发送带附件的邮件 * @param to 接收人 * @param subject 主题 * @param content 内容 * @param filePath 文件路径 */ @Override public void sendAttachmentsMail(String to, String subject, String content, String filePath) { MimeMessage message = javaMailSender.createMimeMessage(); try { MimeMessageHelper helper = new MimeMessageHelper(message, true); helper.setFrom(from); helper.setTo(to); helper.setSubject(subject); helper.setText(content, true); FileSystemResource file = new FileSystemResource(new File(filePath)); String fileName = file.getFilename(); //添加附件 helper.addAttachment(fileName, file); javaMailSender.send(message); logger.info("带附件的邮件已经发送。"); } catch (MessagingException e) { logger.error("发送带附件的邮件时发生异常!", e); } } }
- 简单的测试:
public class SpringBootEmailApplicationTests {

    @Autowired
    private MailService mailService;
    @Autowired
    private TemplateEngine templateEngine;

    /**
     * 测试发送简单邮箱
     */
    @Test
    public void testSimpleEmail() {
        mailService.sendSimpleMail("leeyomwang@qq.com", "测试spring boot的发送简单邮件", "1111111");
    }

    /**
     * 测试发送html邮件
     */
    @Test
    public void testHtmlEmail() {
        String context = "<html>\n" +
                "<body>\n" +
                "    <h3>今天晚上吃啥呢?</h3>\n" +
                "</body>\n" +
                "</html>";
        mailService.sendHtmlMail("leeyomwang@qq.com", "测试spring boot的发送html邮件", context);
    }

    /**
     * 测试发送带附件的邮件
     */
    @Test
    public void testAttachmentFileEmail() {
        String filePath = "/Users/leeyom/Downloads/consumer.xml";
        mailService.sendAttachmentsMail("leeyomwang@qq.com",
        "测试spring boot的发送带附件的邮件", "111111111!", filePath);
    }

    /**
     * 测试发送模板邮件
     */
    @Test
    public void testSendTemplatesEmail() {
        Context context = new Context();
        context.setVariable("id", "1");
        String emailContent = templateEngine.process("emailTemplate", context);
        mailService.sendHtmlMail("leeyomwang@qq.com", "测试spring boot的发送模板邮件", emailContent);
    }

}
- 在发送的时候,如果报如下的异常:
引发次问题是因为此邮件触发了163邮箱服务器反垃圾规则,我发送好几次都失败了,邮件内容改成这种“1111111”才能成功,好无语~
org.springframework.mail.MailSendException: Failed messages: com.sun.mail.smtp.SMTPSendFailedException: 554 DT:SPM 163 smtp8,DMCowACHEMvH1adakFYxKA--.26575S3 1520948680, please see http://mail.163.com/help/help_spam_16.htm?ip=120.194.143.76&hostid=smtp8&time=1520948680 - 项目源码:spring-boot-email
MongoDB是目前比较热门的非关系型数据库,传统的关系型数据库由:数据库(DataBase)、表(Table)、记录(Record)组成,而MongoDB则由:数据库(DataBase)、集合(Collection)、文档对象(Document)三个层次组成,但是这里的集合没有行和列的概念。MongoDB安装教程见:《安装MongoDB》。
spring boot 中使用 MongoTemplate 可以对mongodb进行简单的操作,里面封装了常用的方法,只要将其注入到dao中即可。
- 引入mongodb组件依赖:
<dependency>
    <groupId>org.springframework.boot</groupId>
    <artifactId>spring-boot-starter-data-mongodb</artifactId>
</dependency>
- 配置mongodb用户名、密码、ip、端口、数据库:
集群配置:
spring.data.mongodb.uri=mongodb://leeyom:root@10.211.55.5:27017/hello_mongodbspring.data.mongodb.uri=mongodb://user:pwd@ip1:port1,ip2:port2/database - 在 UserDao 接口的实现类 UserDaoImpl 中注入
MongoTemplate,并实现一些简单的CRUD:@Component public class UserDaoImpl implements UserDao { @Autowired private MongoTemplate mongoTemplate; @Override public void saveUser(UserEntity user) { mongoTemplate.save(user); } @Override public UserEntity findUserByUserName(String userName) { Query query = new Query(Criteria.where("userName").is(userName)); return mongoTemplate.findOne(query, UserEntity.class); } @Override public void updateUser(UserEntity user) { Query query = new Query(Criteria.where("id").is(user.getId())); Update update = new Update(); update.set("userName", user.getUserName()); update.set("passWord", user.getPassWord()); mongoTemplate.updateFirst(query, update, UserEntity.class); } @Override public void deleteUserById(Long id) { Query query = new Query(Criteria.where("id").is(id)); mongoTemplate.remove(query, UserEntity.class); } }
- 测试类:
com.leeyom.mongodb.UserDaoTest,执行对应的测试方法,然后用 Robo 3T 来连接后直接图形化展示查看。 - 项目地址:spring-boot-mongodb
MongoRepository 也可以对 mongodb 进行操作,我们需要创建一个 UserRepository,然后继承 MongoRepository,这样就可直接使用 MongoRepository 的内置方法。
public interface UserRepository extends MongoRepository<UserEntity, Long> {

    UserEntity findUserByUserName(String userName);

    /**
     * 分页查找
     * @param pageable
     * @return
     */
    Page<UserEntity> findAll(Pageable pageable);

}
然后将 UserRepository 注入到指定的类中即可。
这个配置 mongodb 多数据源和 配置 mybatis 多数据源有点相似,步骤如下:
-
提前创建好两个数据库:
hello_mongodb_1、hello_mongodb_2,然后配置application.properties数据源信息:mongodb.one.uri=mongodb://root:root@10.211.55.5:27017 mongodb.one.database=hello_mongodb_1 mongodb.two.uri=mongodb://root:root@10.211.55.5:27017 mongodb.two.database=hello_mongodb_2
-
配置不同包路径下使用不同的数据源:
@Configuration
@EnableMongoRepositories(basePackages = "com.leeyom.mongodb.repository.one",
        mongoTemplateRef = OneMongoDbConfig.MONGO_TEMPLATE)
public class OneMongoDbConfig {
    protected static final String MONGO_TEMPLATE = "oneMongoTemplate";
}
@Configuration
@EnableMongoRepositories(basePackages = "com.leeyom.mongodb.repository.two",
        mongoTemplateRef = TwoMongoDbConfig.MONGO_TEMPLATE)
public class TwoMongoDbConfig {
    protected static final String MONGO_TEMPLATE = "twoMongoTemplate";
}
-
读取配置信息封装:
@ConfigurationProperties(prefix = "mongodb")
public class MultipleMongoProperties {

    MongoProperties one = new MongoProperties();
    MongoProperties two = new MongoProperties();

    public MongoProperties getOne() {
        return one;
    }

    public void setOne(MongoProperties one) {
        this.one = one;
    }

    public MongoProperties getTwo() {
        return two;
    }

    public void setTwo(MongoProperties two) {
        this.two = two;
    }
}
-
MongoTemplate在根据包路径配置注入到对应的包下:@Configuration public class MultipleMongoConfig { @Autowired private MultipleMongoProperties mongoProperties; @Primary @Bean(name = OneMongoDbConfig.MONGO_TEMPLATE) public MongoTemplate oneMongoTemplate() throws Exception { return new MongoTemplate(oneFactory(this.mongoProperties.getOne())); } @Bean @Qualifier(TwoMongoDbConfig.MONGO_TEMPLATE) public MongoTemplate twoMongoTemplate() throws Exception { return new MongoTemplate(twoFactory(this.mongoProperties.getTwo())); } @Bean @Primary public MongoDbFactory oneFactory(MongoProperties mongo) throws Exception { MongoClient client = new MongoClient(new MongoClientURI(mongoProperties.getOne().getUri())); return new SimpleMongoDbFactory(client, mongoProperties.getOne().getDatabase()); } @Bean public MongoDbFactory twoFactory(MongoProperties mongo) throws Exception { MongoClient client = new MongoClient(new MongoClientURI(mongoProperties.getTwo().getUri())); return new SimpleMongoDbFactory(client, mongoProperties.getTwo().getDatabase()); } }
-
创建两个库分别对应的对象和
OneRepository、TwoRepository,然后都继承MongoRepository,例如:public interface OneRepository extends MongoRepository<UserEntity, Long> { UserEntity findUserByUserName(String userName); }
-
在 spring boot 应用的启动类中,添加
@EnableConfigurationProperties(MultipleMongoProperties.class)注解,不然 properties 中自定义的属性将不会生效。 -
在需要的地方注入
OneRepository、TwoRepository,便可以操作指定的 mongodb 数据源了,具体的测试类这里就不贴了,源码里可以看到。
RabbitMQ的安装参考我的文章:《安装RabbitMQ》。- 引入
RabbitMQ组件包:spring-boot-starter-amqp。<dependency> <groupId>org.springframework.boot</groupId> <artifactId>spring-boot-starter-amqp</artifactId> </dependency>
- 在
application.properties配置RabbitMQ的ip、端口、账号、密码等信息。# rabbitmq spring.rabbitmq.host=10.211.55.5 spring.rabbitmq.port=5672 spring.rabbitmq.username=guest spring.rabbitmq.password=guest
- 创建一个队列,队列的名字叫:
hello。@Bean public Queue Queue() { return new Queue("hello"); }
- 创建一个发送者,用于发送消息,由
AmqpTemplate提供实现。@Component public class HelloSender { @Autowired private AmqpTemplate rabbitmqTemplate; public void send() { String context = "hello " + new Date(); System.out.println("Sender: " + context); //将消息发送给routingKey为"hello"的队列 rabbitmqTemplate.convertAndSend("hello", context); } }
- 创建一个接收者,涉及到两个注解:
@RabbitListener和@RabbitHandler。@RabbitListener:指定该消息来自哪个队列。@RabbitHandler:指定具体接收的方法。- 代码如下:
@Component
@RabbitListener(queues = "hello")
public class HelloReceiver {

    @RabbitHandler
    public void process(String hello) {
        System.out.println("Receive: " + hello);
    }

}
- 测试,接收者和发送者的都应该是同一队列
hello,否则将接收到不到消息:打印:@Test public void oneToOne() throws InterruptedException { helloSender.send(); Thread.sleep(2000l); }
说明测试成功,一对多和多对多无非就是创建多个发送者和多个接收者,基本上差不多。Sender: hello Mon Feb 26 23:08:25 CST 2018 AdvanceReceive1: hello Mon Feb 26 23:08:25 CST 2018
- 支持对象的发送与接收:
- 创建一个名为
object的队列:@Bean public Queue objectQueue() { return new Queue("object"); }
- 创建发送者,发送一个对象:
public void send(User user) {
    System.out.println("AdvanceSender3: " + user.toString());
    //将消息发送给routingKey为"object"的队列
    rabbitmqTemplate.convertAndSend("object", user);
}
- 接收者接收对象:
@RabbitHandler
public void process(User user) {
    System.out.println("AdvanceReceive3: " + user.toString());
}
- 测试:
结果为:
@Test
public void testSendObject() throws InterruptedException {
    User user = new User("Leeyom", 24);
    advanceSender3.send(user);
    Thread.sleep(10000l);
}
AdvanceSender3: User{userName='Leeyom', age=24}
AdvanceReceive3: User{userName='Leeyom', age=24}
- 创建一个名为
- 主题(Topic)交换机(exchange)模式可以根据
routing_key匹配不同的队列:- 配置队列,交换机,以及匹配规则。
- 队列
queueMessages的匹配规则是topic.#,#表示相当于一个或者多个单词。例如,一个匹配模式是agreements.eu.berlin.#,那么,以agreements.eu.berlin开头的路由键都是可以的,*表示一个词。所以queueMessages 同时匹配两个队列,queueMessage 只匹配“topic.message”队列。@Bean Binding bindingExchangeMessage(Queue queueMessage, TopicExchange exchange) { return BindingBuilder.bind(queueMessage).to(exchange).with("topic.message"); } @Bean Binding bindingExchangeMessages(Queue queueMessages, TopicExchange exchange) { return BindingBuilder.bind(queueMessages).to(exchange).with("topic.#"); }
- 中间遇到一个异常:
Caused by: org.springframework.amqp.AmqpException: No method found for class [B,一直报错,之前可以跑的测试用例也不行了,后面经过网上查找解决方案,@RabbitListener注解加到方法上,发现问题就没有了,但是我后面又复原代码,发现又没有异常了,比较奇怪,我怀疑应该是RabbitMQ配置问题。
- jdk 1.8
- IntelliJ IDEA 2017.2.4
- spring boot 1.5.9
spring boot官方建议的目录如下:
- root package 结构:
com.example.myprojectmyproject +-src +- main +- java +- com.example.myproject +- comm +- domain +- repository +- service +- web +- Application.java +- resources +- static +- templates +- application.properties +- test +-pom.xml - com.example.myproject 目录下:
- Application.java:建议放到根目录下面,是项目的启动类,Spring Boot 项目只能有一个 main() 方法。
- comm:目录建议放置公共的类,如全局的配置文件、工具类等。
- domain:目录主要用于实体(Entity)与数据访问层(Repository)。
- repository:数据库访问层代码。
- service:该层主要是业务类代码。
- web:该层负责页面访问控制。
- resources 目录下:
- static:目录存放 Web 访问的静态资源,如 JS、CSS、图片等。
- templates:目录存放页面模板。
- application.properties:项目的配置信息。
- test目录下:
- 单元测试的代码
- pom.xml:用于配置项目依赖包
- pom文件中引入热部署的依赖:
<dependency>
    <groupId>org.springframework.boot</groupId>
    <artifactId>spring-boot-devtools</artifactId>
    <optional>true</optional>
</dependency>
- 在 plugin 中配置另外一个属性 fork,并且配置为 true:
<build>
  <plugins>
      <plugin>
          <groupId>org.springframework.boot</groupId>
          <artifactId>spring-boot-maven-plugin</artifactId>
          <configuration>
              <fork>true</fork>
          </configuration>
      </plugin>
  </plugins>
</build>
- Eclipse到此就已经支持spring boot的热部署了,idea还需要配置如下的几步:
- 选择
File-->Settings-->Compiler勾选Build project automatically,低版本 idea 勾选make project automatically。 - 使用快捷键:
CTRL + SHIFT + A输入Registry找到选项compile.automake.allow.when.app.running勾选。ok,搞定!
- 选择
- web开发:
@RestController:controller里面返回的结果都以json格式输出,就不需要引入fastjson相关的依赖,也不需要每个方法都要加@ResponseBody注解。@Controller:就代表着输出为页面内容,跟spring mvc里面的注解一样。
- 单元测试:
@SpringBootTest:有此标签,系统会加载spring boot容器,这样就可以注入实例bean进行业务测试。@Test:测试类启动入口。- 使用
mockmvc进行 web 测试:@RunWith(SpringRunner.class) @SpringBootTest public class HelloWorldTest { private MockMvc mockMvc; @Before public void setUp() throws Exception { mockMvc = MockMvcBuilders.standaloneSetup(new HelloWorldController()).build(); } @Test public void getHello() throws Exception { mockMvc.perform(MockMvcRequestBuilders.post("/hello?name=小明") .accept(MediaType.APPLICATION_JSON_UTF8)).andDo(print()); } }
在使用SSM架构编写controller的时候,如果要返回json格式的数据,需要如下几步:
- 在pom文件中添加解析json的库,比如
gson、fastjson。 - 配置spring mvc。
- 在controller里的每个方法的上面添加
@ResponseBody注解。
@RestController注解是Spring4之后加入的注解,原来在@Controller中返回json需要@ResponseBody来配合,如果直接用@RestController替代@Controller就不需要再配置,也不需要配置spring mvc,就可以发布一个http接口,非常方便快捷。
@RestController
public class WebController {
    @RequestMapping("/getUser")
    public User getUser() {
        User user = new User();
        user.setName("leeyom");
        user.setAge(24);
        user.setPass("123456");
        return user;
    }
}常用的传参注解:
@RequestBody:绑定参数到指定对象,只适用于post和put请求,get请求不适用,在Spring Boot中,这个注解其实都不需要加。@ModelAttribute: 绑定请求参数到指定的对象,跟@RequestBody差不多。@PathVariable:获取请求url中的动态参数。- 比如请求url:
http://localhost:8080/get/leeyom。那么,参数@RequestMapping(value="get/{name}", method= RequestMethod.GET) public User get(@PathVariable String name) { User user=new User(); user.setName(name); return user; }
name的值为:leeyom。
- 比如请求url:
@RequestParam: 接受简单类型的属性,也可以接受对象类型。类似@requestparam("id")等价于request.getParameter("id");
实际请求中除了前端要做参数校验,后台也需要做参数校验,在Spring Boot的spring-boot-starter-web库中集成了 hibernate-validator 来进行参数校验,常用的校验注解:
- Bean Validation 中内置的 constraint 注解:
@Valid:用于标识指定的校验对象。@Null:被注释的元素必须为 null。@NotNull:被注释的元素必须不为 null。@AssertTrue:被注释的元素必须为 true。@AssertFalse:被注释的元素必须为 false。@Min(value):被注释的元素必须是一个数字,其值必须大于等于指定的最小值。@Max(value):被注释的元素必须是一个数字,其值必须小于等于指定的最大值。@DecimalMin(value):被注释的元素必须是一个数字,其值必须大于等于指定的最小值。@DecimalMax(value):被注释的元素必须是一个数字,其值必须小于等于指定的最大值。@Size(max, min):被注释的元素的大小必须在指定的范围内。@Digits (integer, fraction):被注释的元素必须是一个数字,其值必须在可接受的范围内。@Past:被注释的元素必须是一个过去的日期。@Future:被注释的元素必须是一个将来的日期。@Pattern(value):被注释的元素必须符合指定的正则表达式。
- Hibernate Validator 附加的 constraint 注解:
@Email:被注释的元素必须是电子邮箱地址。@Length:被注释的字符串的大小必须在指定的范围内。@NotEmpty:被注释的字符串的必须非空。@Range:被注释的元素必须在合适的范围内。
对User参数进行参数校验:
public class User {
    @NotEmpty(message="姓名不能为空")
    private String name;
    @Max(value = 100, message = "年龄不能大于 100 岁")
    @Min(value= 18 ,message= "必须年满 18 岁!" )
    private int age;
    @NotEmpty(message="密码不能为空")
    @Length(min=6,message="密码长度不能小于 6 位")
    private String pass;
    //...
}
Controller里面采用使用 @Valid + BindingResult绑定参数和打印校验结果:
@RequestMapping("/saveUser")
public void saveUser(@Valid User user, BindingResult result) {
    System.out.println("user:" + user);
    if (result.hasErrors()) {
        List<ObjectError> list = result.getAllErrors();
        for (ObjectError error : list) {
            System.out.println(error.getCode() + "-" + error.getDefaultMessage());
        }
    }
}创建一个名为MyFilter过滤器,实现Filter,拦截所有的请求,然后打印对应的请求的URL:
public class MyFilter implements Filter {
    @Override
    public void init(FilterConfig filterConfig) throws ServletException {

    }

    @Override
    public void doFilter(ServletRequest servletRequest, ServletResponse servletResponse
    , FilterChain filterChain) throws IOException, ServletException {
        HttpServletRequest request = (HttpServletRequest) servletRequest;
        System.out.println("this is MyFilter,url :" + request.getRequestURI());
        filterChain.doFilter(servletRequest, servletResponse);
    }

    @Override
    public void destroy() {

    }
}在SSM架构中,需要在web.xml文件中配置自定义的过滤器,在Spring Boot中,需要创建一个带@Configuration注解的类MyWebConfiguration.java,用于注册我们自定义的过滤器:
@Configuration
public class MyWebConfiguration {

    @Bean
    public RemoteIpFilter remoteIpFilter() {
        return new RemoteIpFilter();
    }

    /**
     * 注册自定义的过滤器
     * @return
     */
    @Bean
    public FilterRegistrationBean testFilterRegistration() {
        FilterRegistrationBean registration = new FilterRegistrationBean();
        registration.setFilter(new MyFilter());
        // 需要过滤的 url
        registration.addUrlPatterns("/*");
        // 初始化的参数
        registration.addInitParameter("paramName", "paramValue");
        // 过滤器的名称
        registration.setName("MyFilter");
        // 过滤器的执行顺序,order 从小到大顺序执行
        registration.setOrder(1);
        return registration;
    }

}在application.properties文件中添加如下的属性:
com.leeyom.title=leeyom
com.leeyom.description=一只有梦想的咸鱼将application.properties里面的属性映射到一个配置类中:
@Component
public class LeeyomProperties {

    @Value("${com.leeyom.title}")
    private String title;
    @Value("${com.leeyom.description}")
    private String description;

    //省略getter和setter
}在测试类中打印application.properties里面的属性:
@Resource
private LeeyomProperties leeyomProperties;
@Test
public void testProperties() throws Exception {
    System.out.println("title:" + leeyomProperties.getTitle());
    System.out.println("description:" + leeyomProperties.getDescription());
}
打印结果:
title:leeyom
description:一只有梦想的咸鱼源码参考:spring-boot-fastweb
Spring Data JPA 是 Spring 基于 ORM 框架、JPA 规范的基础上封装的一套 JPA 应用框架,可使开发者用极简的代码即可实现对数据的访问和操作。它提供了包括增删改查等在内的常用功能,且易于扩展。学习并使用 Spring Data JPA 可以极大提高开发效率。
- 添加相关的依赖:
<dependency>
  <groupId>org.Springframework.boot</groupId>
  <artifactId>Spring-boot-starter-data-jpa</artifactId>
</dependency>
<dependency>
  <groupId>mysql</groupId>
  <artifactId>mysql-connector-java</artifactId>
</dependency>
- 配置数据源:
Spring.datasource.url=jdbc:mysql://localhost:3306/jpa-test
Spring.datasource.username=root
Spring.datasource.password=root
Spring.datasource.driver-class-name=com.mysql.jdbc.Driver

Spring.jpa.properties.hibernate.hbm2ddl.auto=update
Spring.jpa.properties.hibernate.dialect=org.hibernate.dialect.MySQL5InnoDBDialect
Spring.jpa.show-sql= true
hibernate.hbm2ddl.auto:用于:自动创建 | 更新 | 验证数据库表结构create:每次加载 hibernate 时都会删除上一次的生成的表,然后根据 model 类再重新来生成新表,哪怕两次没有任何改变也要这样执行,这就是导致数据库表数据丢失的一个重要原因。create-drop:每次加载 hibernate 时根据 model 类生成表,但是 sessionFactory 一关闭,表就自动删除。update:最常用的属性,第一次加载 hibernate 时根据 model 类会自动建立起表的结构(前提是先建立好数据库),以后加载 hibernate 时根据 model 类自动更新表结构,即使表结构改变了,但表中的行仍然存在,不会删除以前的行。要注意的是当部署到服务器后,表结构是不会被马上建立起来的,是要等应用第一次运行起来后才会。validate:每次加载 hibernate 时,验证创建数据库表结构,只会和数据库中的表进行比较,不会创建新表,但是会插入新值。
dialect:设置数据库方言,指定生成表名的存储引擎为 InneoDB。show-sql:是否打印出自动生产的 SQL,方便调试的时候查看。
- 实体类:实体类中不映射成列的字段得加
@Transient注解,不加注解也会映射成列:@Entity public class User implements Serializable { private static final long serialVersionUID = 1L; @Id @GeneratedValue private Long id; @Column(nullable = false, unique = true) private String userName; @Column(nullable = false) private String passWord; @Column(nullable = false, unique = true) private String email; @Column(nullable = true, unique = true) private String nickName; @Column(nullable = false) private String regTime; //省略 getter settet 方法、构造方法 }
- dao层:Dao 只要继承
JpaRepository类就可以使用常用的一些增删改成,对于一些复杂的查询,可以在dao层新增方法进行扩展。User findByUserName(String userName); User findByUserNameOrEmail(String username, String email);
- 测试:
@Resource private UserRepository userRepository; @Test public void testUserRespository() { Date date = new Date(); SimpleDateFormat dateFormat = new SimpleDateFormat("yyyy-MM-dd HH:mm:ss"); String formattedDate = dateFormat.format(date); userRepository.save(new User("leeyom1", "123", "leeyomwang1@qq.com", "Leeyom1", formattedDate)); userRepository.save(new User("leeyom2", "456", "leeyomwang2@qq.com", "Leeyom2", formattedDate)); userRepository.save(new User("leeyom3", "789", "leeyomwang3@qq.com", "Leeyom3", formattedDate)); System.out.println(userRepository.findAll().size()); System.out.println("Leeyom3".equals( userRepository.findByUserNameOrEmail("leeyom3", "leeyomwang3@qq.com").getNickName())); userRepository.delete(userRepository.findByUserName("leeyom2")); System.out.println(userRepository.findAll().size()); // 打印后的结果为: // 3 // true // 2 }
第一种,使用Spring Data JPA默认预先生成了一些基本的 CURD 的方法,如增、删、改等。只需要我们创建到dao继承JpaRepository 类:
public interface UserRepository extends JpaRepository<User, Long> {
}提供的方法有:
@Test
public void testBaseQuery() {
userRepository.findAll();
userRepository.findOne(1l);
userRepository.save(user);
userRepository.delete(user);
userRepository.count();
userRepository.exists(1l);
// ...
}第二种,Spring Data JPA 提供自定义的简单查询,根据方法名来自动生成 SQL,主要的语法是 findXXBy、readAXXBy、queryXXBy、countXXBy、getXXBy 后面跟属性名称:
User findByUserName(String userName);
User findByUserNameOrEmail(String username, String email);可以使用在方法上加注解@Query,进行自定义查询,但是需要注意的是,由于Spring Data JPA底层采用的Hibernate,所以这里的查询语句为HQL,不是sql,需要注意,比如分页查询:
/**
  * 分页查询
  * @param pageable 分页参数封装
  * @return
  */
 @Query("select u from User u")
 @Override
 Page<User> findAll(Pageable pageable);
测试:
@Test
public void testPageQuery() {
    int page=1,size=20;
    Sort sort = new Sort(Sort.Direction.DESC, "id");
    Pageable pageable = new PageRequest(page, size, sort);
    Page<User> userPage = userRepository.findAll(pageable);
    System.out.println("总数量:"+userPage.getTotalPages());
    System.out.println(userPage.getContent());
}- 有时候会有多表关联查询,首先先创建用户详情类:
@Entity
public class UserDetail implements Serializable {

    private static final long serialVersionUID = 1L;
    @Id
    @GeneratedValue
    private Long id;
    @Column(nullable = false, unique = true)
    private String userId;
    @Column(nullable = true)
    private String address;
    @Column(nullable = true)
    private String hobby;
    //省略 getter settet 方法
}
- 定义一个结果集的接口类,接口类的内容来自于用户表和用户详情表:
public interface UserInfo {
    String getUserName();
    String getEmail();
    String getAddress();
    String getHobby();
}
- 创建对应的dao,接口的返回类型为UserInfo:
@Query("select u.userName as userName, u.email as email, d.address as address ,
d.hobby as hobby from User u , UserDetail d " +
    "where u.id=d.userId  and  d.hobby = ?1 ")
List<UserInfo> findUserInfo(String hobby);
- 测试:
@Resource
private UserDetailRepository userDetailRepository;
@Test
public void testUserInfo(){
    userDetailRepository.save(new UserDetail("12","Hong Kong","running"));
    List<UserInfo> userInfos=userDetailRepository.findUserInfo("running");
    for (UserInfo userInfo:userInfos){
        System.out.println("addree "+userInfo.getAddress());
    }
}
- 打印结果:
addree Hong Kong
源码参考:spring-boot-jpa
- 添加相关的依赖。
<dependency>
	<groupId>org.springframework.boot</groupId>
	<artifactId>spring-boot-starter-thymeleaf</artifactId>
</dependency>
<dependency>
	<groupId>org.springframework.boot</groupId>
	<artifactId>spring-boot-starter-web</artifactId>
</dependency>
- 添加配置文件
application.properties。# 是否启用缓存,生产环境开启,开发环境关闭 spring.thymeleaf.cache=false # 检查当前模板文件是否存在 spring.thymeleaf.check-template-location=true # 设置模板文件的Content-Type spring.thymeleaf.content-type=text/html # 是否启用thymeleaf模板引擎 spring.thymeleaf.enabled=true # 编码格式 spring.thymeleaf.encoding=UTF-8 # 模板文件的模式 spring.thymeleaf.mode=HTML5 # 模板文件的路径 spring.thymeleaf.prefix=classpath:/templates/ # 模板文件的后缀 spring.thymeleaf.suffix=.html
- 创建
controller控制器HelloController.java。@RequestMapping("/") public String helloWorld(ModelMap map) { map.addAttribute("message", "http:www.leeyom.top"); return "index"; }
- 创建一个简单的页面
index.html。<!DOCTYPE html> <html xmlns:th="http://www.w3.org/1999/xhtml"> <head lang="en"> <meta charset="UTF-8"/> <title>spring boot 模板引擎示例</title> </head> <body> <h1 th:text="${message}">Hello World</h1> <!--th:include 和 th:replace 区别,include 只是加载,replace 是替换。--> <div th:include="layout/copyright :: copyright"></div> <div th:replace="layout/copyright :: copyright"></div> </body> </html>
- 启动项目,访问http://localhost:8080/,页面打印:
http:www.leeyom.top
| 关键字 | 功能介绍 | 案例 |
|---|---|---|
th:id |
替换id | <input th:id="'xxx' + ${collect.id}"/> |
th:text |
文本替换 | <p th:text="${collect.description}">description</p> |
th:utext |
支持html的文本替换 | <p th:utext="${htmlcontent}">conten</p> |
th:object |
替换对象 | <div th:object="${session.user}"> |
th:value |
属性赋值 | <input th:value="${user.name}" /> |
th:with |
变量赋值运算 | <div th:with="isEven=${prodStat.count}%2==0"></div> |
th:style |
设置样式 | th:style="'display:' + @{(${sitrue} ? 'none' : 'inline-block')} + ''" |
th:onclick |
点击事件 | th:onclick="'getCollect()'" |
th:each |
循环 | <tr th:each="user,userStat:${users}"> |
th:if |
条件判断 | <a th:if="${userId == collect.userId}" > |
th:unless |
和th:if判断相反 | <a th:href="@{/login}" th:unless=${session.user != null}>Login</a> |
th:href |
链接地址 | <a th:href="@{/login}" th:unless=${session.user != null}>Login</a> /> |
th:switch |
多路选择 配合th:case 使用 | <div th:switch="${user.role}"> |
th:case |
th:switch的一个分支 | <p th:case="'admin'">User is an administrator</p> |
th:fragment |
布局标签,定义一个代码片段,方便其它地方引用 | <div th:fragment="alert"> |
th:include |
布局标签,替换内容到引入的文件 | <head th:include="layout :: htmlhead" th:with="title='xx'"></head> /> |
th:replace |
布局标签,替换整个标签到引入的文件 | <div th:replace="fragments/header :: title"></div> |
th:selected |
selected选择框选中 | th:selected="(${xxx.id} == ${configObj.dd})" |
th:src |
图片类地址引入 | <img class="img-responsive" alt="App Logo" th:src="@{/img/logo.png}" /> |
th:inline |
定义js脚本可以使用变量 | <script type="text/javascript" th:inline="javascript"> |
th:action |
表单提交的地址 | <form action="subscribe.html" th:action="@{/subscribe}"> |
th:remove |
删除某个属性 | <tr th:remove="all/body/tag/all-but-first/none"> |
th:attr |
设置标签属性,多个属性可以用逗号分隔 | th:attr="src=@{/image/aa.jpg},title=#{logo}" |
在实际开发中,开发环境、测试环境、生产环境对应的数据库,或者其他的端口信息都有不同,在发布新的版本的时候,我们需要将配置文件进行相应的修改,但是有时候我们总会忘记或者记错,这样就会导致线上出问题,所以根据不同的环境可以将属性配置文件切换为开发、测试、生产,分別对应的配置文件为:application-dev.properties、application-test.properties、application-prod.properties。只需要在总的配置文件application.properties中将属性配置文件切换为开发环境:
# 将属性配置文件切换为开发环境
spring.profiles.active = dev一个完整的web应用需要添加servlet支持,在spring boot的启动类Application.java中继承SpringBootServletInitializer类,代码如下:
@SpringBootApplication
public class Application extends SpringBootServletInitializer {
    @Override
    protected SpringApplicationBuilder configure(SpringApplicationBuilder builder) {
        return builder.sources(Application.class);
    }

    public static void main(String[] args) {
        SpringApplication.run(Application.class, args);
    }
}- 用户列表:
- 新增用户:
- 编辑用户:
- 删除用户:


源码参考:spring-boot-jpa-thymeleaf
现在越来越多的项目开始进行前后端分离,那为了方便前后端进行通信,就需要一套 API 准则,RESTful API 是目前比较成熟的一套互联网应用程序的 API 设计理论,RESTful API具体设计如下:
| 请求类型 | URL | 功能说明 |
|---|---|---|
| GET | /users | 查询用户列表 |
| POST | /users | 创建一个用户 |
| GET | /users/id | 根据id查询一个用户 |
| PUT | /users/id | 根据id更新一个用户 |
| DELETE | /users/id | 根据id删除一个用户 |
如果对RESTful API设计准则还不是很清楚的话,推荐可以看下阮一峰老师的博文:《RESTful API 设计指南》,便会对RESTful API 有个大概的了解。
这里就不详述了,我之前有写过总结这些注解的一篇文章,当然也可以参考官方的文档,链接如下:
- 添加
swagger2依赖:<dependency> <groupId>io.springfox</groupId> <artifactId>springfox-swagger2</artifactId> <version>2.4.0</version> </dependency> <dependency> <groupId>io.springfox</groupId> <artifactId>springfox-swagger-ui</artifactId> <version>2.4.0</version> </dependency>
- 创建
swagger2配置SwaggerConfig.java,设置API接口扫描包、作者、版本等等相关信息:@Configuration @EnableSwagger2 public class SwaggerConfig { @Bean public Docket createRestApi() { return new Docket(DocumentationType.SWAGGER_2).apiInfo(apiInfo()).select() .apis(RequestHandlerSelectors.basePackage("com.leeyom.controller")) .paths(PathSelectors.any()) .build(); } private ApiInfo apiInfo() { return new ApiInfoBuilder() .title("Spring Boot中使用Swagger2构建RESTful API") .description("更多Spring Boot相关文章请关注:http://leeyom.top/") .termsOfServiceUrl("http://leeyom.top/") .contact("Leeyom") .version("1.0") .build(); } }
- 添加文档:
@Api(description = "用户管理", tags = "UserController", basePath = "/user")
@RestController
@RequestMapping(value = "/user")
public class UserController {
    /**
     * 创建一个线程安全的map,模拟数据库,存放用户信息
     */
    static Map<Long, User> users = new HashMap<>();

    /**
     * 获取用户列表
     * @return
     */
    @ApiOperation(value = "获取用户列表", notes = "获取所有用户信息")
    @RequestMapping(value = "/", method = RequestMethod.GET)
    public List<User> getUserList() {
        List<User> userList = new ArrayList<User>(users.values());
        return userList;
    }

    /**
     * 新增用户
     * @param user 新增用户实体
     * @return
     */
    @ApiOperation(value = "创建用户", notes = "根据User对象创建用户")
    @RequestMapping(value = "/", method = RequestMethod.POST)
    public String addUser(@ApiParam(value = "新增用户实体封装", required = true) @RequestBody User user) {
        users.put(user.getId(), user);
        return "success";
    }

    /**
     * 获取用户信息
     * @param id 用户主键id
     * @return
     */
    @ApiOperation(value = "获取用户详细信息", notes = "根据url的id来获取用户详细信息")
    @ApiImplicitParam(name = "id", value = "用户ID", required = true, dataType = "Long", paramType = "path")
    @RequestMapping(value = "/{id}", method = RequestMethod.GET)
    public User getUser(@PathVariable Long id) {
        return users.get(id);
    }

    /**
     * 更新用户
     * @param id   用户id
     * @param user 更新实体封装
     * @return
     */
    @ApiOperation(value = "更新用户详细信息"
    , notes = "根据url的id来指定更新对象,并根据传过来的user信息来更新用户详细信息")
    @ApiImplicitParams({
            @ApiImplicitParam(name = "id", value = "用户ID", required = true, dataType = "Long"
            , paramType = "path")
    })
    @RequestMapping(value = "/{id}", method = RequestMethod.PUT)
    public String updateUser(@PathVariable Long id, @ApiParam(value = "更新实体封装", required = true)
    @RequestBody User user) {
        User oldUser = users.get(id);
        oldUser.setAge(user.getAge());
        oldUser.setName(user.getName());
        users.put(id, oldUser);
        return "success";
    }

    /**
     * 删除用户
     * @param id 用户id
     * @return
     */
    @ApiOperation(value = "删除用户", notes = "根据url的id来指定删除对象")
    @ApiImplicitParam(name = "id", value = "用户ID", required = true, dataType = "Long", paramType = "path")
    @RequestMapping(value = "/{id}", method = RequestMethod.DELETE)
    public String deleteUser(@PathVariable Long id) {
        users.remove(id);
        return "success";
    }
}
- 启动Spring Boot程序,访问:http://localhost:8080/swagger-ui.html,出现如下的结果:
- SSM架构的项目中,整合swagger可以参考我以前的写一篇博文,就是配置那里有点小区别,其他的没啥区别。

源码参考:spring-boot-restful-swagger
MyBatis的工作流程如下:
- 首先加载mapper配置的sql映射文件,或者注解相关的sql内容。
- 通过读取配置文件,创建会话工厂 SqlSessionFactory。
- 然后通过会话工厂,创建会话对象 SqlSession,会话对象其实就是一个接口,是对某个数据库增删改查的封装。
- 创建执行器 Executor 。
- 封装sql对象,执行器将待处理的 SQL 信息封装到 MappedStatement 对象中,该对象包括 SQL 语句、输入参数映射信息和输出结果映射信息。
- 正式开始操作数据库,返回操作结果,结束流程。
流程图如下:

-
引入mybatis核心依赖:
<dependency>
  <groupId>org.mybatis.spring.boot</groupId>
  <artifactId>mybatis-spring-boot-starter</artifactId>
  <version>1.3.1</version>
</dependency>
除了mybatis的核心依赖,还需要mysql数据库驱动包
mysql-connector-java等等,这里就不贴出来了,完整的可以看项目源码。 -
配置
application.properties,主要是配置mybatis和数据库连接:# mybatis mybatis.config-location=classpath:mybatis/mybatis-config.xml mybatis.mapper-locations=classpath:mybatis/mapper/*.xml mybatis.type-aliases-package=com.leeyom.pojo # dataSource spring.datasource.driverClassName=com.mysql.jdbc.Driver spring.datasource.url=jdbc:mysql://localhost:3306/spring-boot-mybatis ?useUnicode=true&characterEncoding=utf-8 spring.datasource.username=root spring.datasource.password=root
mybatis.config-location:配置mybatis-config.xml路径,mybatis-config.xml中配置 MyBatis 基础属性。mybatis.mapper-locations:配置 Mapper 对应的 XML 文件路径。mybatis.type-aliases-package:配置项目中实体类包路径。spring.datasource.*:数据源配置。
-
配置
mybatis-config.xml:<?xml version="1.0" encoding="UTF-8" ?> <!DOCTYPE configuration PUBLIC "-//mybatis.org//DTD Config 3.0//EN" "http://mybatis.org/dtd/mybatis-3-config.dtd"> <configuration> <!--配置别名--> <typeAliases> <typeAlias alias="Integer" type="java.lang.Integer"/> <typeAlias alias="Long" type="java.lang.Long"/> <typeAlias alias="HashMap" type="java.util.HashMap"/> <typeAlias alias="LinkedHashMap" type="java.util.LinkedHashMap"/> <typeAlias alias="ArrayList" type="java.util.ArrayList"/> <typeAlias alias="LinkedList" type="java.util.LinkedList"/> </typeAliases> </configuration>
该配置文件的主要作用是配置mybatis的基础属性,比如这里可以设置别名,也还可以设置第三方分页等等。设置别名的好处就是,打个比方在编写mapper.xml的时候
resultType="java.lang.Integer"
可以简写为:
resultType="Integer"
-
配置包扫描器,在spring boot的启动类上面添加注解
@MapperScan("com.leeyom.mapper"),com.leeyom.mapper为mapper接口的package路径。@SpringBootApplication @MapperScan("com.leeyom.mapper") public class Application { public static void main(String[] args) { SpringApplication.run(Application.class, args); } }
-
编写 UserMapper.xml,其实我觉得xml方式的的最大的好处就是可以复写sql,可以将重复使用的sql抽离出来,例如这里我抽离两个sql:
<!--查询结果封装-->
<sql id="Base_Column_List">
    id, user_name, password, user_sex, nick_name
</sql>

<!--条件查询封装-->
<sql id="Base_Where_List">
    <if test="userName != null  and userName != ''">
        and user_name = #{userName}
    </if>
    <if test="userSex != null and userSex != ''">
        and user_sex = #{userSex}
    </if>
</sql>
然后在其他的sql里面进行复用:
<!--查询所有-->
<select id="selectAll" resultMap="BaseResultMap">
    select
    <include refid="Base_Column_List"/>
    from users
</select>


<!--分页查询-->
<select id="getUserListByPage" resultMap="BaseResultMap" parameterType="com.leeyom.param.UserParam">
    select
    <include refid="Base_Column_List"/>
    from users
    where 1=1
    <include refid="Base_Where_List"/>
    order by id desc
    limit #{pageNumber} , #{pageSize}
</select>
是不是简化了sql的代码呢?
-
编写 UserMapper.java:
public interface UserMapper {

    int deleteByPrimaryKey(Integer id);

    int insert(User record);

    User selectByPrimaryKey(Integer id);

    List<User> selectAll();

    int updateByPrimaryKey(User record);

    List<User> getUserListByPage(UserParam userParam);
}
-
这个就是spring boot 集成mybatis的以xml方式操作数据库,虽然说配置要有点多,但是xml的方式可以极大的复用sql,并且可以高度定制化sql,sql语句与java代码解耦,在实际的开发中使用的还是蛮多的。像UserMapper.java、User.java、UserMapper.xml我们都可以使用mybatis-generator自动生成,还是挺方便的。
-
注解版本其实就是xml版本的简化,不再需要
UserMapper.xml、mybatis-config.xml等相关的xml配置文件,只需要在application.properties配置映射实体类所在的package。# mybatis mybatis.type-aliases-package=com.leeyom.pojo
-
对应的sql写在Mapper中:
public interface UserMapper {

    @Delete("DELETE FROM users WHERE id =#{id}")
    int deleteByPrimaryKey(Integer id);

    @Insert("INSERT INTO users(user_name,password,user_sex,nick_name)
    VALUES(#{userName}, #{password}, #{userSex} ,#{nickName})")
    int insert(User record);

    @Select("SELECT * FROM users WHERE id = #{id}")
    User selectByPrimaryKey(Integer id);

    @Select("SELECT * FROM users")
    @Results({
            @Result(property = "userSex", column = "user_sex"),
            @Result(property = "nickName", column = "nick_name")
    })
    List<User> selectAll();

    @Update("UPDATE users SET user_name=#{userName},password=#{password},user_sex=#{userSex},
    nick_name=#{nickName} WHERE id =#{id}")
    int updateByPrimaryKey(User record);

    @SelectProvider(type = UserSql.class, method = "getUserListByPage")
    List<User> getUserListByPage(UserParam userParam);


    @SelectProvider(type = UserSql.class, method = "getCount")
    Long getCount(UserParam userParam);
}
建议使用#,使用$有 SQL 注入的可能性!
-
对于动态的sql,mybatis也做出了相应的优化,他的主要原理还是拼接sql,创建一个动态的sql类
UserSql.java,添加如下的方法:public String getUserListByPage(UserParam userParam) { StringBuffer sql = new StringBuffer("select id, user_name, password, user_sex, nick_name"); sql.append(" from users where 1=1 "); if (userParam != null) { if (StringUtils.isNotBlank(userParam.getUserName())) { sql.append(" and user_name = #{userName}"); } if (StringUtils.isNotBlank(userParam.getUserSex())) { sql.append(" and user_sex = #{userSex}"); } } sql.append(" order by id desc"); sql.append(" limit " + userParam.getPageNumber() + "," + userParam.getPageSize()); log.info("getUserListByPage sql is :" + sql.toString()); return sql.toString(); }
然后在Mapper里面:
@SelectProvider(type = UserSql.class, method = "getUserListByPage")
List<User> getUserListByPage(UserParam userParam);
当然这样拼接是非常繁琐的,mybatis也推出了结构化SQL来解决这个问题,如下所示:
public String getCount(UserParam userParam) {
    String sql = new SQL() {{
        SELECT("count(1)");
        FROM("users");
        if (StringUtils.isNotBlank(userParam.getUserName())) {
            WHERE("user_name = #{userName}");
        }
        if (StringUtils.isNotBlank(userParam.getUserSex())) {
            WHERE("user_sex = #{userSex}");
        }
    }}.toString();

    log.info("getCount sql is :" + sql);
    return sql;
}
-
以上便是以注解的方式操作数据库,其实根据个人的使用经验,我个人倾向于XML的方式,因为XML方法是可以痛快的写SQL语句,结构化清晰,并且sql语句不会过度的耦合到java代码中。注解版本对于业务逻辑不是很复杂的可以采用,但是像一些比较复杂的sql注解也就不太好处理。
分页插件PageHelper和通用Mapper插件均出自大牛@Liuzh之手,在此感谢!!!
mybatis generator 插件主要用于生成pojo、Mapper、Mapper.xml文件,简单的配置便可以在spring boot中集成 mybatis generator 插件。
-
由于 mybatis generator 插件是集成在通用Mapper插件中,所以需要引入通用Mapper的依赖包,当然了还有数据库驱动、数据库连接池等依赖,这里就只贴出通用Mapper的依赖,可以查看完整的pom文件。
<!--通用mapper-->
<dependency>
    <groupId>tk.mybatis</groupId>
    <artifactId>mapper-spring-boot-starter</artifactId>
    <version>1.2.0</version>
</dependency>
-
创建子自定义的Mapper接口,继承通用的Mapper。
/**
 * 通用mapper
 * @param <T>
 */
public interface MyMapper<T> extends Mapper<T>, MySqlMapper<T> {
    //TODO
    //FIXME 特别注意,该接口不能被扫描到,否则会出错
}
-
配置mybatis和通用mapper接口,在
application.properties添加如下内容:# mybatis 配置 mybatis.type-aliases-package=com.leeyom.mybatis.model mybatis.mapper-locations=classpath:mapper/*.xml # 通用 Mapper 配置 mapper.mappers=com.leeyom.mybatis.util.MyMapper mapper.not-empty=false mapper.identity=MYSQL
根据不同的环境,配置数据源,我这里开发环境,编辑
application-dev.properties:# database spring.datasource.url=jdbc:mysql://localhost:3306/mybatis-test2 spring.datasource.username=root spring.datasource.password=root spring.datasource.driver-class-name=com.mysql.jdbc.Driver # 德鲁伊连接池配置 spring.datasource.druid.initial-size=1 spring.datasource.druid.min-idle=1 spring.datasource.druid.max-active=20 spring.datasource.druid.test-on-borrow=true spring.datasource.druid.stat-view-servlet.allow=true
-
创建
generatorConfig.xml,映射数据库实体,指定pojo、mapper、mapper.xml生成的路径:<?xml version="1.0" encoding="UTF-8"?> <!DOCTYPE generatorConfiguration PUBLIC "-//mybatis.org//DTD MyBatis Generator Configuration 1.0//EN" "http://mybatis.org/dtd/mybatis-generator-config_1_0.dtd"> <generatorConfiguration> <properties resource="application.properties"/> <context id="Mysql" targetRuntime="MyBatis3Simple" defaultModelType="flat"> <property name="beginningDelimiter" value="`"/> <property name="endingDelimiter" value="`"/> <plugin type="tk.mybatis.mapper.generator.MapperPlugin"> <property name="mappers" value="com.leeyom.mybatis.util.MyMapper"/> </plugin> <jdbcConnection driverClass="com.mysql.jdbc.Driver" connectionURL="jdbc:mysql://localhost:3306/mybatis-test2" userId="root" password="root"> </jdbcConnection> <javaModelGenerator targetPackage="com.leeyom.mybatis.model" targetProject="src/main/java"/> <sqlMapGenerator targetPackage="mapper" targetProject="src/main/resources"/> <javaClientGenerator targetPackage="com.leeyom.mybatis.mapper" targetProject="src/main/java" type="XMLMAPPER"/> <!--通配符%来匹配所有表--> <table tableName="%"> <!--mysql 配置,generatedKey意味着所有的表都有一个id自增的主键--> <generatedKey column="id" sqlStatement="Mysql" identity="true"/> </table> </context> </generatorConfiguration>
-
pom文件中加入mybatis generator 插件:
<!--mybatis-generator插件-->
<plugin>
    <groupId>org.mybatis.generator</groupId>
    <artifactId>mybatis-generator-maven-plugin</artifactId>
    <version>1.3.2</version>
    <configuration>
        <configurationFile>${basedir}/src/main/resources/generator/generatorConfig.xml
        </configurationFile>
        <overwrite>true</overwrite>
        <verbose>true</verbose>
    </configuration>
    <dependencies>
        <dependency>
            <groupId>mysql</groupId>
            <artifactId>mysql-connector-java</artifactId>
            <version>${mysql.version}</version>
        </dependency>
        <dependency>
            <groupId>tk.mybatis</groupId>
            <artifactId>mapper</artifactId>
            <version>3.4.0</version>
        </dependency>
    </dependencies>
</plugin>
-
使用IDEA的maven插件运行 mybatis generator 插件:
-
eclipse开发工具的话,使用命令:
mvn mybatis-generator:generate执行项目。 -
更加具体的使用可以参考通用mapper插件文档:https://mapperhelper.github.io/docs/3.usembg/

通用Mapper都可以极大的方便开发人员。可以随意的按照自己的需要选择通用方法,还可以很方便的开发自己的通用方法。极其方便的使用MyBatis单表的增删改查。集成了 mybatis generator 插件基本上其实就已经集成通用Mapper了,但是还有个地方需要注意下,就是启动类中配置mapper扫描器的时候,注解@MapperScan是属于包tk.mybatis.spring.annotation.MapperScan,需要注意下。有了通用的Mapper,常用的增删改查基本上都可以省略,直接继承通用的Mapper接口,例如:
public interface CityMapper extends MyMapper<City> {
}
同时也可以简化Mapper.xml文件,后续只要在mapper.xml文件中再继续扩展我们要的数据接口就行,常用的增删改查就可以全部省略了:
<?xml version="1.0" encoding="UTF-8" ?>
<!DOCTYPE mapper PUBLIC "-//mybatis.org//DTD Mapper 3.0//EN"
"http://mybatis.org/dtd/mybatis-3-mapper.dtd" >
<mapper namespace="com.leeyom.mybatis.mapper.CityMapper" >
  <resultMap id="BaseResultMap" type="com.leeyom.mybatis.model.City" >
    <!--
      WARNING - @mbg.generated
    -->
    <id column="id" property="id" jdbcType="BIGINT" />
    <result column="name" property="name" jdbcType="VARCHAR" />
    <result column="state" property="state" jdbcType="VARCHAR" />
  </resultMap>
</mapper>有了通用的Mapper自然就可以构建通用的service层,创建一个通用的service接口IBaseService,并实现该接口BaseServiceImpl:
public abstract class BaseServiceImpl<T> implements IBaseService<T> {

    @Autowired
    protected Mapper<T> mapper;

    public Mapper<T> getMapper() {
        return mapper;
    }

    @Override
    public int deleteByPrimaryKey(Integer id) {
        return mapper.deleteByPrimaryKey(id);
    }

    @Override
    public int insert(T record) {
        return mapper.insert(record);
    }

    @Override
    public T selectByPrimaryKey(Integer id) {
        return mapper.selectByPrimaryKey(id);
    }

    @Override
    public List<T> selectAll() {
        return mapper.selectAll();
    }

    @Override
    public int updateByPrimaryKey(T record) {
        return mapper.updateByPrimaryKey(record);
    }
}后期所有的service接口只要继承通用的service接口实现类BaseServiceImpl,就可以省略增删改查的这部分代码,使代码更加简洁,比方说:
@Service("cityService")
public class CityServiceImpl extends BaseServiceImpl<City> implements ICityService {
    @Autowired
    CityMapper cityMapper;
}这就是通用mapper的集成以及简易的使用过程,具体的可以参考通用mapper的官方文档:https://mapperhelper.github.io/docs/。
集成分页插件其实很简单,首先添加依赖:
<!--分页插件pagehelper-->
<dependency>
    <groupId>com.github.pagehelper</groupId>
    <artifactId>pagehelper-spring-boot-starter</artifactId>
    <version>1.2.1</version>
</dependency>然后在application.properties添加如下的配置:
# 分页插件配置
pagehelper.helperDialect=mysql
pagehelper.reasonable=true
pagehelper.supportMethodsArguments=true
pagehelper.params=count=countSql
即可完成集成。具体的使用过程可以如下,比如我要分页查找第一页的country列表,每一页5条,service层接口实现如下:
/**
 * 分页查找
 * @param pageParam 分页参数封装
 * @return
 */
@Override
public DataGridResult getCountryListByPage(PageParam pageParam) {
    Integer pageNumber = pageParam.getPageNumber();
    Integer pageSize = pageParam.getPageSize();
    PageHelper.startPage(pageNumber, pageSize);
    List<Country> list = countryMapper.selectAll();
    PageInfo<Country> pageInfo = new PageInfo<>(list);
    DataGridResult dataGridResult = new DataGridResult();
    dataGridResult.setRows(list);
    dataGridResult.setTotal(pageInfo.getTotal());
    return dataGridResult;
}
最终的结果:
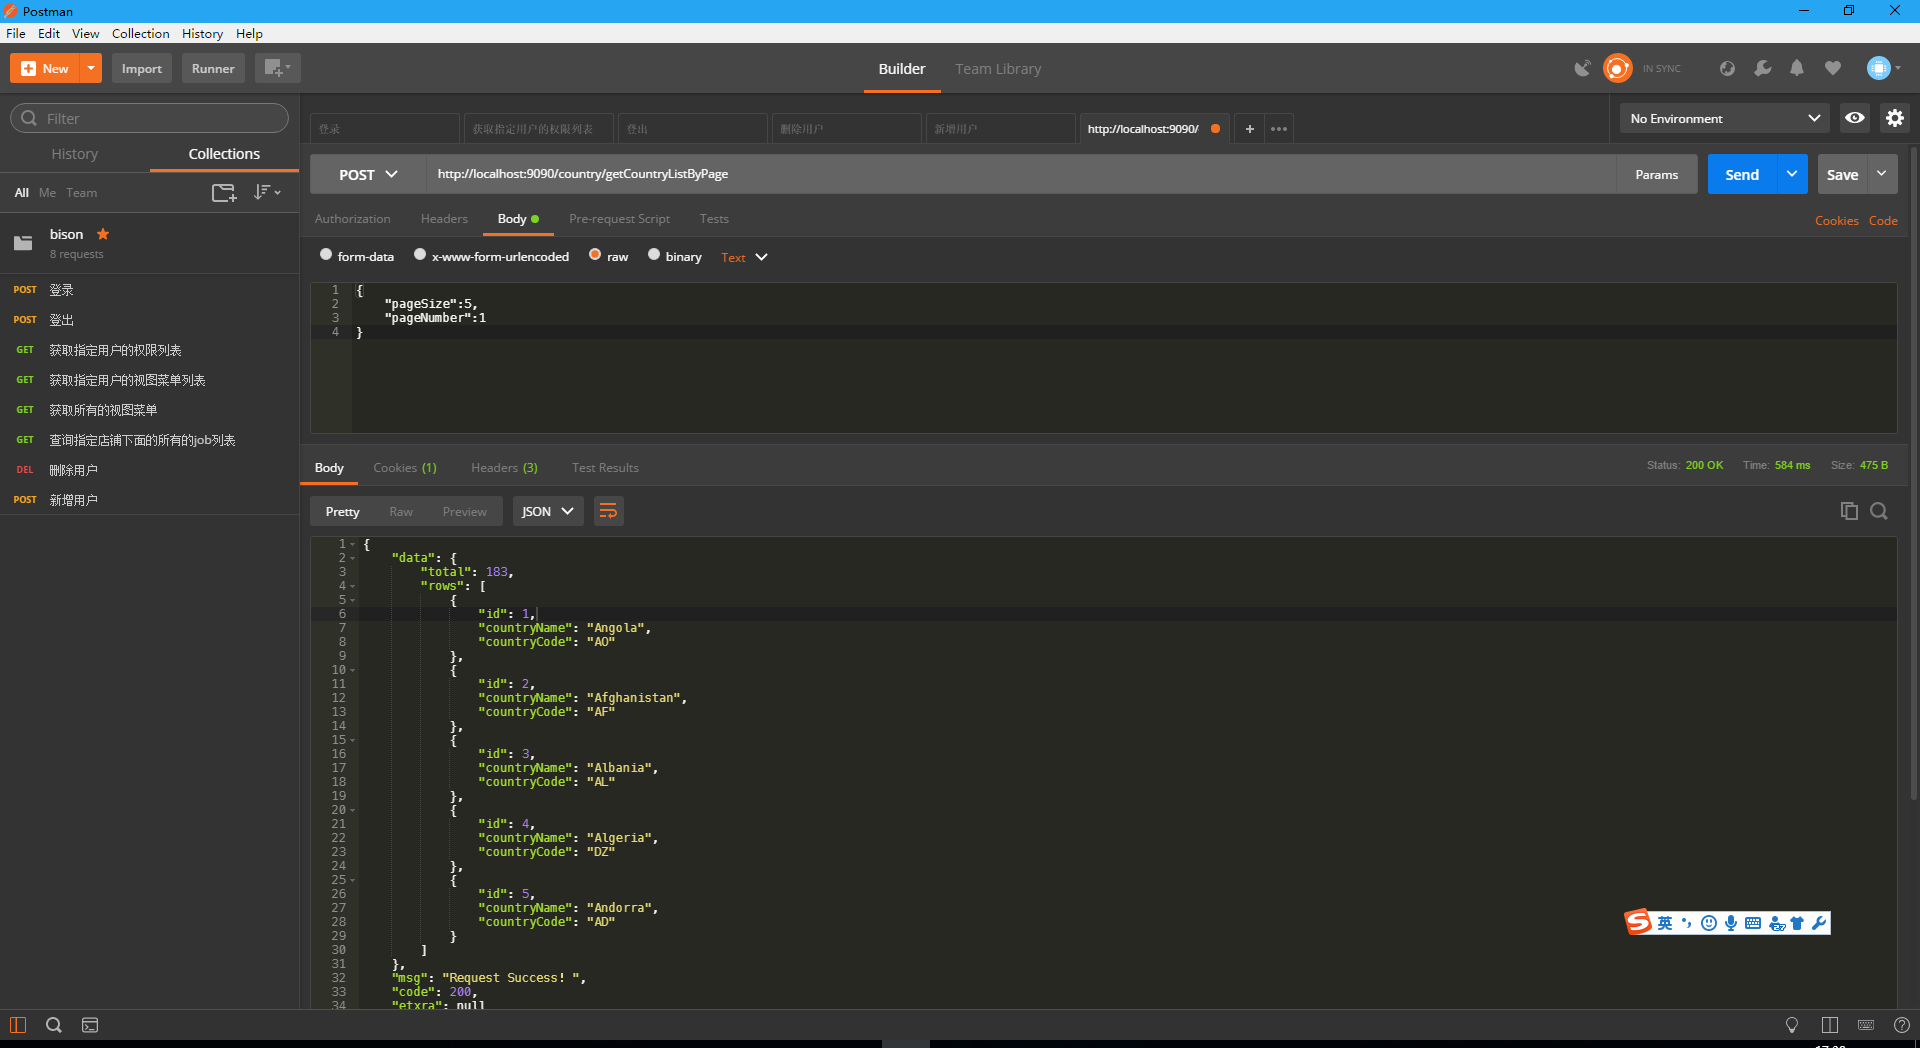
对于分页插件PageHelper更多的资料可以查看其官网:https://pagehelper.github.io/。
源码参考:spring-boot-mybatis-pagehelper-mapper
Druid是阿里巴巴公司旗下的一个开源项目,可以说是目前世界上最好的数据库连接池,其 spring boot 版本的项目地址是:https://github.com/alibaba/druid/tree/master/druid-spring-boot-starter。
集成 druid 单数据源相对于比较简单,只需要简单的配置即可:
-
添加 druid 依赖:
<!--Druid-->
 <dependency>
     <groupId>com.alibaba</groupId>
     <artifactId>druid-spring-boot-starter</artifactId>
     <version>1.1.6</version>
 </dependency>
-
在
application.properties中配置 druid 的相关的属性:# 配置数据源 spring.datasource.druid.driverClassName=com.mysql.jdbc.Driver spring.datasource.druid.url=jdbc:mysql://localhost:3306/mybatis-test ?useUnicode=true&characterEncoding=utf-8 spring.datasource.druid.username=root spring.datasource.druid.password=root # 初始化大小、最小、最大连接数 spring.datasource.druid.initial-size=3 spring.datasource.druid.min-idle=3 spring.datasource.druid.max-active=10 # 配置获取连接等待超时的时间 spring.datasource.druid.max-wait=60000 # 监控后台账号和密码 spring.datasource.druid.stat-view-servlet.login-username=admin spring.datasource.druid.stat-view-servlet.login-password=admin # 配置 StatFilter spring.datasource.druid.filter.stat.log-slow-sql=true spring.datasource.druid.filter.stat.slow-sql-millis=2000
更多配置项可以访问 druid 官方项目地址。
-
首先我们先发起一个请求:http://localhost:8080/getUsers/,触发查询所有的用户列表。druid 有个好处就是可以在其提供的监控台,监控所有的sql的执行情况,比如执行次数、执行时间、读取行数等等,访问地址:http://localhost:8080/druid,输入
application.properties配置好的监控后台账号和密码,就能进入首页,并查看sql监控,如下所示: -
以上便是 Druid 单数据源配置,很简单,项目地址为:spring-boot-mybatis-druid-single。


在不同的业务场景中,一个项目中可能涉及到多个数据源(虽然不推荐),Druid也做了相应的支持。
-
修改
application.properties文件,配置多个数据源,分别是test1和test2:# 数据源1 spring.datasource.druid.one.driverClassName = com.mysql.jdbc.Driver spring.datasource.druid.one.url = jdbc:mysql://localhost:3306/test1 ?useUnicode=true&characterEncoding=utf-8 spring.datasource.druid.one.username = root spring.datasource.druid.one.password = root # 数据源2 spring.datasource.druid.two.driverClassName = com.mysql.jdbc.Driver spring.datasource.druid.two.url = jdbc:mysql://localhost:3306/test2 ?useUnicode=true&characterEncoding=utf-8 spring.datasource.druid.two.username = root spring.datasource.druid.two.password = root # 其他的类似
有个比较有意思的地方就是
Druid支持属性的继承,在多数据源的情况下设置了spring.datasource.druid的相关属性会被spring.datasource.druid.*给继承,如果spring.datasource.druid.*也配置了相同的属性会被覆盖。示例如下:spring.datasource.druid.initial-size=3 spring.datasource.druid.min-idle=3 spring.datasource.druid.max-active=10 # Druid 数据源 1 配置,继承 spring.datasource.druid.* 配置,相同则覆盖 spring.datasource.druid.one.max-active=20 spring.datasource.druid.one.max-wait=10000 # Druid 数据源 2 配置,继承spring.datasource.druid.* 配置,相同则覆盖 spring.datasource.druid.two.max-active=30 spring.datasource.druid.two.max-wait=20000
-
接下来就是注入多数据源,核心的配置文件是:
MultiDataSourceConfig.java,OneDataSourceConfig.java,TwoDataSourceConfig.java,这三个类的作用分别如下:MultiDataSourceConfig.java:加载数据源。- 使用注解:
@Primary,指定一个默认的主数据源。
- 使用注解:
OneDataSourceConfig.java:将创建好的数据源,注入到SqlSessionFactory中,再创建事务,将SqlSessionFactory注入到创建的SqlSessionTemplate中,最后将SqlSessionTemplate注入到对应的Mapper包路径下。- 这里需要注意一点的是:多数据源的情况下,不需要在启动类添加:
@MapperScan("com.xxx.mapper")的注解。
- 这里需要注意一点的是:多数据源的情况下,不需要在启动类添加:
TwoDataSourceConfig.java:同上。
-
在
UserController里注入两个不同数据源的mapper,然后获取这两个不同数据源下面的所有的用户列表,前台发起一个请求:http://localhost:8080/getUsers/,看能不能拿到这两个数据源的数据。@Autowired private UserOneMapper userOneMapper; @Autowired private UserTwoMapper userTwoMapper; @RequestMapping("/getUsers") public List<Object> getUsers() { List<User> oneUserList = userOneMapper.selectAll(); List<User> twoUserList = userTwoMapper.selectAll(); List<Object> users = new ArrayList<>(); users.add(oneUserList); users.add(twoUserList); return users; }
-
访问
Druid控制台:http://localhost:8080/druid,若出现两个数据源的信息,说明多数据源是配置成功的。 -
更多的细节可以查看源码:spring-boot-mybatis-druid-multi。


redis是一个key-value存储系统。和Memcached类似,它支持存储的value类型相对更多,包括string(字符串)、list(链表)、set(集合)、zset(sorted set --有序集合)和hash(哈希类型)。这些数据类型都支持push/pop、add/remove及取交集并集和差集及更丰富的操作,而且这些操作都是原子性的。在此基础上,redis支持各种不同方式的排序。与memcached一样,为了保证效率,数据都是缓存在内存中。区别的是redis会周期性的把更新的数据写入磁盘或者把修改操作写入追加的记录文件,并且在此基础上实现了master-slave(主从)同步。
-
安装redis,可以参考我的文章,这里就不详述。
-
引入核心依赖包:
spring-boot-starter-data-redis,里面封装了一系列操作redis的API。<dependency> <groupId>org.springframework.boot</groupId> <artifactId>spring-boot-starter-data-redis</artifactId> </dependency>
-
配置redis的连接信息、端口、密码、最大连接数、最小连接数等等,编辑
application.properties:# Redis 数据库索引(默认为0) spring.redis.database=0 # Redis 服务器地址 spring.redis.host=192.168.1.225 # Redis 服务器连接端口 spring.redis.port=6379 # Redis 服务器连接密码(默认为空) spring.redis.password=root # 连接池最大连接数(使用负值表示没有限制) spring.redis.pool.max-active=100 # 连接池最大阻塞等待时间(使用负值表示没有限制) spring.redis.pool.max-wait=-1 # 连接池中的最大空闲连接 spring.redis.pool.max-idle=10 # 连接池中的最小空闲连接 spring.redis.pool.min-idle=5 # 连接超时时间(毫秒) spring.redis.timeout=10000
-
创建redis配置类
RedisConfig,主要是配置主键生成策略和缓存的过期时间,如果不配置的话,均采用默认的配置。@EnableCaching:开启缓存。- 主键生成策略:默认的是以参数名为主键。
- 默认的过期时间:如果没有设置expire,默认的时效是永不过期,但是网上说:如果实际内存超过你设置的最大内存,就会使用LRU删除机制。
@Configuration
@EnableCaching
public class RedisConfig extends CachingConfigurerSupport {

    /**
     * 配置主键生成策略,默认的是参数名做为主键
     * @return
     */
    @Bean
    public KeyGenerator keyGenerator() {
        return new KeyGenerator() {
            @Override
            public Object generate(Object target, Method method, Object... params) {
                StringBuilder sb = new StringBuilder();
                sb.append(target.getClass().getName());
                sb.append(method.getName());
                for (Object obj : params) {
                    sb.append(obj.toString());
                }
                return sb.toString();
            }
        };
    }

    /**
     * 设置默认的缓存时效
     * @param redisTemplate
     * @return
     */
    @Bean
    public CacheManager cacheManager(RedisTemplate redisTemplate) {
        RedisCacheManager rcm = new RedisCacheManager(redisTemplate);
        //设置缓存过期时间,单位为秒
        //rcm.setDefaultExpiration(60);
        return rcm;
    }
}
-
以上便是集成redis的过程,下面来简单的梳理下redis中对常用的数据类型的简单操作需要注意的点:
- 简单的数据类型
- 多次进行 set 相同的 key,键对应的值会被覆盖。
- 对象
- 若缓存对象是对象,需要注意的一点就是:对象要序列化。
- hash(哈希)
-
HashOperations<String, Object, Object> hashOperations = redisTemplate.opsForHash();
//第一个参数为key,第二个参数为属性,第三个参数为属性值
hashOperations.put("leeyom", "sex", "man");
-
- List
- Redis list 的实现为一个双向链表,即可以支持反向查找和遍历,更方便操作,不过带来了部分额外的内存开销,Redis 内部的很多实现,包括发送缓冲队列等也都是用的这个数据结构。
- set
- set集合有自动去重的功能,无法自动排序。
difference:difference(ket1,key2) 函数会把 key1 中不同于 key2 的数据对比出来。unions:unions(ket1,key2) 会取两个集合的合集。
- zset
- zset 和 set 类似,区别是 set 不是自动有序的,而 zset 可以通过用户额外提供一个优先级(score)的参数来为成员排序,并且是插入有序,即自动排序。
-
//第一个参数key、第二个参数为值,第三个参数权重值,就是根据这个权重值进行排序
zset.add("zset", "http", 1);
- 简单的数据类型
-
项目地址为:spring-boot-redis-simple。
- 引入核心依赖包
spring-boot-starter-cache。<!--缓存--> <dependency> <groupId>org.springframework.boot</groupId> <artifactId>spring-boot-starter-cache</artifactId> </dependency>
- 配置redis,前面已经配置过,这里就不详述。
- 数据缓存涉及到三个重要的注解:
@Cacheable、@CachePut、@CacheEvict,就是使用这三个注解,配合redis便可以实现数据缓存。@Cacheable:- 属性:
value:缓存的名称。key:缓存的 key,可以为空,如果指定要按照 Spel 表达式编写,如果不指定,则缺省按照方法的所有参数进行组合。condition:触发条件,只有满足条件的情况才会加入缓存,默认为空,既表示全部都加入缓存,支持 Spel表达式。
- 示例:
/**
  * 如果参数的长度小于4,才走缓存
  * @param userName
  * @return
  */
 @RequestMapping("/hello2")
 @Cacheable(value = "helloCache2", key = "#userName", condition = "#userName.length() <= 4")
 public String hello2(String userName) {
     System.out.println("方法被调用了!!");
     return "hello2 " + userName;
 }
- 总结:
- 当标记在一个方法上时表示该方法是支持缓存的,当标记在一个类上时则表示该类所有的方法都是支持缓存的。
- 当执行到一个被
@Cacheable注解的方法时,Spring 首先检查 condition 条件是否满足,如果不满足,执行方法,返回;如果满足,在缓存空间中查找使用 key 存储的对象,如果找到,将找到的结果返回,如果没有找到执行方法,将方法的返回值以 key-value 对象的方式存入缓存中,然后方法返回。
- 属性:
@CachePut:- 属性:同
@Cacheable的属性一样,也拥有value、key、condition三个属性。 - 示例:
/**
 * CachePut:在满足条件的前提下,每次调用改方法,
 * 都会更新更新指定的缓存
 * @param nickName
 * @return
 */
@RequestMapping("/findByNickName")
@CachePut(value = "usersCache", key = "#nickName")
public List<Users> findByNickName(String nickName) {
    System.out.println("执行了数据库操作");
    return userRepository.findByNickName(nickName);
}
- 总结:
- 与
@Cacheable不同的是使用@CachePut标注的方法在执行前,不会去检查缓存中是否存在之前执行过的结果,而是每次都会执行该方法,并将执行结果以键值对的形式存入指定的缓存中。
- 与
- 属性:同
@CacheEvict:- 属性:
- 同
@Cacheable的属性一样,也拥有value、key、condition三个属性。 allEntries:allEntries 是 boolean 类型,表示是否需要清除缓存中的所有元素。默认为 false,表示不需要。beforeInvocation:boolean类型,默认为false,当我们指定该属性值为 true 时,Spring 会在调用该方法之前清除缓存中的指定元素。
- 同
- 示例:
/**
 * allEntries = true 表示清除所有的缓存
 * beforeInvocation = true 表示调用该方法之前清除缓存中的指定元素。
 * @param nickname
 * @return
 */
@RequestMapping("/allEntries")
@CacheEvict(value = "usersCache", allEntries = true, beforeInvocation = true)
public List<Users> allEntries(String nickname) {
    List<Users> users = userRepository.findByNickName(nickname);
    System.out.println("执行了数据库操作");
    return users;
}
- 总结:
@CacheEvict是用来标注在需要清除缓存元素的方法或类上的。当标记在一个类上时表示其中所有的方法的执行都会触发缓存的清除操作。
- 属性:
- 项目源码:spring-boot-redis-cache。
很多的时候由于用户请求的增大,我们需要做请求分发,负载均衡。用户的请求通过Nginx,由于权重的不同,就会出现第一次的请求会交给服务器 A 处理,下次的请求可能会是服务B处理,如果不做 Session 共享的话,就有可能出现用户在服务 A 登录了,下次请求的时候到达服务 B 又要求用户重新登录。假如我们将Session缓存到redis中,那么A服务器和B服务器都可以共享Session。
spring boot 中可以使用组件spring-session-data-redis来实现session共享,下面来集成spring session,集成的话很简单,只需要简单的2步就可以:
- 引入
spring-session-data-redis依赖:<!--session--> <dependency> <groupId>org.springframework.session</groupId> <artifactId>spring-session-data-redis</artifactId> </dependency>
- 创建session配置类
SessionConfig,指定session失效时间:@Configuration @EnableRedisHttpSession(maxInactiveIntervalInSeconds = 86400 * 30) public class SessionConfig { }
那接下来,简单的验证下两台服务器之间是否真的可以进行session共享,创建了两个项目spring-boot-redis-session-one和spring-boot-redis-session-two,其对应的端口分别为8080和9090,这两个项目代表服务器A和服务器B。
- 分别启动两个项目。
- 首先访问服务器A:
http://localhost:8080/setSession,将session缓存到redis。 - 再访问服务器A:
http://localhost:8080/getSession,获取缓存的session信息。{ "sessionId": "e6d9eaf2-03a3-40e2-9428-e8b233a530a8", "message": "http://localhost:8080/setSession" } - 访问服务器B:
http://localhost:9090/getSession,看返回的session信息是否是缓存在redis中的session信息,若两台服务器之间返回的session信息一致,说明session共享是成功的。{ "sessionId": "e6d9eaf2-03a3-40e2-9428-e8b233a530a8", "message": "http://localhost:8080/setSession" }
通过以上的简单验证,证明是可以通过redis进行session共享的,具体的项目代码可以参考:spring-boot-redis-session。
DUBBO是一个分布式服务框架,致力于提供高性能和透明化的RPC远程服务调用方案,是阿里巴巴SOA服务化治理方案的核心框架。而ZooKeeper是一个分布式的,开放源码的分布式应用程序协调服务,ZooKeeper的目标就是封装好复杂易出错的关键服务,将简单易用的接口和性能高效、功能稳定的系统提供给用户。两者之间需要配合使用。
下面简单讲解下spring boot中集成dubbo和zookeeper实现分布式项目,整个示例由以下模块组成:
spring-boot-dubbo-api:此项目被所有模块依赖,一些公用的类库或者要暴露的接口放在此处,为了防止循环依赖,此模块不需要继承父级项目。spring-boot-dubbo-consumer:消费者,应用端口为9090。spring-boot-dubbo-provider:提供者,应用端口为8080。spring-boot-dubbo:父级项目,管理公有的依赖。
下面来梳理下整个的整合过程:
- 首先肯定是安装
zookeeper,可以参考我的文章,此处不做详述了。 - 在父级项目
spring-boot-dubbo的pom文件中引入dubbo相关的依赖,利用maven的聚合继承,这样消费者和提供者的pom文件就不需要再引入相同的依赖:<!-- dubbo --> <dependency> <groupId>io.dubbo.springboot</groupId> <artifactId>spring-boot-starter-dubbo</artifactId> <version>1.0.0</version> </dependency>
- 配置提供者
spring-boot-dubbo-provider的application.properties,设置服务暴露的端口号、注册中心、扫描dubbo注解包等等相关配置:# dubbo spring.dubbo.application.name=example-provider spring.dubbo.registry.address=zookeeper://192.168.1.230:2181 spring.dubbo.protocol.name=dubbo spring.dubbo.protocol.port=20880 spring.dubbo.scan=com.leeyom.dubbo
- 配置消费者
spring-boot-dubbo-consumer的application.properties:# dubbo spring.dubbo.application.name=example-consume spring.dubbo.registry.address=zookeeper://192.168.1.230:2181 spring.dubbo.scan=com.leeyom.dubbo
- 在
spring-boot-dubbo-api模块中,发布一个接口UserService类:public interface UserService { /** * 获取指定的用户信息 * @param userId 用户id * @return */ UserEntity getUserById(Integer userId); }
- 然后在提供者模块
spring-boot-dubbo-provider,实现(暴露)该接口,实现这接口需要使用注解@Service,需要注意的是,这个是dubbo包下面的注解,不是spring包下面的注解,不要搞混了。@Service(timeout = 1200000, version = "1.0.0") public class UserServiceImpl implements UserService { @Override public UserEntity getUserById(Integer userId) { //模拟测试 return new UserEntity(userId, "Leeyom", "123"); } }
- 消费者
spring-boot-dubbo-consumer模块想调用提供者发布的getUserById这个接口,只需要使用注解@Reference,引用提供者服务,注解@Reference需要带上版本号(version)属性,否则会报空指针异常。@Reference(version = "1.0.0") private UserService userService; @RequestMapping(value = "/testDubbo") public UserEntity testDubbo(Integer userId) { return userService.getUserById(userId); }
- 测试验证,访问消费者的http接口:
http://localhost:9090/testDubbo?userId=1,该接口的内部调用了服务者暴露的接口,如果返回了如下数据,说明dubbo是整合成功的,否则整合失败。{ "id": 1, "userName": "Leeyom", "password": "123" } - 以上这个版本我称它为:无xml版本,另外还搞了个xml版本的,这里就不详述了,具体可以查看项目源码:spring-boot-dubbo。