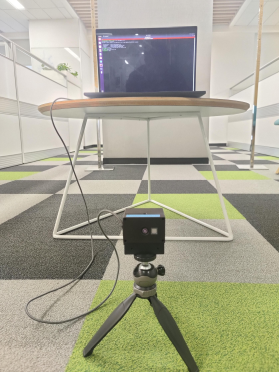
The ADI 3DToF ADTF31xx is a ROS (Robot Operating System) package for working with ADI’s ADTF3175D ToF sensor. This node captures the Depth and IR frames from the sensor and publishes them as ROS topics. The node uses ADI ToF SDK APIs to capture frames from the sensor. The node publishes Depth and IR Images at 512x512 (16 bits per image) resolution and Camera Info @ 30FPS.
- EVAL-ADTF3175D-NXZ Module
- USB type-c to type-A cable - with 5gbps data speed support
- Host laptop with intel i5 of higher cpu running Ubuntu-20.04LTS
📝 Note: Refer the EVAL-ADTF3175D-NXZ User Guide to ensure the Eval module has adequate power supply during operation.
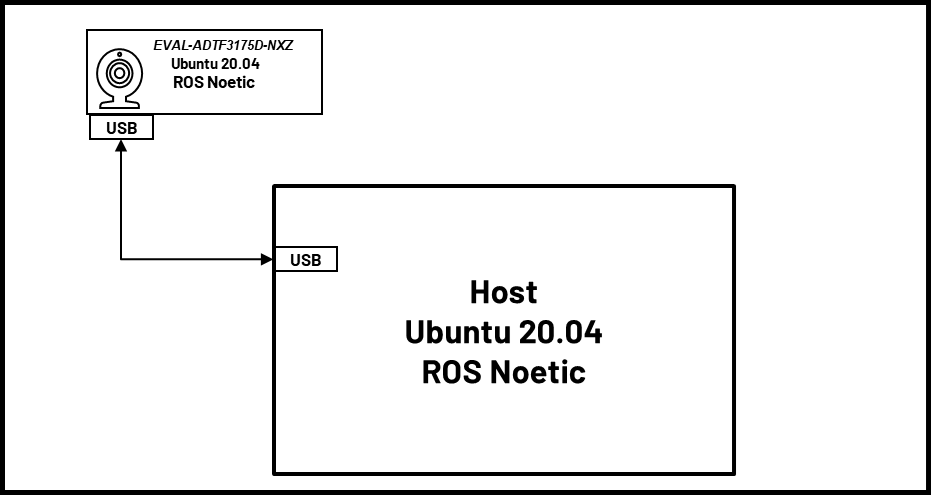
The image below shows the connection diagram of the setup (with labels):
📝 ADSD3500 Firmware :
Make sure the sensor is flashed with the compatible FW. The minimum version is listed below:
CR/DV series : 4.1.0.0
AM series : 4.2.0.0
Follow the below instructions to read the FW version
- Login to the EVAL-ADTF3175D-NXZ module using ssh. On the Host machine open the “Terminal” and run the following command to ssh to the device.
$ ssh analog@10.42.0.1 Username: analog Password: analog- Run the follwing commands
    $ cd ~/Workspace/Tools/ctrl_app
    $ ./ctrl_app
The output would look like below,
V4L2 custom control interface app version: 1.0.1
59 31
04 02 01 00 61 35 39 61 66 61 64 36 64 36 63 38 65 37 66 62 31 35 33 61 32 64 62 38 63 64 38 38 34 30 33 35 39 66 31 37 31 39 35 61
59 31
The first four bytes in the third line represents the FW version. For example for the output above, the version is 4.2.1.0
If the firware version is older than this please upgrade the FW using the following instructions
- Install ADI ToF SDK release v4.2.0
- After installing goto the inastallation folder and run the following commands to download the image
    $ cd ~/Analog\ Devices/ToF_Evaluation_Ubuntu_ADTF3175D-Relx.x.x/image.
    $ chmod +x get_image.sh and ./get_image.sh.
Latest image will be downloaded at ./image path as NXP-Img-Relx.x.x-ADTF3175D-.zip. Extract this folder using unzip NXP-Img-Relx.x.x-ADTF3175D-.zip command.
This folder contains the NXP image and ADSD3500 firmware(Fw_Update_x.x.x.bin).
- Run the following command to copy the Fimware to the NXP device
    $ scp Fw_Update_4.2.4.bin analog@10.42.0.1:/home/analog/Workspace
       Username: analog
       Password: analog
- Now login to the device and run the Firmware upgrade command.
⚠️ Do not interrupt/abort while the upgrade is in progress.Doing this may corrupt the module.$ ssh analog@10.42.0.1 Username: analog Password: analog $ cd Workspace/ToF/build/examples/data_collect/ $ ./data_collect --fw ~/Workspace/Fw_Update_x.x.x.bin config/config_default.json
- Reboot the board after the successful operation.
For details refer to EVAL-ADTF3175D-NXZ NVM upgrade guide
-
Download and install the latest version of ADI 3DToF ADTF31xx from the Release pages.
-
After installing the software, go to the installation folder(~/Analog Devices/ADI3DToFADTF31xx-Relx.x.x) and run the get_image.sh script. This script will download the custom Ubuntu 20.04 image for the EVAL-ADTF3175D-NXZ.
-
Flash .img file to the SD card, follow steps in this linkEVAL-ADTF3175D-NXZ Users Guide to flash the .img file to SD card.
Note: This image contains the necessary software and code to start using the ROS node. The source code for the
adi_3dtof_adtf31xxcan be found in/home/analog/catkin_ws/src/ -
Follow the instructions below to run the adi_3dtof_adtf31xx application on the EVAL-ADTF3175D-NXZ module.
-
Connect the EVAL-ADTF3175D-NXZ module to the PC using the USB3.0 cable and wait for the network to come up. By default, the device ip is set to 10.42.0.1. Refer to EVAL-ADTF3175D-NXZ Startup Guide for details.
-
Login to the EVAL-ADTF3175D-NXZ module using ssh. On the Host machine open the “Terminal” and run the following command to ssh to the device.
$ ssh analog@10.42.0.1
  Username: analog
  Password: analog
Note: If you do not have a Linux Host machine, then install Windows Subsystem for Linux(WSL) and Ubuntu 20.04 on Windows. Refer to this link for instructions.
📝
- Setting Date/Time:
Make sure the Date/Time is set properly before compiling and running the application. Connecting to a WiFi network would make sure the Date/Time is set properly. The custom Ubuntu 20.04 image is configured to connect to a network with following SSID and Password by default.
SSID : ADI Password: analog123
You can either setup a network with the above properties or configure the Device to connect to any available network.
Alternatively, the Host machine can be setup as a local NTP server and the devices can be configured to update Date/Time using the Host machine.
Refer to below links for setting and configuring NTP on Ubuntu machines.
- The ROS Noetic and dependent packages are already installed in the EVAL-ADTF3175D-NXZ image and the source code for the adi_3dtof_adtf31xx is present in
/home/analog/catkin_ws/src/folder. The package is also pre-built, hence there is no need to build the package.
If the source files are modified, then use the following commands to build the package.$ cd ~/catkin_ws/ $ catkin_make -DCMAKE_BUILD_TYPE=RELEASE -j2Note:
/home/analog/catkin_ws/is set up as the catkin workspace and this workspace is already sourced in the~/.bashrc
-
Running the ROS Node:
On the EVAL-ADTF3175D-NXZ device, the ROS Master is set to the IP address of the Host machine, hence it is required to run
roscoreon the Host machine (applicable only to Linux host).On the Linux Host, open a terminal and run the following command
$ roscore
On the Device:
$ roslaunch adi_3dtof_adtf31xx adi_3dtof_adtf31xx.launch
📝Note:
If you are using WSL as the Host machine, then setting Host as ROS Master does not work. In this case, you must unset the ROS master. Run the following command to unset the ROS Master and use the EVAL-ADTF3175D-NXZ as the ROS master. On the WSL Host, open an Ubuntu 20.04 Terminal and run the following command$ export ROS_MASTER_URI=http://10.42.0.1:11311 $ export ROS_IP=10.42.0.100 $ export ROS_HOSTNAME="Your Device name"
On Device,
$ unset ROS_MASTER_URI
$ roslaunch adi_3dtof_adtf31xx adi_3dtof_adtf31xx.launch
At this stage, the adi_3dtof_adtf31xx_node will be launched and start publishing the topics
/cam1/depth_image, /cam1/ir_image and /cam1/camera_info.To see the depth and IR images on the Host machine, simply open the RVIZ and add
/cam1/depth_imageand/cam1/ir_imagetopics to visualize the images -
The Node supports sending the Depth and IR images as compressed streams using RVL compression. To publish the compressed images set the
arg_enable_depth_ir_compressionparameter to1in the launch file.
The topic names for the compressed Depth and IR images are/cam1/depth_image/compressedDepthand/cam1/ir_image/compressedDepthrespectively.The users can run the adi_3dtof_adtf31xx_compressed_image_subscriber_node on the Host to machine to visualize the synchronized depth and ir images in RVIZ.
Refer to the Appendix 1 for instructions on how to build the node on a Host machine.
To run the node run the following command
$ roslaunch adi_3dtof_adtf31xx adi_3dtof_adtf31xx_compressed_host.launch
This launch file will run the Host node which decompresses the incoming images, computes the Point-cloud and publish the raw images. The launch file also invokes
adi_3dtof_adtf31xx_raw.rvizfor visualization.
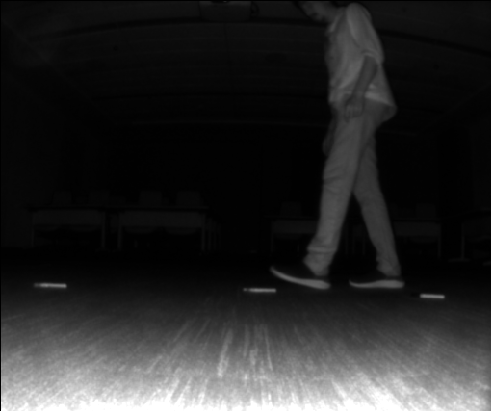
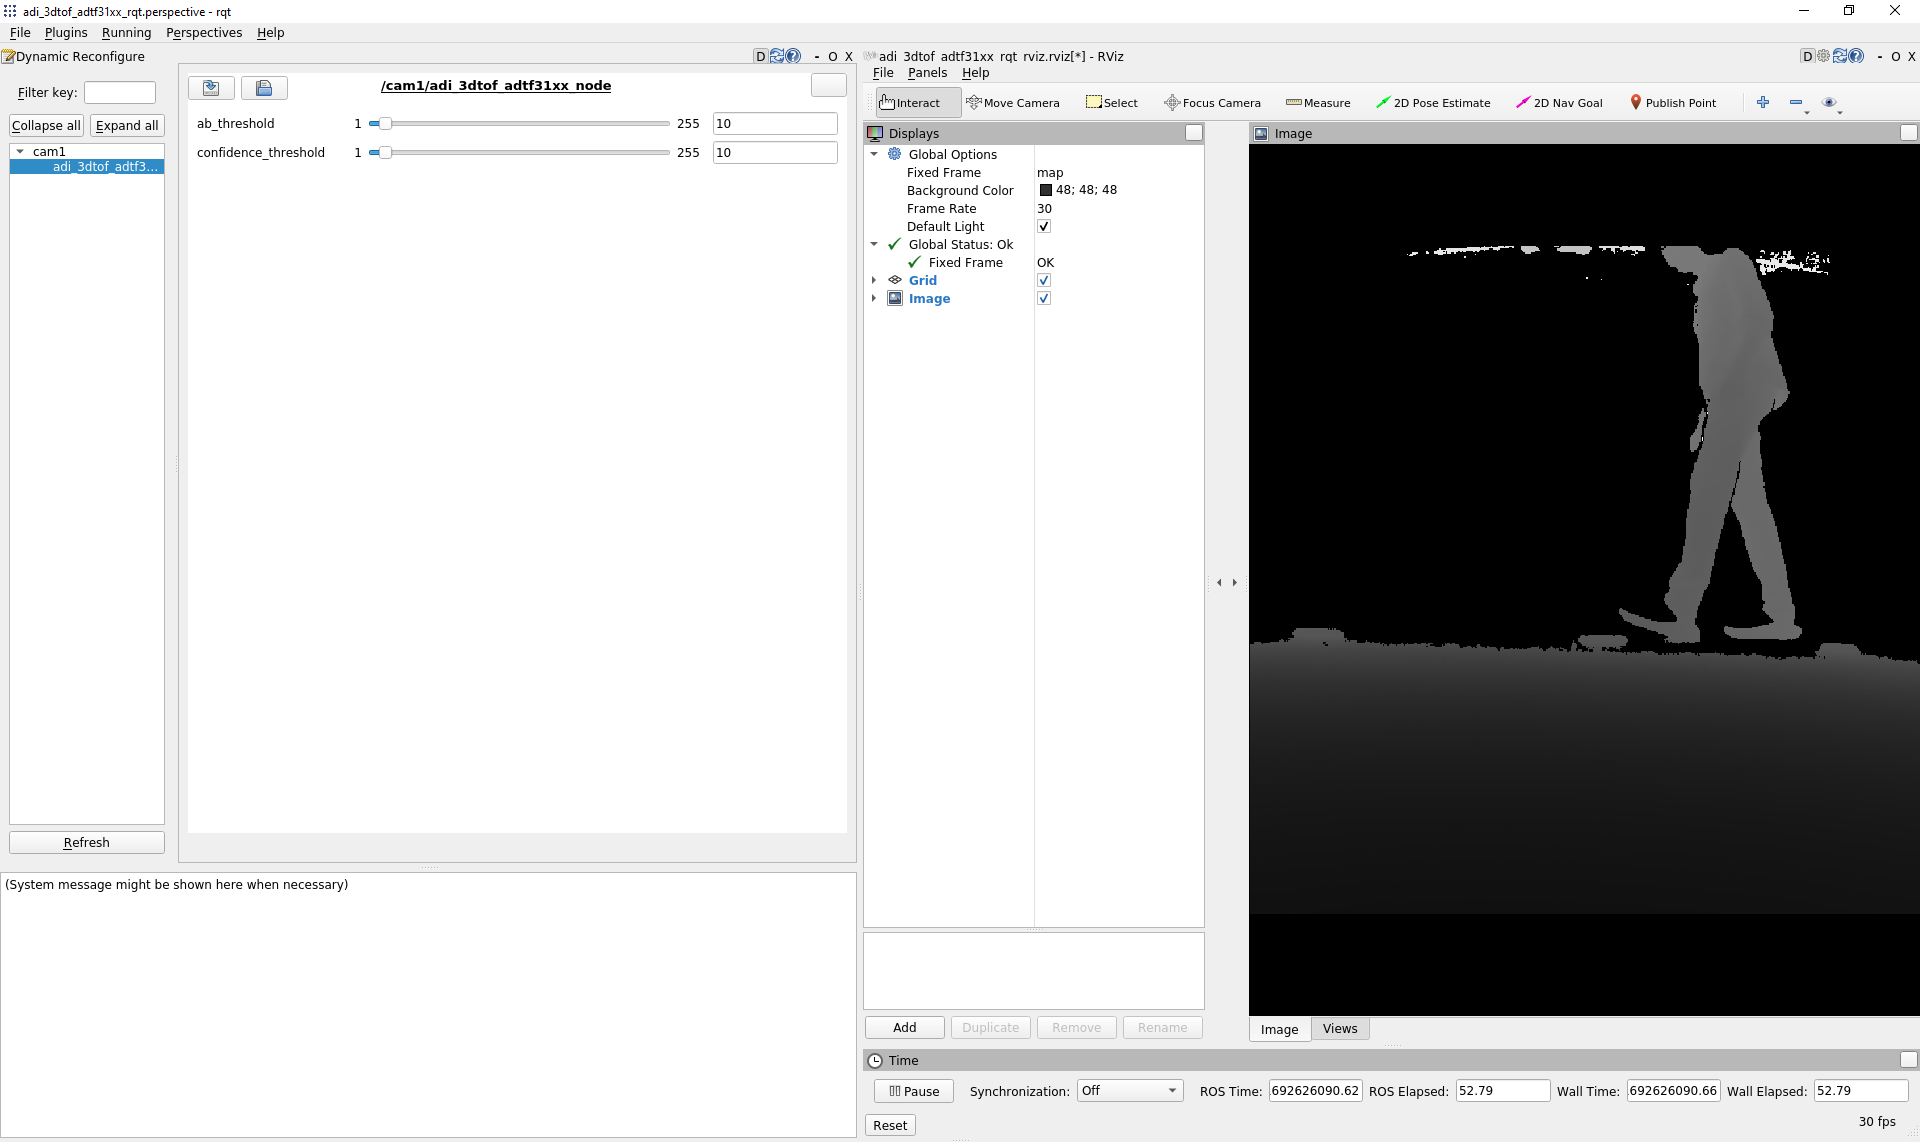
Sample output images are shown below:
/cam1/depth_image
/cam1/ir_image
These are the default topic names, topic names can be modified as a ROS parameter.
-
/depth_image
- 16-bit Depth image of size 512X512
-
/ir_image
- 16-bit IR image of size 512X512
-
/camera_info
- Camera info
If RVL image-compression is enabled:
- /depth_image/compressedDepth
- 512X512 16-bit Depth image from sensor node compressed with RVL compression
- /ir_image/compressedDepth
- 512X512 16-bit IR image from sensor node compressed with RVL compression
- param_camera_link (String, default: "adi_camera_link")
- Name of camera Link
- param_input_sensor_mode (int, default: 0)
- Input mode, 0:Real Time Sensor, 2:Rosbag bin
- param_input_file_name (String, default: "no name")
- Input filename : Applicable only if the input mode is 2
- param_ab_threshold (int, default: 10)
- abThreshold for the sensor
- param_confidence_threshold (int, default: 10)
- confidenceThreshold for the sensor.
- param_enable_depth_ir_compression (int, default: 0)
- Enables RVL compression for the depth images
- param_config_file_name_of_tof_sdk (String, default: "config/config_crosby_old_modes.json")
- Configuration fie name of ToF SDK
"config_crosby_old_modes.json" - For CR/DV series of Eval Boards
"tof-crosby-new.json" - For AM series of Eval Boards
- Configuration fie name of ToF SDK
- param_frame_type (String, default: "qmp")
- Frame Type
"qmp" - For CR/DV series of Eval Boards
"lr-qnative" - For AM series of Eval Boards
- Frame Type
-
/depth_image
- 16-bit Depth image of size 512X512
-
/ir_image
- 16-bit IR image of size 512X512
-
/camera_info
- Camera info
-
/raw_depth_image
- 16-bit Depth image of size 512X512
-
/raw_ir_image
- 16-bit IR image of size 512X512
-
/point_cloud
- 16-bit point cloud of size 512X512X3
- param_camera_prefix (String, default: "no name")
- ROS Topic prefix name to subscribe
-
param_input_file_name (String, default: "no name")
- Input file name
-
param_camera_prefixes (Vector of strings, default: null)
- Vector of strings to indicate camera prefixes.
📝 Notes:
- If any of these parameters are not set/declared, default values will be used.
- Enabling file input may slow down the speed of publishing.
Using Dynamic Reconfigure some parameters of adi_3dtof_adtf31xx ROS node can be modifed during run time. The Perspective file is present in rqt_config/ folder.
roslaunch adi_3dtof_adtf31xx adi_3dtof_adtf31xx_rqt.launch
Make sure the adi_3dtof_adtf31xx is already running before executing this command.
None
Please contact the Maintainers if you want to evaluate the algorithm for your own setup/configuration.
Any other inquiries are also welcome.
The Node can be run on a Host machine without the need for the actual 3D ToF sensor. This mode is supported for users who would want to test some algorithms on the recorded video files. In this mode the adi_3dtof_adtf31xx_node will read the video file and publish the frames as ROS topics. Follow the below instructions to build and run the node in File-IO mode.
Note: It is assumed that the correct version of ROS is installed and configured properly, if not please install the ROS from here
To run the adi_3dtof_adtf31xx_node in file-io mode, the video files should be given as input. Please follow the below instructions to set up the input video files.
- Go to the installation directory of the ADI 3DToF ADTF31xx appliation (~/Analog Devices/ADI3DToFADTF31xx-Relx.x.x)
- Run the get_videos.sh script which will download the adi_3dtof_input_video_files.zip file in the current directory.
- Unzip it and copy the directory as ~/catkin_ws/src/adi_3dtof_input_video_files.
- Update the input file argument arg_input_file_name_or_ros_topic_prefix_name in the launch file adi_3dtof_adtf31xx.launch as per the above file path.
-
Clone the repo and checkout the corect release branch/ tag into catkin workspace directory
$ cd ~/catkin_ws/src
$ git clone https://github.com/analogdevicesinc/adi_3dtof_adtf31xx.git -b v1.0.0
-
Install dependencies:
$ cd ~/catkin_ws/
$ rosdep install --from-paths src -y --ignore-src
-
Build the package
$ cd ~/catkin_ws/src
$ catkin_make -DCMAKE_BUILD_TYPE=RELEASE -DHOST_BUILD=TRUE -j2
$ source devel/setup.bash
-
To run the adi_3dtof_adtf31xx_node in File-IO mode, we need to make some changes in the launch file. Change the following parameters in launch file.
arg_input_sensor_mode to be set to 2
arg_in_file_name to be set to the input file name
-
After updating the launch file, run the roslaunch with the updated launch file.
$ roslaunch adi_3dtof_adtf31xx adi_3dtof_adtf31xx.launch
At this stage, the adi_3dtof_adtf31xx_node will be launched and start publishing the topics /cam1/depth_image, /cam1/ir_image and /cam1/camera_info.
rosbag, a utility provided by ROS, is used to record topics. The data is collected in bag format, and the read_rosbags node converts it to bin file format. format of bin file as given below.
start of bin file

4 byte uint32_t = total frames in bin file.
4 byte uint32_t = image width.
4 byte uint32_t = image height.
4 byte uint32_t = number of bytes per pixel.
4 byte uint32_t = version of generated binary file.
4 byte uint32_t = first frame position( End of header position).
4 byte uint32_t = frame pitch ( number of bytes in one frame).
8 byte long = device timestamp.

till first frame position some header bits are present.
Here header bits are camera_info
K ( 9 doubles = 72 bytes)
size of D ( 1 uint32_t = 4 bytes)
D ( based on size of D, size of D * double)
R ( 9 doubles = 72 bytes)
P ( 12 doubles = 96 bytes)

a single frame contains..
8 byte depth timestamp, depth data, 8 byte IR timestamp, IR data.

n number of frames

end of bin file
Change below parameters in read_bagfile.lauch file
-
in_file_name = enter the file name with path
ex:<arg name="in_file_name" default="$(find adi_3dtof_adtf31xx)/../4camera.bag"/> -
Add Camera names for arguments camera1_name, camera2_name, camera3_name and camera4_name.
ex:
<arg name="camera1_name" default="cam1"/>
<arg name="camera2_name" default="cam2"/>
<arg name="camera3_name" default="cam3"/>
<arg name="camera4_name" default="cam4"/> -
In
<arg name="camera_names" default="[$(arg camera1_name), $(arg camera2_name), $(arg camera3_name), $(arg camera4_name)]"/>change the number of arguments in default section to get output binary files for those number of cameras.
ex: for single camera
<arg name="camera_names" default="[$(arg camera1_name)]"/>
the name of the generated output file will be2022-11-03-22-12-27_cam1_out.bin
for two cameras
<arg name="camera_names" default="[$(arg camera1_name), $(arg camera2_name)]"/>
the name of the generated output files will be
2022-11-03-22-12-27_cam1_out.binand2022-11-03-22-12-27_cam2_out.bin -
run below command to launch read_rosbags node
$ roslaunch read_rosbags read_bagfile.launch -
The output files will have names in following manner: input_file_name_camera_name_out.bin
Ex: if input file name is4cameras.bagand camera name iscam5then output is4cameras_cam5_out.bin
To see the depth and IR images open an other Terminal and open the RVIZ and add /cam1/depth_image and /cam1/ir_image topics to visualize the images


