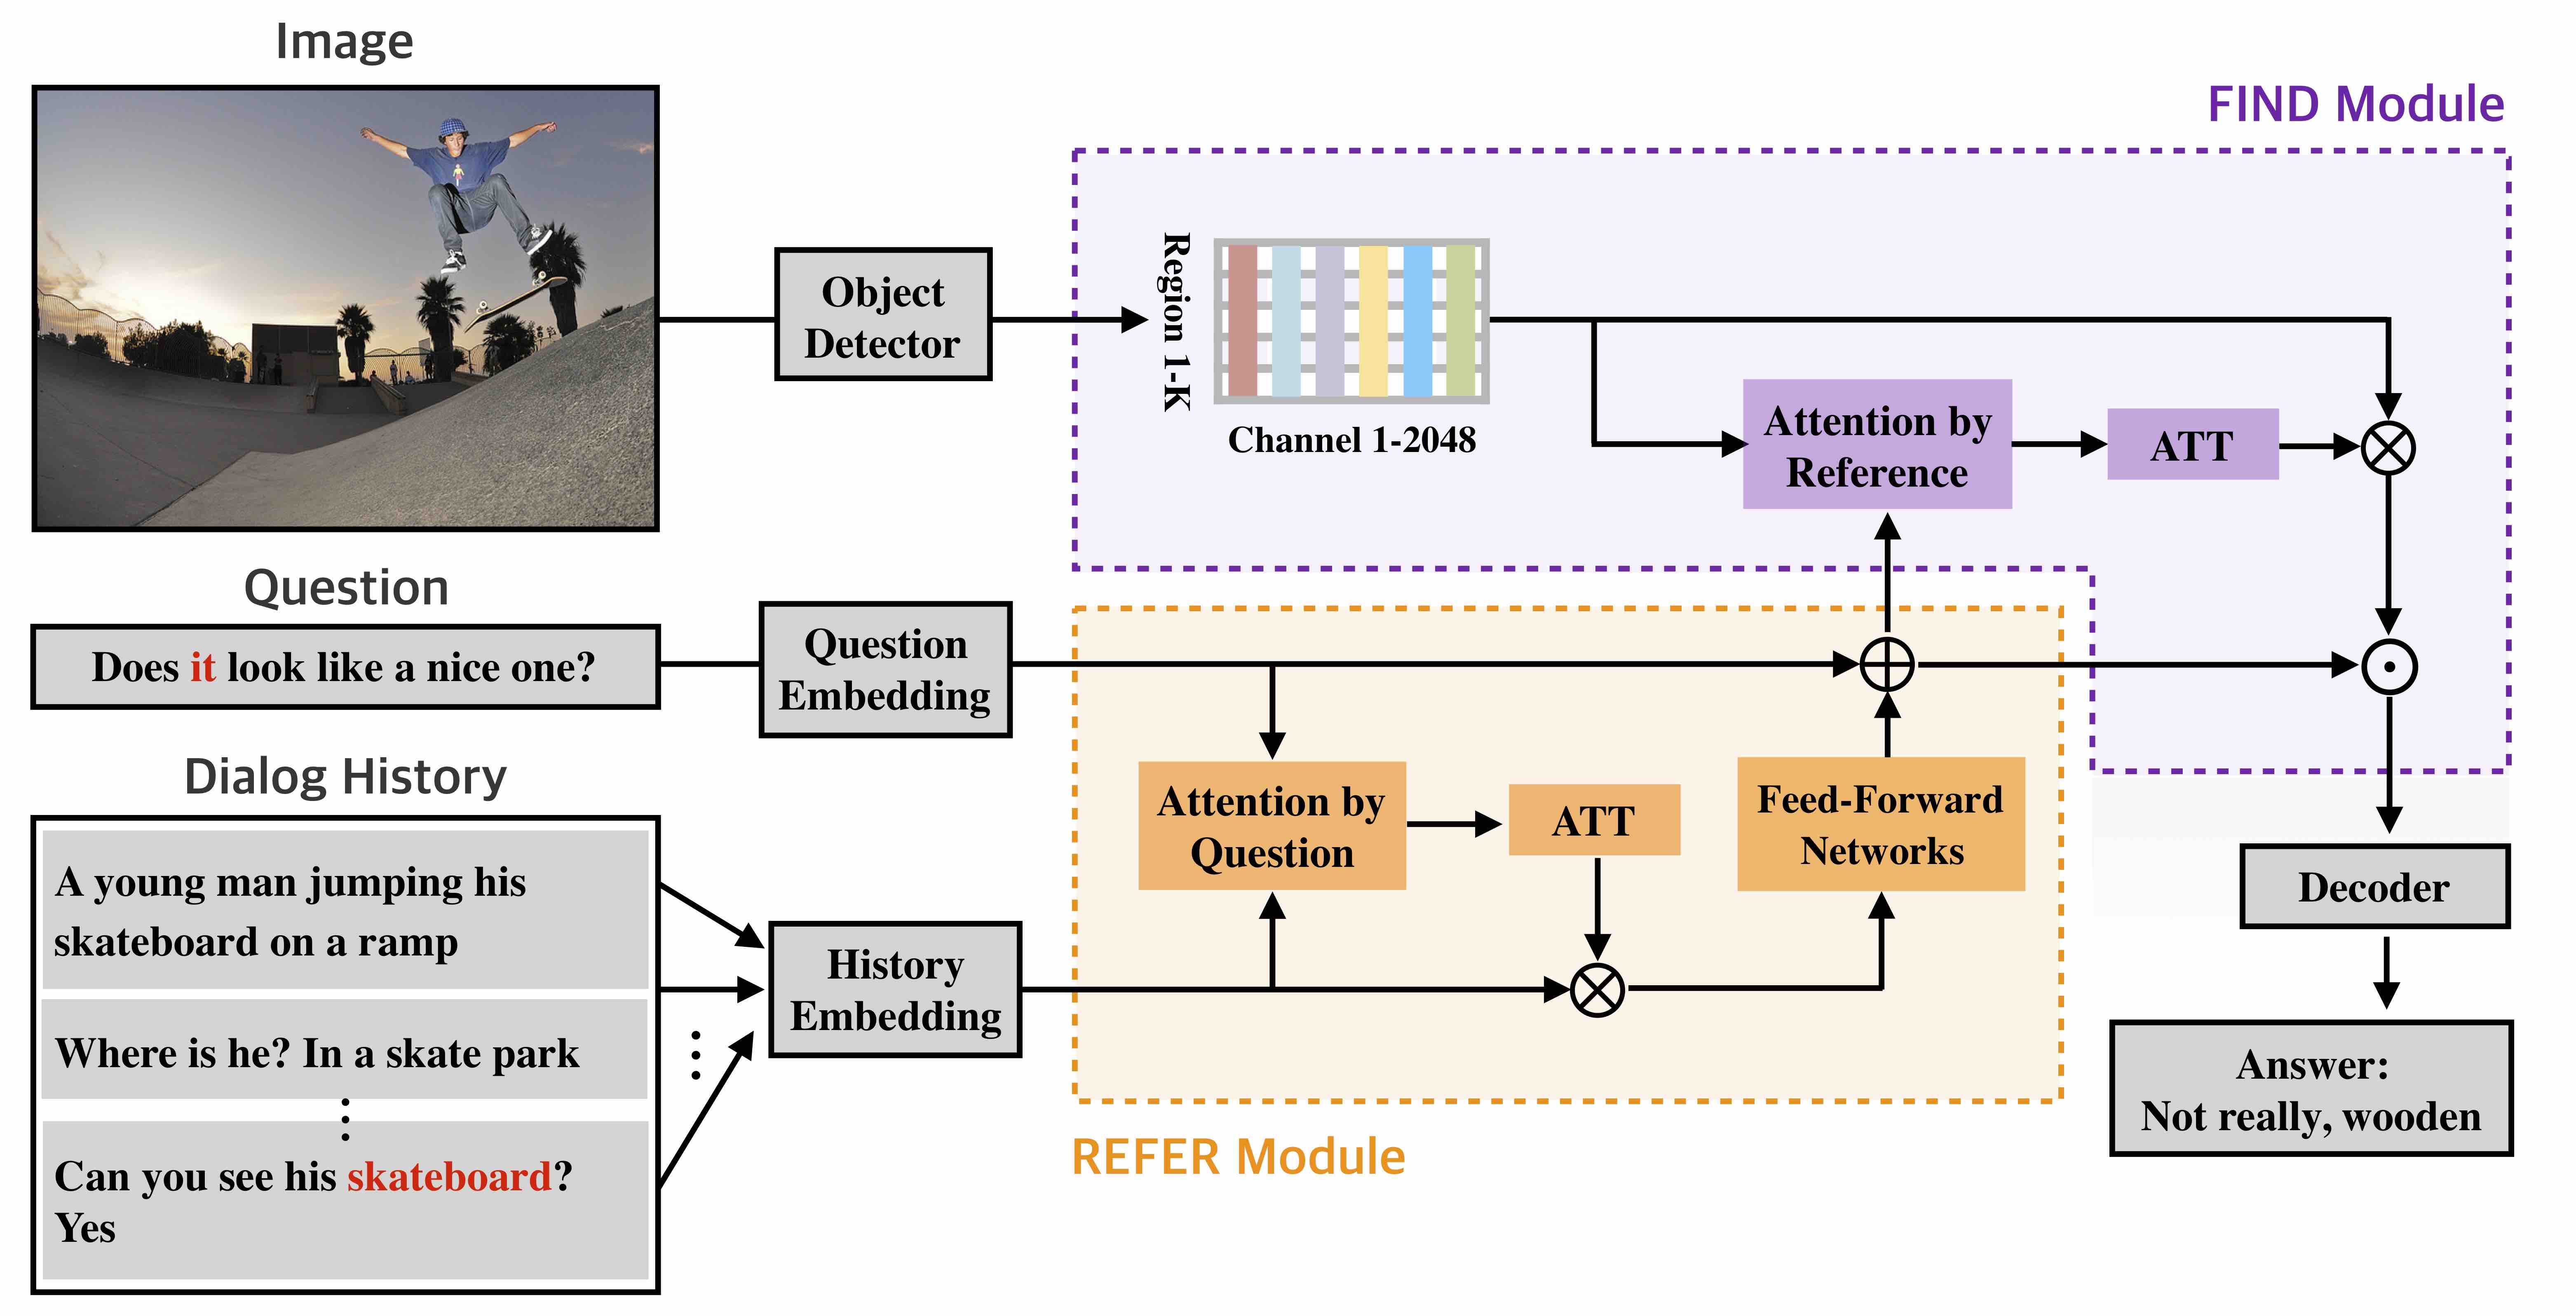
PyTorch implementation for the EMNLP'19 Dual Attention Networks for Visual Reference Resolution in Visual Dialog.
For the visual dialog v1.0 dataset, our single model achieved state-of-the-art performance on NDCG, MRR, and R@1.
If you use this code in your published research, please consider citing:
@inproceedings{kang2019dual,
  title={Dual Attention Networks for Visual Reference Resolution in Visual Dialog},
  author={Kang, Gi-Cheon and Lim, Jaeseo and Zhang, Byoung-Tak},
  booktitle={Proceedings of the 2019 Conference on Empirical Methods in Natural Language Processing},
  year={2019}
}
This starter code is implemented using PyTorch v0.3.1 with CUDA 8 and CuDNN 7.
It is recommended to set up this source code using Anaconda or Miniconda.
- Install Anaconda or Miniconda distribution based on Python 3.6+ from their downloads' site.
- Clone this repository and create an environment:
git clone https://github.com/gicheonkang/DAN-VisDial
conda create -n dan_visdial python=3.6

# activate the environment and install all dependencies
conda activate dan_visdial
cd DAN-VisDial/
pip install -r requirements.txt- We used the Faster-RCNN pre-trained with Visual Genome as image features. Download the image features below, and put each feature under
$PROJECT_ROOT/data/{SPLIT_NAME}_featuredirectory. We needimage_idto RCNN bounding box index file ({SPLIT_NAME}_imgid2idx.pkl) because the number of bounding box per image is not fixed (ranging from 10 to 100).
train_btmup_f.hdf5: Bottom-up features of 10 to 100 proposals from images oftrainsplit (32GB).train_imgid2idx.pkl:image_idto bbox index file fortrainsplitval_btmup_f.hdf5: Bottom-up features of 10 to 100 proposals from images ofvalidationsplit (0.5GB).val_imgid2idx.pkl:image_idto bbox index file forvalsplittest_btmup_f.hdf5: Bottom-up features of 10 to 100 proposals from images oftestsplit (2GB).test_imgid2idx.pkl:image_idto bbox index file fortestsplit
- Download the GloVe pretrained word vectors from here, and keep
glove.6B.300d.txtunder$PROJECT_ROOT/data/glovedirectory.
# data preprocessing
cd DAN-VisDial/data/
python prepro.py

# Word embedding vector initialization (GloVe)
cd ../utils
python utils.pySimple run
python train.py By default, our model save model checkpoints at every epoch. You can change it by using -save_step option.
Logging data checkpoints/start/time/log.txt shows epoch, loss, and learning rate.
Evaluation of a trained model checkpoint can be evaluated as follows:
python evaluate.py -load_path /path/to/.pth -split valValidation scores can be checked in offline setting. But if you want to check the test split score, you have to submit a json file to online evaluation server. You can make json format with -save_ranks=True option.
Performance on v1.0 test-std (trained on v1.0 train):
| Model | NDCG | MRR | R@1 | R@5 | R@10 | Mean |
|---|---|---|---|---|---|---|
| DAN | 0.5759 | 0.6320 | 49.63 | 79.75 | 89.35 | 4.30 |
