Dockerfile and supporting files to create a new Docker image from the Source Code at brats18 for brain tumor segmentation, which is a revision of the original implementation of brats17 according to the following paper:
*Guotai Wang, Wenqi Li, Sebastien Ourselin, Tom Vercauteren. "Automatic Brain Tumor Segmentation using Cascaded Anisotropic Convolutional Neural Networks." In International MICCAI Brainlesion Workshop, pp. 178-190. Springer, Cham, 2017. https://arxiv.org/abs/1709.00382
The brats18 code supports test time augmentation, where the final prediction for a test image is obtained by fusing predictions of multiple transformed versions of that image. This is the main difference from the brats17 code.
- Download the source code of this repositry, and the source code of brats18 project.
git clone https://github.com/taigw/brats18_docker.git
cd brats18_docker
git clone https://github.com/taigw/brats18.git- Build the docker image.
docker build . < DockerfileYou will get some screen outputs like Successfully built 4dff82933875 where 4dff82933875 is the docker image id.
- Set docker memory to 16G.
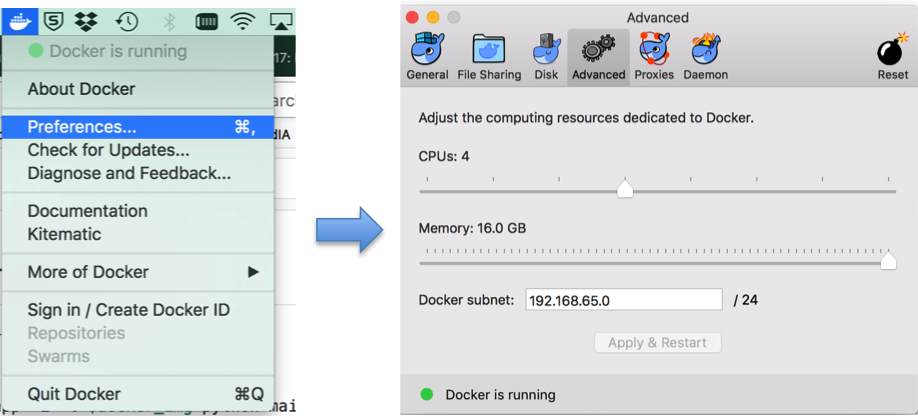
Since GPU computing with docker is not implemented, only CPU is used when running the segmentation code in docker. The code requires a large memory and ~300s for segmenting one brain tumor with CPU. Please set the memory for docker to 16G, as illustrated in the following:
- Open the
./single_prediction.shfile and editdirectoryandmy_image.
# content of ./single_prediction.sh
directory=/Users/guotaiwang/Documents/data/BraTS2018_Validation
my_image=4dff82933875
docker run -v $directory:/data --workdir=/usr/src/app -i -t $my_image python docker/main.py docker/test_cfg.txt
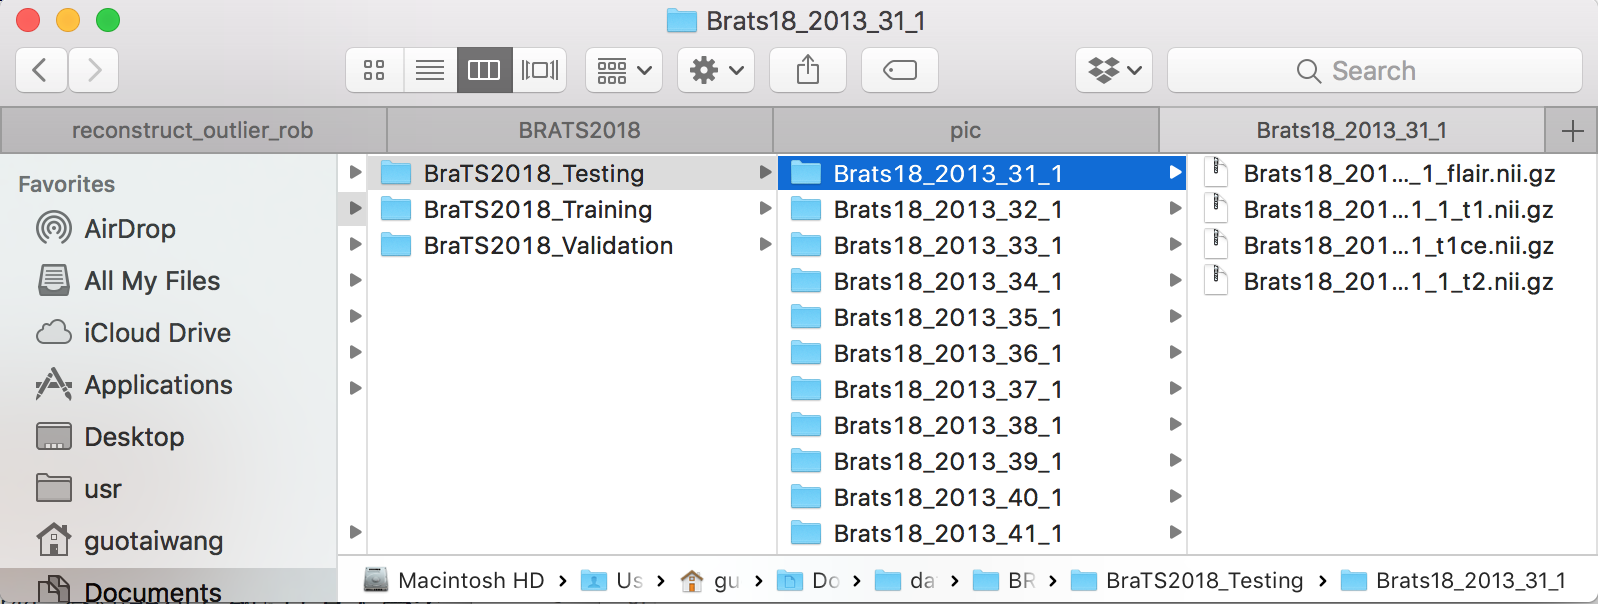
where directory is the dir in which the testing images are stored, such as BraTS2018_Validation and BraTS2018_Testing. Please set directory as full path of the folder containing testing images. Then the folder should look like:
Set my_image as the docker image id obtained in the previous step. Note that each time when you build the docker image, the id may change and my_image should be reset accordingly.
- Now run the bash file to start the segmentation with single prediction (no test-time augmentation).
bash ./single_prediction.shThe segmentation results will be saved to $directory/Brats18_XXXX_XX_1/results/tumor_tiggw_class.nii.gz.
- To use test-time augmentation with multiple predictions. Open the
./multiple_predictions.shfile and editdirectoryandmy_image.
# content of ./multiple_predictions.sh
directory=/Users/guotaiwang/Documents/data/BraTS2018_Validation
my_image=4dff82933875
docker run -v $directory:/data --workdir=/usr/src/app -i -t $my_image python docker/main.py docker/test_cfg_tta1.txt
docker run -v $directory:/data --workdir=/usr/src/app -i -t $my_image python docker/main.py docker/test_cfg_tta2.txt
docker run -v $directory:/data --workdir=/usr/src/app -i -t $my_image python docker/main.py docker/test_cfg_tta3.txt
docker run -v $directory:/data --workdir=/usr/src/app -i -t $my_image python docker/main.py docker/test_cfg_tta4.txt
docker run -v $directory:/data --workdir=/usr/src/app -i -t $my_image python docker/main.py docker/test_cfg_tta5.txt
docker run -v $directory:/data --workdir=/usr/src/app -i -t $my_image python docker/vote_result.py docker/vote_result_cfg.txt
As an example, five predictions are obtained and then fused into a single prediction here.
- Now run the bash file to start the segmentation with multiple predictions (test-time augmentation).
bash ./multiple_predictions.shThe segmentation results will be saved to $directory/Brats18_XXXX_XX_1/results/tumor_tiggw_class.nii.gz.
The current version of this docker repository only supports cpu-based computation, which is far slower than using gpu. To run the code with GPU, please see non-dockered version of brats18.

