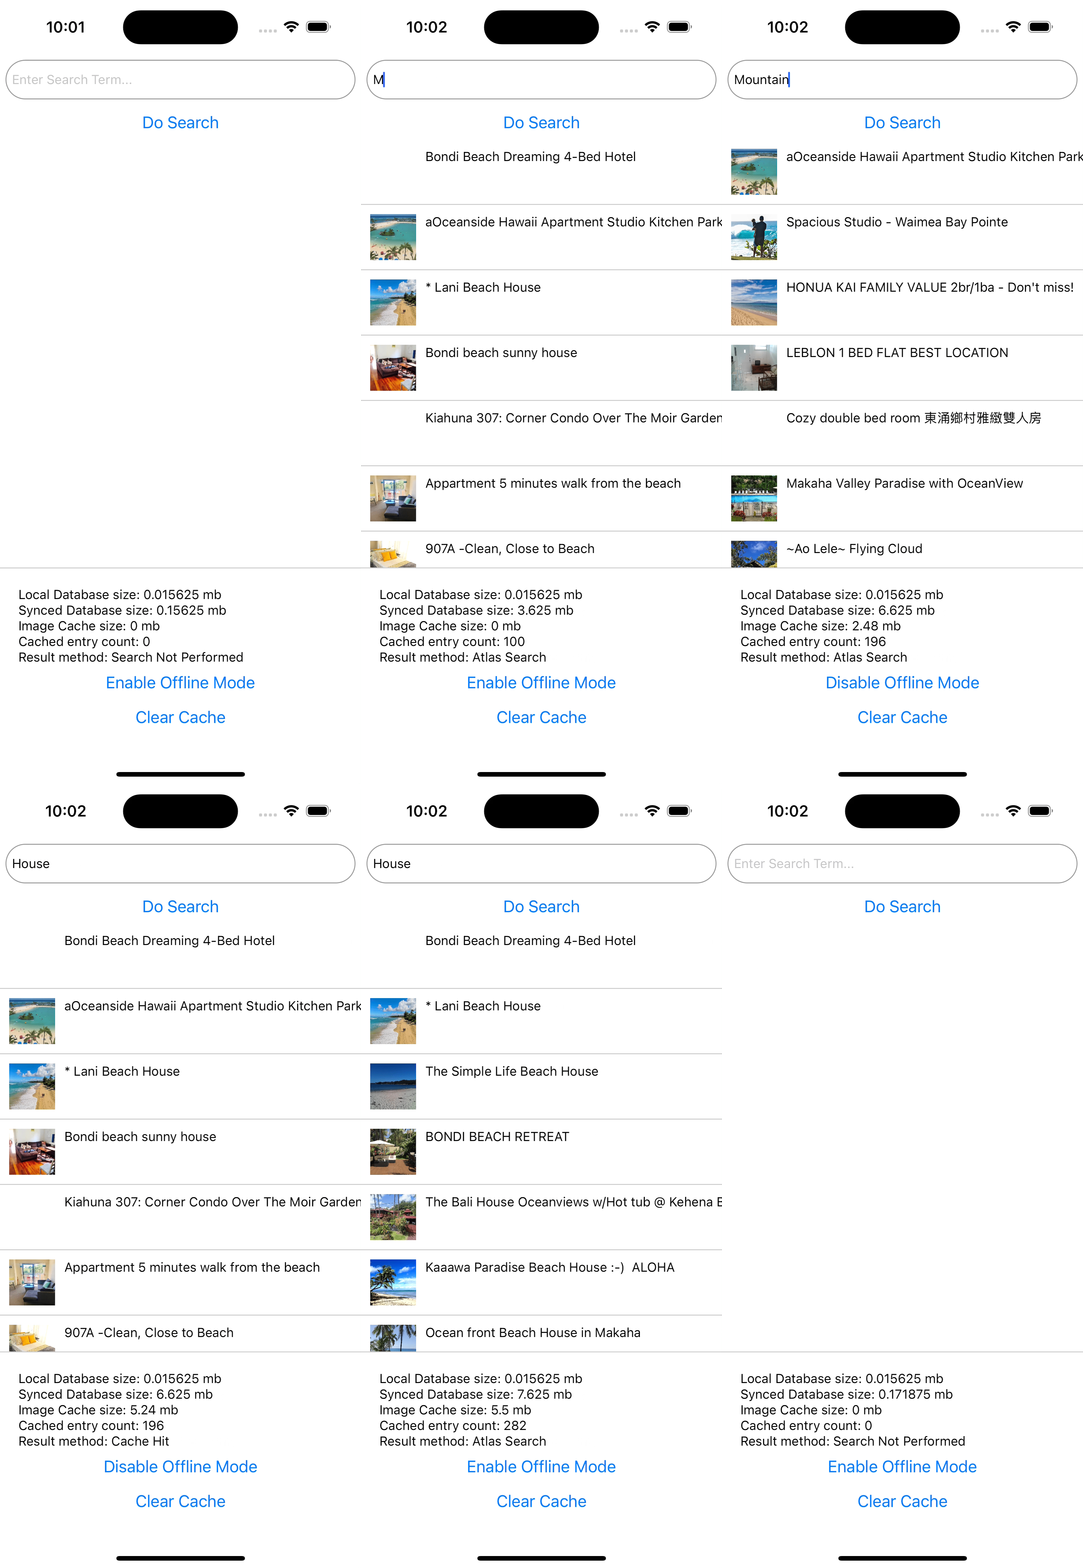
A AirBnB Listing Search Demo with Searchable Results when Offline Using Atlas Device SDK for React Native
A demo application showcasing how to use MongoDB's Atlas Device SDK for React Native in order to cache viewed collection items and view them offline. It uses anonymous auth to create a session which allows the demo user to search for AirBnB listings from the Sample AirBnB Listings dataset.
The following shows the project structure and the most relevant files.
To learn more about the backend file structure, see App Configuration.
├── app
│   ├── AirbnbList.tsx        - Main application screen
│   ├── AnonAuth.tsx          - Anonymous authentication component
│   ├── AppWrapper.ts         - Main wrapper with Realm Providers
│   ├── localModels.ts     		- Local only realm model schema
│   ├── localRealm.ts         - Local realm context and hooks
│   ├── syncedModels.tsx      - Synced realm model schema
│   └── syncedRealm.tsx       - Synced realm context and hooks
├── App.js                      - Entry point
├── sync.config.js                - Add App ID
├── package.json                  - Dependencies
└── README.md                     - Instructions and info
This app uses multiple Realms, which have been configured using createRealmContext. This creates separate providers and hooks to access either the local-only Realm or the synced Realm.
When opening a Realm, we can specify the behavior in the Realm configuration when opening it for the first time (via newRealmFileBehavior) and for subsequent ones (via existingRealmFileBehavior). We can either:
OpenRealmBehaviorType.OpenImmediately- Opens the Realm file immediately if it exists, otherwise it first creates a new empty Realm file then opens it.
- This lets users use the app with the existing data, while syncing any changes to the device in the background.
OpenRealmBehaviorType.DownloadBeforeOpen- If there is data to be downloaded, this waits for the data to be fully synced before opening the Realm.
This app opens a Realm via RealmProvider (see AuthenticatedApp.tsx) and passes the configuration as props. We use OpenImmediately for new and existing Realm files in order to use the app while offline.
See OpenRealmBehaviorConfiguration for possible configurations of new and existing Realm file behaviors.
- Node.js
- React Native development environment
- Refer to the "React Native CLI Quickstart".
- Deploy a free Atlas cluster and create an Atlas database.
- Load the Sample Airbnb Dataset into your Atlas database.
- Several databases and collections exist in the sample dataset, but we will only be using the
sample_airbnbdatabase and itslistingsAndReviewscollection.
- Several databases and collections exist in the sample dataset, but we will only be using the
- Create a Search Index with an Index Name of
airbnb. This will be used for Atlas Search within the application
To import and deploy changes from your local directory to App Services you can use the command line interface:
- Set up App Services CLI.
- In the provided backend directory (the App Services App), update the following:
- Cluster Name
- Update the
"clusterName"in data_sources/mongodb-atlas/config.json to the name of your cluster. - (The default name is
Cluster0.)
- Update the
- App ID
- There is no
"app_id"defined in realm_config.json since we will create a brand new App. If you for some reason are updating an existing app, add an"app_id"field and its value.
- There is no
- Cluster Name
- Create and deploy the local directory to App Services:
appservices push --local ./backend- Once pushed, verify that your App shows up in the App Services UI. There will be a function called
- 🥳 You can now go ahead and install dependencies and run the React Native app.
From the project root directory, run:
npm installIf developing with iOS, also run:
npx pod-install- Copy your Atlas App ID from the App Services UI.
- Paste the copied ID as the value of the existing variable
appIdin ./sync.config.js:
export const SYNC_CONFIG = {
  // Add your App ID here
  appId: "<YOUR APP ID>",
};- Start Metro (the JavaScript bundler) in its own terminal:
npm start- In another terminal, start the app:
# Open the app on an iOS simulator.
npm run ios

# Open the app on an Android emulator.
npm run android
To run the app on an actual device, see React Native's Running on Device.
A great help when troubleshooting is to look at the Application Logs in the App Services UI.
If permission is denied:
- Make sure your IP address is on the IP Access List for your App.
- Make sure you have the correct data access permissions for the collections.
- See Set Data Access Permissions further above.
Removing the local database can be useful for certain errors.
On an iOS simulator:
- Press and hold the app icon on the Home Screen.
- Choose to remove the app and its data.
On an Android emulator via Android Studio:
- Quit the emulator if it is running.
- Open
Device Manager. - Select
Wipe Datafor the relevant emulator.
