
[](https://travis-ci.org/Tanner Nelson/HamburgerMenu)


Hamburger Menu
An Elegant UITabBarController Subclass
Features
- Quick installation
- Easy customization
- No changes to Storyboard layout required
Animations
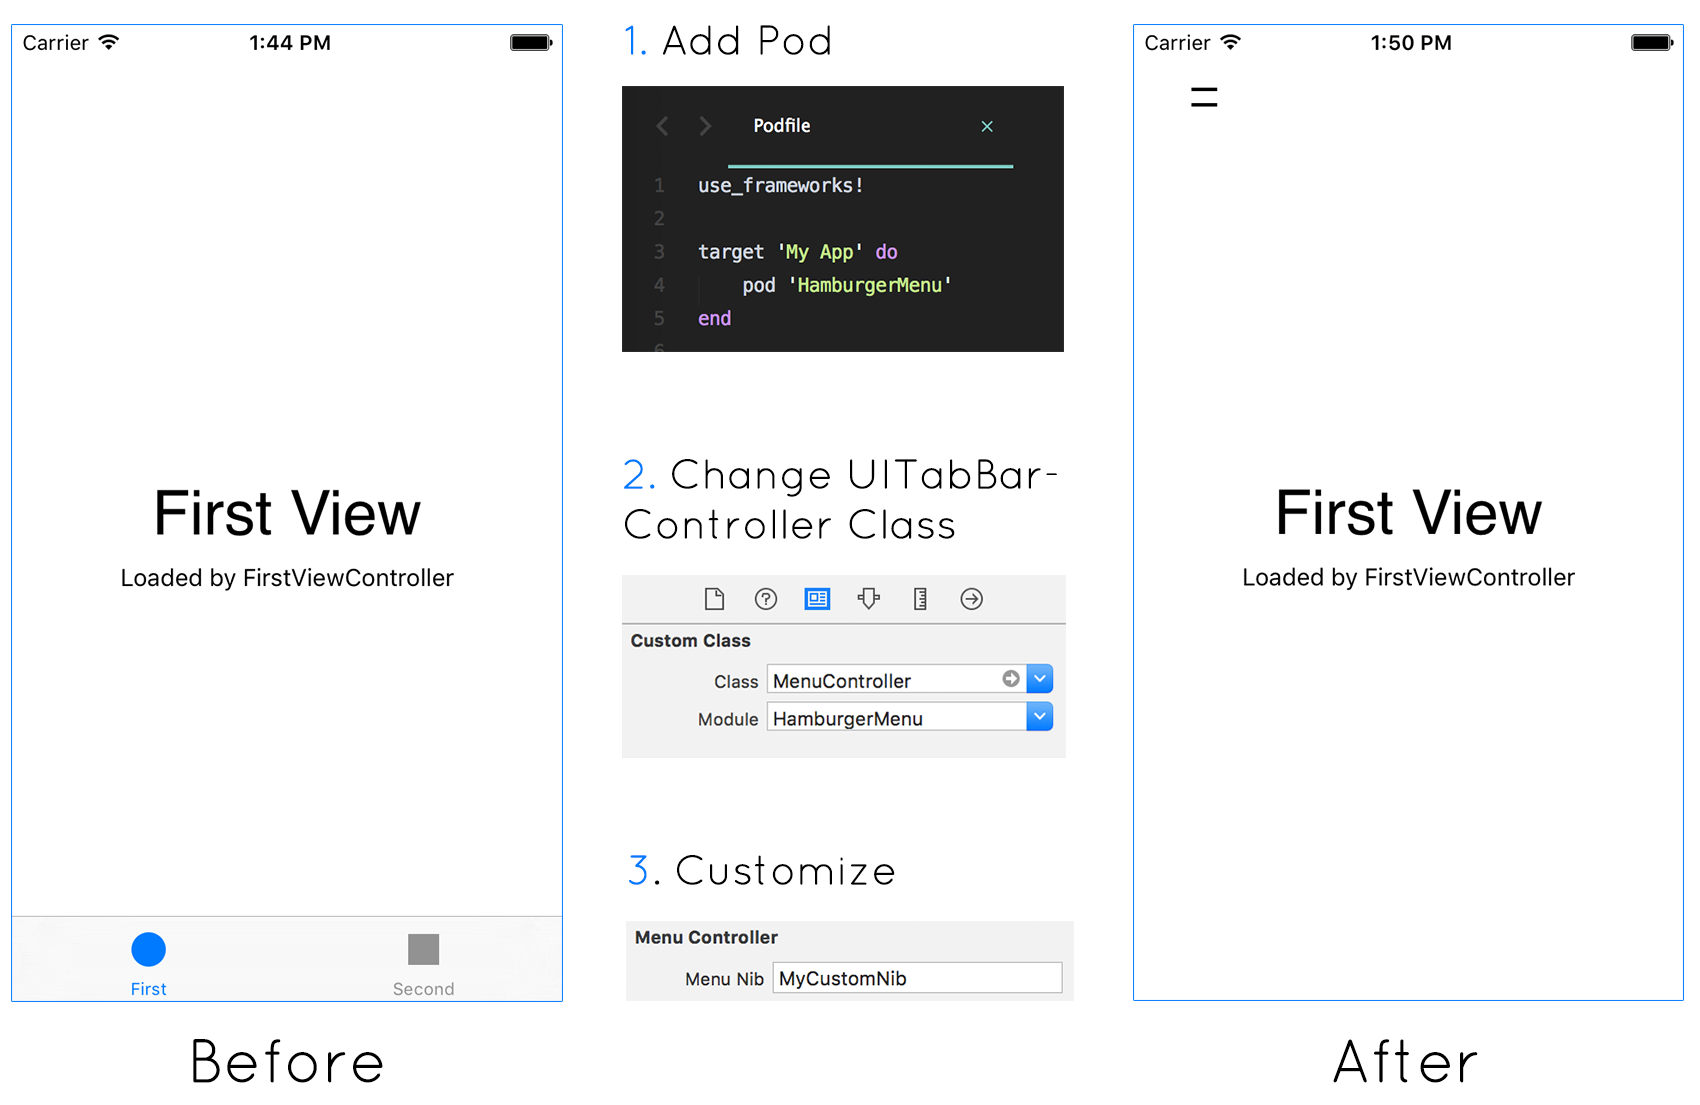
Hamburger Menu features spring animations and a menu button that transitions between opened and closed states.
Setup
Install
Add the Pod to your Podfile
pod "HamburgerMenu"Change UITabBarController Class
Change the class of your main UITabBarController to MenuController from the Module HamburgerMenu.
This will instantly transform your UITabBarController into a Hamburger Menu using the default menu nib.
Customize
The hamburger menu is easily customized by providing a subclass of MenuView to the MenuController.
1. Create MenuView Nib
Right click on your main Storyboard and select New File.... Choose User Interface and create a new View.
Name the view MyCustomNib (or whatever you want).
2. Create MenuView Subclass
Right click on the newly created .xib file and select New File.... Choose Source and create a new Cocoa Touch Class.
Name the class MyCustomNib (or whatever you named the nib) and make it a subclass of MenuView.
3. Prepare Nib
Open MyCustomNib.xib and set the UIView's class to MyCustomNib.
Open MyCustomNib.swift and import HamburgerMenu.
import HamburgerMenuOpen your main Storyboard and set your MenuController's Menu Nib to MyCustomNib (or whatever you named your nib). Do this by selecting the MenuController, going to the property panel, and entering the nib's (without .xib) name into the property box.
4. Add UI
You are now free to add whatever UI elements you want to the MyCustomNib.xib. Whatever you add here will show up in your Hamburger Menu.
Make sure to use Autolayout if you want your Hamburger Menu to behave correctly in all orientations and on all devices.
5. Switching Tabs
Call self.switchTab(_: Int, andClose: Bool) inside of your MenuView subclass to change the currently selected tab.
@IBAction func buttonForTabTwoTouchUpInside(sender: UIButton) {
    self.switchToTab(1, andClose: true) //index 1 = tab #2
}
You can also loop over self.controller.tabBar.items as is done in the default menu view or self.controller.viewControllers to dynamically create buttons for all children view controllers.
Look at DefaultMenuView.swift in the Pod to see examples of this being done with a UIStackView.
Disclaimer
Apple recommends against using hamburger menus in your UI because they can make your app harder to use. See Designing Intuitive User Experiences - 211 WWDC 2014 session (at 31’ 57") to learn more.
This repo is for the special cases where a hamburger menu is the better solution or where finalized design files demand it (the latter being the reason it was made).
Author
Tanner Nelson
License
HamburgerMenu is available under the MIT license. See the LICENSE file for more info.