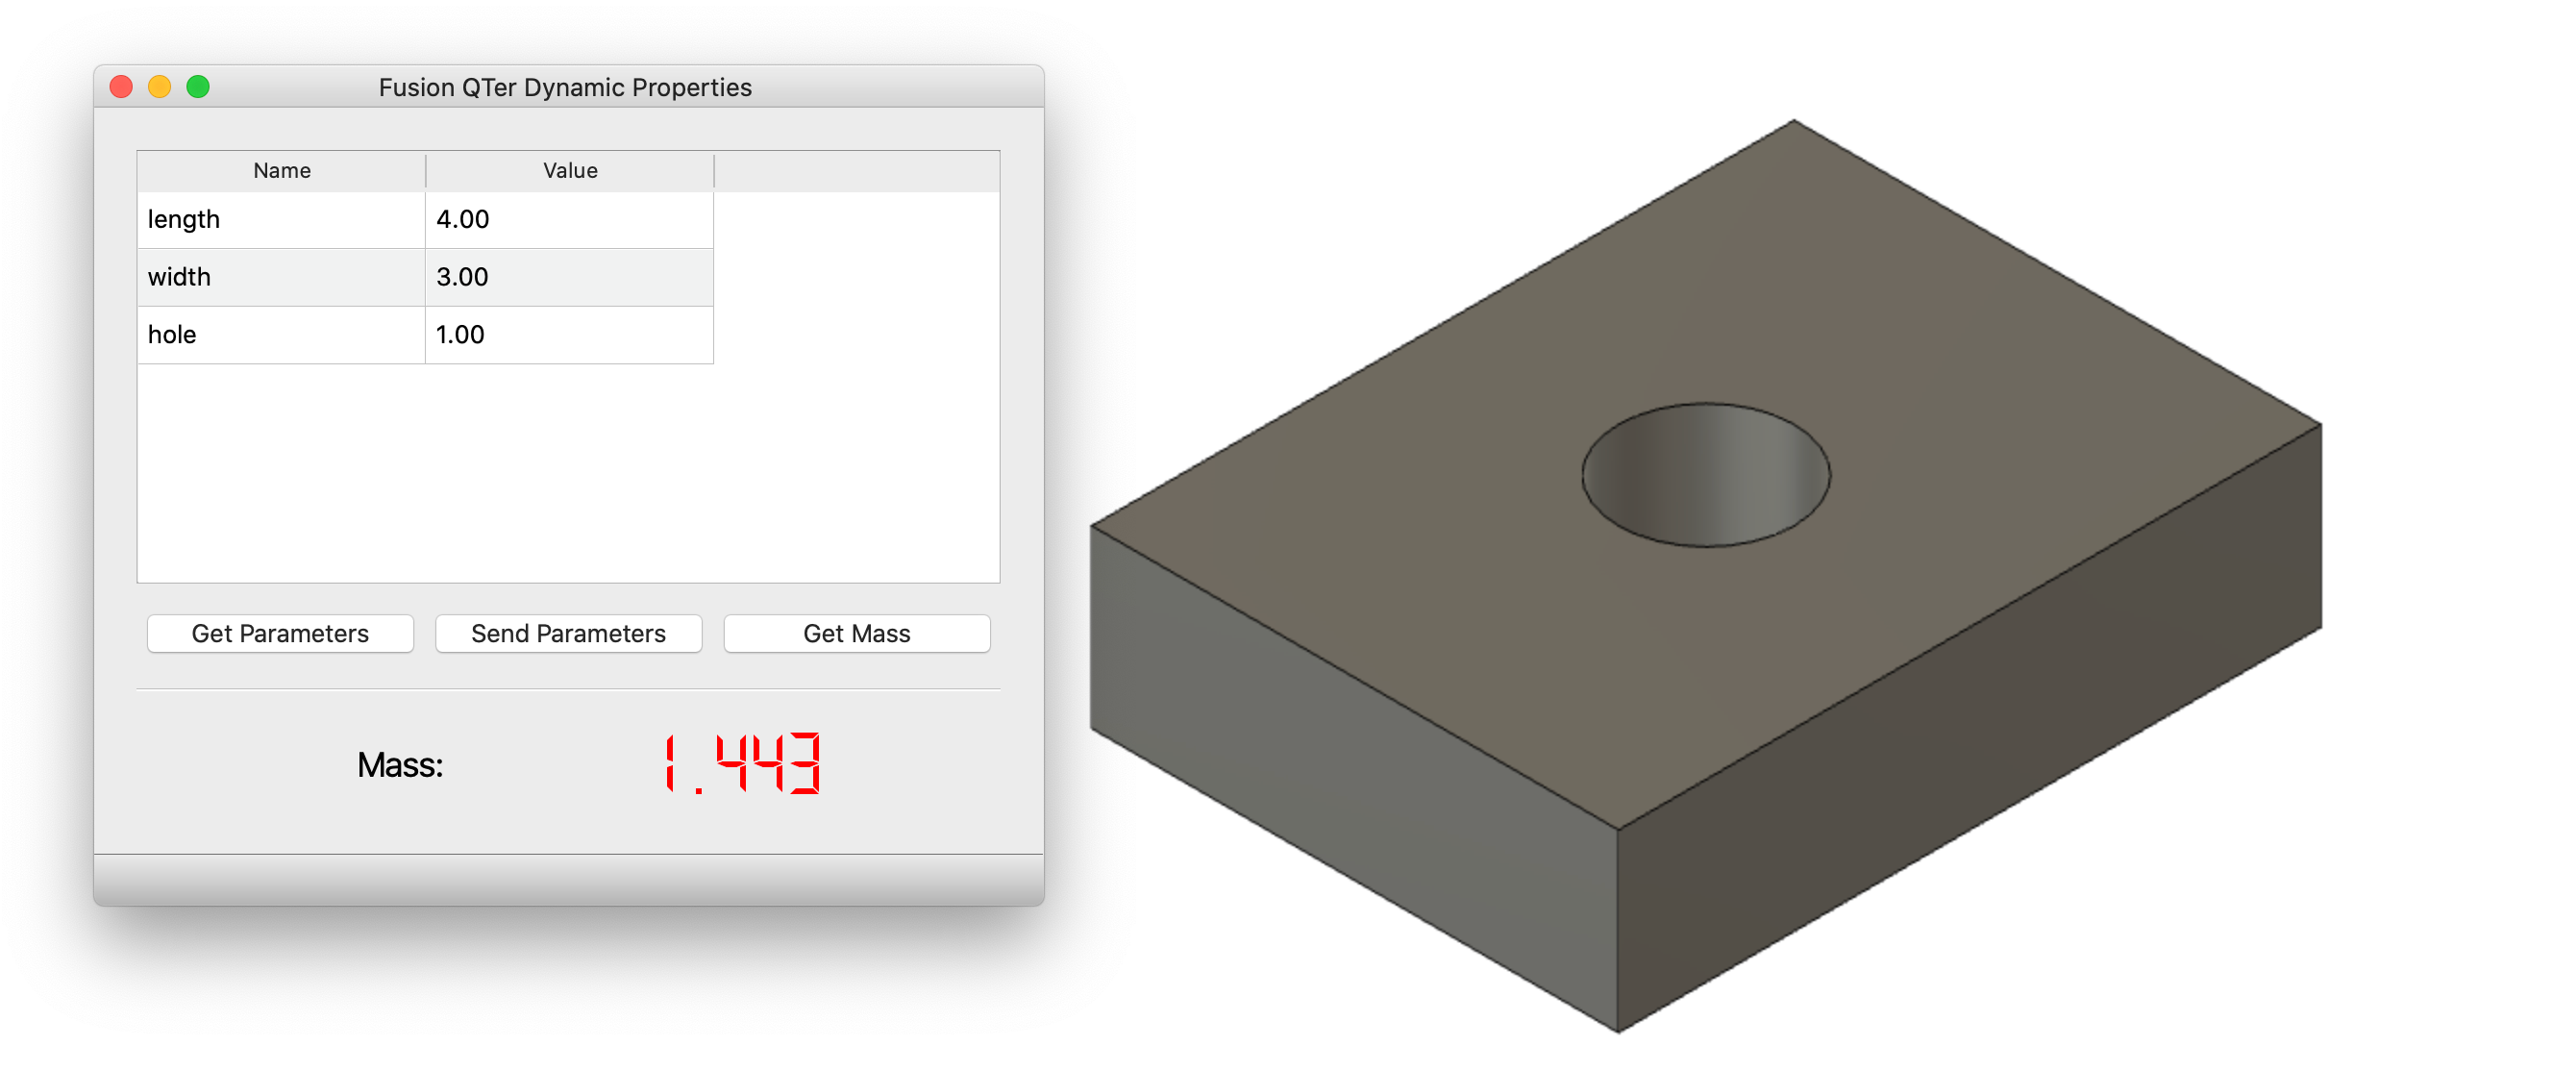
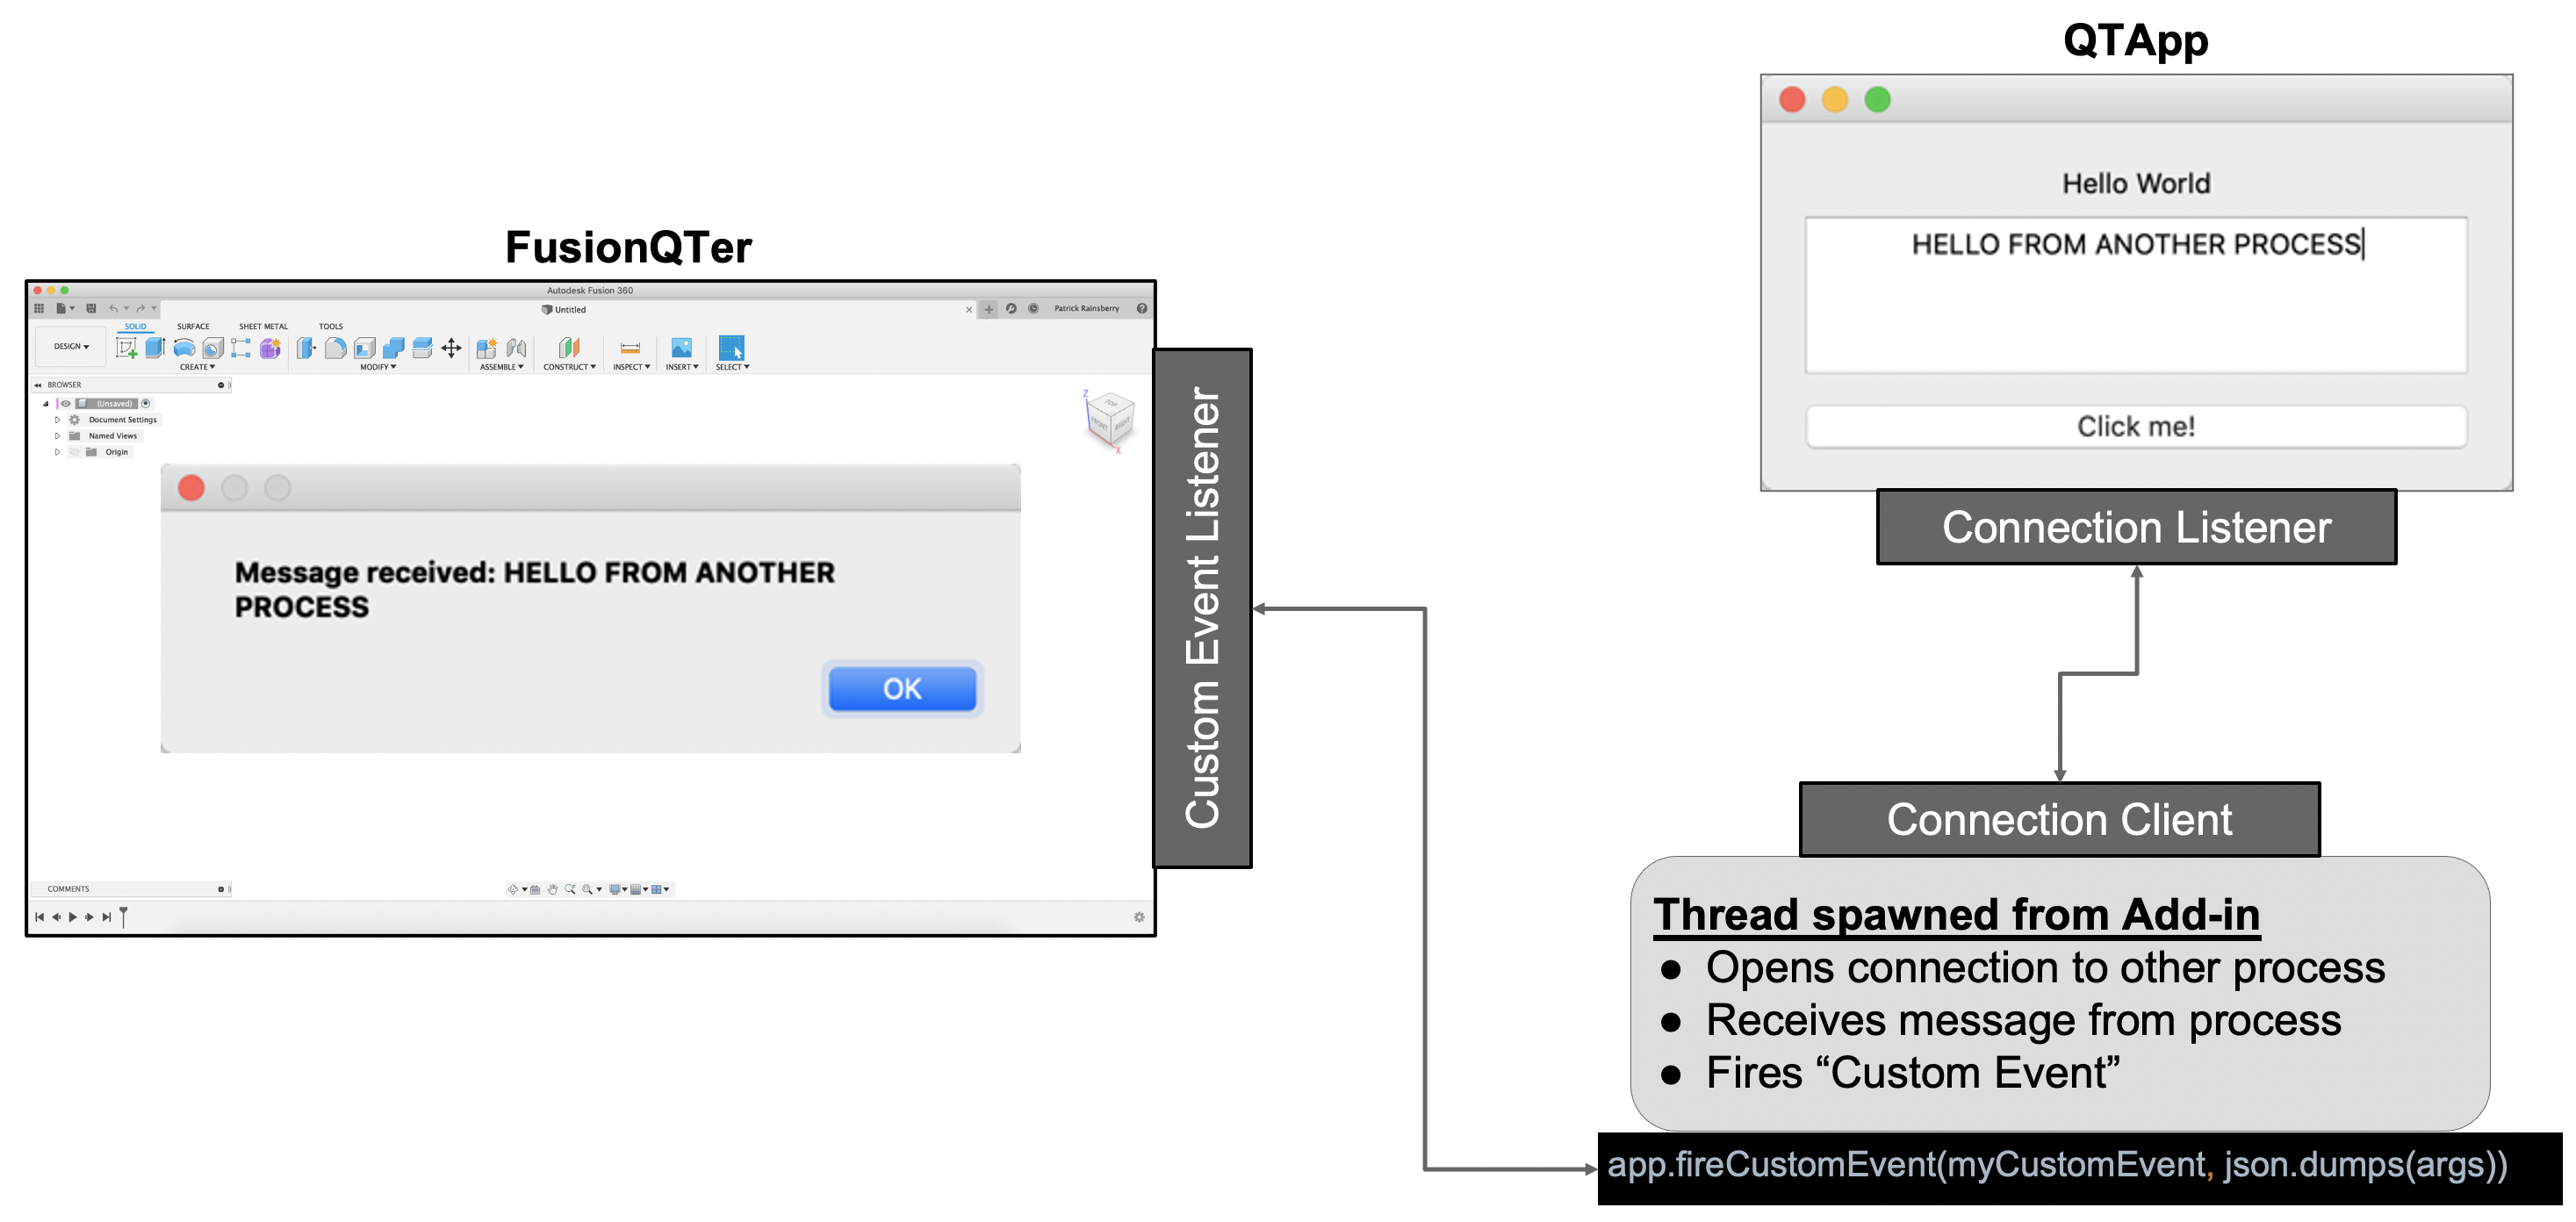
Demo app showing communication between a standalone QT Application and a Fusion 360 Add-in.
This repo contains essentially two independent sets of applications.
/QTApp
This is a collection of "standalone" python apps that uses PySide6 (QT) to create a simple GUI.
They will communicate to your Fusion360 Addin over a local socket connection.
/FusionQTer
This is a Fusion 360 add-in that will communicate to the standalone application.
By sending a receiving messages over a local socket connection you can react to commands executed in a separate application and send data responses back.
To run this example you need to make sure that the Fusion 360 addin and the standalone application have all of their requirements and are properly configured
IMPORTANT Before proceeding make sure you have installed and properly configured:
Navigate to your desired location in a terminal, clone the repo and update the apper sub-module:
Optionally you can clone this into the `Fusion 360 add-ins directory <#fusion-360-addins-directory>`_, but that is not necessary
Once you have navigated to the desired location clone the repo:
git clone https://github.com/tapnair/FusionQTer.gitYou SHOULD create a virtual environment in the QTApp Directory to run the standalone app.
Execute the following commands in the root directory of this repo:
cd QTApp
python3 -m venv venv/
source venv/bin/activate
pip3 install -r requirements.txtNavigate to the repo root directory in a terminal and update the apper sub-module:
cd FusionQTer
cd FusionQTer
cd apper
git submodule init
git submodule update
The apper directory inside of the FusionQTer directory should now be fully populated.
If this is not the case or you are having significant difficulty cloning the repo with git or syncing the sub-module directly through git, which is sometimes common, you can download this repo manually and download the apper source files directly from the apper repo.
It is VERY IMPORTANT that you get the naming correct.
For example manually downloaded github repos typically append the -master suffix to the zip file.
Ultimately you should have a directory structure that looks like this:
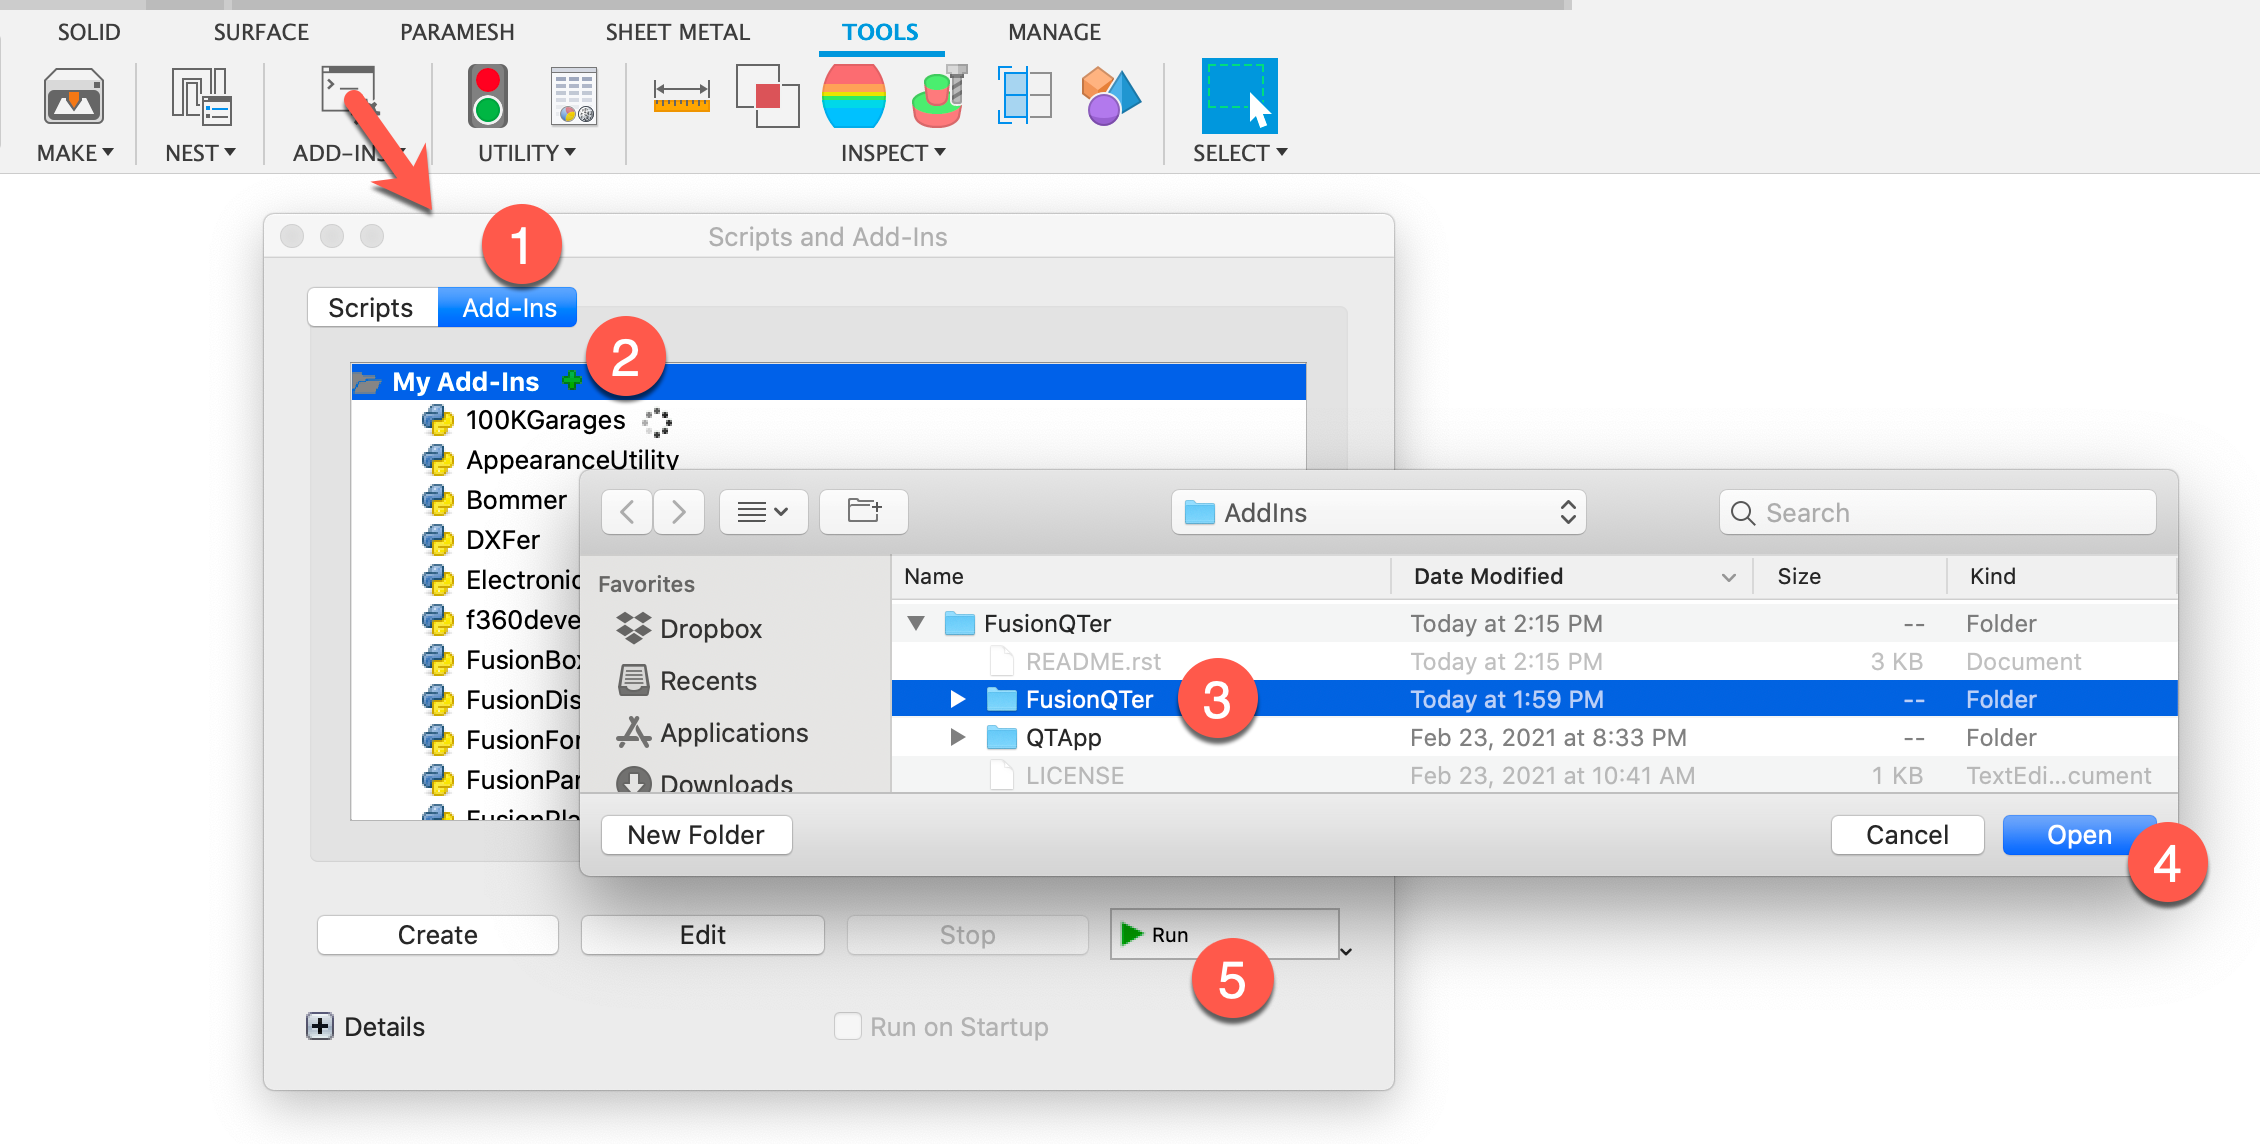
You need to actually register the add-in location in Fusion 360:
- In Fusion 360 launch the Scripts and Add-ins command and select the add-ins tab
- Press the green plus sign
- Navigate to the FusionQTer/FusionQTer sub-directory
- Click Open to add this as a recognized add-in within Fusion 360
- Now select FusionQTer in the add-ins list and click: Run
Note: It is important to do it in this order!
The QT App needs to start first. It is setting up a Listener client and waiting for a connection before displaying the UI.
If you are doing testing and need to restart the standalone QT App you will also need to reset the connection from Fusion 360 there is a command to do that from the QTer toolbar.
Run one of the main.py files from one of the QTApp sample directories in the virtual environment.
See above for how to create the virtual environment.
Assuming you are in a terminal in the QTApp/1_SimpleTextBox Directory:
python3 ./main.pyYou can also use your IDE (VS Code, PyCharm, etc.) to create a run configuration for this.
Start the addin from within Fusion 360 (if it is not already started).
If you close the QT APP or make changes and restart it you need to restart the connection thread in Fusion 360.
You should see a command that will do this from the Fusion 360 GUI.
The following libraries and their subsequent dependencies are used for the QTApp
- PySide6
Samples are licensed under the terms of the MIT License. Please see the [LICENSE](LICENSE) file for full details.
FusionQTer was written by Patrick Rainsberry.
A few miscellaneous notes on usage and setup
Here are the typical locations of the standard Fusion 360 add-ins directory:
Mac:
/Users/**USERNAME*/Library/Application Support/Autodesk/Autodesk Fusion 360/API/AddIns/*
cd ~/Library/Application\ Support/Autodesk/Autodesk\ Fusion\ 360/API/AddInsWindows:
C:Users**USERNAME*AppDataAutodeskAutodesk Fusion 360APIAddIns*
cd %AppData%\Autodesk\Autodesk Fusion 360\API\AddInsInstall Python for your operating system. Fusion 360 uses Python 3.7 so it is recommended to install this version locally as it will simplify setting up your development environment in general.
Consult the official Python documentation for details.
You can install the Python binaries from python.org.
Git is a free and open source distributed version control system designed to handle everything from small to very large projects with speed and efficiency.
You will need to have git installed to properly setup your local environment. It is recommended to just install github desktop if you do not already have git installed locally.
Alternatively you can review other installation options.
Ensure that your bin folder is on your path for your platform.
Typically ~/.local/ for UNIX and macOS, or %APPDATA%\Python on Windows.
(See the Python documentation for site.USER_BASE
for full details.)
MacOS
For bash shells, add the following to your .bash_profile (adjust for other shells):
Add ~/.local/ to PATH with the following shell command:
export PATH=$HOME/.local/bin:$PATHRemember to load changes with source ~/.bash_profile or open a new shell session.
Windows
Ensure the directory where cookiecutter will be installed is in your environment's Path
in order to make it possible to invoke it from a command prompt.
To do so, search for "Environment Variables" on your computer
(on Windows 10, it is under``System Properties`` --> Advanced) and add that directory to the Path
environment variable, using the GUI to edit path segments.
Example segments should look like %APPDATA%\Python\Python3x\Scripts,
where you have your version of Python instead of Python3x.
You may need to restart your command prompt session to load the environment variables.
Setting up Python on Windows can be ridiculously frustrating for some reason. There are many other ways to do it. There are a number of resources online to help, such as Configuring Python (on Windows) but I encourage you to look further if you are still having trouble.


