Some Python scripts to be used with the Glyphs font editor, written by Tim Ahrens.
To install Freemix in Glyphs,
- download the whole freemix package using “Clone or download”, “Download ZIP”.
- in Glyphs, press Cmd+Shift+Y, which opens a Finder window
- move the
.pyfiles from the freemix package into theScriptssubfolder - move the
.glyphsReporterand.glyphsPalettefiles into thePluginssubfolder - in Glyphs, open Preferences (Cmd+,) / Addons / Modules and press “Install Modules”
- restart Glyphs
See also: Font Remix Tools for Glyphs, Just Another Foundry
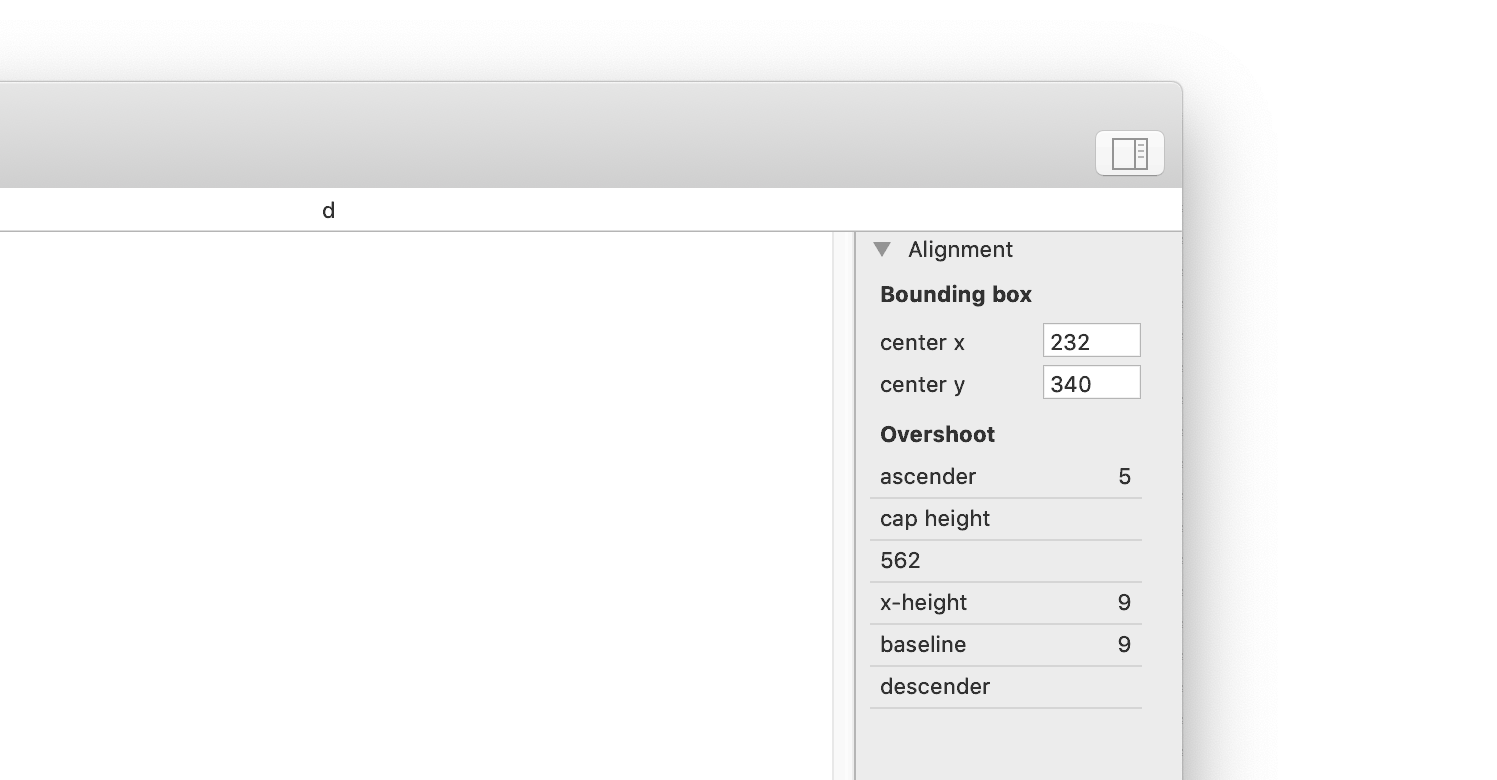
The palette shows the position of the center of the glphs’s bounding box. This works with components, with multiple glyphs selected and is also editable. Useful for centering all case-sensitive punctuation vertically, or to check whether mathematical operands are on the same x position (use Glyphs’ built-in glyph info to check whether they have the same advance width). Note that the bounding box center may be .5 even if your font has a grid of 1 without subdivisions (i.e. integer coordinates). The node/path selection is intentionally ignored.
The Overshoots section displays the overshoot of the selected glyph(s) relative to each alignment zone.
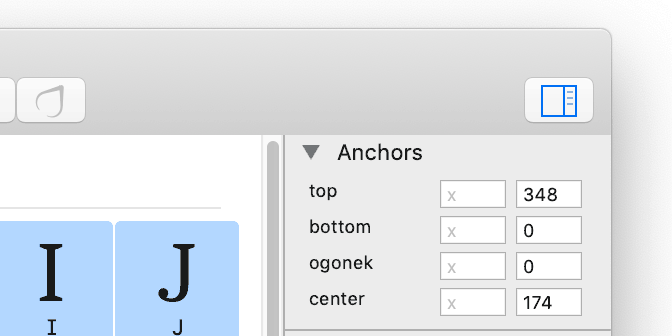
The palette shows the position of anchors in the selected glyphs. This helps you check for consistent positioning of anchors if multiple glyphs are selected. For example, select A–Z to see whether all top anchors are on the same height, and adjust their position. If the position of the anchors is not identical in all selected glyphs then a gray x or y is shown.
The palette shows the four most frequently used anchors. Setting the x or y position of a particular anchor via the palette only affects glyphs that have an anchor with the respective name (anchors are never inserted or removed).
The palette shows the name(s) of the selected glyph(s), split by suffix. The fields are editable.
This is useful for quickly changing the suffix of multiple glyphs at once.
This is one of the most powerful scripts in this collection. I highly recommend to give it a keyboard shortcut.
- Enter a glyph name.
- Press the left align or right align button.
- This script will clear the mask, then insert the specified glyph into the mask.
- With right align selected, the contours will be pasted as if the advance widths were aligned. For example, inserting the X into the K right-aligned will instantly give you a visual feedback whether the spacing is consistent.
- The keyboard shortcuts for left and right aligned are Enter and Esc. If you really have to cancel the dialog, use the little button on the dialog’s title bar.
- It is sufficient to enter the beginning of the glyph name, e.g. "deg" for "degree". Be careful if there are several glyphs in the font starting with your entry. The script will simply enter one it finds. – For non-master layers, the script will try to find matching (by name) non-master layers from the interted glyph. – For brace layers, if no corresponding brace layer is found in the inserted glyph, an interpolation is generated on-the-fly. A typical use case would be to set up a brace layer for the E, then insert the L so as to determine the standard (not visually corrected) interpolated stems.
Same as “Insert Glyph to Background” but the glyph is inserted into the active (foreground) layer, not in the background
Simulates the good ol' Mask to Master function we know from FontLab (i.e. replaces the current outline with the background).
You can give it the familiar Cmd+J shortcut via App Shortcuts in the Mac OS System Preferences.
The main improvement is that it is appplied only to the selection. In combination with Insert Glyph to Background, you can easily transfer parts of the outline between glyphs.
Pastes the background contours into the current layer.
Former FontLab users can give it the familiar Cmd+L shortcut via App Shortcuts in the Mac OS System Preferences.
Activates the next/ previous glyph in the tab for editing. Makes most sense if you give it a keyboard shortcut in the macOS system preferences.
-
This script toggles between the master layer and the last backup layer in the list.
-
Given a keyboard shortcut, this is useful for quickly comparing two versions of a glyph.
In the edit view, use this script to “jump” back and forth (or to circle) between alternate glyphs such as one, one.lf and one.tosf.
Same as the “Copy” button on the Layers palette but as a script. Because I really want a keyboard shortcut for this. Without a keyboard shortcut this script is completely useless. Sorry.
Removes all backup layers (i.e. those created using the "Copy" button) from the selected glyphs.
Symmetrifies the glyph shape.
S - creates point reflection (rotational symmetry)
T - creates horizontal reflection symmetry
C - creates vertical reflection symmetry
H - creates 2-axis symmetry (ie. all the above)
-
- creates 5-fold rotational symmetry, useful for asterisks (note that this automatically also applies horizontal reflection symmetry)
The buttons are available only as far as the node structure allows.
Prints the interpolation coefficients for each master in all instances.
Rounds the kerning values to full integer numbers.
In addition, values smaller than MIN_VALUE are erased.
Run this macro while in the Font View.
The macro selects all glyphs that
- export
- do not have a Unicode value and
- are not covered by any OT feature
i.e. are not accessible in the final font.
These glyphs can usually be excluded from the final exported OTF font.
- Rounds the kerning values to full integer numbers.
- In addition, values smaller than MIN_VALUE are erased.
Expand Kerning like we know it from FontLab.
Removes all hints from the selected glyphs.
Removes all zero-thickness hints from all glyphs in the font.


