After this lesson, you will be able to:
- Create an Angular service to share information with all the components in your application.
- Create Angular routes with parameters.
- Create different components that are connected to each other.
- Fork this repo
- Clone your fork into your
~/code/labsfolder.
Upon completion, run the following commands:
$ git add .
$ git commit -m"done"
$ git push origin master
Navigate to your repo and create a Pull Request -from your master branch to the original repository master branch.
In the Pull Request name, add your campus, name, and last name separated by a dash "-".
All the files of your project, including the service and the different components you will use to create your solution.
These days, movie theaters are hurting. The internet is damaging the industry, allowing people to search and download movies without paying for them. A cinema has contacted Ironhack to help them change people's views on movies.
Their idea is to redo their website by using Angular2. They think that if they use the latest technologies on their website, people will see them in a hip and cool new way.
The cinema has 5 different rooms, where you will be able to watch 5 movies. The cinema's latest proposal is to show people's favorite movies instead of the latest ones! Your task will be to help them decide which movies to show.
First, we are going to create an Angular Service to contain all of the movies' information. This service is going to have the following:
movies will be an Array of objects, that will contain one item per each cinema room. Each object inside the array will have the following information:
id(Number) - A unique number used to distinguish between movies.title(String) - Contains the movie title.poster(String) - A URL of a poster image for the movie.synopsis(String) - A brief description about the movie.genres(Array of Strings) - The genres of a movie, such as "Adventure", "Action", "Romantic Comedy" etc.year(Number) - Movie's release year.director(String) - Director of the movie.actors(Array of Strings) - The actors' names, using one string per each actor.hours(Array of Strings) - The times the movie is showing. i.e.Wednesday 19:30, 22:30would be an element of this array to indicate that you can watch a movie on wednesday at 19:30h and 22:30h.room(Number) - Room number of the movie. Will be a value between 1 and 5.
In the movies array you will have to create an element for each movie, and fill the different fields we just defined. We've provided a list of sample movies in src/sample-movies.js. Copy the code from this file into your service, you only have to fill in the hours and room numbers.
The movies service will also have two different methods that will be used later on the project. The methods you have to create are the following:
getMovies()- Returns the array of movies.getMovie(id)- Will receive a movie's id number as a parameter, and will return correct movie.
- Create a
Cinemaservice. - Add a
moviesarray of objects to the service. Each object will have the following properties:id, number.title, string.poster, string.synopsis, string.genres, array of strings.year, number.director, string.actors, array of strings.hours, array of strings.room, number.
- Add a
getMovies()method, that will return the array of movies. - Add a
getMovie(id)method, that receives a number id as a parameter and returns an object from theMoviesarray.
In the second iteration of this exercise, we will create two different routes to show the details of our cinema.
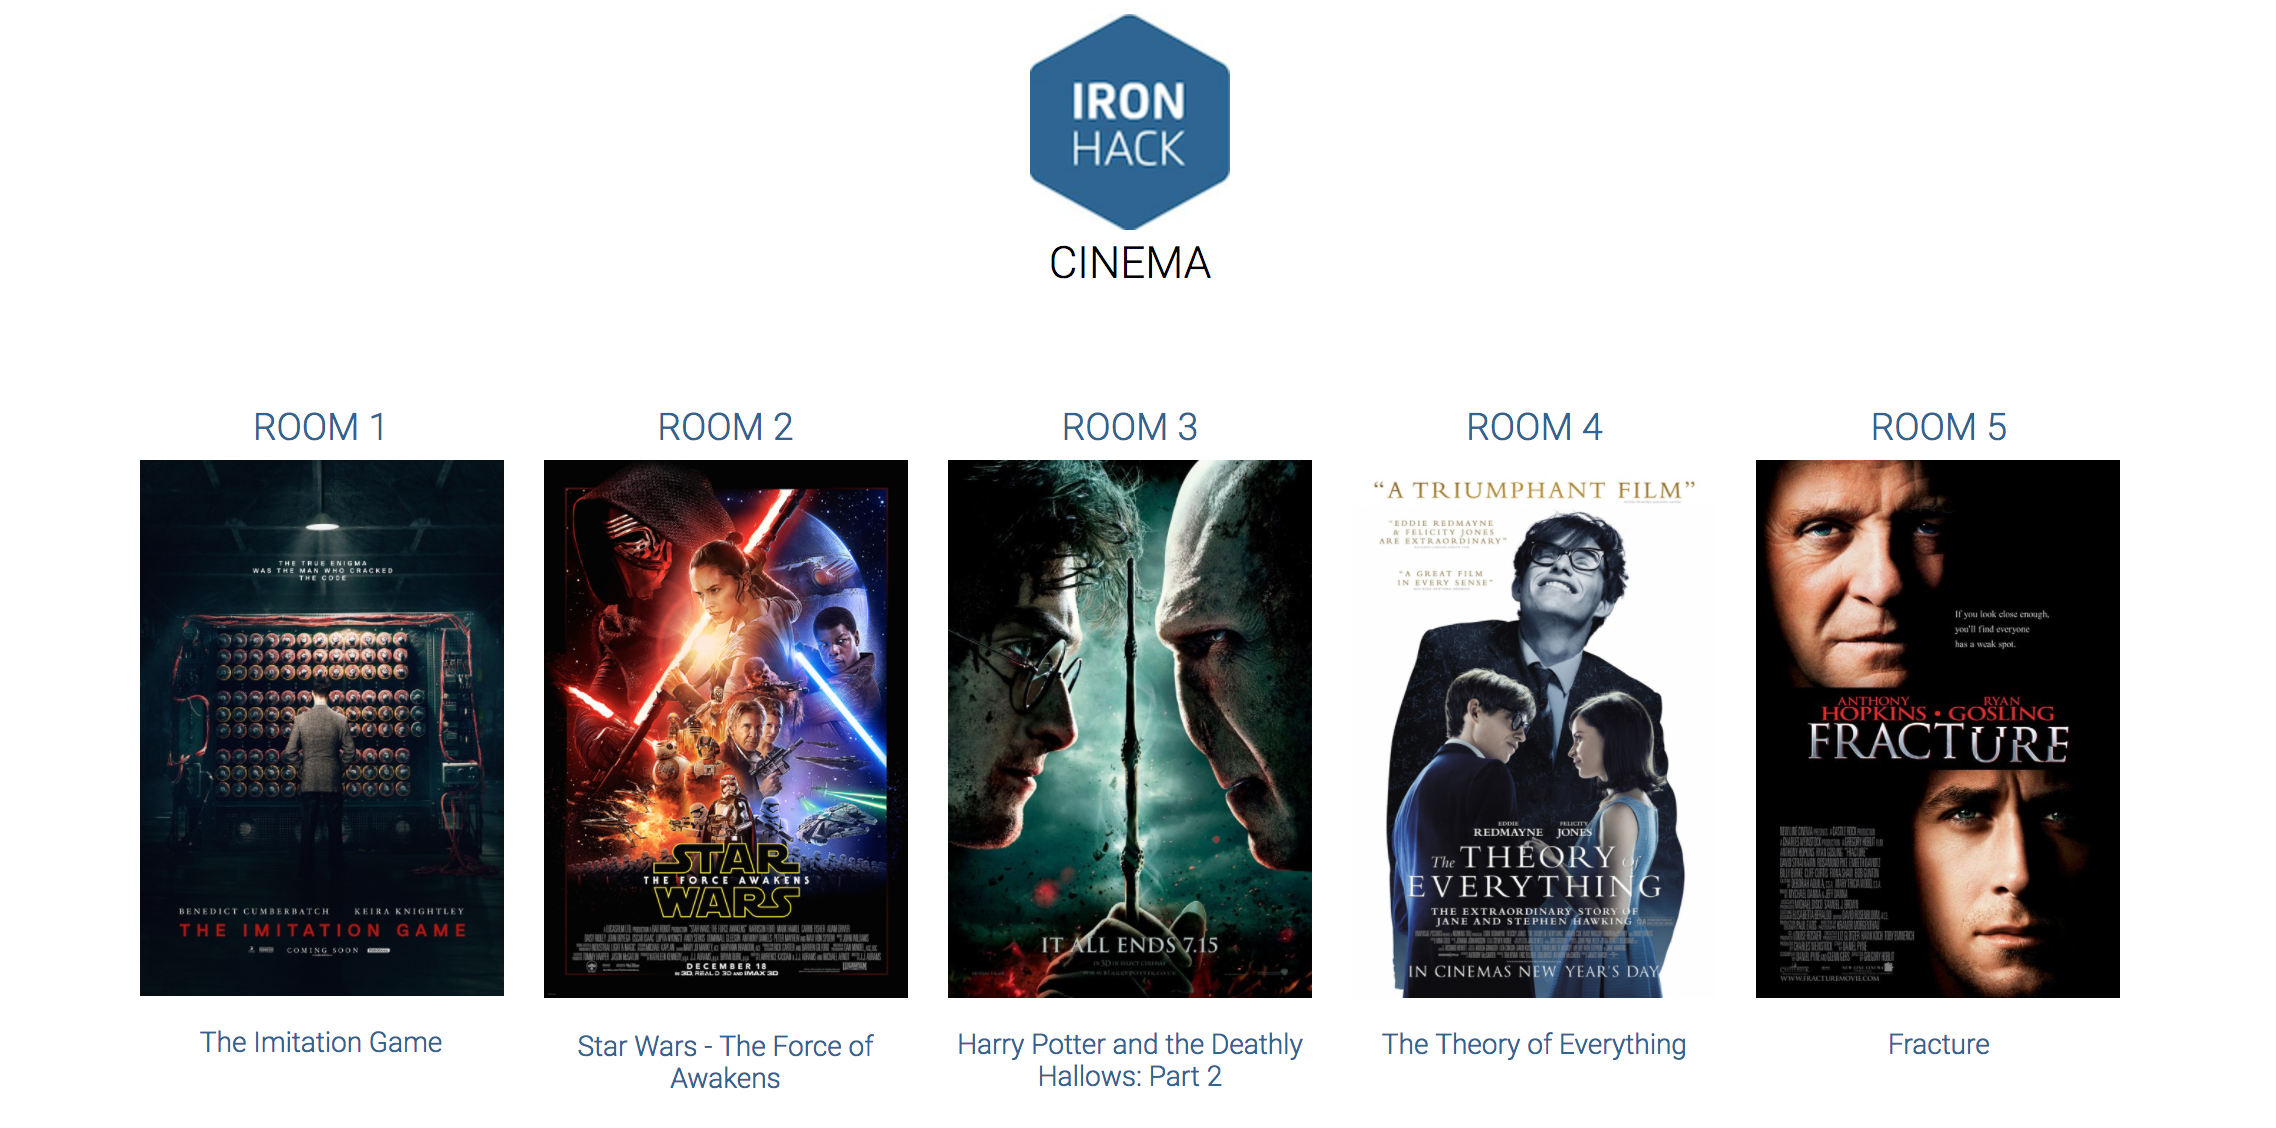
In the main page of the application, we will show a list with all the movies in the cinema. Once you click on one of the movies, you will see the movie's details.
We will create the components that will be used to show the information: MyHomeComponent and MyMovieComponent. Once we have created all the components we need, we have to create two different routes:
/home, that will render theMyHomeComponentcomponent./movie/:id, that will render theMyMovieComponentcomponent.
Remember, we also have to add the <router-outlet></router-outlet> tag in the app.component.html file to be able to load the different information depending on the indicated route.
- Create two components:
MyHomeComponentMyMovieComponent
- Create the different routes to show each component:
/home, to showMyHomeComponent/movie/:id, to showMyMovieComponent
- Add
<router-outlet></router-outlet>tag toapp.component.htmlfile
We are going to work on the MyHomeComponent component we created in the iteration above. We have to use the Cinema service to load all the movies' information that's contained in the movies array.
In the home page, we will show a list of all the movies. In addition, we will add a link to view the details of a movie.
Remember, we're trying to stand out in the cinema world and convert all of the hip millenials. Add some styling to the home page.
- Load the movies from the
Cinemaservice, with thegetMovies()method we've previously defined. - Display the movies on the
/homepage. - Create a link for each movie that directs the user to
/movie/:id. - Style the page.
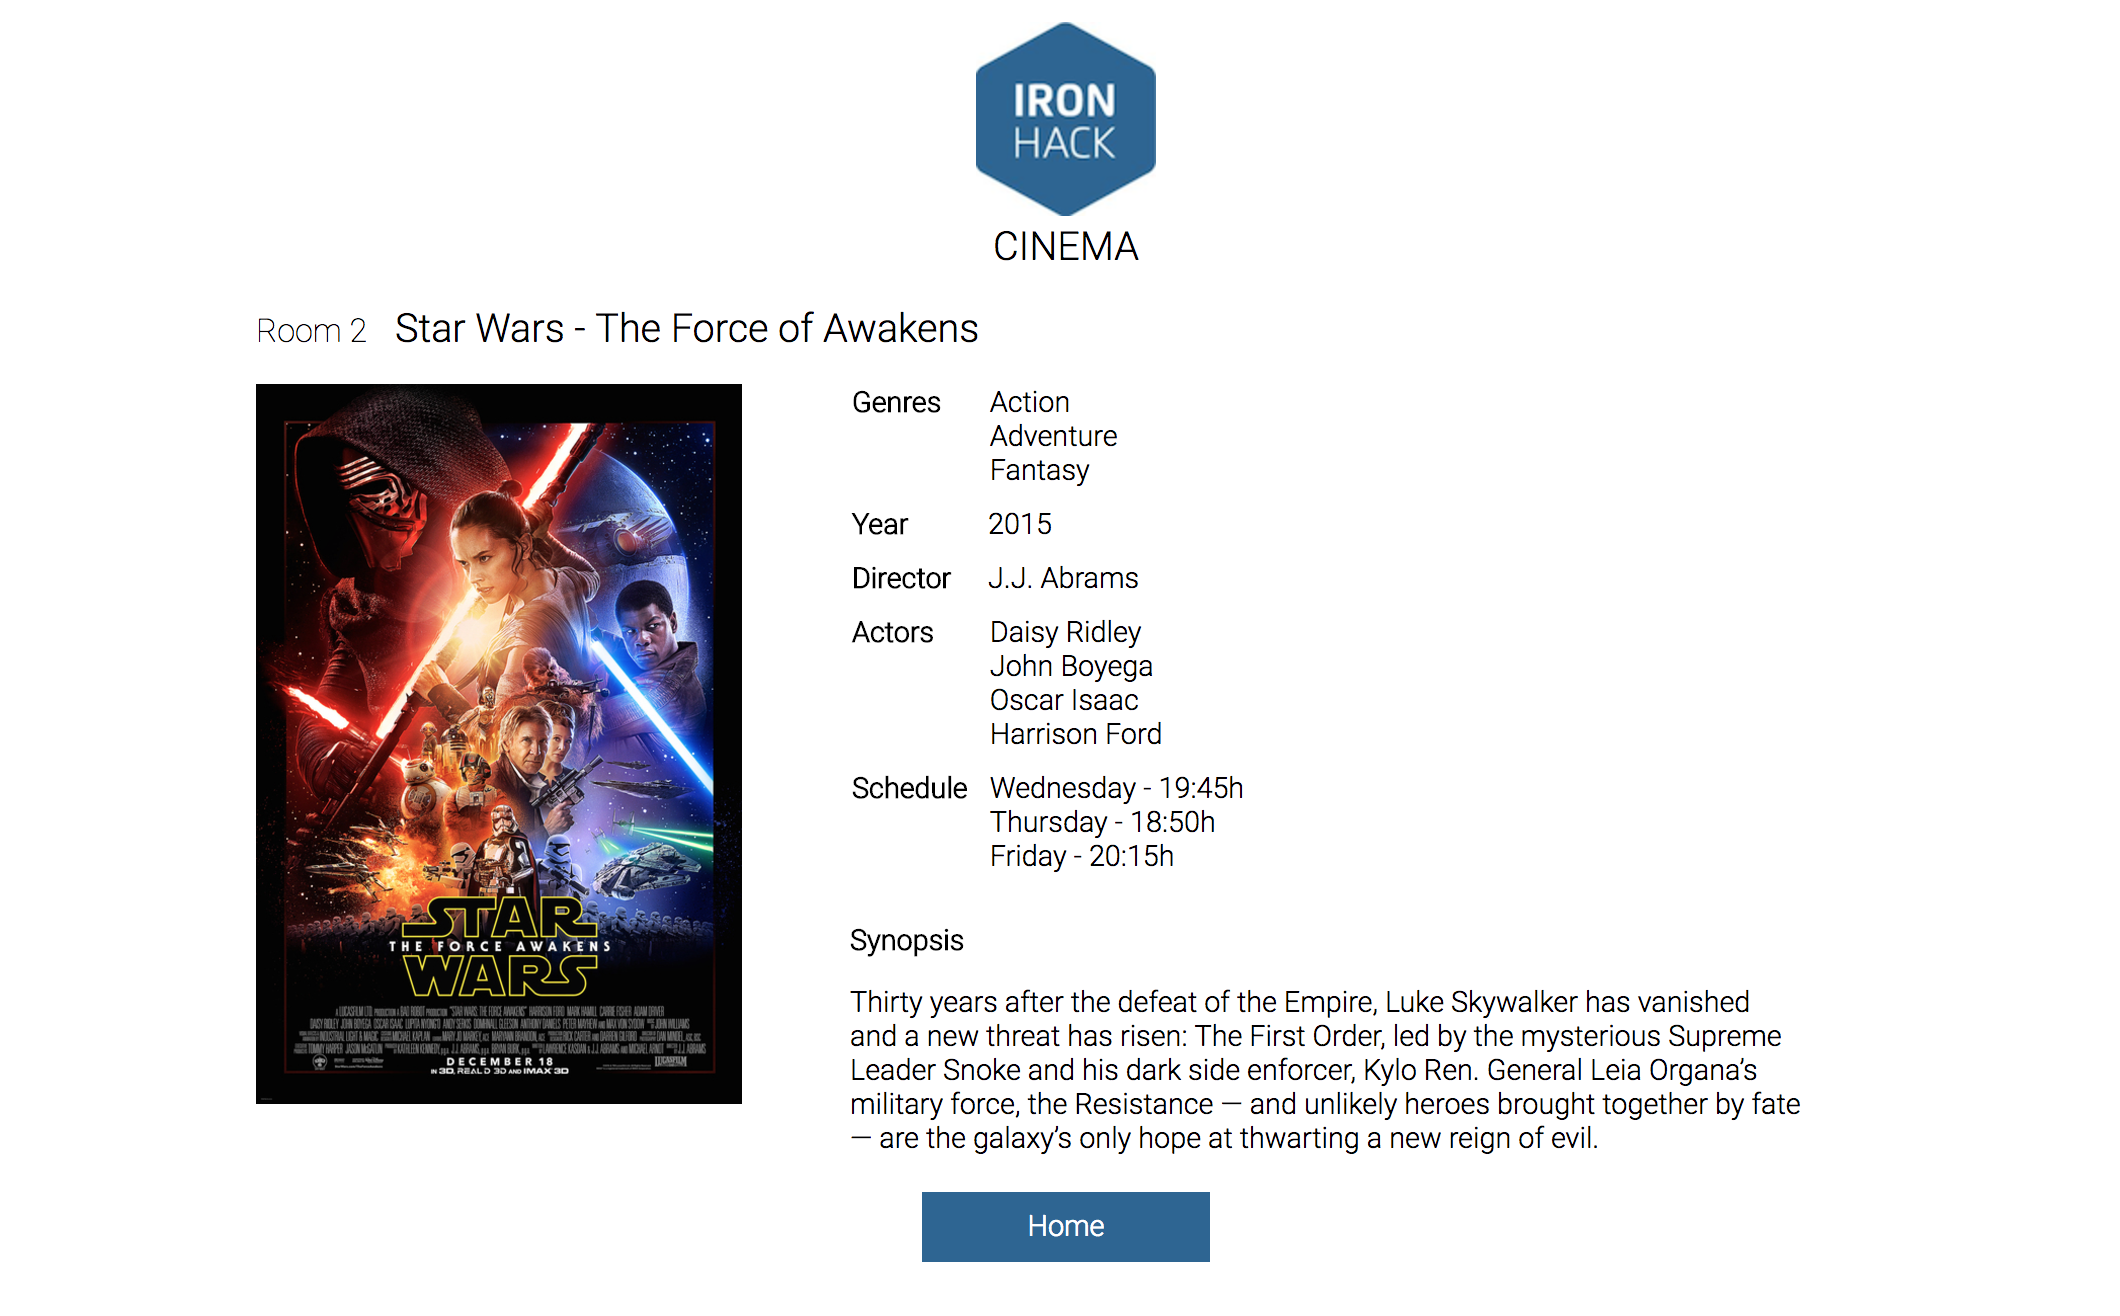
Once the user visits a movie page, we have to show them the movie's details. Again, we need to use the Cinema service to load the information of one movie. On this page, display all of the movie's details, and create a back button to return to the home page.
In addition, add a bit of styling to make the details page look nice.
- Load the movie from the
Cinemaservice, with thegetMovie()method defined on it. Use the:idparameter in the URL to get the correct movie. - Show the movie's details in the view.
- Add a "Go back" button, that takes the user to the home page.
- Style the page.
/Happy coding!


