A Visual Studio Code extension that allows graph based visualization of a code/model written in a DSL created using textX meta-language.
IMPORTANT: For 0.1 to 0.2 version migration (needed to be cross-platform functional):
- Reinstall the extension and follow the installation steps (or run the setup script) again
or - Update the extension and run only the step for creating the python symlink manually - 3) b) last step
- VS Code extension (Typescript)
- Interpreter of viewX model and custom DSL concrete model, generators of model preview and viewX project template structure (Python)
- Preview of model graph and socket server for interaction between extension and graph, each using Cytoscape.js and Socket.io libraries respectively (Javascript)
- Install Python 3.x version by following the instructions
- Make sure that python and pip has been added to the HOME environment variable by running the following commands:
    python -V
    pip -V
- Install Python virtualenv module using pip:
pip install virtualenv
IMPORTANT: It is possible that you will have both Python 2.x and 3.x versions already installed on UNIX system. It is OK to install virtualenv using pip (for Python 2.x) or just installing the package directly and making sure that virtualenv is added to the PATH. Just make sure that you have python3 script added to the PATH and the script will create virtual environment for the Python 3.x version with pip and other tools automatically.
- Install viewX extension from the VS Code Extension Marketplace or by searching for viewX extension from VS Code editor
- Restart Visual Studio Code editor
-
Go to the VS Code extensions default installation directory
-
Open viewX extension directory and from 'setup_scripts' directory, run a 'viewX_setup' script appropriate for your operating system. Parameters needed for the script are -path (path for the environment to be created) and -name (name of the virtual environment). Optionaly you can define -reqFile (path to the requirements file), by default the python_requirements.txt file is been used from extension's root folder. Examples:
- Windows 10 (Powershell) - (default extension path: 'C:\Users\<username>\.vscode\extensions'):
IMPORTANT: Before running the Powershell script make sure first that developer mode is enabled by openning Settings -> Update & Security -> For developers and under Use developer features select Developer mode.
.\viewX_setup.ps1 -path "some\parent\folder" -name "env_name" [-reqFile "path\to\requirements\file"]- Linux / macOS - (default extension path: '~\.vscode\extensions'):
Add the execution priviledge to the script by running:
chmod +x ./viewX_setup.shThen execute the setup script:
./viewX_setup.sh --path="some/parent/folder" --name="env_name" [--reqFile="path/to/requirements/file"]
-
Create Python virtual environment
-
Create viewXVEnv environment variable and set Python virtual environment's root path as it's value
-
Copy python_requirements.txt file to the created Python virtual environment
-
Install Python dependencies by running following command in a console:
- Windows 10 (Powershell):
& $Env:viewXVEnv\Scripts\pip install -r $Env:viewXVEnv/python_requirements.txt- Linux / macOS:
$viewXVEnv/Scripts/pip install -r $viewXVEnv/python_requirements.txt -
Create a python symlink in virtual environment's root folder pointing to python script (make sure it is 3.x version) within virtual environment (e.g. Windows: python -> .\Scripts\python.exe, Linux: python -> ./bin/python)
- Windows 10 (Powershell):
IMPORTANT: Check first that developer mode is enabled by openning Settings -> Update & Security -> For developers and under Use developer features select Developer mode.
Then open Powershell and run following command:cmd /c mklink "$Env:viewXVEnv\python.exe" "$Env:viewXVEnv\Scripts\python.exe"- Linux / macOS:
sudo ln -srf "$viewXVEnv/bin/python" "$viewXVEnv/python"
... and you're good to go! :)
- When extension is installed and loaded, press
ctrl+alt+v ikeyboard shortcut to initialize viewX project. If workspace is loaded, you can right-click on some folder from the tree view and selectviewX: Initialize Projectcommand. This way the selected folder will be used as destination for your viewX project and only the project name will be prompted. - Insert project path (if keyboard shortcuts are used) and then project name. It will create the folder structure and initialize valid viewX project template which include configuration file, DSL example in textX, 2 DSL model examples and 1 viewX model example. This will help a user to have a better understanding of how viewX project should look like and to:
- Write a custom DSL using textX
- Develop models in his own custom DSL
- Define a way of visualizing his models using viewX
- Visualize your model in a graph-like preview based on the defined visualization rules by pressing press
ctrl+alt+v pkeyboard shortcut or by rigth clicking the active document and selecting theviewX: Preview model on side panelcommand from the context menu. It will appear only on documents that match the filter defined in vxconfig.json file in loaded workspace. - You can make basic interactions with the graph on the preview (navigation, panning, zooming, selection, moving nodes etc.). Saved changes to the currently previewed concrete model are immediately applied to the graph (if the model is valid after saving).
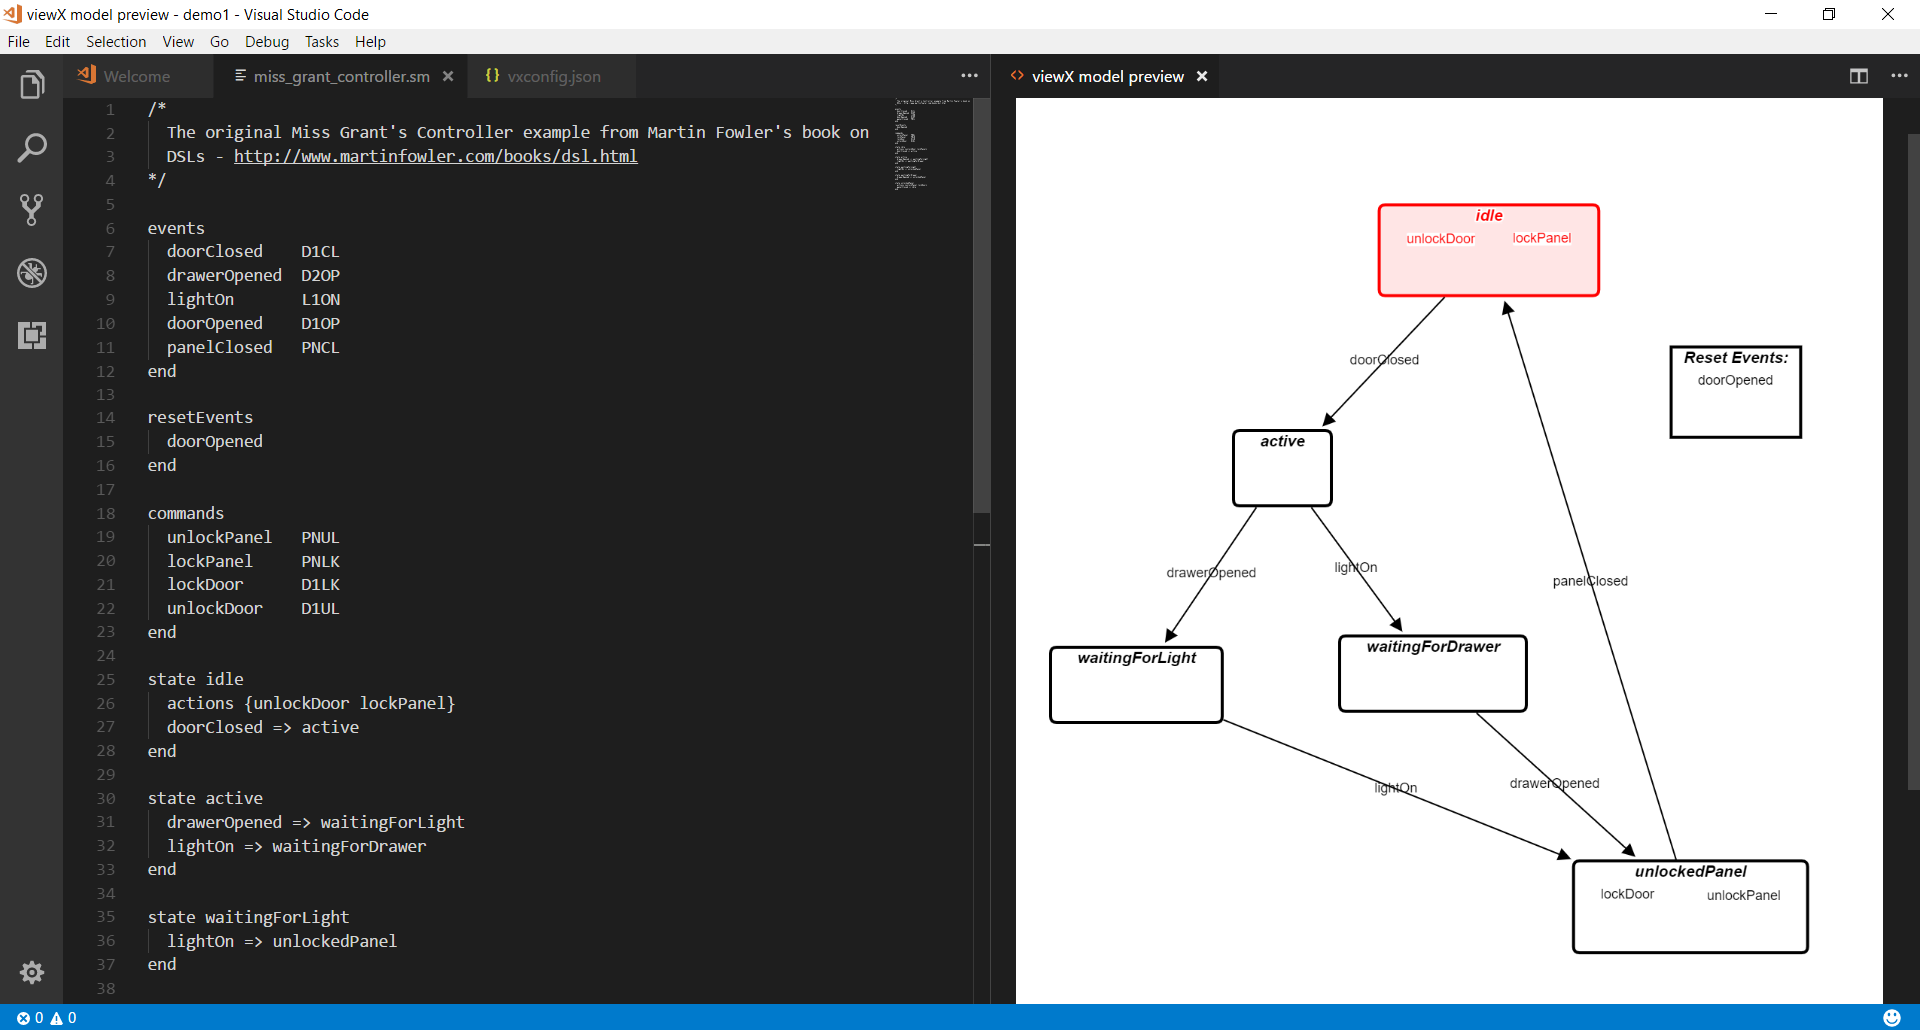
Let's say we want to visualize a Martin Fowler's state machine example similarly to the way it is visualized in this textX demo (about the details of this model and textX metamodel please watch the demo video).
This is where viewX extension comes into play. There are 2 complementary ways we can go to accomplish this:
- Use viewX DSL only to describe graph structure and apply valid Cytoscape.js styling within viewX model style section (example: vx_examples/state_machine/dot_like_css.vx)
- Use viewX DSL to define both the structure and the styling of the graph (example: vx_examples/state_machine/dot_like.vx)
Using any of these two completely different examples results in a graph to be displayed in the same way:
Depending on the complexity of the textX model and the user's preferences, one can define viewX model in a way anywhere between these two examples.
-
This extension is intended to provide useful features during development using textX framework, so it heavily depends on textX. TextX is a meta-language which allows user to create his own DSL language defined by textX grammar rules. For more information about textX please check documentation or GitHub repository.
-
Since textX is implemented in Python, it is also used to perform user's DSL concrete model and viewX visualization interpretation as well as generation of preview script. You can find more information on Python homepage.
-
Since model interpetation logic is done on python side, it needs to be called somehow from extension within Node.js process. For that purpose a python-shell Node module has been used. It allows us to easily make an asynchronous call to a python script from Javascript code, pass arguments during that call and receive data that can be sent from python script during execution. Code can be found on module's Github repository.
-
Preview logic is a regular Javascript code within preview.html file which uses Cytoscape.js Javascript library for graph visualization. For more details about this library please visit Cytoscape.js homepage.
-
The graph preview is based on web server hosting the preview.html file and BrowserSync server instance which synchronizes connected browser clients with hosted preview file if any changes are detected. The idea for this solution was made thanks to Yuichi Nukiyama and his repository for HTML live preview VS Code extension. The base code was taken from his extension and reimplemented in a way suitable for viewX extension so big thanks to Yuichi.
-
To enable communication between extension and graph preview file, and vice versa, a Socket.io Javascript library is used. This library is used for creating a socket based server listening on a port and distributing commands between graph preview browser clients and extension itself. More on this library and how it can be used can be found here Socket.io homepage.
-
Since many editor instances can be run separately, it necessary to support multiple Socket.io server instances to allow communication between multiple extension instances independently. For that a portscanner module is used to check which ports are taken and to retrieve available ports to be used by Socket.io servers.
-
For loading viewX project JSON configuration file (.vxconfig.json) from project's workspace we use load-json-file module.
-
If you have any issues, bugs, feature requests, suggestions or comments you want to report or share please create an issue on the issues page.
-
If you find time and will to contribute to this repository feel free to send a pull request.
-
For supported features and changesets by versions please check the CHANGELOG.md file.
-
For grammar, syntax and features overview supported by viewX language please check the documentation.
-
Tested on the following operating systems:
- Windows 10 (x64)
- Linux - Ubuntu 16.04 (x64)
- Linux - ElementaryOS Freya (x64)
Author: Daniel Kupčo
Licensed under MIT license.
All referenced libraries , code parts and ideas used from other repositories are licensed under MIT license as well.


