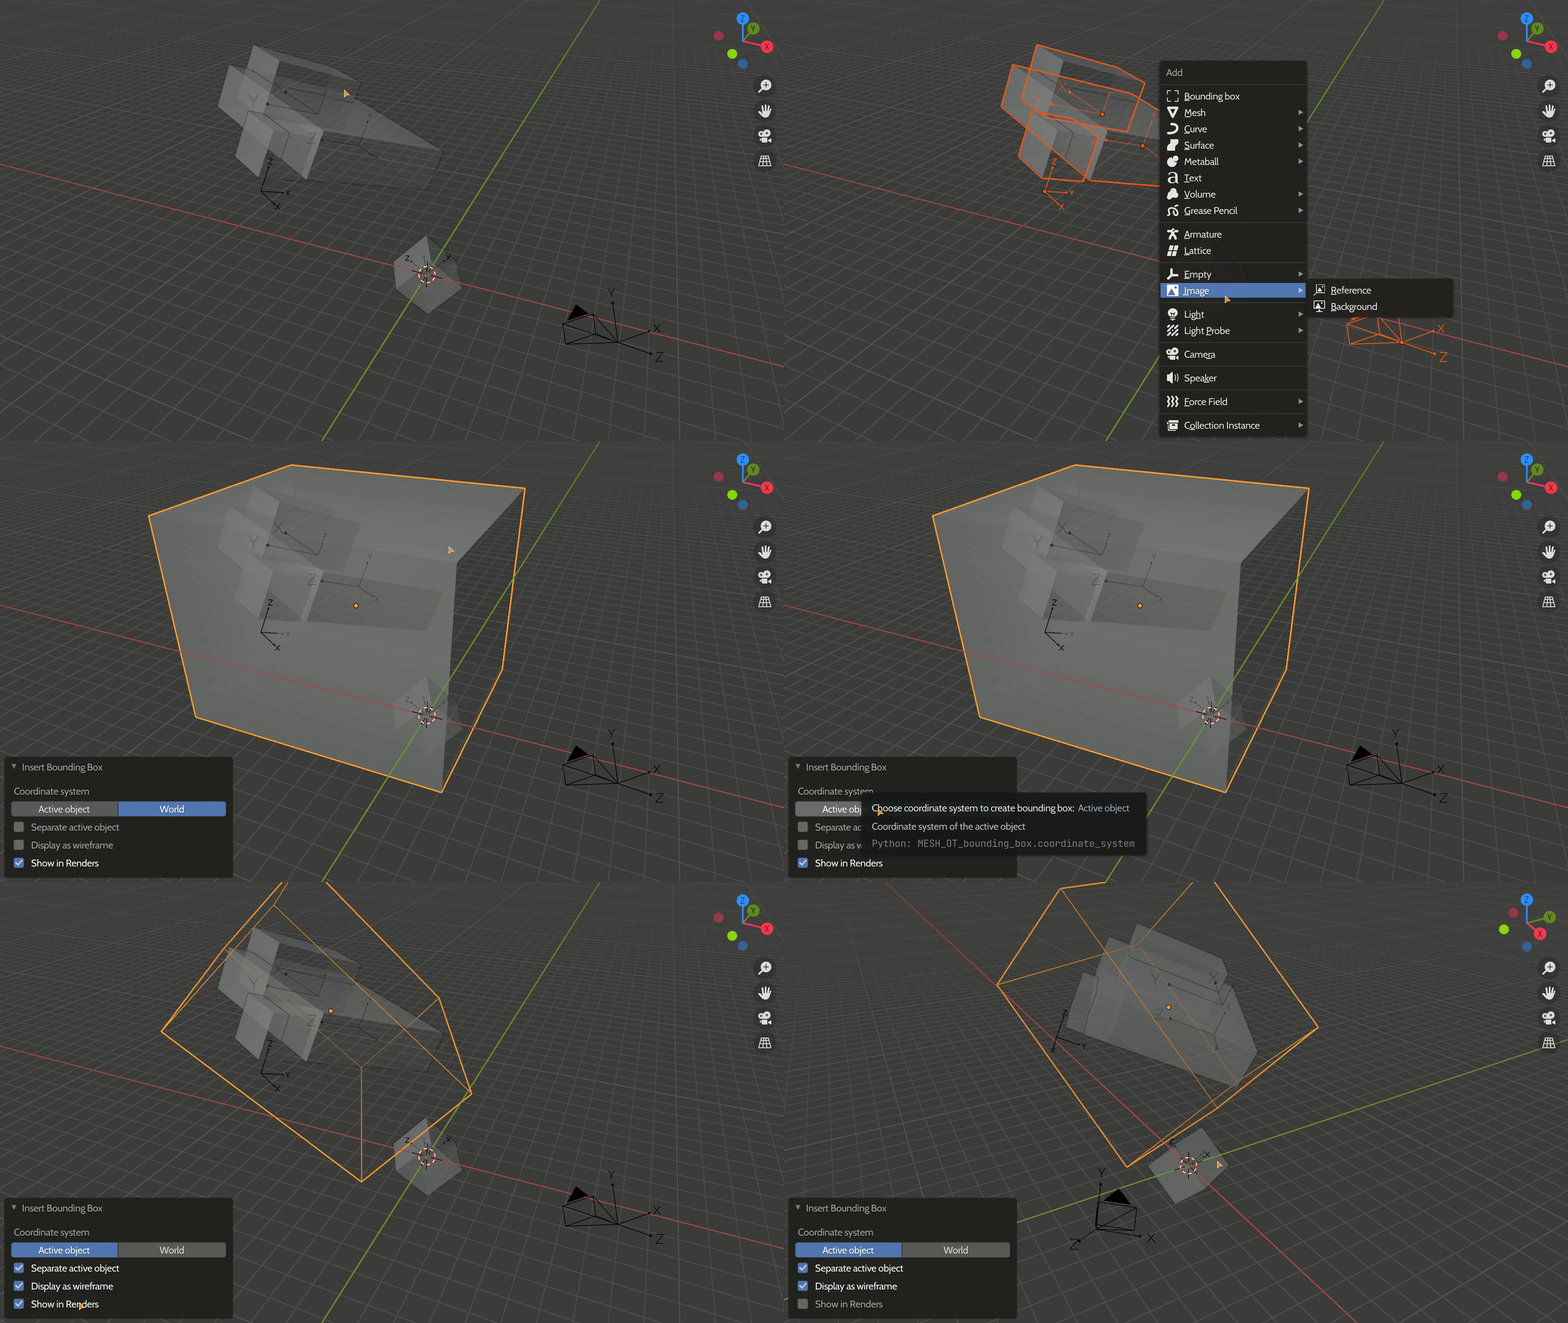
On April 14, 2021, Blender 2.93 Beta has been released, confirming the integration of the Bounding Box Node in a new series of Geometry Node. It is more efficient and more compatible than the approach of this add-on. Therefore, it should be archived.
You can check the Differential Revision here.
A Blender add-on for creating simple bounding boxes from selected objects. It creates AABB (axis-aligned bounding box) which based on the active object's coordinate system or world coordinate system.
This add-on will be useful when you need to create a hole on the wall (using Boolean) to place your windows or when you need to calculate the size of an object group.
- Open Blender
- Go to Edit > Preferences
- In the Add-ons tab, select Install
- Choose the ZIP file downloaded from Github
- Check the checkbox of the add-on
The add-on create a bounding box based on selected object and active object.
There are 2 coordinate systems the bounding box axes can align:
- The active object coordinate system: The bounding box axes will align with the axes of the active object.
- The world coordinate system: The bounding box axes will align with the global coordinate system.
There are some helpful switches :
- Separate active object: Active object will not contribute vertices to the bounding box.
- Display as wireframe: Display bounding box under wireframe display type.
- Show in Renders: Show bounding box in rendered scenes.
Active object can be various types of object (Empties, Lights, Cameras...) but only mesh objects in selected objects affect the result. All scenarios are shown in the table below.
You can run the operator from the Search Menu (F3) or from Add Menu (Shift + A).
If you cannot find the operator or the Bounding box button is fade out, you need to select something first.
| Separate active object | Selected objects | Active object | Behavior |
|---|---|---|---|
| TRUE | None | None | |
| TRUE | None | Mesh | |
| TRUE | None | not Mesh | |
| TRUE | List of meshes contain active object | None | |
| TRUE | List of meshes contain active object | Mesh | Remove active object from selected objects |
| TRUE | List of meshes contain active object | not Mesh | |
| TRUE | List of meshes not contain active object | None | Pick first object from selected objects as active object |
| TRUE | List of meshes not contain active object | Mesh | Create bounding box normally |
| TRUE | List of meshes not contain active object | not Mesh | Create bounding box normally |
| FALSE | None | None | |
| FALSE | None | Mesh | Selected objects is active object |
| FALSE | None | not Mesh | |
| FALSE | List of meshes contain active object | None | |
| FALSE | List of meshes contain active object | Mesh | Create bounding box normally |
| FALSE | List of meshes contain active object | not Mesh | |
| FALSE | List of meshes not contain active object | None | Pick first object from selected objects as active object |
| FALSE | List of meshes not contain active object | Mesh | Create bounding box normally |
| FALSE | List of meshes not contain active object | not Mesh | Create bounding box normally |
I am using:
- Editor: Visual Studio Code
- Linter: Flake8
- Formatter: Black
- Environment manager: pipenv
These steps will show how to set up a python virtual environment that fits my workflow.
- Open CLI in the project directory.
- Run following command
python -m venv .venv. A .venv folder will appear in the project folder. - Then run this
pipenv install --devto install packages for development. - After that, a virtual environment has been setup. You can get in using
pipenv shelland get out withexit. Once activated, you will have all packages you need.
