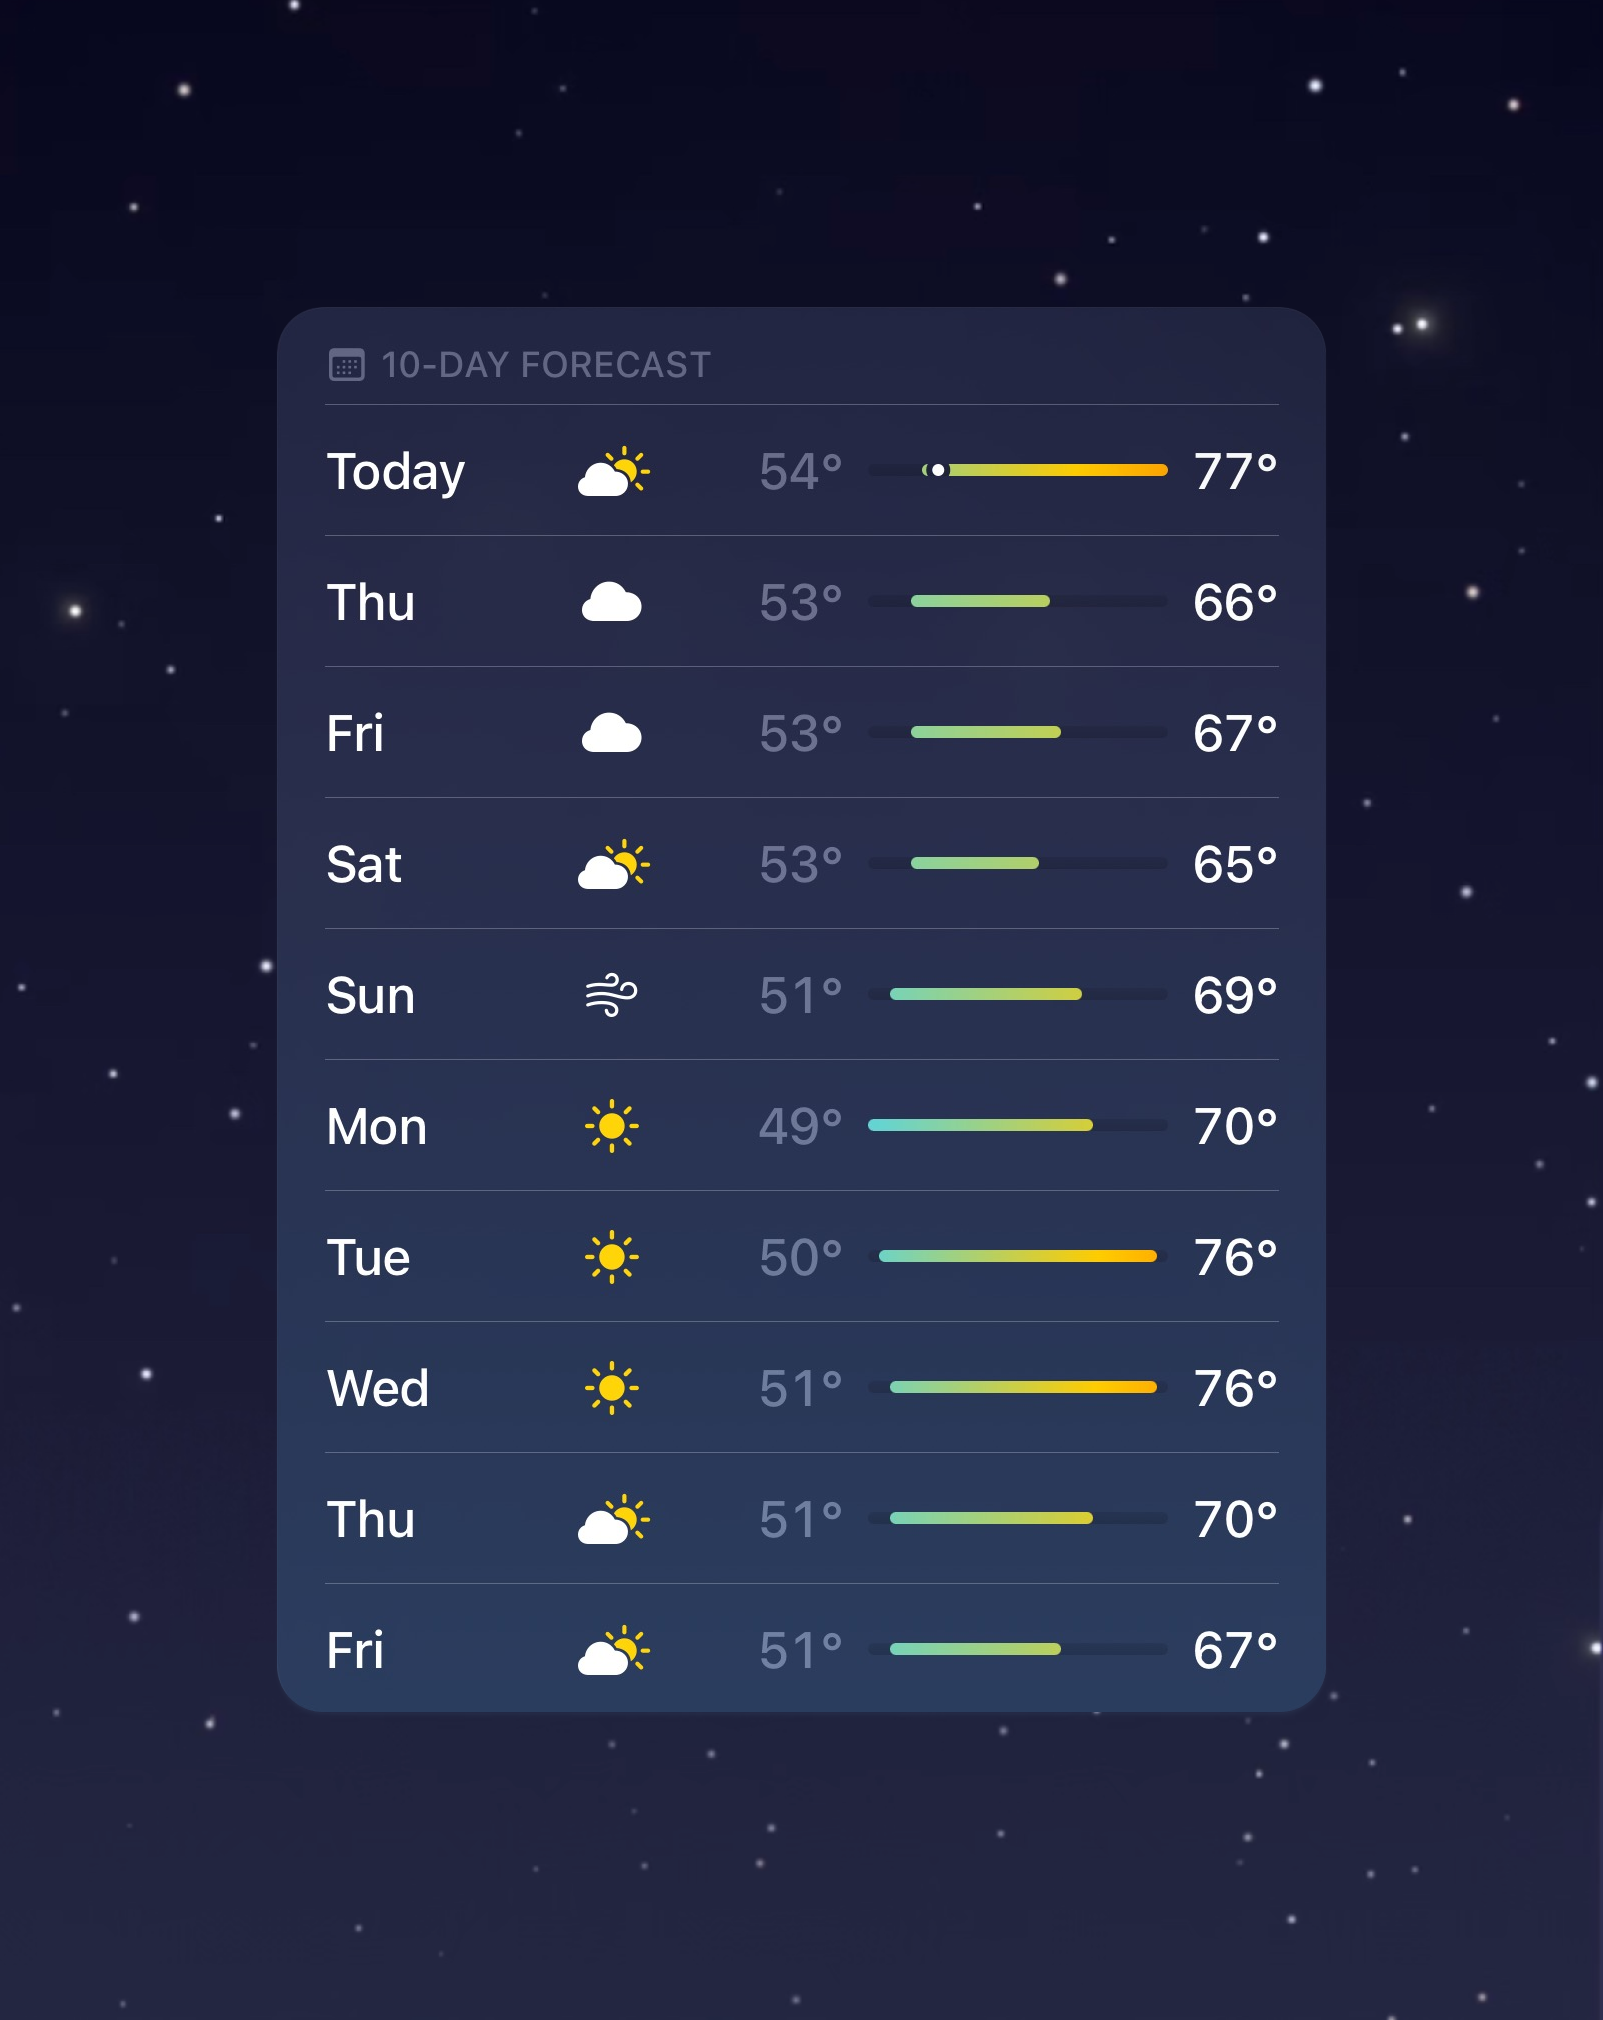
After carefully scrutinizing iOS's default weather app, I wanted to take a closer look at how some components were styled and created.
One of the elements that I carefully analyzed was the temperature gauge. Upon examination, I came to a few conclusions that helped me create a clone of the forecasted weather module in the weather app.
iOS uses normalizes the entire bar width off of the daily maximum temperature change (absolute high temp - absolute low temp) throughout the next 10 days.
After normalizing, render the filled gradient bar using min/max temperatures from each day as a ratio percentage for margins.
Rendering each weather row (weatherDay) 7 times with data fetched from an API, we can get a very similar render to that of iOS’s weather app.
It needs a few small tweaks, but thankfully most of the heavy lifting was figuring out data manipulation for a second time, since the API I was using in the middle of my project suddenly went down - and is still down
Thankfully, I switched over to a highly available API with a wide variety of data - Open-Meteo
Looking forward to write out the hourly forecast preview as a next module 🎉
This project was bootstrapped with Create React App.
In the project directory, you can run:
Runs the app in the development mode.
Open http://localhost:3000 to view it in your browser.
The page will reload when you make changes.
You may also see any lint errors in the console.
Launches the test runner in the interactive watch mode.
See the section about running tests for more information.
Builds the app for production to the build folder.
It correctly bundles React in production mode and optimizes the build for the best performance.
The build is minified and the filenames include the hashes.
Your app is ready to be deployed!
See the section about deployment for more information.
Note: this is a one-way operation. Once you eject, you can't go back!
If you aren't satisfied with the build tool and configuration choices, you can eject at any time. This command will remove the single build dependency from your project.
Instead, it will copy all the configuration files and the transitive dependencies (webpack, Babel, ESLint, etc) right into your project so you have full control over them. All of the commands except eject will still work, but they will point to the copied scripts so you can tweak them. At this point you're on your own.
You don't have to ever use eject. The curated feature set is suitable for small and middle deployments, and you shouldn't feel obligated to use this feature. However we understand that this tool wouldn't be useful if you couldn't customize it when you are ready for it.


