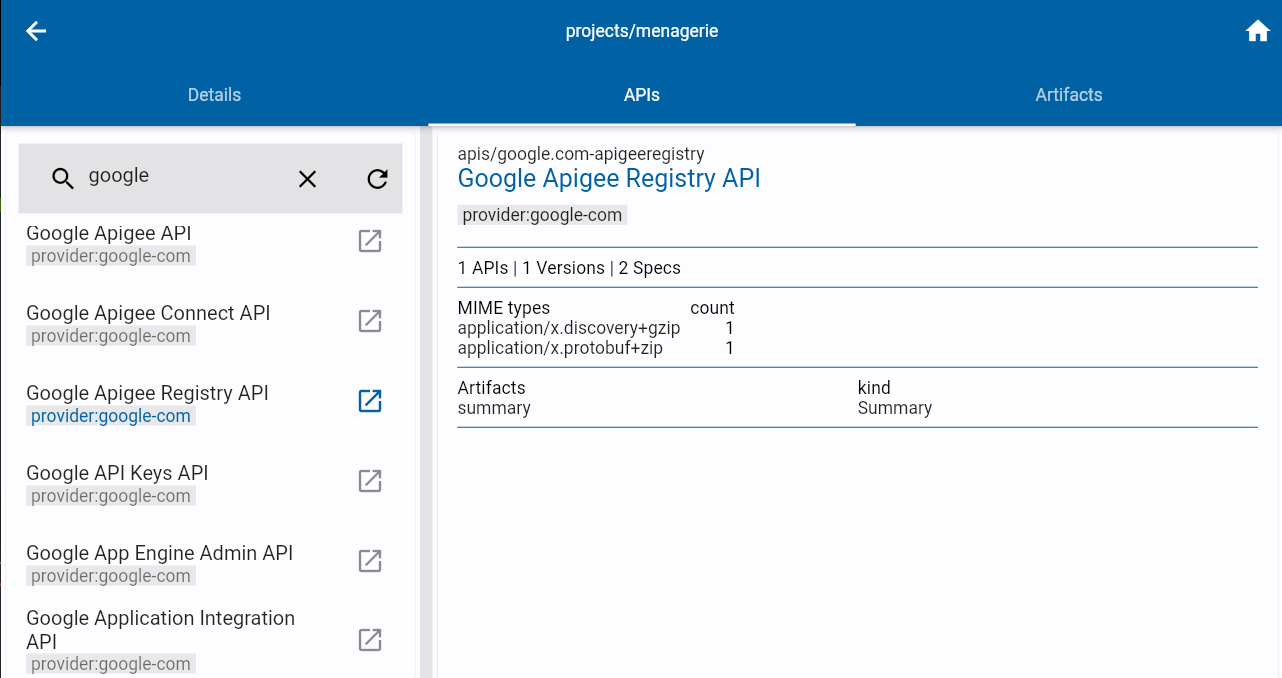
This repository contains a graphical viewer for the Registry API. The viewer is written with Flutter, which allows it to be run on many platforms. It is developed on the Linux, MacOS, and web platforms, and this repository includes support for web deployments on Google Cloud Run.
The Registry Viewer allows API platform teams and other collectors of API descriptions to view and curate API descriptions and metadata stored in a registry. It is optimized for general browsing (vs. specific tasks), and is a possible starting point for application-specific interfaces that manage and govern APIs through their lifecycles.
Please tell us about your experience if you use it.
The Registry Viewer is a Flutter application written in Dart. It can be run locally and hosted on the web. One way to host the web version is in a container deployed to services like Google Cloud Run. Currently it stores all information directly in the Registry API (no other backend storage or service is used). Users authenticate with Google IDs, and a file in the implementation allows deployments to specify users and domains that are authorized to use the viewer.
The following tools are needed to build this software:
- The Flutter development environment, release 1.25.0-5.0.pre.91 or later.
- protoc, the Protocol Buffer Compiler, version 3.10 or later.
- make, git, and other elements of common unix build environments.
This repository contains a Makefile that performs frequently-used tasks, including building and deploying the viewer on Google Cloud Run.
Platform-specific code is generally not included in the repo and should be
created by running make create in the root of this repo. This uses
flutter create to initialize the project.
Protocol Buffer support code is needed and is generated by the
COMPILE-PROTOS.sh script. This can be run by running
make protos at the repo root.
The easiest way to try the Registry Viewer is to run the Linux build with
make linux. This build gets its server address and authorization credentials
from environment variables.
If you are running the Registry Server on Google Cloud Run, you can set
these variables by running source auth/CLOUDRUN.sh from the
github.com/apigee/registry repo. There's
a version of this repo checked out in third_party, so one way to get
credentials would be to run the following:
source third_party/registry/auth/CLOUDRUN.sh.
If you are running the Registry Server locally, you can set these variables
by running source auth/LOCAL.sh from the
github.com/apigee/registry repo. Using
the version checked out in third_party, you could run the following:
source third_party/registry/auth/LOCAL.sh.
Once you have set up your credentials, build and run the viewer with
make linux.
The Registry Viewer can be built for the web and deployed like any Flutter web
application. This project contains support for deploying on
Google Cloud Run. To support this, the
Makefile contains targets that build a Docker image and that deploy
it to Google Cloud Run. Both use the gcloud command, which should be
authenticated and configured for the project where the services should be run.
Requirements:
-
Both targets require the gcloud command, which is part of the Google Cloud SDK.
-
If not already done,
gcloud auth logingets user credentials for subsequentgcloudoperations andgcloud config set project PROJECT_IDcan be used to set your project ID to the one where you plan to host your servce. -
The Makefile gets your project ID from the
REGISTRY_PROJECT_IDENTIFIERenvironment variable. This can be set automatically by runningsource auth/CLOUDRUN.sh.
make build uses Google Cloud Build to
build a container containing a simple Go web server and the compiled Registry
Viewer application. The container is stored in
Google Container Registry.
make deploy deploys that container on
Google Cloud Run.
When deploying to Cloud Run for the first time, you will be asked a few questions, including this one:
Allow unauthenticated invocations to [registry-backend] (y/N)?
You will need to answer "y" to be able to access your application.
You will also need to set two environment variables in your Cloud Run environment (described below).
Web builds of the Registry Viewer require two configuration strings that are specified as meta tags in registry/web/index.html. Both can be set using environment variables in the container running the web server:
-
google-signin-client_id(environment variableGOOGLE_SIGNIN_CLIENTID) is the OAuth Client ID used by the Google Signin package to identify your client application. Helpful instructions for creating your application ID are here and web-specific package documentation is here. Application ID creation includes setting authorized JavaScript origins to enable your implementation to call the Google Signin API. -
registry-service(environment variableREGISTRY_SERVICE) is the URL of your Registry API server (backend). Note that because web deployments run in browsers, a grpc-web interface to the Registry API is required. To support this, the registry distribution includes Envoy configuration that allows Envoy to proxy grpc-web connections and the Cloud Run deployments supported by the registry Makefile include this configured proxy.
The Google Signin component provides ids of authenticated users. To authorize these users, adjust the variables in registry/lib/authorizations.dart.
This software is licensed under the Apache License, Version 2.0. See LICENSE for the full license text.
This is not an official Google product. Issues filed on Github are not subject to service level agreements (SLAs) and responses should be assumed to be on an ad-hoc volunteer basis.
Contributions are welcome! Please see CONTRIBUTING for notes on how to contribute to this project.
