Comfoair Q 350 MQTT bridge
This software script let you use a ESP32 + CAN Transceiver to interact with the Comfoair Q 350 unit.
It does expose all known informations through MQTT and let you control the air flow via MQTT as well.
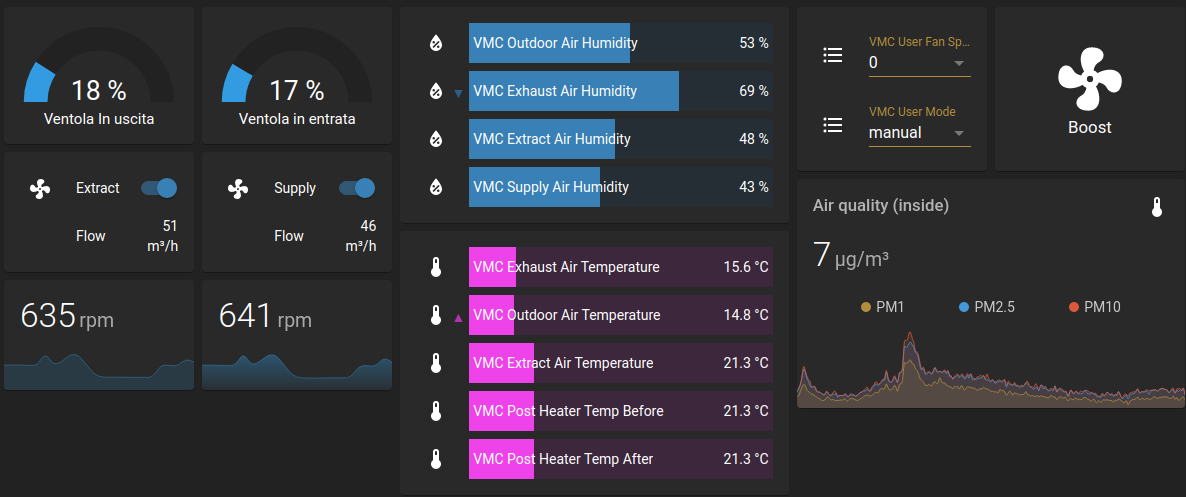
It does allow you to integrate the unit on Home Assistant as depicted below:

You can find the configuration YAML files in the docs folder.
Components
Provided you've the necessary hardware, you need to create the .env file based on the .env-sample file with the proper environment variables.
Prerequisites:
ESP32-> linkDC-DC converter-> linkRJ45 Female-> linkCan Transceiver-> Waveshare SN65HVD230
- Some ethernet cable
How
-
Buy Type B cabled Some ethernet Cable:
-
Cut the cable and use
* RJ45 White/Brown -> black in VMC
* RJ45 Brown -> Red in VMC
* RJ45 green  -> white in VMC (CAN_L)
* RJ45 orange -> yellow in VMC (CAN_H)
- Cable RJ45 Female
- Green and Orange to CAN_L and CAN_H of transceiver
- Whtie/Brown to DC-DC
IN- - Brown to DC-DC
IN+
- Connect trasceiver
- can_rx -> pin 5 of esp32
- can_tx -> pin 4 of esp32
- gnd + vcc to DC-DC OUT pins
- Connect ESP32 to DC-DC out pins and transceiver (as prev step).
- Print the Fusion 3D file provided in
docs/3dfolder
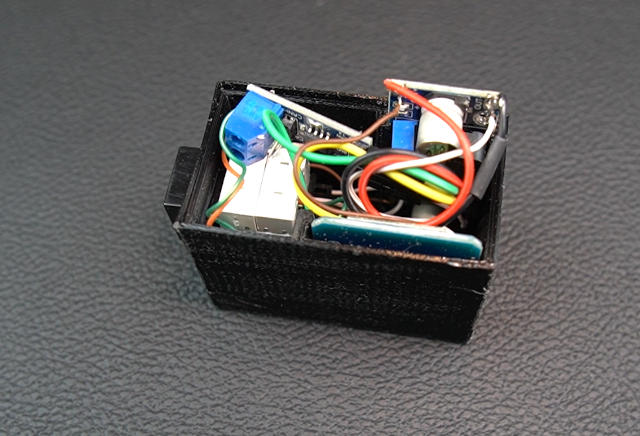
The end result should look like this:

MQTT commands
The following commands are available. just issue whatever payload you want to ${prefix}/commands/${key}
where ${key} is:
- ventilation_level_0
- ventilation_level_1
- ventilation_level_2
- ventilation_level_3
- boost_10_min
- boost_20_min
- boost_30_min
- boost_60_min
- boost_end
- auto
- manual
- bypass_activate_1h
- bypass_deactivate_1h
- bypass_auto
- ventilation_supply_only
- ventilation_supply_only_reset
- ventilation_extract_only
- ventilation_extract_only_reset
- ventilation_balance
- temp_profile_normal
- temp_profile_cool
- temp_profile_warm
Along with these above you can also use the ventilation_level key with the string 0 or 1, 2, 3 to set the desired fan speed level.
There is also set_mode which accepts auto or manual as payload.
Credits
A lot of this repo was inspired by the reverse engineering here. If you'd like to know more how the unit communicates, head over
There's also a Node.JS version with a Raspberry PI here