This repository includes various resources for creating animatronic projects using an Arduino.
The FlySky FS-i6 is a popular and affordable 6-channel radio control transmitter unit often used for RC planes, drones etc., and is also suitable for real-time animatronic control. It has a total of 10 user inputs on the controller:
- 2x horizontal/vertical sticks
- 3x 2-position toggles
- 1x 3-position toggle
- 2x rotary dials
Even though it has 10 inputs, out-of-the-box, you can only use 6 of those channels - the horizontal and vertical axes of the two sticks are always assigned to channels 1-4, while any two of the switches or dials can be assigned through the controller menu to channels 5-6.
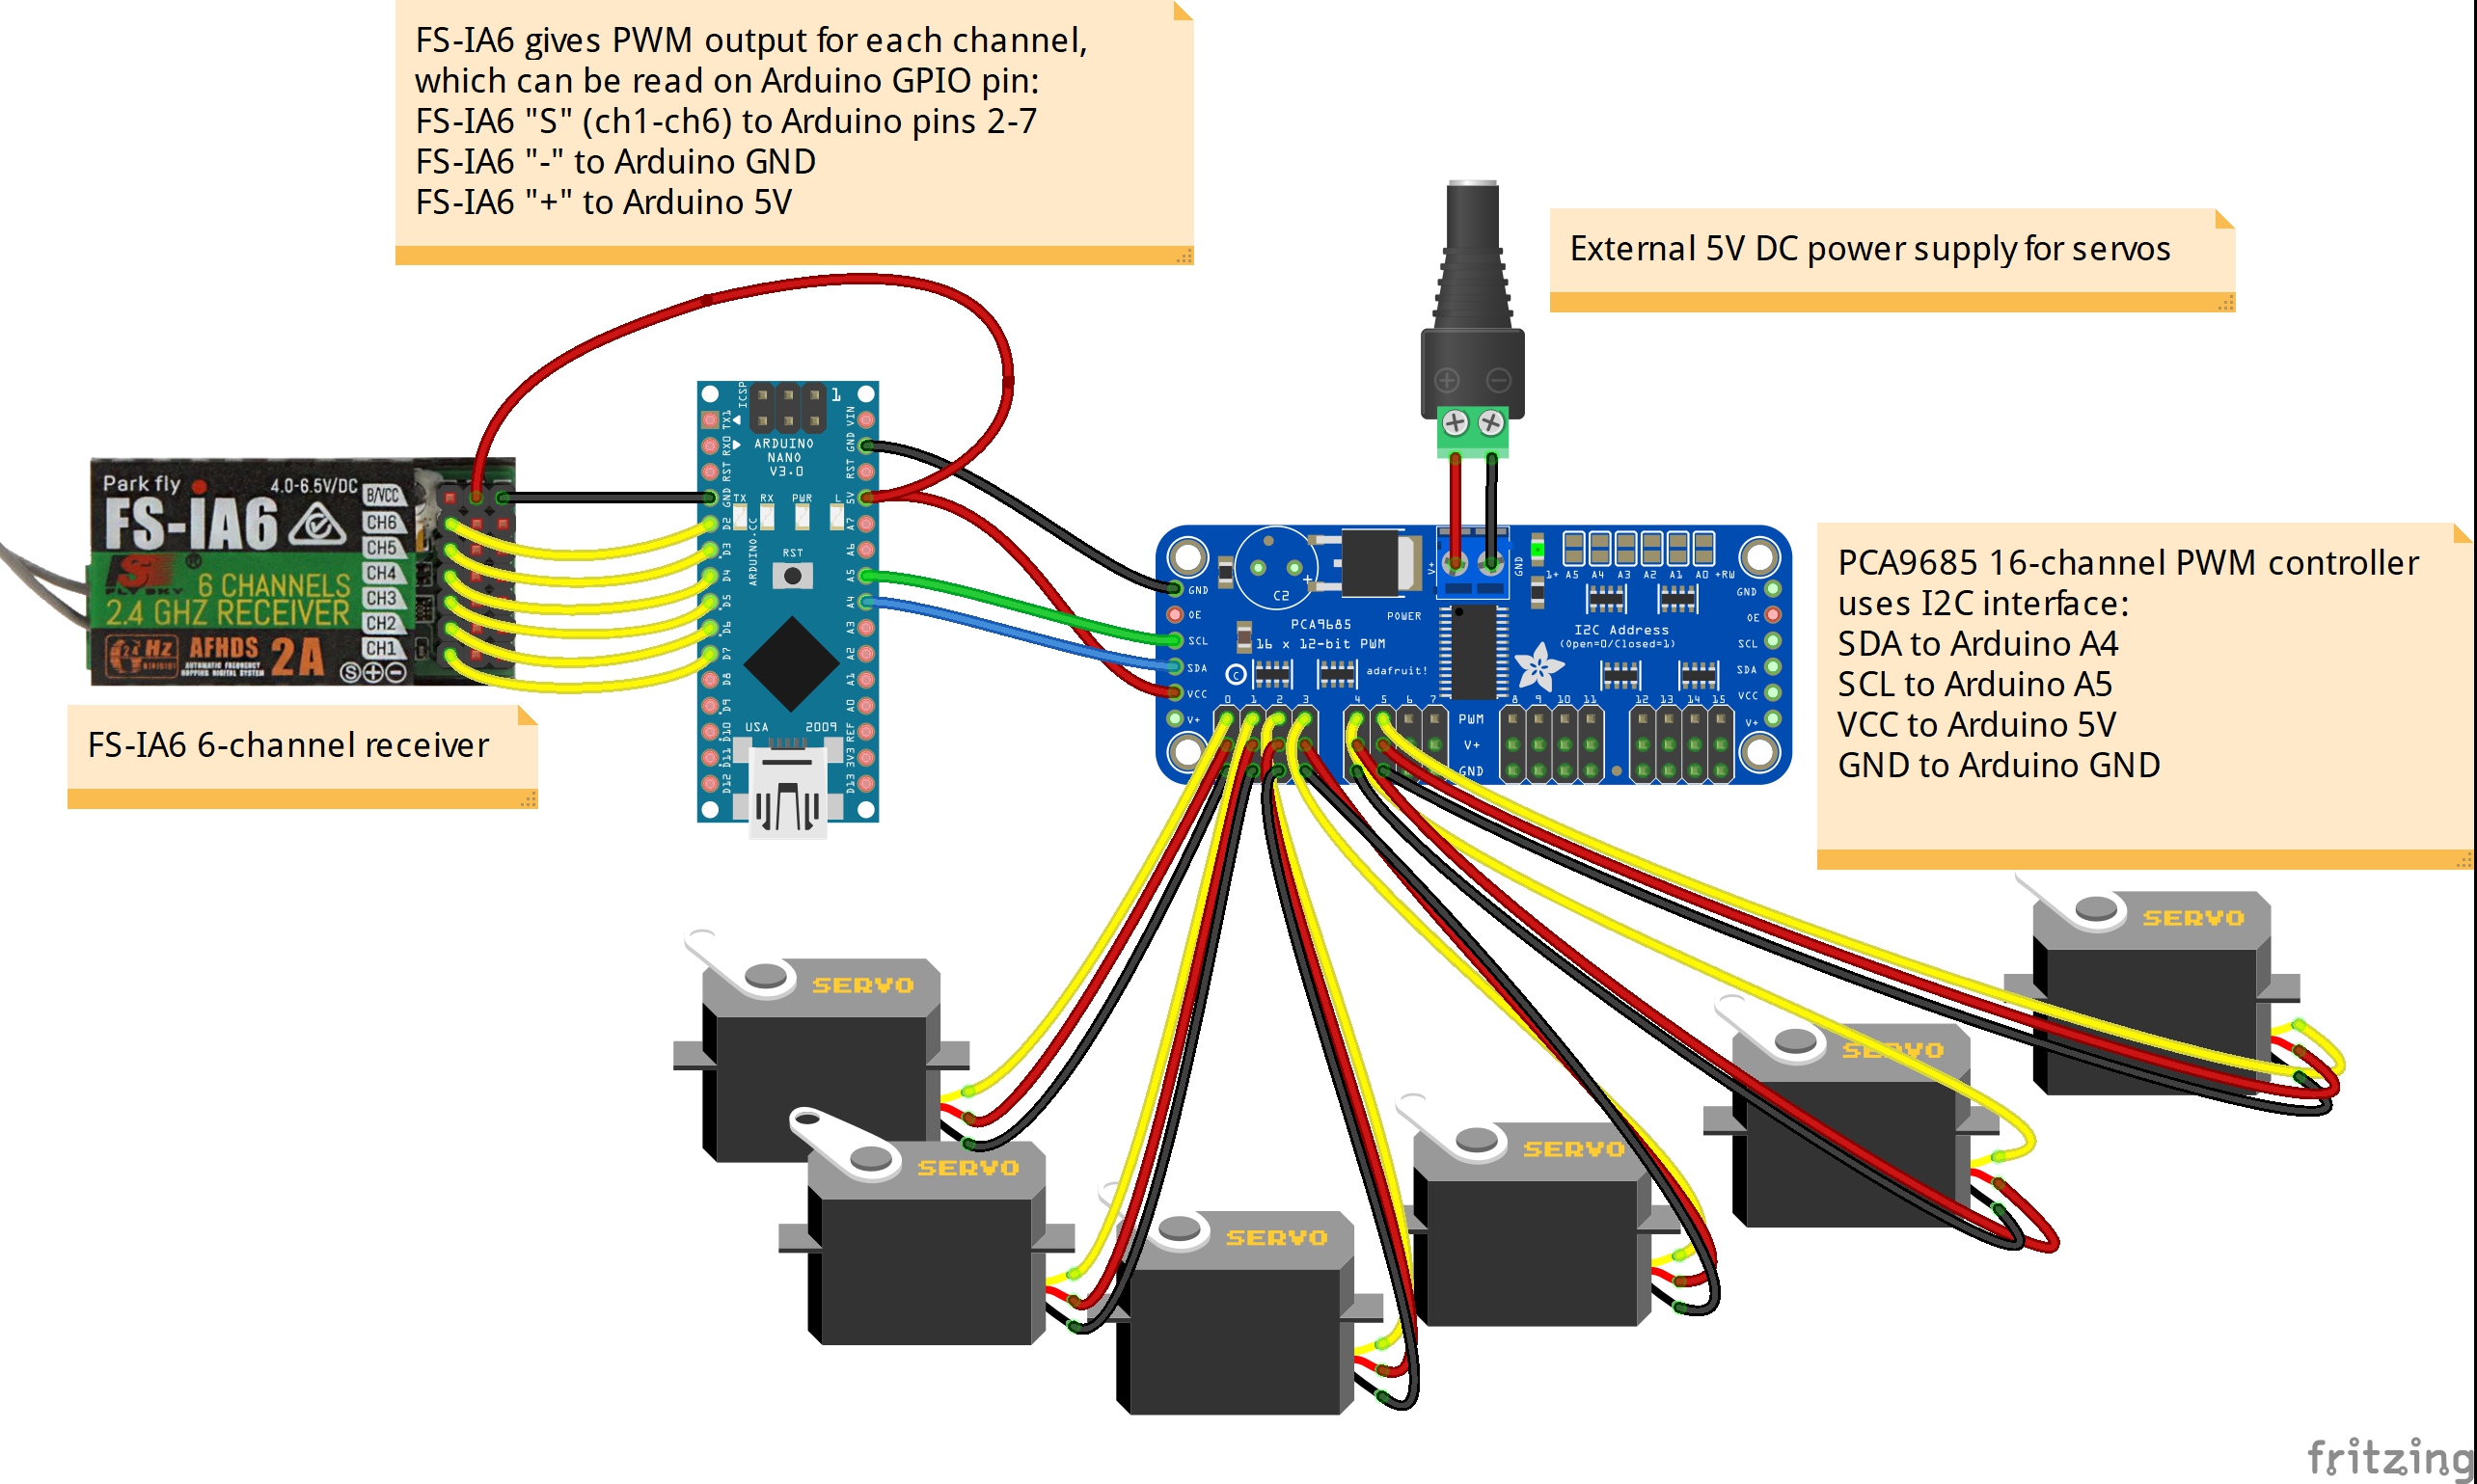
Using the FS-IA6 receiver module which often comes supplied with the transmitter, you can access those 6 inputs by wiring the PWM signal output from each channel to a unique GPIO pin on an Arduino as follows:

The FS-iA6B is a newer receiver module than the FS-iA6, and is sometimes provided instead of the FS-iA6. While still being advertised as a 6-channel receiver and having only 6 PWM output pins, it includes support for the "iBus" protocol, which is a serial data interface that can carry up to 14-channels. Those extra channels makes the controller a very attractive choice for animatronic control. To make use of them, a few steps are required:
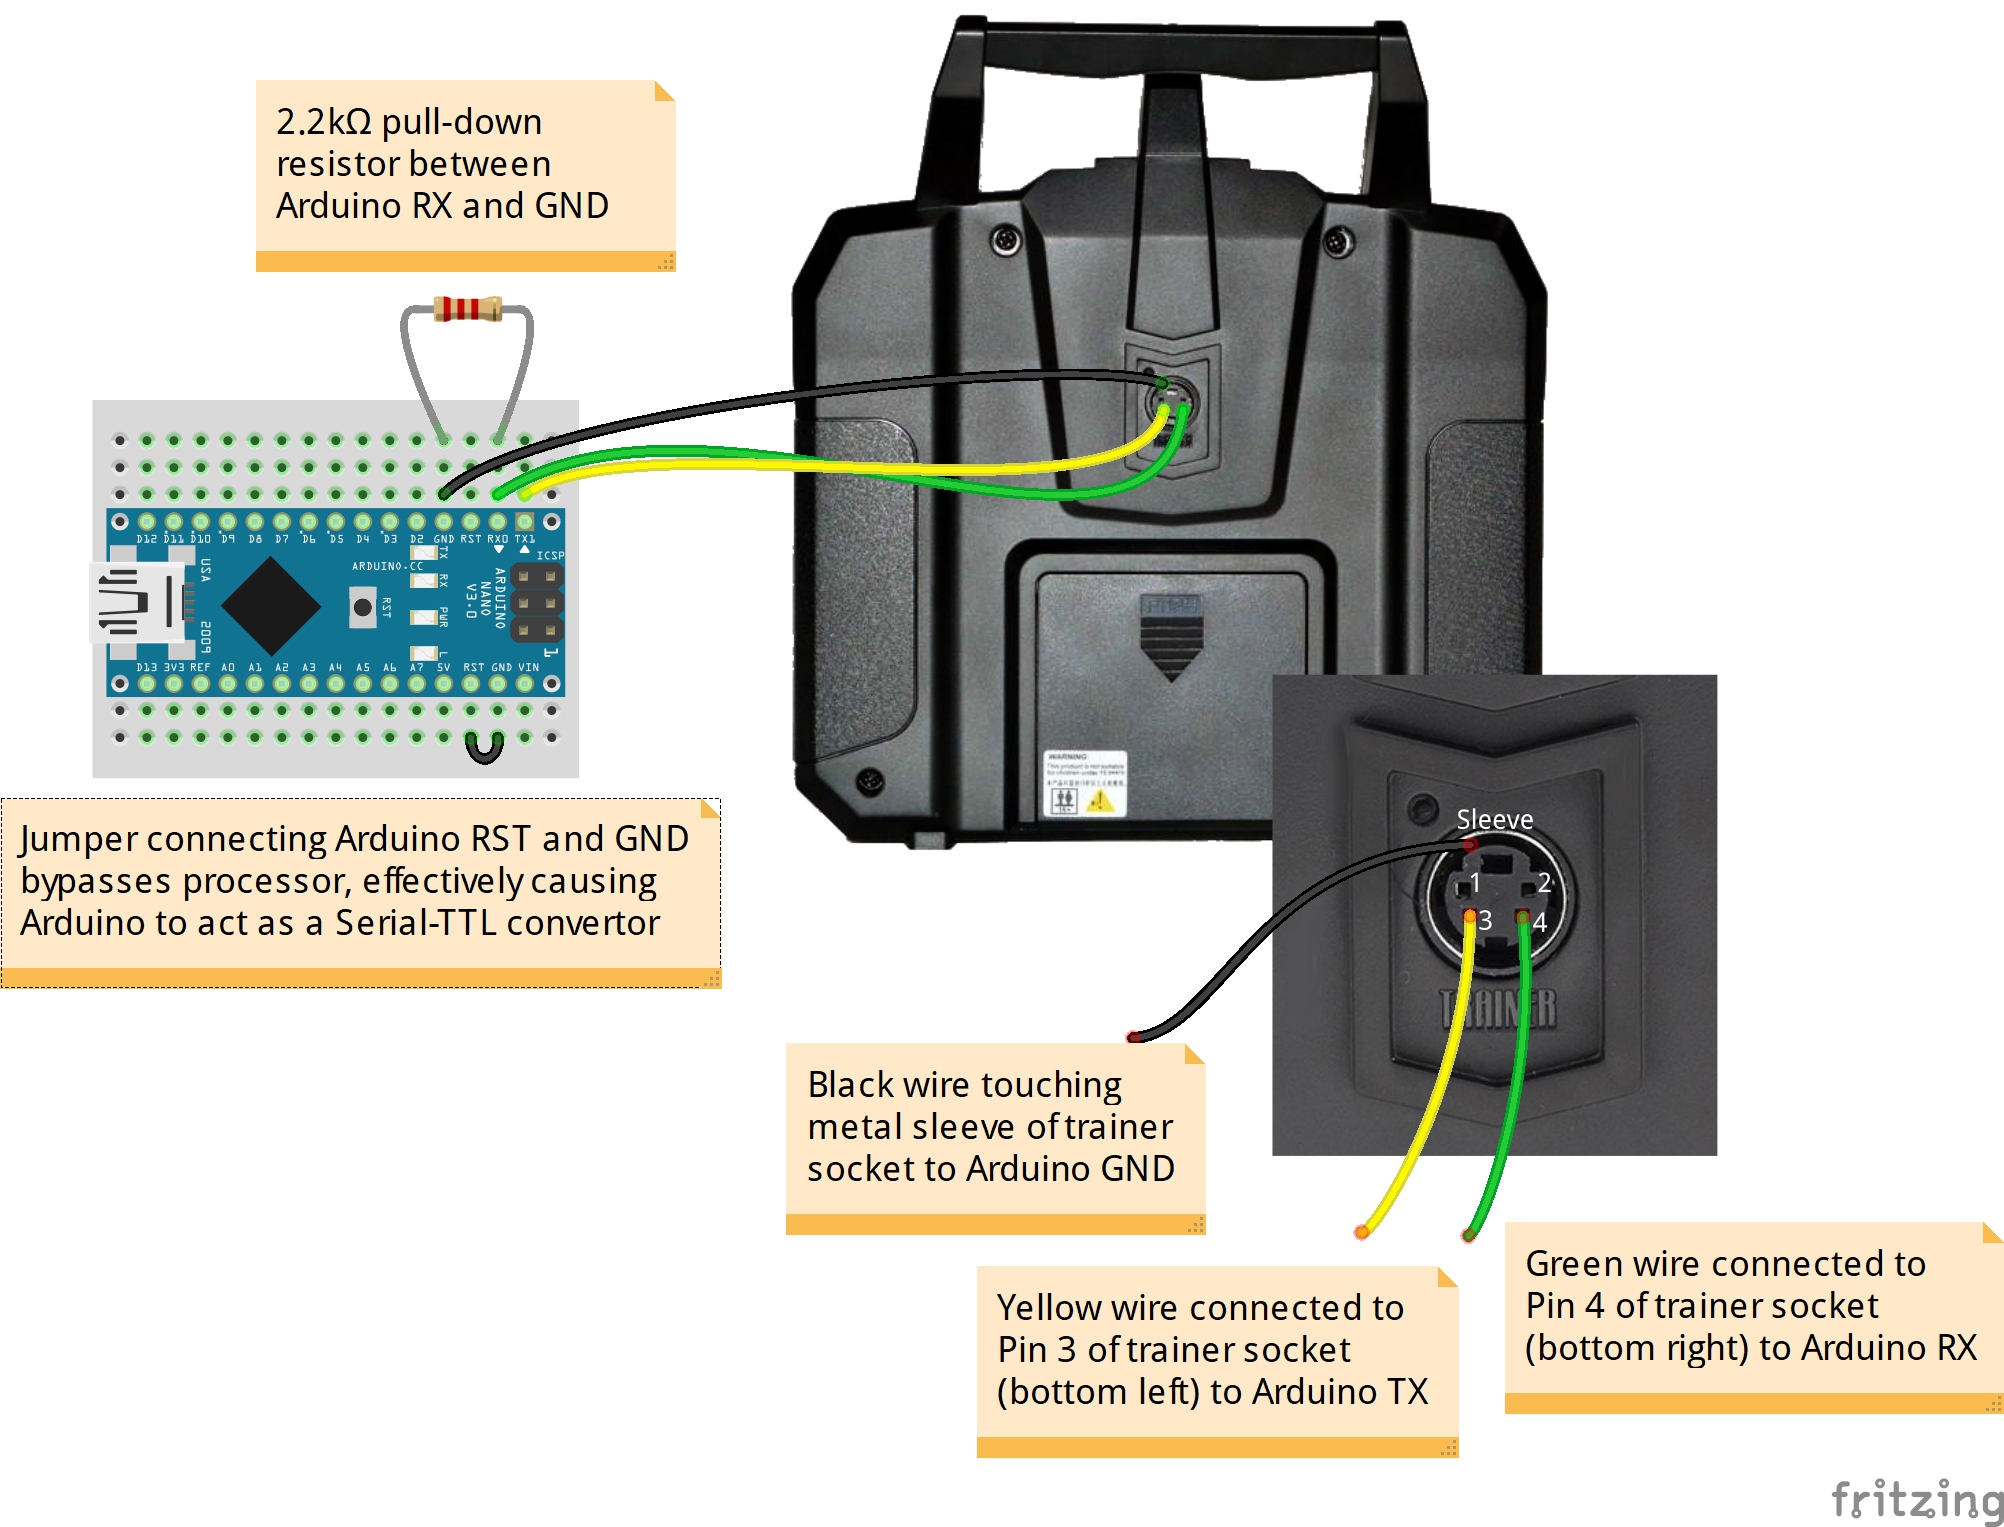
The FS-i6X controller already supports 10 channels, but to broadcast all 10 channels from the cheaper FS-i6 controller, we need to upgrade the firmware of the transmitter, which is normally done by connecting a separately-sold specialist USB data cable to the "trainer" socket on the back of the transmitter. However, since this is an Arduino project, you can use an Arduino to upgrade the firmware instead, wired as follows:
 Then, run this updater program to flash new firmware to the transmitter, allowing all the face controls to be assigned to channels.
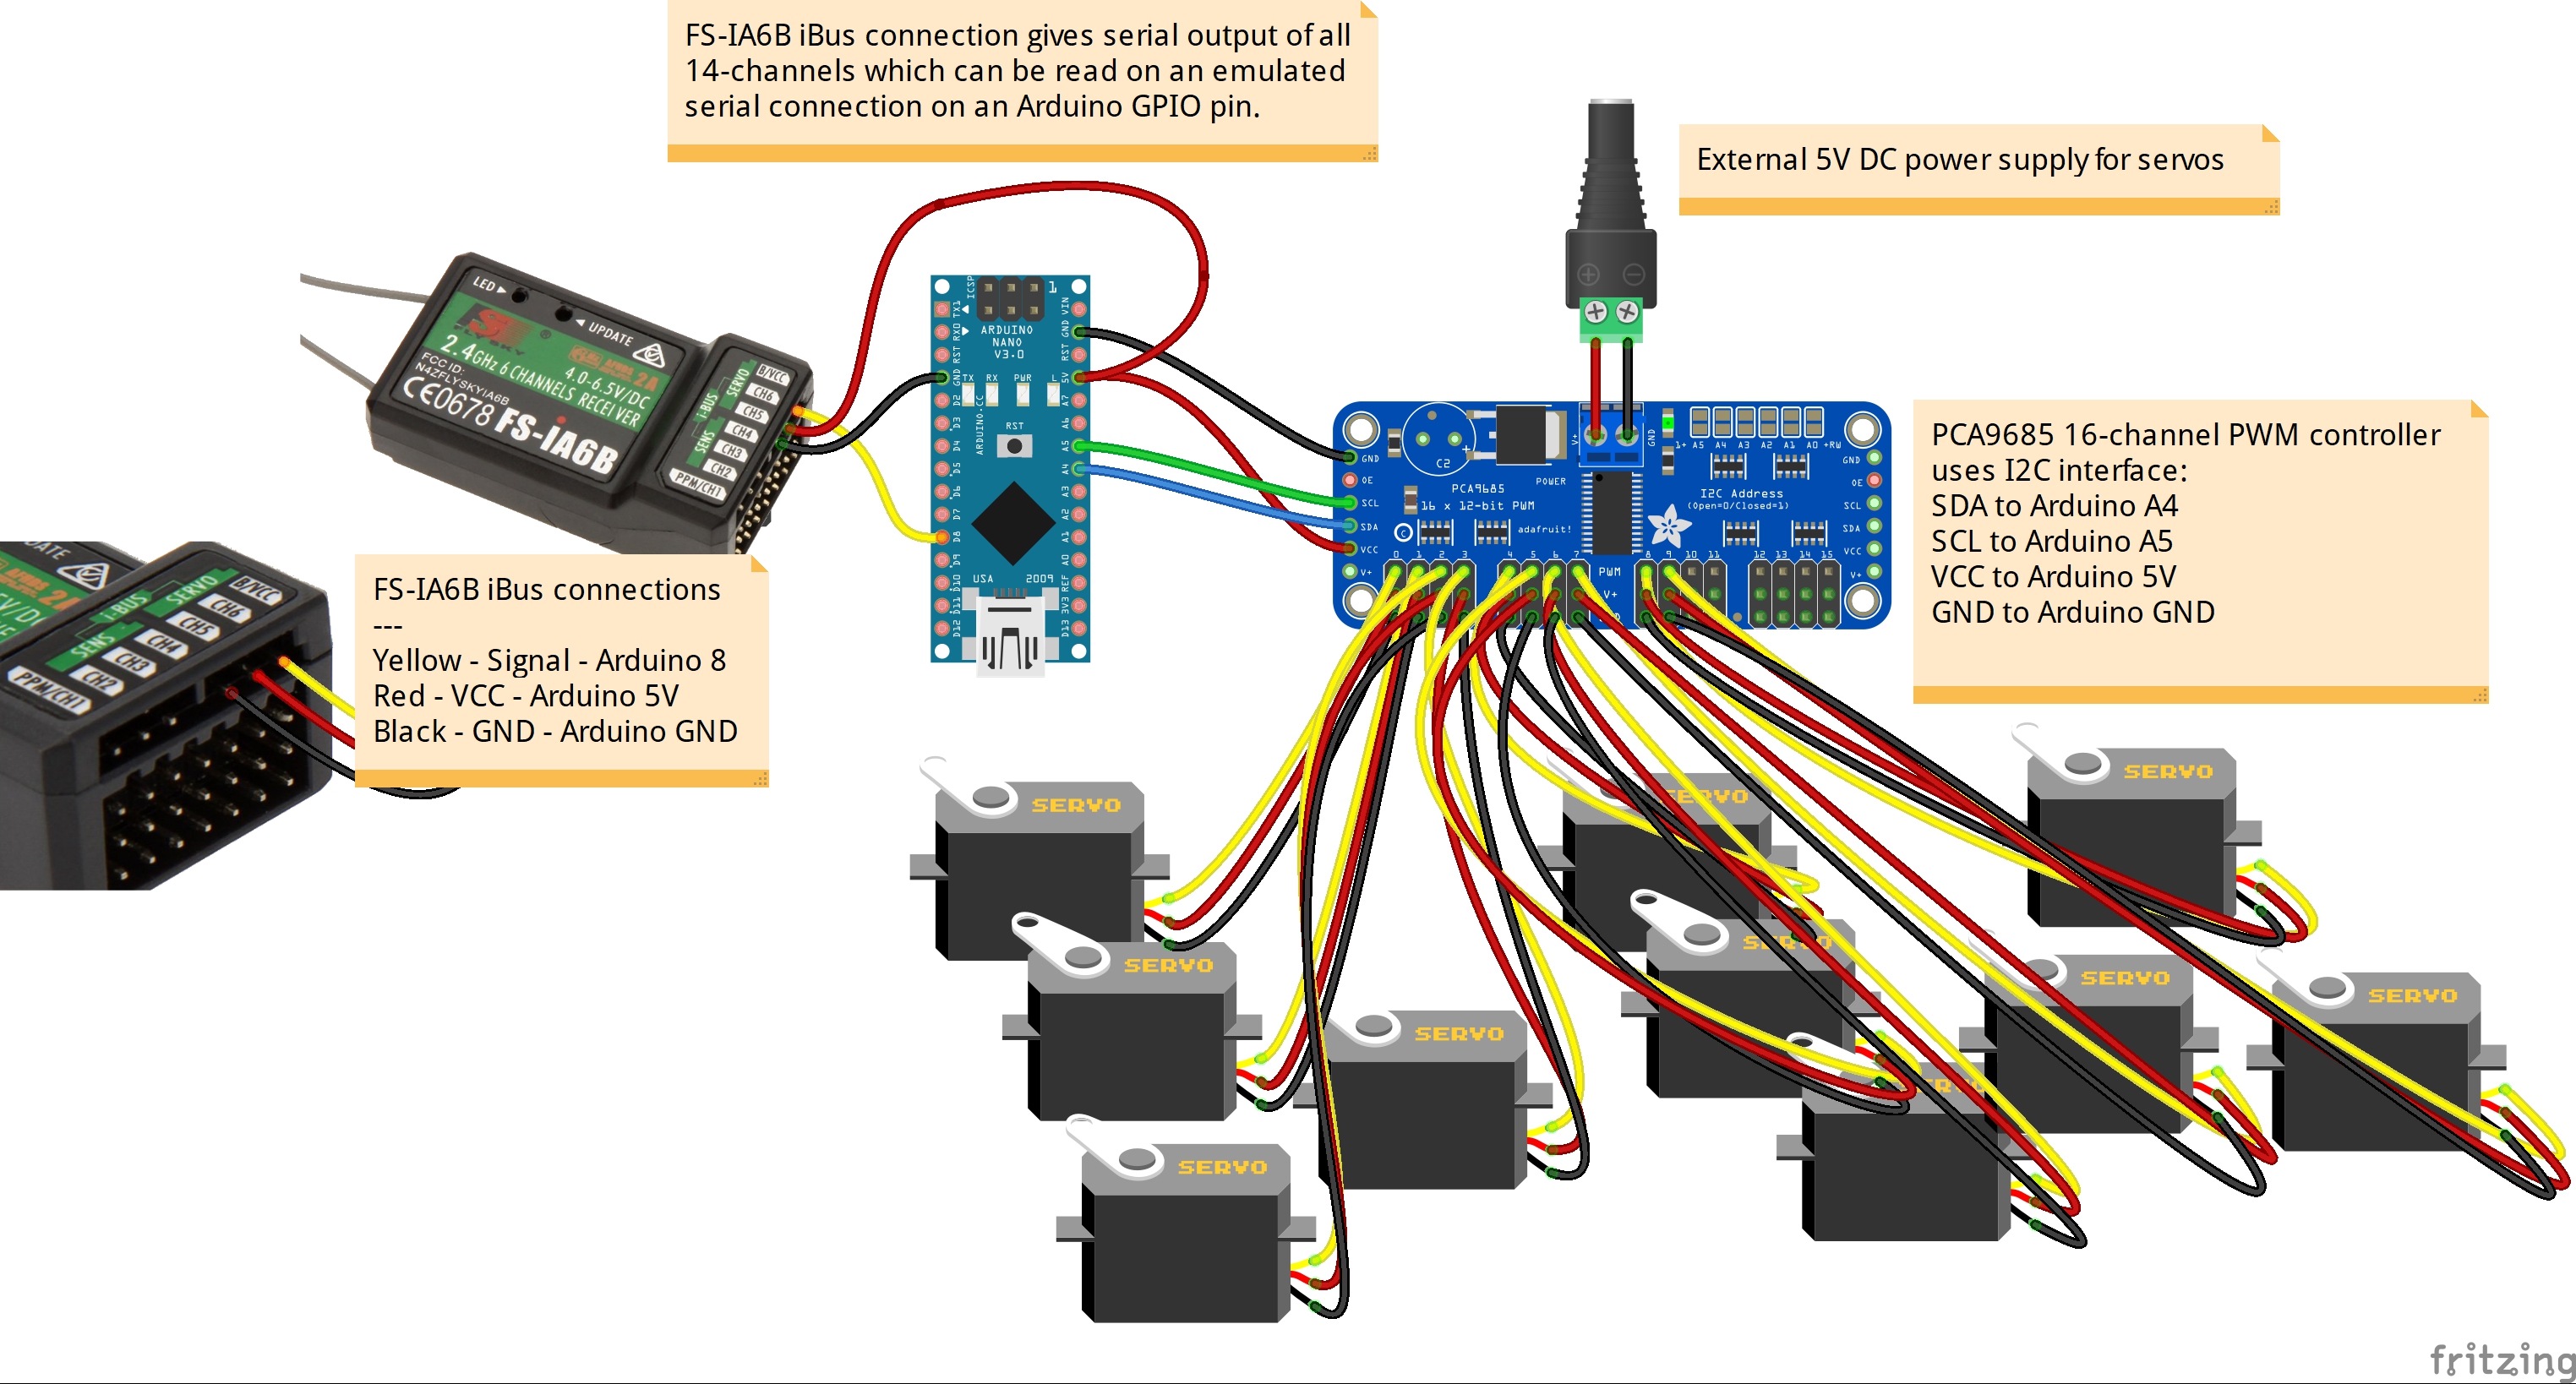
The iBus interface uses a 115,200 baud serial connection. My initial build used Paul Stoffregen's excellent AltSoftSerial library to emulate this serial connection on GPIO pin 8 of an Arduino Nano:

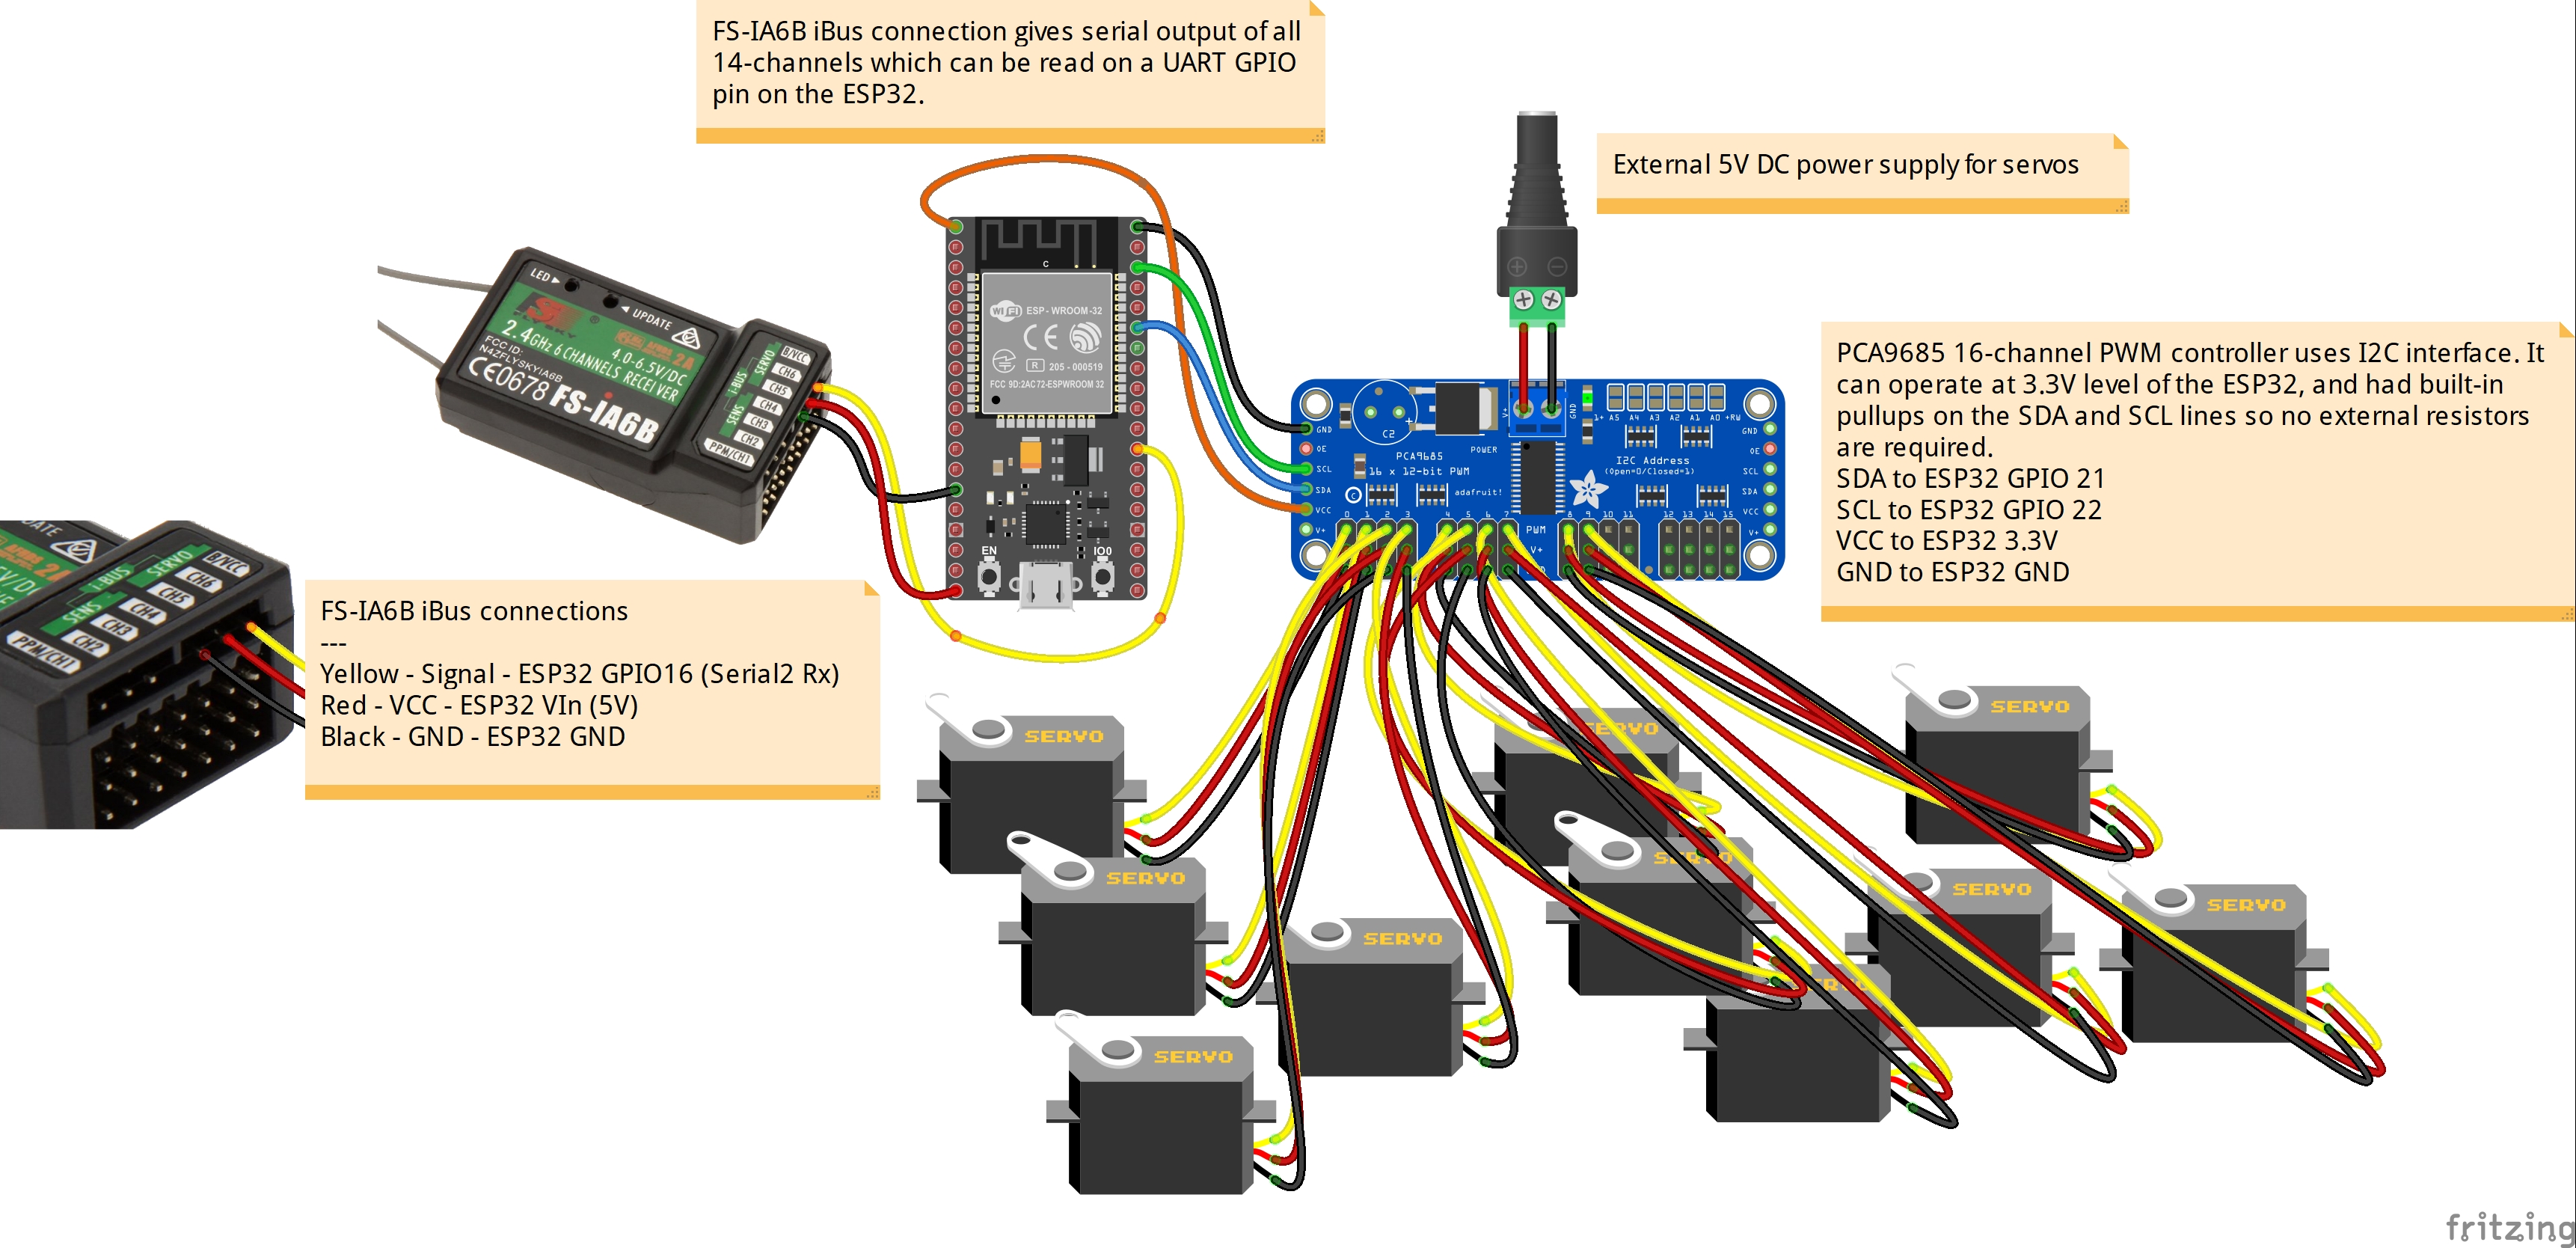
I noticed after a while that the Arduino in the setup would occasionally crash, I suspect as a result of a buffer overrun with the emulation not being able to handle the 115,200 baud rate required by the iBus connection. A better solution is therefore to use a board with a dedicated hardware UART, such as an Arduino MEGA, or an ESP32. The PCA9685 can operate at 3.3V logic just fine so, since the ESP32 is the more capable board, I opted to adopt that approach instead:
