ReinforceConf2019
This repository includes presentation slides and supplementary material from Paris and Mars' presentations in Budapest at the Reinforce AI Conference (presentation_main) and the nearby Budapest Artificial Intelligence Meetup (presentation_meetup) in 2019.
Aside from the written content, a simple demo app was written in Swift 5 using the Xcode 10.2 Beta 3 to demonstrate Neural Style Transfer on iOS. This NSTDemo project is a quick and easy way to get started experimenting with TuriCreate and CoreML, with visual output that is fun to test.
Using NSTDemo
The structure of the app is very simple. There is an AppDelegate.swift file that is nothing more that what is required, and there is a ViewController.swift file with a corresponding Main.storyboard that controls a single view and its elements:
- a
UIBarButtonthat summons anUIImagePickerViewto select from Photos - a
UIImageViewto display the image chosen - a
UIPickerViewto select the model to apply - a
UIButtonto apply the model and show the output in the UIImageView - a
UIBarButtonthat summons aUIActivityViewto share the created image - an optional
UIAlertViewthat is displayed if the image selected is too small for the model to transform, or something else goes wrong in the transform process
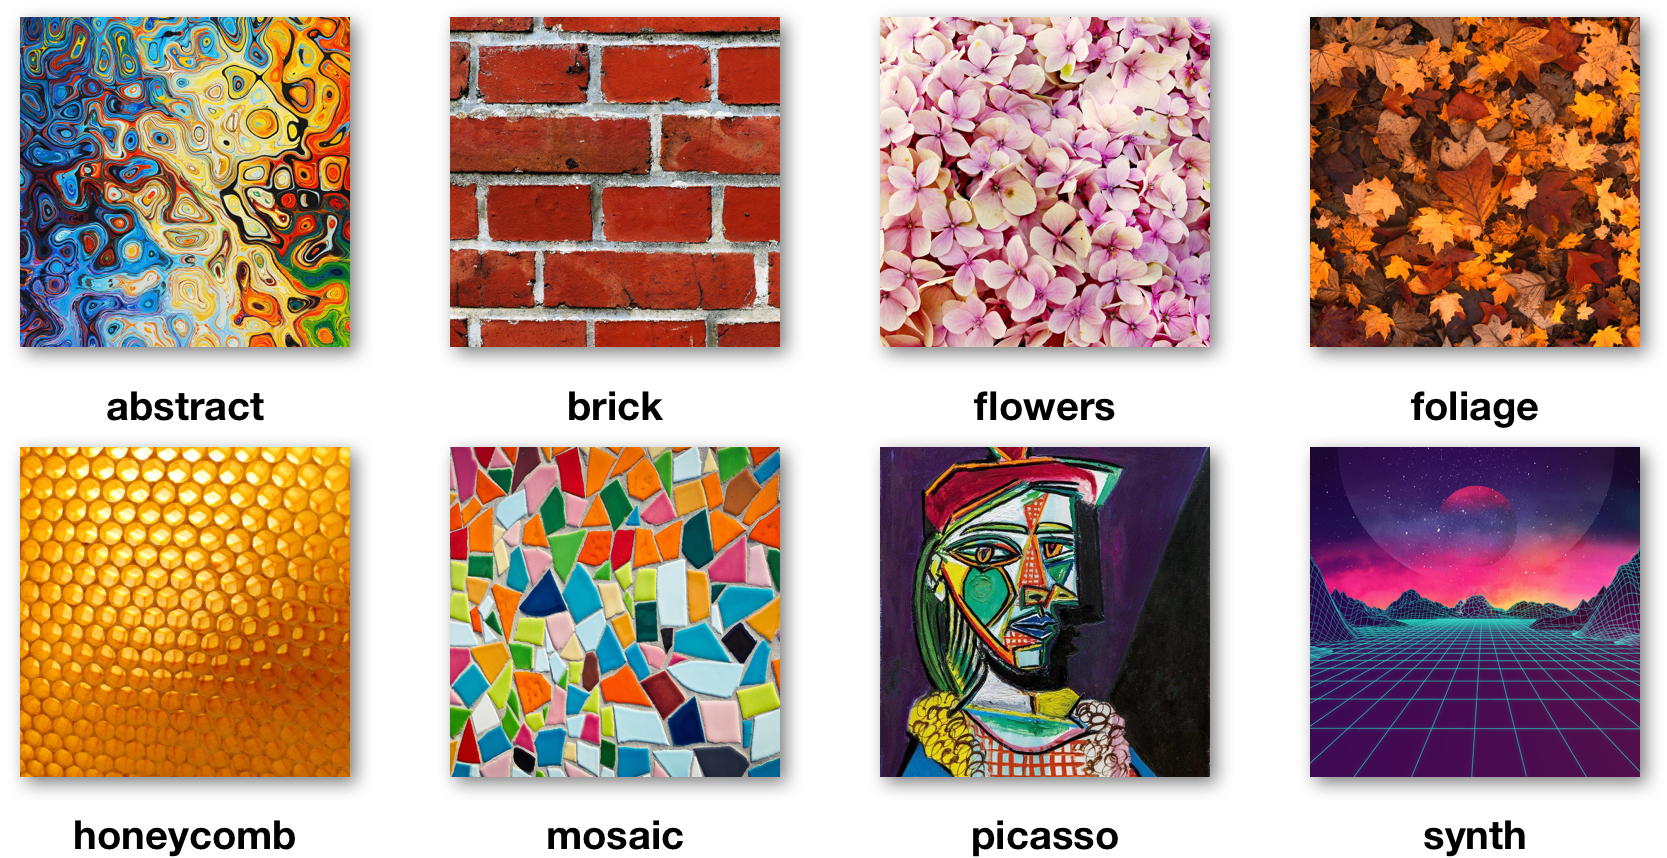
There is a StyleTransferModel.mlmodel file that was trained for a quick demonstration. It features eight styles trained on style images with distinct colours and textures (see below), but was only trained with 6000 iterations and given very limited content images. This should be replaced with something trained for longer and with more diverse training content if output quality is to be improved.
There are also three additional Swift files. Image.swift contains UIImage extensions for cropping, resizing, and creating CVPixelBuffer from a given image. This file also includes a function styled(with modelSelection: StyleModel) -> UIImage that will return a copy of the image it is called on, styled with the model and options provided.
StyleModel.swift is the file provided the enumeration passed to the styled(with:) function. Its cases correspond to the styles the .mlmodel file was trained with. Utils.swift just contains a few general-purpose extensions to make code nicer to read and write, including functions for MLMultiArrays, CVPixelBuffers and CGContexts.
Creating a new MLModel
Once you've got TuriCreate up and running, ideally inside a virtualenv (refer to Turi's installation guide for info), activate the virtualenv and make three folders inside it:
- content — place a collection of images of the type you'd like the style transfer to work on in here (ideally lots of images representing a vast range of content: people, animals, landscapes, objects, everything)
- style – place as many different style images as you'd like to be able to transfer in here (the images you want your created images to imitate the style of)
- test – place a collection of images of the same type as the content images in here, so you can potentially evaluate your style transfer model for effectiveness (like the first category but needs less images, content doesn't really matter but will benefit from being varied)
At the same level as the folders, add the train_nst.py script, and execute it using the command python train_nst.py.
Now, sit back and wait for your computer to train a model. Depending on how many styles you ask it to train, and how many content images you provide, this could take upwards of 2 days!
Modifying code
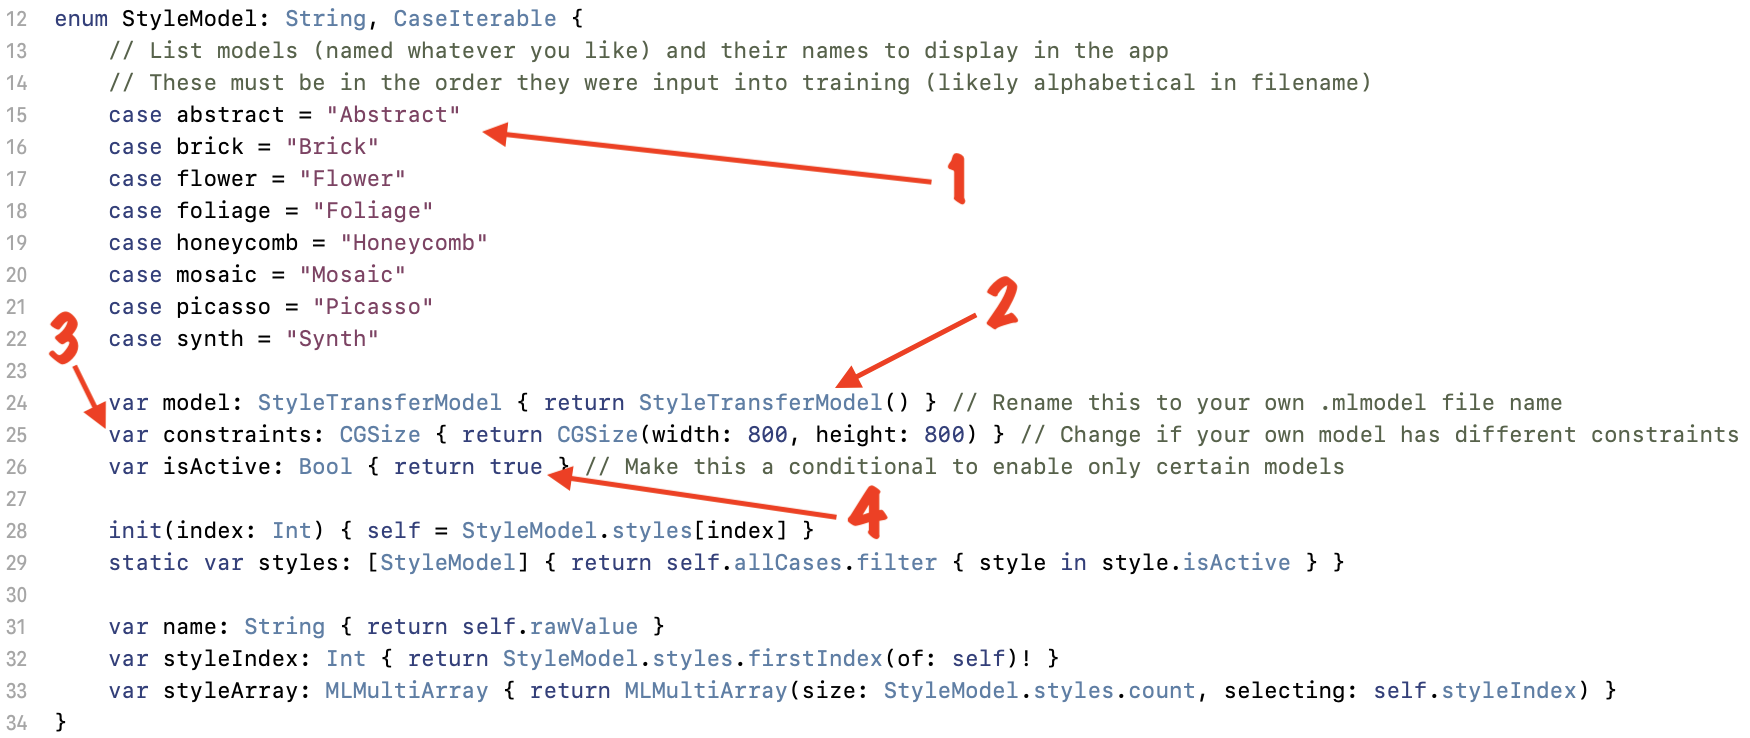
In the StyleModel.swift file, there is the declaration of an enum called StyleModel. It looks as follows:
If a new .mlmodel file has been trained to replace the old one, some changes may need to be made.
- the enum cases should list all model style options in the order they were input into training (this will often be alphabetical by image filename): the case name can be anything, the String rawValue should be how you want it listed in the app
- the model variable type and return value must match the name of your .mlmodel file
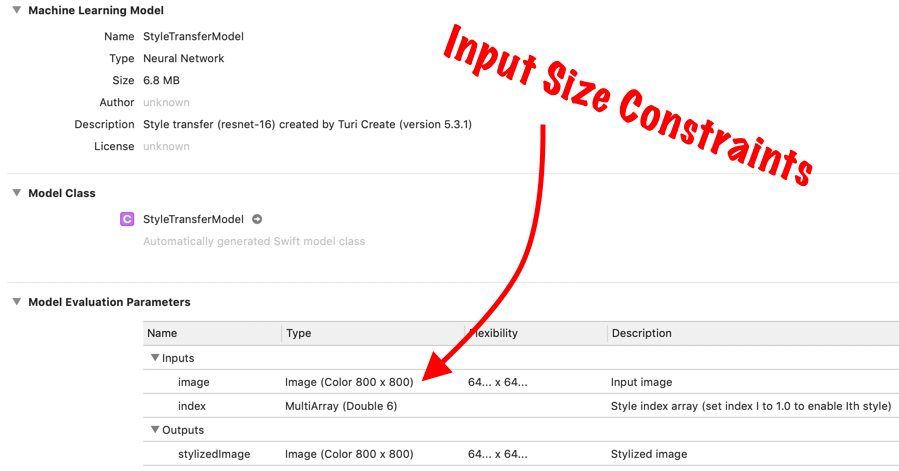
- the constraints for input size must match those listed in the .mlmodel details (see below)
- the isActive variable return value can be replaced with conditional statements to omit styles from being visible and accessible in the app (in case you decide you don't like all styles you trained on, you can still use the same .mlmodel)
And that's it! Go forth and transform!
License
NSTDemo is available under the MIT license. See the LICENSE file for more info.
All images used in the creation of models included are Public Domain or from Pixabay (either CC0 or under the Pixabay License).
Images featured/style-transferred in screenshots are of--and belong to--the repository authors.


