Android Studio Version: Android Studio Koala Feature Drop | 2024.1.2 Beta 1
Android Java | RecyclerView Episode #1
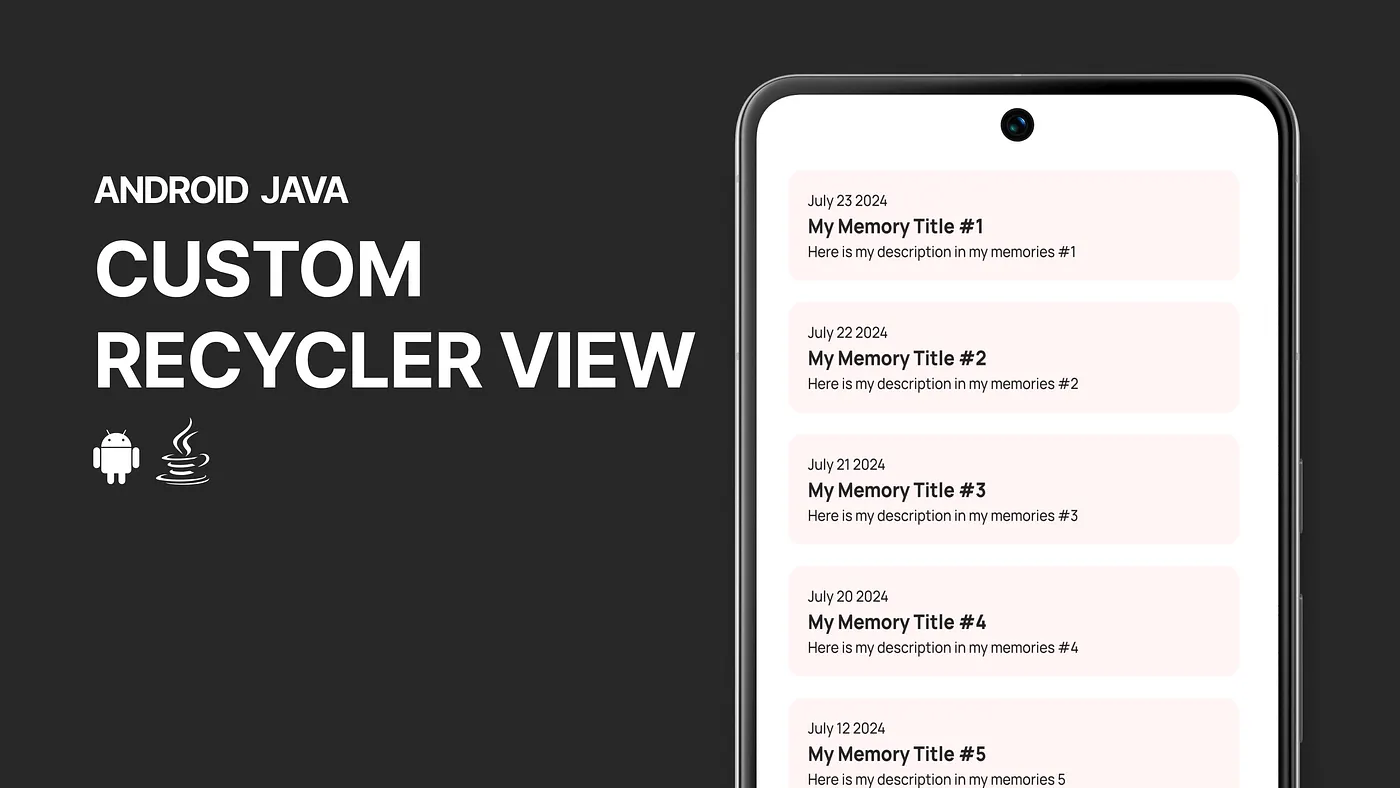
Welcome to this tutorial on creating a Custom Recycler View in Android Java. This guide is designed to be simple and easy to follow, helping you step by step in understanding and implementing a custom Recycler View in your Android projects using Android Studio.
In this tutorial, you will learn how to:
- Set up a Recycler View in Android.
- Create an adapter and model classes.
- Design the layout for your Recycler View items.
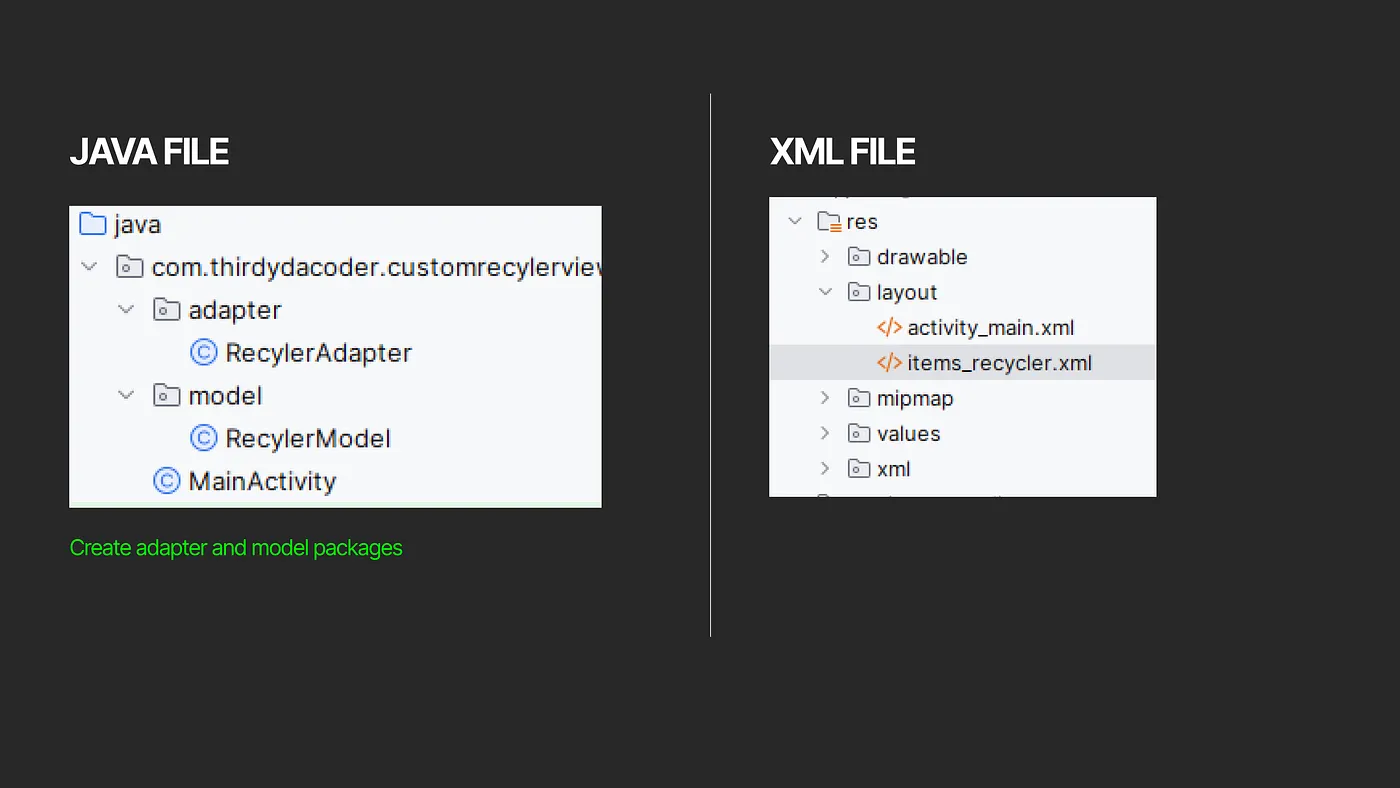
Create the necessary file structure for your project. You will need to create adapter and model packages, along with the necessary XML files for the layouts.
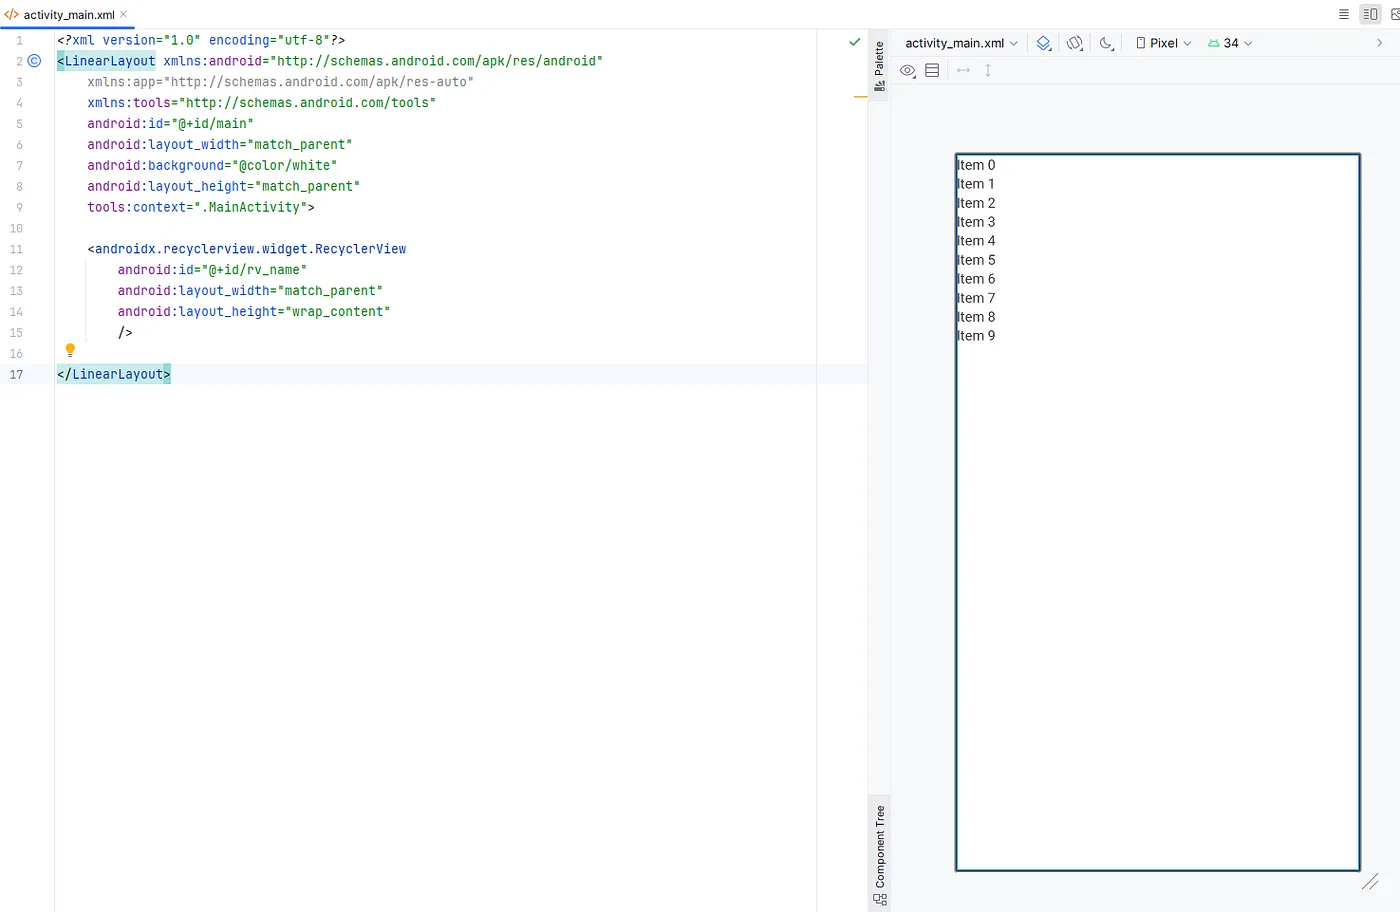
- activity_main.xml
- This file contains the main layout for your activity, including the Recycler View.
<?xml version="1.0" encoding="utf-8"?>
<LinearLayout xmlns:android="http://schemas.android.com/apk/res/android"
    xmlns:app="http://schemas.android.com/apk/res-auto"
    xmlns:tools="http://schemas.android.com/tools"
    android:id="@+id/main"
    android:layout_width="match_parent"
    android:background="@color/white"
    android:layout_height="match_parent"
    tools:context=".MainActivity">
    <androidx.recyclerview.widget.RecyclerView
        android:id="@+id/rv_name"
        android:layout_width="match_parent"
        android:layout_height="wrap_content" />
</LinearLayout>
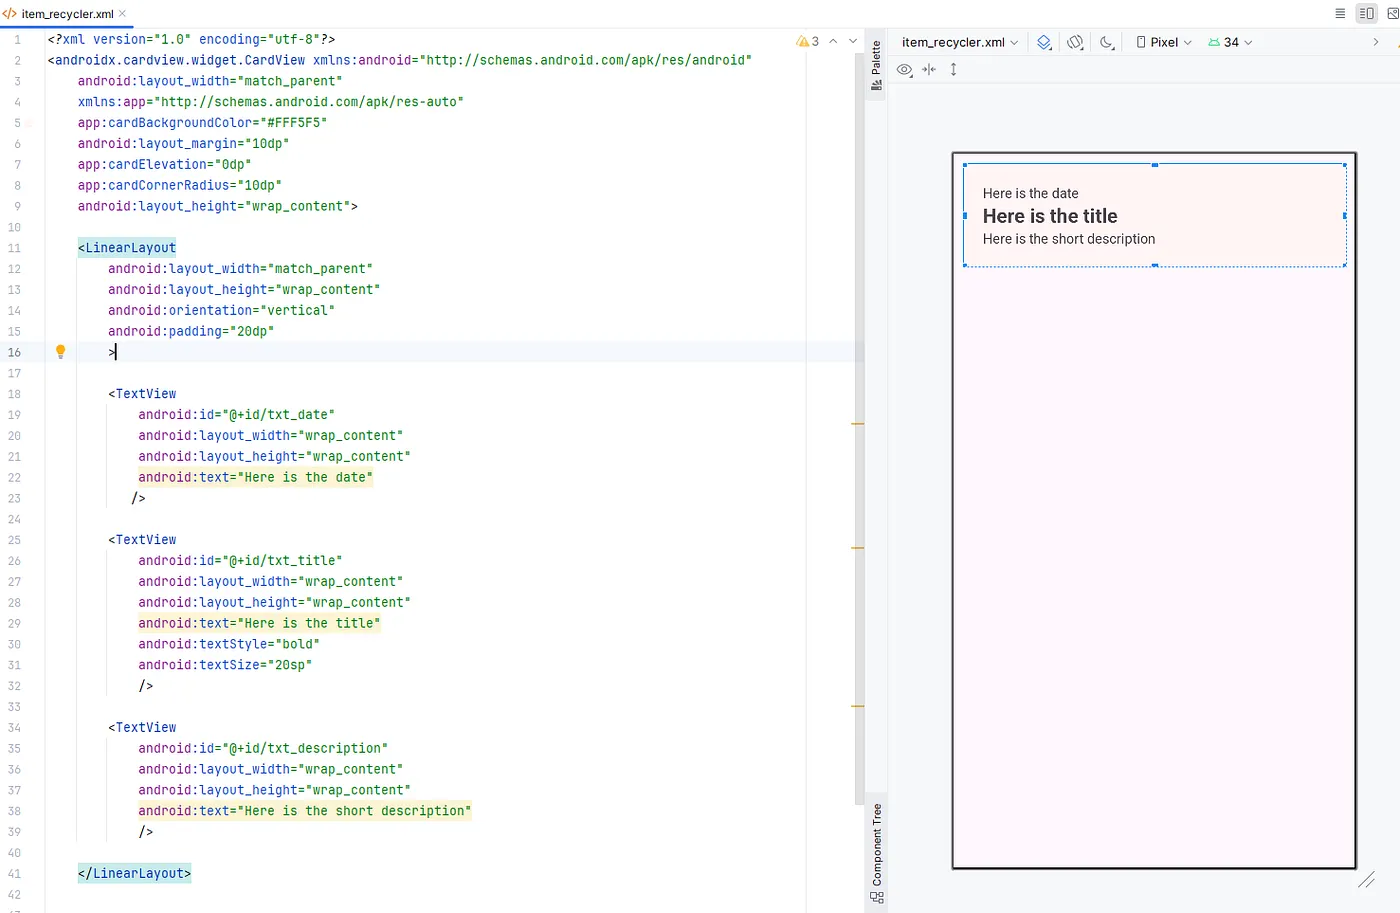
2. item_recyler.xml
This file defines the layout for each item in the Recycler View.
<?xml version="1.0" encoding="utf-8"?>
<androidx.cardview.widget.CardView xmlns:android="http://schemas.android.com/apk/res/android"
    android:layout_width="match_parent"
    xmlns:app="http://schemas.android.com/apk/res-auto"
    app:cardBackgroundColor="#FFF5F5"
    android:layout_marginVertical="5dp"
    android:layout_marginHorizontal="10dp"
    app:cardElevation="0dp"
    app:cardCornerRadius="10dp"
    android:layout_height="wrap_content">
    <LinearLayout
        android:layout_width="match_parent"
        android:layout_height="wrap_content"
        android:orientation="vertical"
        android:padding="20dp">
        <TextView
            android:id="@+id/txt_date"
            android:layout_width="wrap_content"
            android:layout_height="wrap_content"
            android:text="Here is the date" />
        <TextView
            android:id="@+id/txt_title"
            android:layout_width="wrap_content"
            android:layout_height="wrap_content"
            android:text="Here is the title"
            android:textStyle="bold"
            android:textSize="20sp" />
        <TextView
            android:id="@+id/txt_description"
            android:layout_width="wrap_content"
            android:layout_height="wrap_content"
            android:text="Here is the short description" />
    </LinearLayout>
</androidx.cardview.widget.CardView>
Remember the variable names used in these XML files (rv_name, txt_date, txt_title, and txt_description). These will be crucial for connecting the XML layout and the Recycler View adapter.
Using a model is effective because it keeps data organized and clear, making the code easier to understand and manage.
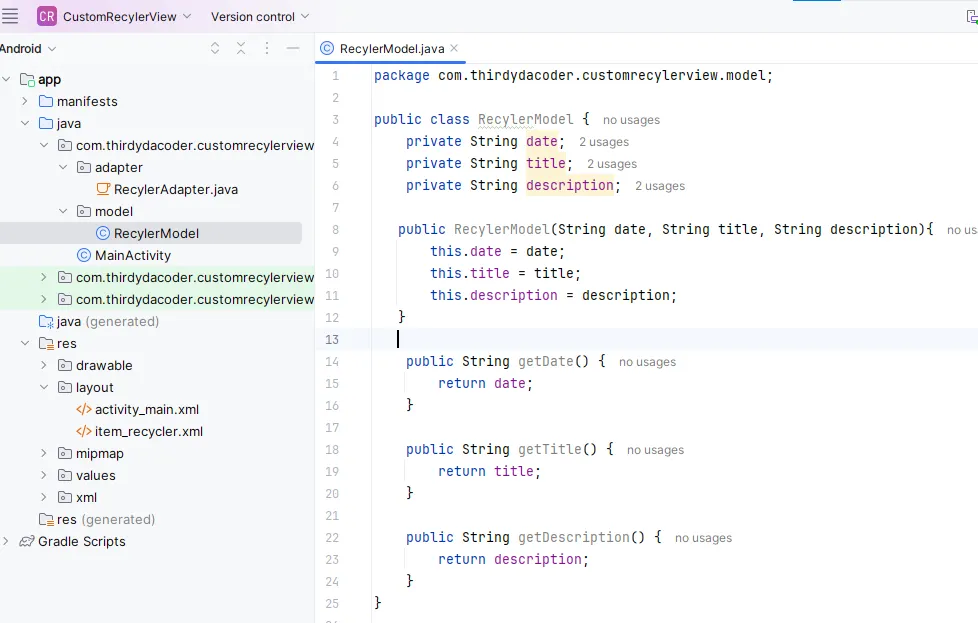
- Private Variables:
date,title, anddescriptionhold data for each item. - Constructor: Initializes
date,title, anddescription. - Getters:
getDate(),getTitle(), andgetDescription()return their values.
public class RecylerModel {
    private String date;
    private String title;
    private String description;
   public RecylerModel(String date, String title, String description){
       this.date = date;
       this.title = title;
       this.description = description;
   }
    public String getDate() {
        return date;
    }
    public String getTitle() {
        return title;
    }
    public String getDescription() {
        return description;
    }
}
An adapter in Android is a bridge between the data source and the user interface (UI) components like RecyclerView. It helps in binding the data to the UI components.
    Context context;
    List<RecylerModel> recylerModels;
    public RecylerAdapter(Context context, List<RecylerModel> recylerModels) {
        this.context = context;
        this.recylerModels = recylerModels;
    }
Context: is a reference to the current state of the application.
List : This list contains the data that will be displayed in the RecyclerView.
public RecyclerAdapter(Context context, List recyclerModels): It is called when a new instance of the adapter is created.
    @NonNull
    @Override
    public RecylerAdapter.ViewHolder onCreateViewHolder(@NonNull ViewGroup parent, int viewType) {
        LayoutInflater inflater =LayoutInflater.from(context);
        View view = inflater.inflate(R.layout.item_recycler, parent, false);
        return new ViewHolder(view);
    }
It inflates the item_recycler.xml layout using the provided context to create a view for each item. This ensures that each item in the RecyclerView has a corresponding view to display its data.
 @Override
    public void onBindViewHolder(@NonNull RecylerAdapter.ViewHolder holder, int position) {
        holder.txtDate.setText(recylerModels.get(position).getDate());
        holder.txtTitle.setText(recylerModels.get(position).getTitle());
        holder.txtDescription.setText(recylerModels.get(position).getDescription());
    }
This method sets the data for each item in the RecyclerView. It updates the text for date, title, and description based on the position of the item in the list.
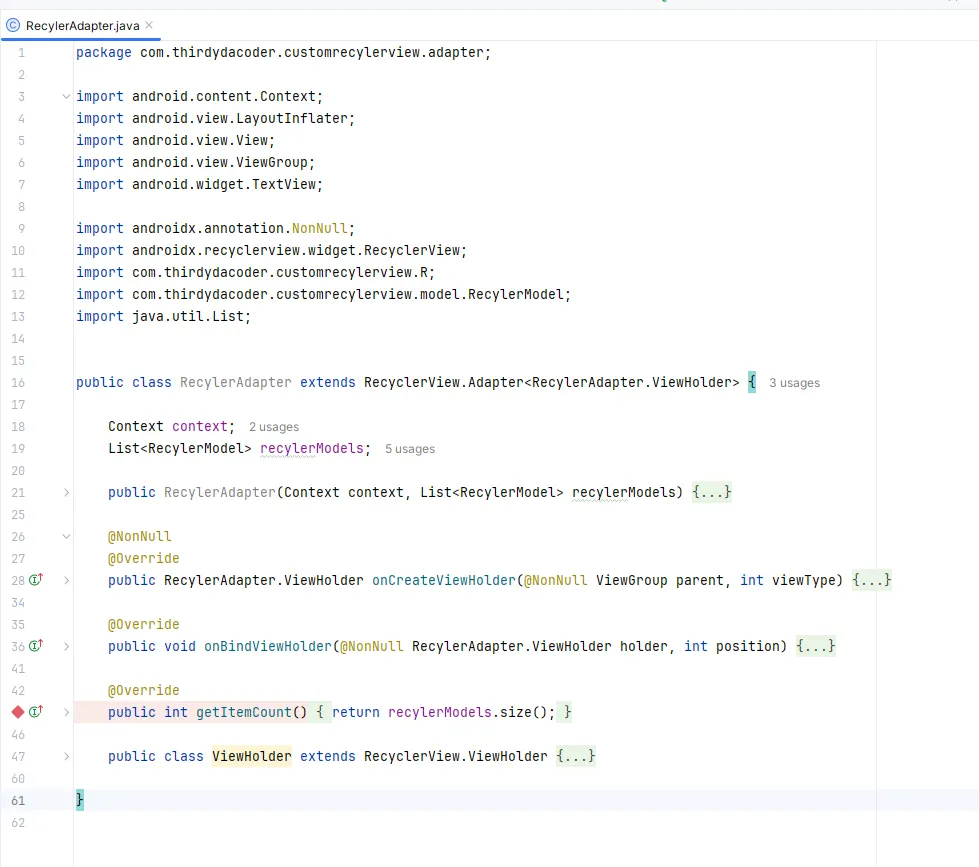
@Override
public int getItemCount() {
    return recylerModels.size();
}
This method returns the total number of items in the list. It tells the RecyclerView how many items to display.
public class ViewHolder extends RecyclerView.ViewHolder {
    TextView txtDate, txtTitle, txtDescription;
    public ViewHolder(@NonNull View itemView) {
        super(itemView);
        txtDate = itemView.findViewById(R.id.txt_date);
        txtTitle = itemView.findViewById(R.id.txt_title);
        txtDescription = itemView.findViewById(R.id.txt_description);
    }
}
The ViewHolder class holds references to the TextViews for the date, title, and description of each item in the RecyclerView. It initializes these references in the constructor by finding the corresponding views in the item layout. This helps to efficiently manage and bind data to the views for each item.
package com.thirdydacoder.customrecylerview.adapter;
import android.content.Context;
import android.view.LayoutInflater;
import android.view.View;
import android.view.ViewGroup;
import android.widget.TextView;
import androidx.annotation.NonNull;
import androidx.recyclerview.widget.RecyclerView;
import com.thirdydacoder.customrecylerview.R;
import com.thirdydacoder.customrecylerview.model.RecylerModel;
import java.util.List;
public class RecylerAdapter extends RecyclerView.Adapter<RecylerAdapter.ViewHolder> {
    Context context;
    List<RecylerModel> recylerModels;
    public RecylerAdapter(Context context, List<RecylerModel> recylerModels) {
        this.context = context;
        this.recylerModels = recylerModels;
    }
    @NonNull
    @Override
    public RecylerAdapter.ViewHolder onCreateViewHolder(@NonNull ViewGroup parent, int viewType) {
        LayoutInflater inflater =LayoutInflater.from(context);
        View view = inflater.inflate(R.layout.item_recycler, parent, false);
        return new ViewHolder(view);
    }
    @Override
    public void onBindViewHolder(@NonNull RecylerAdapter.ViewHolder holder, int position) {
        holder.txtDate.setText(recylerModels.get(position).getDate());
        holder.txtTitle.setText(recylerModels.get(position).getTitle());
        holder.txtDescription.setText(recylerModels.get(position).getDescription());
    }
    @Override
    public int getItemCount() {
        return recylerModels.size();
    }
    public class ViewHolder extends RecyclerView.ViewHolder {
        TextView txtDate, txtTitle, txtDescription;
        public ViewHolder(@NonNull View itemView) {
            super(itemView);
            txtDate = itemView.findViewById(R.id.txt_date);
            txtTitle = itemView.findViewById(R.id.txt_title);
            txtDescription = itemView.findViewById(R.id.txt_description);
        }
    }
}

package com.thirdydacoder.customrecylerview;
import android.os.Bundle;
import androidx.appcompat.app.AppCompatActivity;
import androidx.recyclerview.widget.LinearLayoutManager;
import androidx.recyclerview.widget.RecyclerView;
import com.thirdydacoder.customrecylerview.adapter.RecylerAdapter;
import com.thirdydacoder.customrecylerview.model.RecylerModel;
import java.util.ArrayList;
import java.util.List;
public class MainActivity extends AppCompatActivity {
private RecyclerView recyclerView;
private List<RecylerModel> recylerModel = new ArrayList<>();
private RecylerAdapter recylerAdapter;
@Override
protected void onCreate(Bundle savedInstanceState) {
super.onCreate(savedInstanceState);
setContentView(R.layout.activity_main);
recyclerView = findViewById(R.id.rv_name);
//create data on recyclermodel list
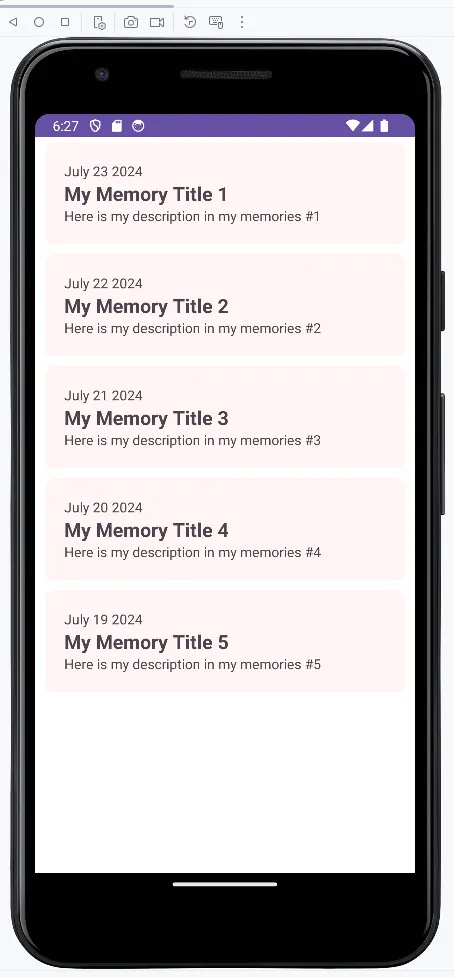
recylerModel.add(new RecylerModel("July 23 2024", "My Memory Title 1", "Here is my description in my memories #1"));
recylerModel.add(new RecylerModel("July 22 2024", "My Memory Title 2", "Here is my description in my memories #2"));
recylerModel.add(new RecylerModel("July 21 2024", "My Memory Title 3", "Here is my description in my memories #3"));
recylerModel.add(new RecylerModel("July 20 2024", "My Memory Title 4", "Here is my description in my memories #4"));
recylerModel.add(new RecylerModel("July 19 2024", "My Memory Title 5", "Here is my description in my memories #5"));
//call adapter
recylerAdapter = new RecylerAdapter(this, recylerModel);
//Set adapter on recyler view
recyclerView.setAdapter(recylerAdapter);
recyclerView.setLayoutManager(new LinearLayoutManager(this));
}
}
In the final step, we set up MainActivity to show data in the custom RecyclerView. We declare a RecyclerView, a list of RecyclerModel items, and a RecyclerAdapter. In the onCreate method, we initialize the RecyclerView and fill the list with sample data. We then create the RecyclerAdapter with the context and data list and set this adapter to the RecyclerView. Lastly, we set a LinearLayoutManager to arrange the items vertically. This setup makes the RecyclerView display our data.
Thank you for following this tutorial on creating a Custom Recycler View in Android Java.
If you found this helpful, please subscribe to my YouTube channel for more tutorials.
Buy me a coffee
https://www.buymeacoffee.com/thirdygayares
Please check out my other content and connect with me on various platforms:
- YouTube: @thirdydacoder
- Github: thirdygayares
- LinkedIn: Jose Gayares III
- Facebook Page: Thirdy Dacoder
- Website: thirdygayares.com
- Website : thirdygraphics.com
Feel free to reach out with any questions or feedback. Happy coding!