The goals / steps of this project are the following:
- Use the simulator to collect data of good driving behavior
- Build, a convolution neural network in Keras that predicts steering angles from images
- Train and validate the model with a training and validation set
- Test that the model successfully drives around track one without leaving the road
- Summarize the results with a written report
Here I will consider the rubric points individually and describe how I addressed each point in my implementation.
My project includes the following files:
- model.py containing the script to create and train the model
- drive.py for driving the car in autonomous mode
- model.h5 containing a trained convolution neural network
- writeup_report.md or writeup_report.pdf summarizing the results
Using the Udacity provided simulator and my drive.py file, the car can be driven autonomously around the track by executing
python drive.py model.h5The model.py file contains the code for training and saving the convolution neural network. The file shows the pipeline I used for training and validating the model, and it contains comments to explain how the code works.
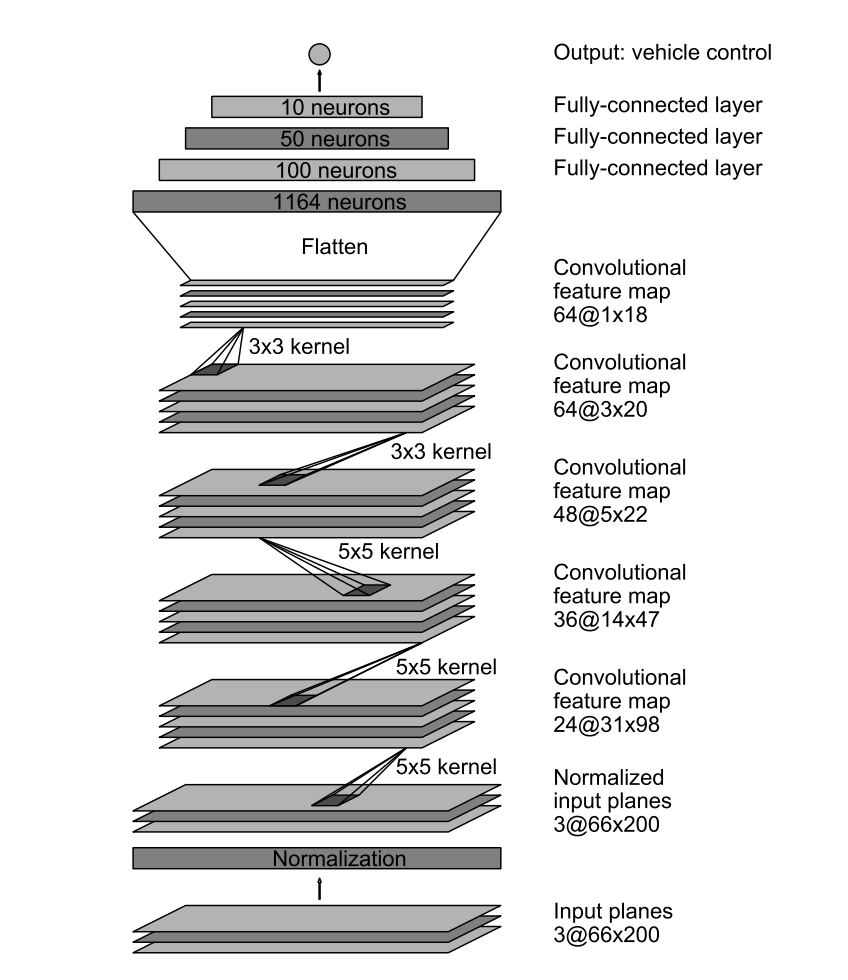
My model is based on the suggested Nvidia architecture.
My model consists convolutional neural network with 5x5 and 3x3 filter sizes, and depths between 24 and 64 (model.py lines 86-117)
The model includes RELU activations to introduce nonlinearity in each of its convolutions (lines 92-100), and the data is normalized in the model using a Keras Lambda layer (code line 86).
The images are cropped, with 70 pixels removed from the top, and 25 from the bottom, with a Keras Cropping2D layer (line 90).
The model was trained and validated on different data sets to ensure that the model was not overfitting (model.py line 117). The model was tested by running it through the simulator and ensuring that the vehicle could stay on the track.
The model used an Adam optimizer, so the learning rate was not tuned manually (model.py line 115).
Training data was chosen to keep the vehicle driving on the road. I used exclusively images based on trying to stay in the center of the lane, although I was imperfect at staying in the center, which I kept in to help the model learn to correct itself.
For details about how I created the training data, see the next section.
The overall strategy for deriving a model architecture was to follow the steps given in the Udacity lessons. I put together what they suggested, and it worked without even including the left or right images, or actively adding correction data.
I had to adjust the speed in the drive.py file (line 47), but other than that I mostly just followed directions.
My first step was to use a convolutional neural network model similar to the Nvidia model presented in the online lectures. I thought this model might be appropriate because it had already been used on in the real world, and that should hopefully translate to more simplified, simulated conditions.
In order to gauge how well the model was working, I split my image and steering angle data into a training and validation sets. At first the model was taking a LONG time to run. This was because I was not using the generator function, which yields (returns) an array in batches (smaller groups) instead of constructing and iterating through the entire data set. I was also initially using the left and right camera images, as well as flipping them, which I will eventually put back into an improved model, but I have to minimum-viable-product things for now, with Term 1 closing soon.
My model has a low mean squared error on both the training and validation sets, implying it was doing a good job predicting the angles. Again, I was surprised by this, because the Nvidia model is strong enough to work without drop out layers, or the left and right camera angles as long as you augment the center images with their flipped counter-parts.
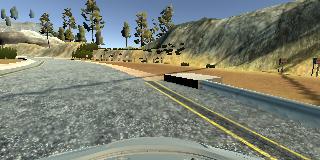
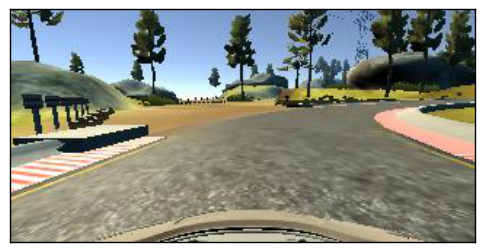
The final step was to run the simulator to see how well the car was driving around track one. The model worked the first time I tried it at a constant speed of 9 mph. I then really hit the simulated nitro at by setting my drive.py speed to 30 mph (line 47), which caused the car to veer wildly into a stony ravine. I then adjusted it to 18 mph, and it almost worked, eventually settling at 15 mph. Here's the only curve the vehicle had trouble with at 18 mph:
At the end of the process, the vehicle is able to drive autonomously around the track without leaving the road.
The final model architecture (model.py lines 86-117) consisted of a convolution neural network with the following layers and layer sizes:
| Layer (type) | Output Shape | Parameters |
|---|---|---|
| Lambda | (None, 160, 320, 3) | 0 |
| Cropping2D | (None, 65, 320, 3) | 0 |
| Convolution2D (5x5) | (None, 31, 158, 24) | 1824 |
| Convolution2D (5x5) | (None, 14, 77, 36) | 21636 |
| Convolution2D (5x5) | (None, 5, 37, 48) | 43248 |
| Convolution2D (3x3) | (None, 3, 35, 64) | 27712 |
| Convolution2D (3x3) | (None, 1, 33, 64) | 36928 |
| Flatten | (None, 2112) | 0 |
| Dense | (None, 100) | 211300 |
| Dense | (None, 50) | 5050 |
| Dense | (None, 10) | 510 |
| Dense | (None, 1) | 11 |
Total parameters: 348,219
Trainable parameters: 348,219
Non-trainable parameters: 0
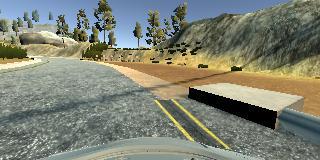
To capture good driving behavior, I first recorded three laps on track one using center lane driving. Here is an example image of center lane driving:
After the collection process, I had 3214 CSV rows of data, with 9642 corresponding images. Using just the 3214 center images, I preprocessed this data by converting the color layer order form BGR to RGB. I used a Lambda layer to normalize the data around an average value of zero. I finally randomly shuffled the data set and put 20% of the data into a validation set.
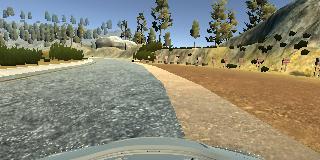
To augment the data sat, I also flipped images and angles to avoid overfitting for left turns. Because the track is essentially a circle, the car is getting mostly left turn data. Therefore I mirrored every image and angle (multiplied angle by -1) to make sure there was an equal distribution of turns to both the right and left. For example, here is an image that has then been flipped:
I used this combination of preprocessed and augmented data for training the model. The validation set helped determine if the model was over or under fitting. The ideal number of epochs appears to be 9, as evidenced by the increased loss in both the training and validation sets.
Epoch 1/10

6464/6428 [==============================] - 54s - loss: 0.0076 - val_loss: 0.0060

Epoch 2/10

6456/6428 [==============================] - 13s - loss: 0.0067 - val_loss: 0.0067

Epoch 3/10

6464/6428 [==============================] - 12s - loss: 0.0054 - val_loss: 0.0060

Epoch 4/10

6456/6428 [==============================] - 12s - loss: 0.0060 - val_loss: 0.0067

Epoch 5/10

6464/6428 [==============================] - 12s - loss: 0.0049 - val_loss: 0.0065

Epoch 6/10

6456/6428 [==============================] - 12s - loss: 0.0055 - val_loss: 0.0055

Epoch 7/10

6464/6428 [==============================] - 12s - loss: 0.0046 - val_loss: 0.0056

Epoch 8/10

6456/6428 [==============================] - 12s - loss: 0.0052 - val_loss: 0.0047

Epoch 9/10

6464/6428 [==============================] - 12s - loss: 0.0044 - val_loss: 0.0048

Epoch 10/10

6456/6428 [==============================] - 12s - loss: 0.0051 - val_loss: 0.0058
Although it is possible that the Adam optimizer may have found a lower rate, given it was trending towards a better fit despite not having consistently lower loss for each new epoch. I used an Adam optimizer so that manually training the learning rate wasn't necessary.
There are many ways I hope to improve this model in the future. I'd like to incorporate the left and right images, and data from the second, more difficult track. It would also be helpful to give the drive.py file a range of speeds to drive at, as opposed to a constant speed. Also, sometimes the road has shadows that the car seems to avoid slightly, so shadows could be included in some of the augmented images. Overall, this is an incredibly fun and exciting project, and I look forward to diving deeper into it in the near future.

