Simple Node.js server example for using the Watson Assistant API v2
This is a simple example to use the Watson Assistant API v2 with the Node.js SDK to get a Watson Assistant sessionID and send a message to Watson Assistant using this session ID.
Related blog post: Simple Node.js server example using the Watson Assistant API v2
These are the REST endpoints of the simple Node.js server:
GETgetsession (which creates a newsessionID)POSTsendmessage
The project contains examples for using Postman.
Here are the steps you can follow to run that example on your local machine.
git clone https://github.com/thomassuedbroecker/
watson-assistant-simple-node-js-server-example.git
cd
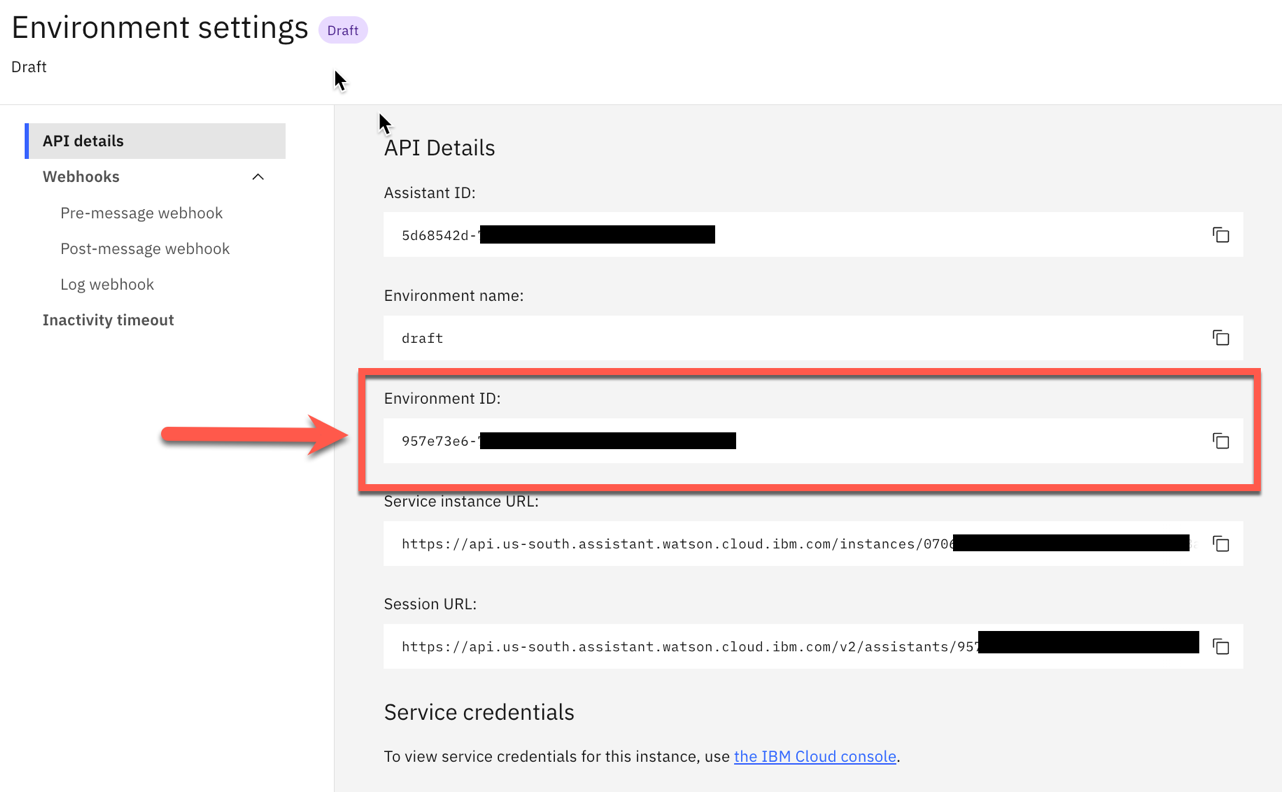
watson-assistant-simple-node-js-server-example/code/simple-serverHere we need an environment ID. We can find this ID in the Watson Assistant user interface, by navigating to the Environments page and selecting the environment you want to use (such as Draft or Live). Then you open the environment settings and copy the value from the appropriate field. (Contains the Link to the IBM Cloud documentation)
The image blow shows the environment ID in the IBM Cloud UI.
We also need an API key and a base URL from the Credentials. The image below shows the API key and the URL in the IBM Cloud UI.
- Create an
.envfile
cat .env-template > .env- Configure the
.envfile to your needs
WATSON_ASSISTANT_VERSION='2021-11-27'
WATSON_ASSISTANT_API_KEY='XXXX'
WATSON_ASSISTANT_SERVICE_URL='https://api.us-south.assistant.watson.cloud.ibm.com'
WATSON_ASSISTANT_ENVIRONMENT_ID='XXX'npm install
npm startIt returns the newly created sessionID.
open http://localhost:3010/getsession- Example output:
{
"session_id": "37d13c72-1643-4add-bee5-574c6fd062dc"
}The images shows the import button in postman.
Select the /postman/watson-assistant-example.postman_collection.json in the project for the import.
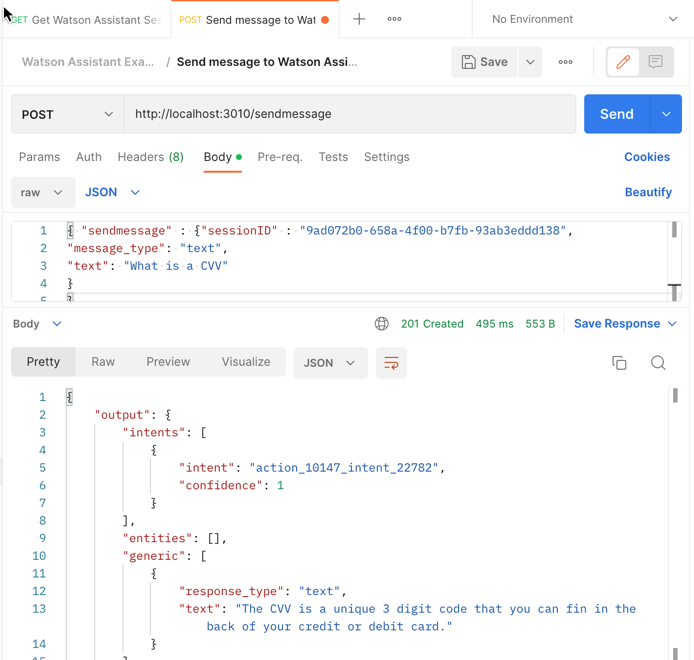
The images shows the imported collection.
This is the JSON format which is used in the post request sendmessage
{ "sendmessage" : {
  "sessionID" : "XXXX",
  "message_type": "text",
  "text": "Hello"
  }
}


