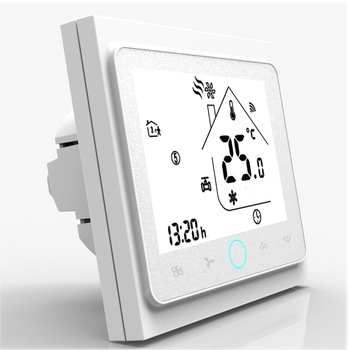
Fork of https://github.com/klausahrenberg/WThermostatBeca with some new features
Replaces original Tuya firmware on Beca thermostat with ESP8266 wifi module. The firmware is tested with following devices:
- BHT-002-GBLW, BHT-6000 (floor heating)
- BHT-002-GALW (Water/Gas heating)
- BHT-002-GCLW (Water/Gas Boiler)
- BAC-002-ALW (heater, cooling, ventilation)
Also selled by Moes or Qiumi.
- No Cloud dependencies!
- Enables thermostat to communicate via MQTT and/or Mozilla WebThings
- Autodiscovery for Home Assistant via MQTT (fas)
- Autodiscovery for WebThings via mDNS
- Configuration of connection, device parameters and schedules via web interface
- Provides NTP, time zone handling and Daylight-Saving-Calculation (fas) to set the clock of thermostat
- Provides Fallback to Access Point mode if requested using panel-buttons (fas)
- Reading and setting of all parameters via MQTT
- Reading and setting of main parameters via WebThings
- Only BHT-002-GxLW: actualFloorTemperature (external temperature sensor)
- Only BAC-002-ALW: fanSpeed:auto|low|medium|high; systemMode:cooling|heating|ventilation
- Reading and setting of time schedules via MQTT
- Reading and setting of Schedules via Web-GUI
- Automatic switching back to temperature-scheduling from manual mode next schedule interval (optional)
- Logging to MQTT (fas)
(fas): Only available in -fas version
The Hardware itself has two Microcontrollers:
- The MCU, the Main Controlling Unit.
- It controls Temperature, Display, the Relay, Scheduling, has RTC, etc.
- The software on the MCU gets not upgraded with WThermostat, so no changes here.
- The ESP8266-based Tuya-Wifi-Module.
- WThermostat replaces the Software on this ESP-Module
- There is a serial connection between MCU and ESP. Via this connection the we can control the MCU
- Only the Wifi-Verisons of thermostats have the ESP-Module.
You need the WiFi Version! (W in productname suffix, like -GALW). There is also a version without WLAN.
The BHT Version is for heating only. The BAC-Version has modes Cooling, Heating and Ventilation. The BHT-002-GA/GB/GC versions only differs in relays-wiring.
- GA - Water-Heating
- Two Relays for opening and closing valve
- Only one Relay will be closed at the same time
- Closing Relay PIN 1 - PIN 3 (N or L)
- Opening Relay PIN 2 - PIN 3 (N or L)
- Product Spec says Max Power: 3 A
- GB - Electric-Heating
- Connect Heating between PIN 1 and PIN 2
- Product Spec says Max Power: 16 A
- GC - Water/Gas Boiler
- One Relay - potential free (dry contact)
- Relay on PIN 1 - PIN 2 (dry contacts)
- Product Spec says Max Power: 3 A
You can connect one external NTC temperature sensor (type 10K, 3950) to BHT-002 thermostates, for GB-Model it's included. In settings menu of MCU (option 4) you can switch between internal (IN), external (OU) and All (AL).
- IN-Mode: MCU reports only temperature of internal sensor and uses it for thermostat room-temperature. Value "floorTemperature" shows 0.00, or last measured value of OU- or AL-Mode (even after restart or re-powering).
- OU-Mode: MCU reports only temperature of external sensor and uses it for thermostat room-temperatur. Values "temperature" and "floorTemperature" are the same (external sensor).
- AL-Mode: MCU reports both temperatures, uses internal sensor for room-temperature and external sensor for maximum floor temperature overheating protection. Values "temperature" and "floorTemperature" are both valid.
- Hint: Long pressing the most right button for 5 seconds (while device switched on) the displays shows external temperature.
Pre-built binaries can be downloaded at releases-page.
- see Installation.md
You can install the firmware either
- by using tuya-convert - no Hardware Modifications necessary
- by soldering cables to the ESP-Modules using an ESP/Arduino-Programmer (3,3 Volt TTL)
Yoube video of converting to 1.14-fas with tuya-convert: https://youtu.be/fqfghJqnK_8
Follow instructions here: Flashing.md
To setup the device model, network options and other parameters, follow instrcution here:
Configuration.md
After initial setup, the device configuration is available via http://<device_ip>/
You can Upgrade over the Air from other versions of ThermostatBecaWifi on the Web-GUI. Please check all settings after Upgrade!
If you upgrade from original Klaus-Ahrenberg's Original-Version please note:
- Only WLAN settings are kept
- If you get "Not Enough Space" you can use WThermostat_1.xx-fas-minial.bin as interim-version.
- WLAN settings are kept
- no MQTT, no Beca-control, no Clock in -minimal
- Then Upgrade to normal-version
- Not neccessary when upgrading from fas to fas versions
Main Screen:
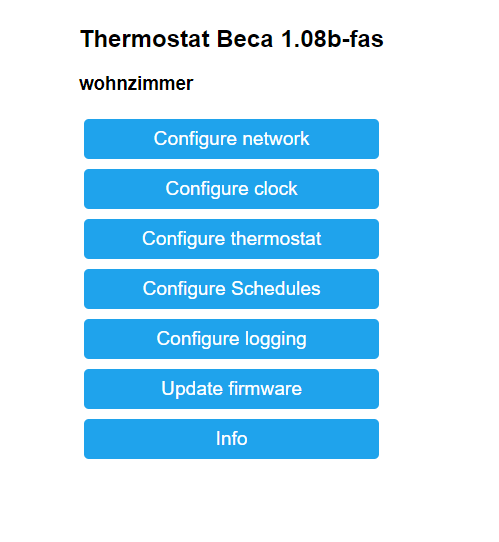
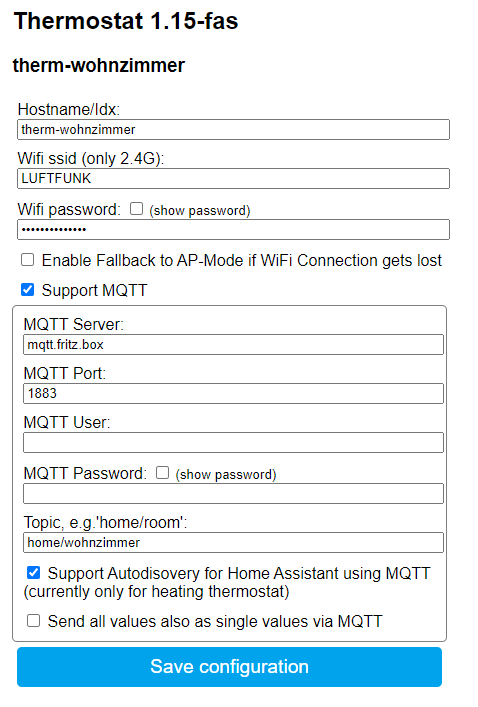
Network Screen:
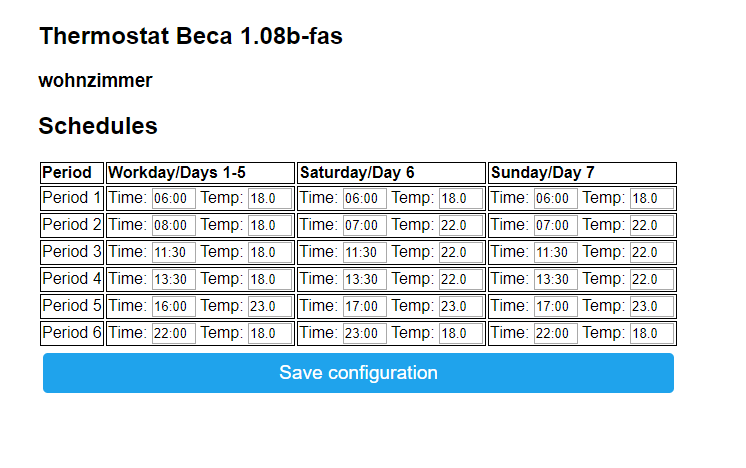
Schedule Screen:
Since version 0.96 this firmware supports Mozilla WebThings directly. With webthings you can control the thermostat via the Gateway - inside and also outside of your home network. No clunky VPN, dynDNS solutions needed to access your home devices. I recommend to run the gateway in parallel to an MQTT server and for example Node-Red. Via MQTT you can control the thermostat completely and logic can be done by Node-Red. WebThings is used for outside control of main parameters.
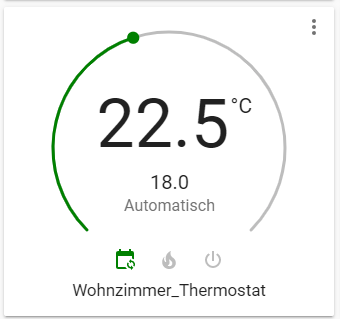
Add the device to the gateway via '+' icon. After that you have the new nice and shiny icon in the dashboard:
![]()
The icon shows the actual temperature and heating state.
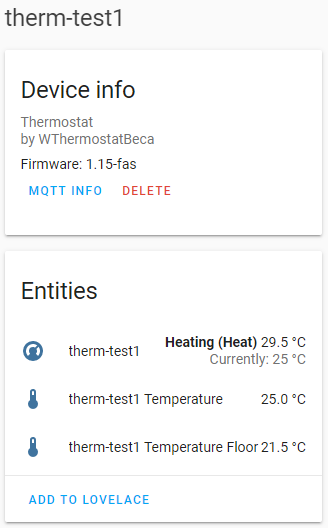
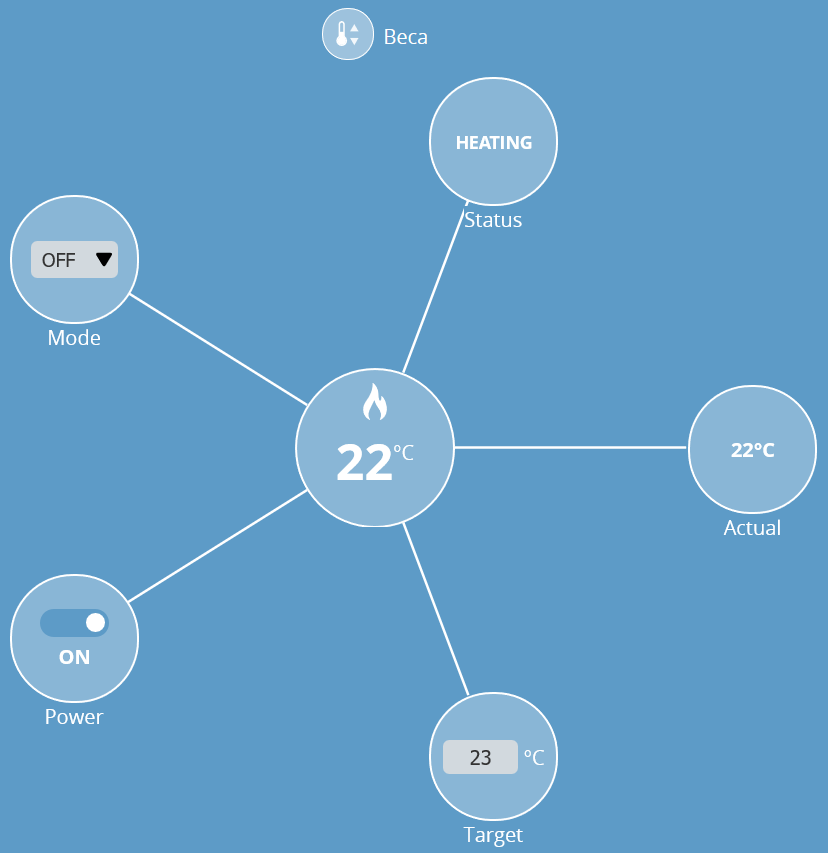
There is also a detailed view available:
ThermostatBecaWifi supports optional HASS-Autodiscovery since Version 1.08-fas (currently only for heating devices). You have to enable it at Thermostate (settings network) and of course it must be enabled in your HASS configuration.yaml file:
mqtt:
  broker: <ip of broker>
  discovery: true
discovery_prefix: homeassistantYou should use a persistent MQTT-Broker, keeping all retained messages during reboot/restart. HASS integrated MQTT broker is not persistent Otherwise all autodiscovered messages are getting lost and you have to reboot all devices, to send HASS autodiscover messages again! See: https://www.home-assistant.io/docs/mqtt/discovery/
Example for users of mosquitto, file mosquitto.conf:
persistence true
persistence_file mosquitto.db
persistence_location /var/lib/mosquitto/
autosave_interval 1800
# The default if not set is to never expire persistent clients.
persistent_client_expiration 24h
See https://mosquitto.org/man/mosquitto-conf-5.html for more details.
For manual Configuration here is an example for your configuration.yaml file:
climate:
  - platform: mqtt
    name: Room_Thermostat
    availability_topic: "home/room/tele/LWT"
    payload_available: "Online"
    payload_not_available: "Offline"
    action_topic: "home/room/stat/things/thermostat/properties"
    action_template: "{{value_json.action}}"
    temperature_command_topic: "home/room/cmnd/things/thermostat/properties/targetTemperature"
    temperature_state_topic: "home/room/stat/things/thermostat/properties"
    temperature_state_template: "{{value_json.targetTemperature}}"
    current_temperature_topic: "home/room/stat/things/thermostat/properties"
    current_temperature_template: "{{value_json.temperature}}"
    away_mode_command_topic: "home/room/cmnd/things/thermostat/properties/ecoMode"
    away_mode_state_topic: "home/room/stat/things/thermostat/properties"
    away_mode_state_template: "{{value_json.ecoMode}}"
    mode_command_topic: "home/room/cmnd/things/thermostat/properties/mode"
    mode_state_topic: "home/room/stat/things/thermostat/properties"
    mode_state_template: "{{value_json.mode}}"
    payload_on: "true"
    payload_off: "false"
    modes: [ "heat", "auto", "off" ]
    min_temp: 5
    max_temp: 35
    temp_step: 0.5
    precision: 0.5
If you have several thermostates you can anchor some settings while defining the first device and refer later on. Example:
climate:
- platform: mqtt
  name: Wohnzimmer_Thermostat
  availability_topic: "home/wohnzimmer/tele/LWT"
  action_topic: "home/wohnzimmer/stat/things/thermostat/properties"
  temperature_command_topic: "home/wohnzimmer/cmnd/things/thermostat/properties/targetTemperature"
  temperature_state_topic: "home/wohnzimmer/stat/things/thermostat/properties"
  current_temperature_topic: "home/wohnzimmer/stat/things/thermostat/properties"
  away_mode_command_topic: "home/wohnzimmer/cmnd/things/thermostat/properties/ecoMode"
  away_mode_state_topic: "home/wohnzimmer/stat/things/thermostat/properties"
  mode_command_topic: "home/wohnzimmer/cmnd/things/thermostat/properties/mode"
  mode_state_topic: "home/wohnzimmer/stat/things/thermostat/properties"
  <<: &commonbeca
    payload_available: "Online"
    payload_not_available: "Offline"
    action_template: "{{value_json.action}}"
    temperature_state_template: "{{value_json.targetTemperature}}"
    current_temperature_template: "{{value_json.temperature}}"
    mode_state_template: "{{value_json.mode}}"
    away_mode_state_template: "{{value_json.ecoMode}}"
    payload_on: "true"
    payload_off: "false"
    modes: [ "heat", "auto", "off" ]
    min_temp: 5
    max_temp: 35
    temp_step: 0.5
    precision: 0.5
- platform: mqtt
  name: Flur_Thermostat
  availability_topic: "home/flur/tele/LWT"
  action_topic: "home/flur/stat/things/thermostat/properties"
  temperature_command_topic: "home/flur/cmnd/things/thermostat/properties/targetTemperature"
  temperature_state_topic: "home/flur/stat/things/thermostat/properties"
  current_temperature_topic: "home/flur/stat/things/thermostat/properties"
  away_mode_command_topic: "home/flur/cmnd/things/thermostat/properties/ecoMode"
  away_mode_state_topic: "home/flur/stat/things/thermostat/properties"
  mode_command_topic: "home/flur/cmnd/things/thermostat/properties/mode"
  mode_state_topic: "home/flur/stat/things/thermostat/properties"
  <<: *commonbeca
- platform: mqtt
  name: WC_Thermostat
  availability_topic: "home/wc/tele/LWT"
  action_topic: "home/wc/stat/things/thermostat/properties"
  temperature_command_topic: "home/wc/cmnd/things/thermostat/properties/targetTemperature"
  temperature_state_topic: "home/wc/stat/things/thermostat/properties"
  current_temperature_topic: "home/wc/stat/things/thermostat/properties"
  away_mode_command_topic: "home/wc/cmnd/things/thermostat/properties/ecoMode"
  away_mode_state_topic: "home/wc/stat/things/thermostat/properties"
  mode_command_topic: "home/wc/cmnd/things/thermostat/properties/mode"
  mode_state_topic: "home/wc/stat/things/thermostat/properties"
  <<: *commonbeca
See https://www.home-assistant.io/integrations/climate.mqtt/ for more information.
The software provides different messages:
- Thermostat State report (JSON)
- Schedules (JSON)
- Device (at start of device to let you know the topics and ip)
- Logs (Plain)
MQTT: State report is provided every 5 minutes, at change of a parameter or at request via message with empty payload to <your_topic>/cmnd/things/thermostat/properties , reports are sent to <your_topic>/stat/things/thermostat/properties.
The state report is sent with MQTT-retain-flag enabled.
WebThings: State report can be requested by: http://<device_ip>/things/thermostat/properties
{
  "idx":"thermostat_beca",
  "ip":"192.168.0.xxx",
  "firmware":"x.xx",
  "temperature":21.5,
  "targetTemperature":23,
  "deviceOn":true,
  "schedulesMode":"off|auto",
  "ecoMode":false,
  "locked":false,
  "state":"off|heating", //only_available, if hardware is modified
  "floorTemperature":20, //only_BHT-002-GxLW
  "fanMode":"auto|low|medium|high", //only_BAC-002-ALW
  "systemMode":"cool|heat|fan_only", //only_BAC-002-ALW
  "mode":"off|auto|heat" // BHT-002: combined Mode for better home assistant support.
  "mode":"off|autoheat|autocool|autofan|heat|cool|fan_only" // BAC-002-ALW
  "action":"off|idle|heating|cooling|fan" // read only current action, idle only available if hardware is modified, cooling/fan only BAC-002
}MQTT: Request actual schedules via message with empty payload to <your_topic>/cmnd/things/thermostat/schedules, answers are reported to to <your_topic>/stat/things/thermostat/schedules
WebThings: State report can be requested by: http://<device_ip>/things/thermostat/schedules
{
  "w1h":"06:00",
  "w1t":20,
  "w2h":"08:00",
  "w2t":15,
  ...
  "w6h":"22:00",
  "w6t":15,
  "a1h":"06:00",
  ...
  "a6t":15,
  "u1h":"06:00",
  ...
  "u6t":15
}MQTT: At start of device to let you know the topics and ip to devices/thermostat
WebThings: n.a.
{
  "url":"http://192.168.0.xxx/things/thermostat",
  "ip":"192.168.0.xxx",
  "topic":"thermostat_beca/things/thermostat"
}If logging is enabled (webgui/mqtt) you will see messages like:
<your_topic>/tele/log trace: sending heartBeatCommand
<your_topic>/tele/log trace: commandCharsToSerial: 55 aa 00 00 00 00
WebThings: n.a. MQTT: The retained message at topic '<your_topic>/tele/LWT' is set to the value "Online" if the devices comes up and your MQTT-Broker is requested to set to "Offline" as last will when device goes down.
Send a json with changed parameters to <your_topic>/cmnd/things/thermostat/properties.
Send a json with changed schedules to <your_topic>/cmnd/things/thermostat/schedules.
Also you can change single values by sending the value to <your_topic>/cmnd/things/thermostat/properties/parameterName.
Examples:
# set device on
mosquitto_pub -h mqtt -t home/test/cmnd/things/thermostat/properties/deviceOn  -m "true"

# set device to heating
mosquitto_pub -h mqtt -t home/test/cmnd/things/thermostat/properties/mode  -m "heat"

# set target temperature
mosquitto_pub -h mqtt -t home/test/cmnd/things/thermostat/properties/targetTemperature  -m "23.5"

# set target temperature (json)
mosquitto_pub -h mqtt -t home/test/cmnd/things/thermostat/properties -m '{"targetTemperature":23.00}'

# set target temperature and mode (json)
mosquitto_pub -h mqtt -t home/test/cmnd/things/thermostat/properties -m '{"targetTemperature":22.00,"mode":heat}'

# set device to auto (target temperature controlled by MCU-Scheduler)
mosquitto_pub -h mqtt -t home/test/cmnd/things/thermostat/properties/mode -m "auto"

# just request properties
mosquitto_pub -h mqtt  -t home/test/cmnd/things/thermostat/properties -n

# request properties and show answer directly
mosquitto_rr -h mqtt -t home/test/cmnd/things/thermostat/properties  -n -e home/test/stat/things/thermostat/properties


# Change Schedules (here: weekday schedules)
mosquitto_pub -h mqtt -t home/test/cmnd/things/thermostat/schedules -m \
'{"w1h":"06:00","w1t":20.00,"w2h":"08:00","w2t":15.00,"w3h":"11:30","w3t":15.00,"w4h":"13:30","w4t":15.00,"w5h":"17:00","w5t":23.00,"w6h":"23:00","w6t":15.00}'

# disable MQTT logging
mosquitto_pub -h mqtt -t home/test/cmnd/things/logging/properties/logLevel -m "silent"

# set to level trace (available: silent|fatal|error|warning|notice|trace|verbose)
mosquitto_pub -h mqtt -t home/test/cmnd/things/logging/properties/logLevel -m "trace"

# show logs
mosquitto_sub -h mqtt -v -t "home/test/tele/log/#"
Flash the original firmware (see installation). Write me a message with your exact model and which parameter was not correct. Maybe your MQTT-server received some unknown messages - this would be also helpful for me. Again: I have tested this only with model BHT-002-GBLW. If you have another device, don't expect that this is working directly.
For build from sources i suggest Visual Studio Code and Platform.IO. All sources needed are inside the folder 'WThermostat', also you need the WAdapter library from https://github.com/fashberg/WAdapter. Additionally you will need some other libraries: DNSServer, EEPROM (for esp8266), ESP8266HTTPClient, ESP8266mDNS, ESP8266WebServer, ESP8266WiFi, Hash, NTPClient, Time.
