This workflow takes in unprocessed fastq.gz files from short-read sequencers then pre-process, map, and call variants against the M. leprae genome TN reference (pre-configured). The original workflow was built upon python2 code from Chloe Loiseau and adapted with python3 code and Snakemake workflow manager by me. The workflow is delivered through github + conda environment and run locally with the installed dependencies.
The workflow was designed to be user-friendly to those without coding skills. However, a basic understanding is still necessary to run things without problems and to fix any issues that may happen.
If you have any questions, please write-me up.
-
A computer with any linux distribution or MacOS (not tested in Windows, but should work under a virtual machine or WSL);
-
Snakemake,
-
conda and mamba;
-
MEGA 11 and megacc for phylogeny;
-
FASTQ.gz files sample-demultiplexed, separated by lanes or not, single-ended (SE) or paired-end (PE).
-
❗ Please, make sure that your fastq files follow the Illumina official naming scheme;
-
Internet connection for downloading software (at least for the first time).
- Download this repository by using
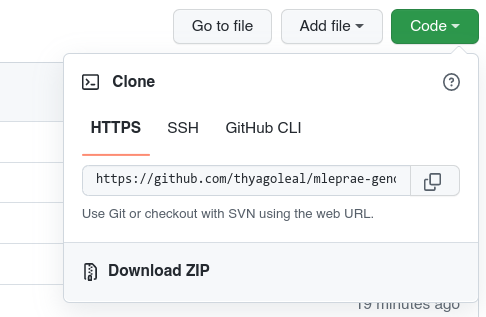
git clone github.com/thyagoleal/mleprae-genomics_workflow/or through the Code -> Download ZIP green button. - Unzip the contents and navigate inside the directory;
-
Install miniconda following the instructions in the software page;
-
Install Mamba with:
conda install mamba -n base -c conda-forge; -
Launch a terminal making sure you're inside the mleprae_genomics_workflow directory. Then, create the environment with the specified dependencies using mamba:
conda activate base
mamba env create --file docs/dependencies.yaml
-
If everything installed correctly run
conda activate mleprae-genomics; -
Install MEGA 11 according to your operating system. megacc must be available in your command line. If not, try installing MEGA 11 for command line CC specifically as well;
-
Now you can use the workflow and its installed tools. It is likely that all of these steps have been done for you already;
❗ Every time you wish to run the pipeline or one of its tools, you must have the mleprae-genomics environment active. To activate it, just run
conda activate mleprae-genomics.
Now that you have a conda environment with the installed tools, you can configure your samples.
-
Inside of the
datadirectory, copy your fastqs tosamples/; -
Make sure you are in the root workflow directory
mleprae-genomics_workflow. -
Important Make sure your files are named according to Illumina scheme, with underscores
_between sample name, sample id, lanes, and so on. Use dash-in the sample name if you need a delimiter. For example:Correct Incorrect SampleName**S1L001R1**001.fastq.gz SampleName**-S1-L001-R1-**001.fastq.gz Sample1_L001_R1.fastq.gz Sample1.L001.R1.fastq.gz Sample5-bait-Capture_S5_L005_R2_001.fastq.gz Sample5_bait-Capture_S5-L005-R2-001.fastq.gz 🚫 If your files violate these rules, you should rename them manually or they'll cause issues in the next steps. Please see the rename Perl tool included in most Debian linux distros.
-
Then, to create the sample files and feed the workflow, execute the code below:
python3 scripts/prepare_input.py /path/to/samples/
This script will check the names of your fastq files, merge lanes (default), fix suffixes (i.e., standardize
fastq.gzinstead offq.gzetc), compress, and check which samples are paired-end or not. Then, it will build thesamples.tsvandunits.tsvfiles necessary to start the workflow with soft links insidedata/samplespointing to the original files.The original files will remain untouched in the data/samples dir. The workflow-ready files will be in
data/samples/prepared-fastqs/by default (you can change it, runpython3 prepare_input.py --help).🚫 Before running the workflow, make sure you configured the options by editing the file
config/config.yaml.All parameters should be changed only in this file. If you need to pass a flag or change a parameter not in the config file, you can add them in the "extra" section of the config file.. ├── config/ │ ├── config.yaml │ └── README.md ├── data/ │ ├── refs/ │ └── samples/ ├── docs/ │ ├── dependencies.yaml │ ├── Dockerfile │ ├── enviroment.yaml │ ├── illumina.txt │ └── requirements.yml ├── envs/ │ ├── basic.yml │ ├── bowtie.yml │ ├── mapping_tools.yml │ ├── picard.yml │ ├── qc_trimming.yml │ ├── qualimap.yml │ ├── samtools.yml │ ├── seqprep.yml │ ├── snpeff.yml │ ├── varscan.yml │ └── vcf2bed.yml ├── README.md ├── rules/ │ ├── fastqc.smk │ ├── helpers.smk │ ├── mapping.smk │ ├── markduplicates.smk │ ├── merge_overlapping.smk │ ├── multiqc.smk │ ├── prepare_phylogeny.smk │ ├── qualimap.smk │ ├── trimming.smk │ ├── variant_calling.smk │ ├── vcf2table.smk │ └── workflow_recap.smk ├── scripts/ │ ├── collect_metrics.py │ ├── collect_seqPrep-metrics.py │ ├── prepare4phylogeny.py │ ├── prepare-input.py │ └── SNP-table_to_SNPeff-table_v2.sh └── SnakefileWith the mleprae-genomics environment activated, you can:
- Run a dry-run, that is, just show what would be done without running;
snakemake --cores 5 -pn
- Run the workflow quietly only showing progress;
snakemake --cores 5 --quiet progress
- Run the workflow in verbose mode (
--verbose) and printing the shell commands (-p);
snakemake --cores 5 -p --verbose
📌To see all the snakemake options and flags, just run
snakemake -h✔️ After successfully running the workflow, two directories will be created, namely
results/andlogs/.
