Managing the progress and grades of multiple students from different schools, each with its own assessment format, presents a significant challenge for free-lance tutors who do not have tools at their disposal for maintaining academic documentation. Parents who pay a premium for tutoring services expect personalised feedback that reflects their child's progress and performance.
This is where TutorGrapher comes in as a productivity tool designed for free-lance tutors. With TutorGrapher, tutors can easily keep track of their students' details and grades. The charting functionality enables tutors to effortlessly create charts that visually depict students' academic progress over time. Additionally, the report card generation feature allows tutors to integrate charts and feedback into report cards for sharing with parents. This makes monitoring student progress and providing feedback a breeze for tutors.
You need to have git, angular cli, maven, mongoDB and an SQL client installed on your machine to run these commands.
Here are the steps for testing the app locally:
-
Clone the repo. In your terminal, use the git clone command. This command creates a local copy of the project on your machine.
git clone https://github.com/tofuyong/TutorGrapher-Project.git
-
Get a free SendGrid API key at https://docs.sendgrid.com/ui/account-and-settings/api-keys. Enter your API key in application.properties. Replace ${spring.sendgrid.api-key} with your API key
spring.sendgrid.api-key=${spring.sendgrid.api-key} -
Run the SQL script. Ensure that you have an SQL client installed. Inside the sql-script folder, you will find the TutorGrapherDB.sql script. Run it to create the tutorgrapher database locally. This creates a tutor (Tutor ID: 1) and assigns 5 students to this account.
-
Install mongoDB. Ensure that you have mongoDB installed.
-
Start the client app. Navigate to the client folder in terminal and run:
ng serve --proxy-config proxy-config.js
-
Start the server app. Navigate to the server folder in terminal and run:
mvn clean spring-boot:run
-
Open the app in your browser. Visit http://localhost:4200/
-
Log in and test the app. Use Tutor ID 1 to log in.

The landing page of the app is the login page. Here, the user logs in to his/her account.
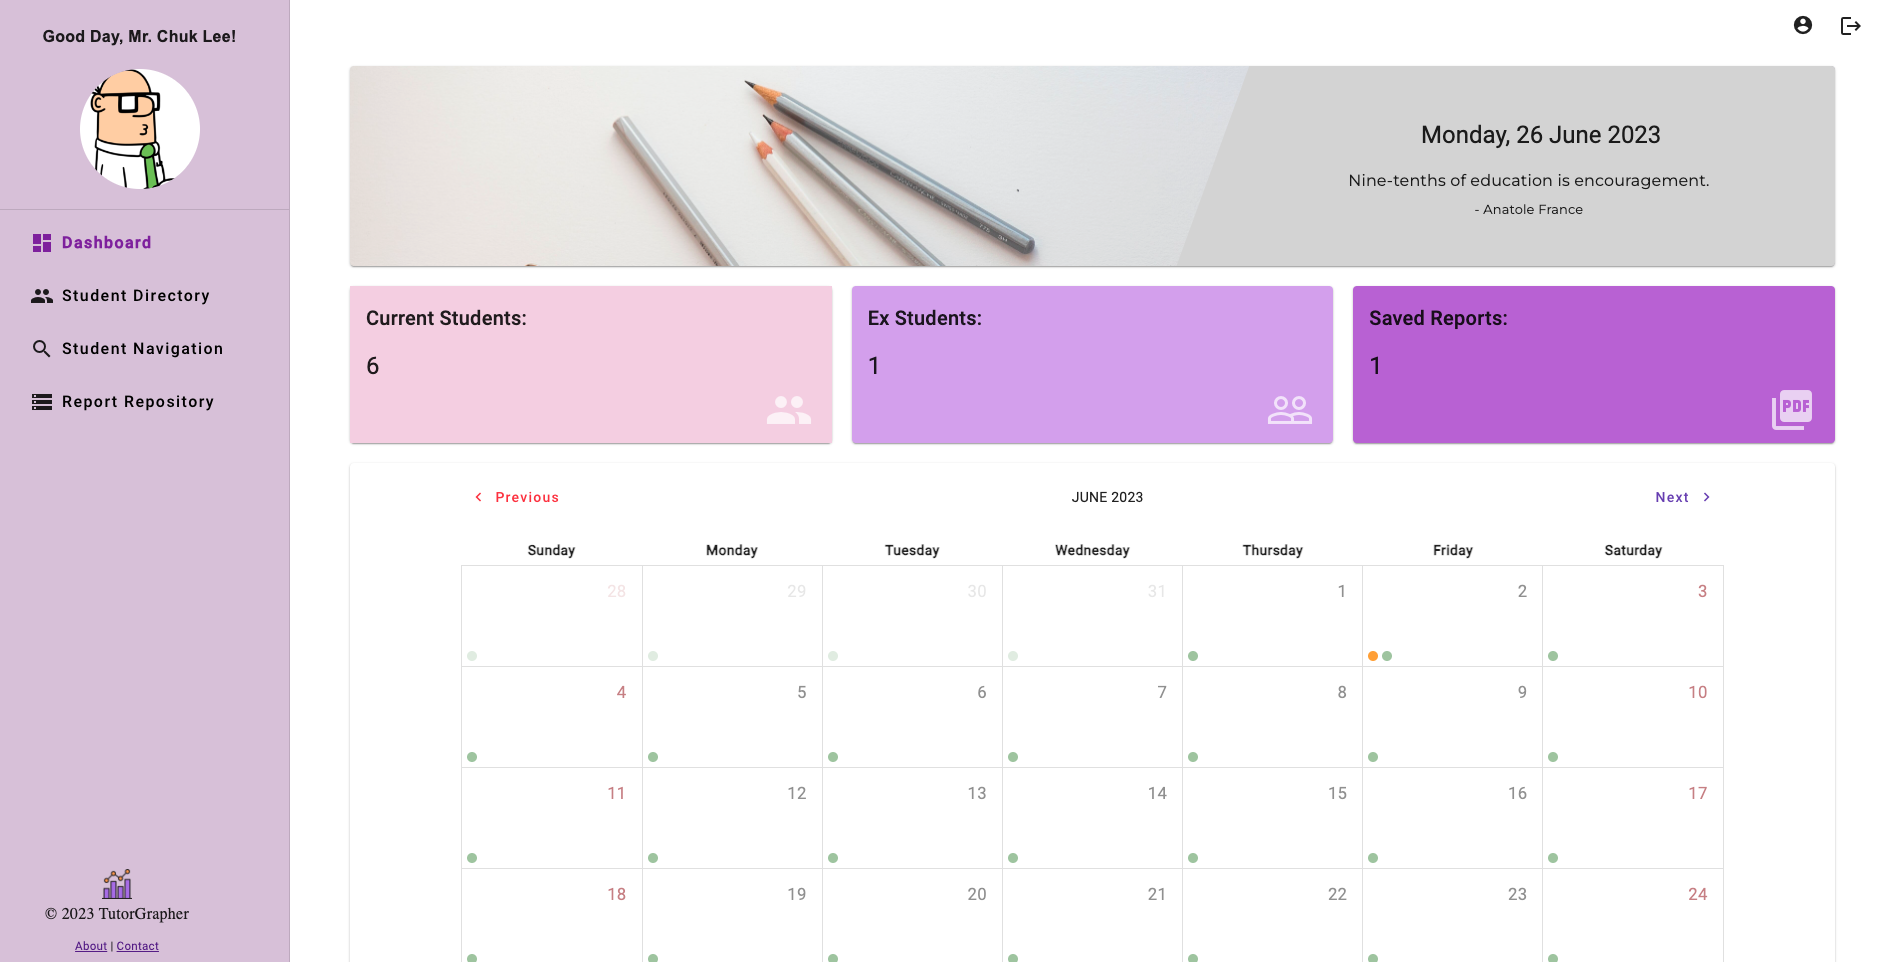
Upon logging in, the dashboard greets the user with a sprinkle of motivation in the form of a teaching-related motivational quote, some shortcuts and a calendar displaying important dates.
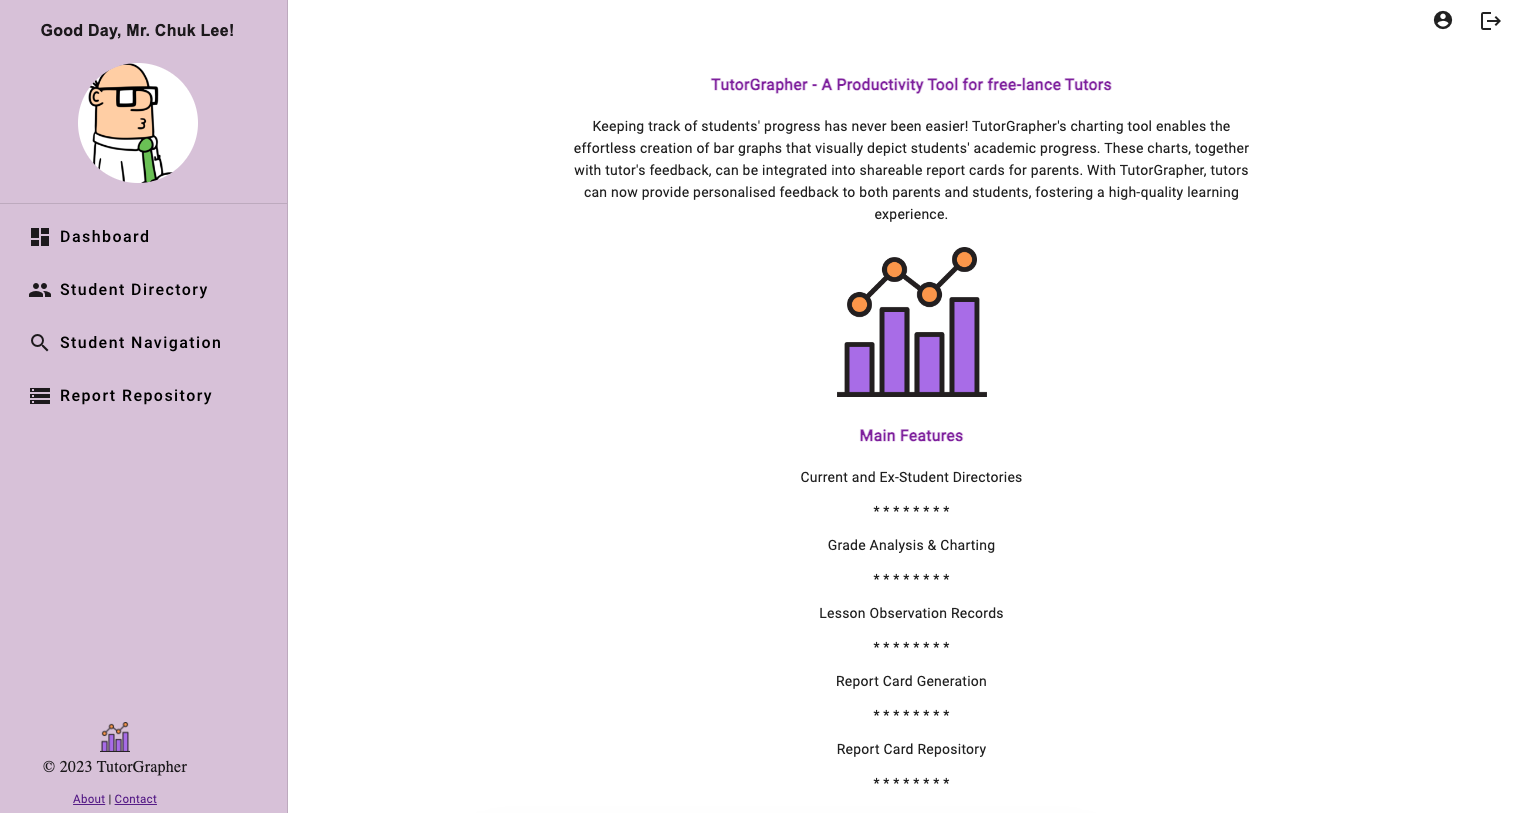
An about page describes the main features of TutorGrapher.
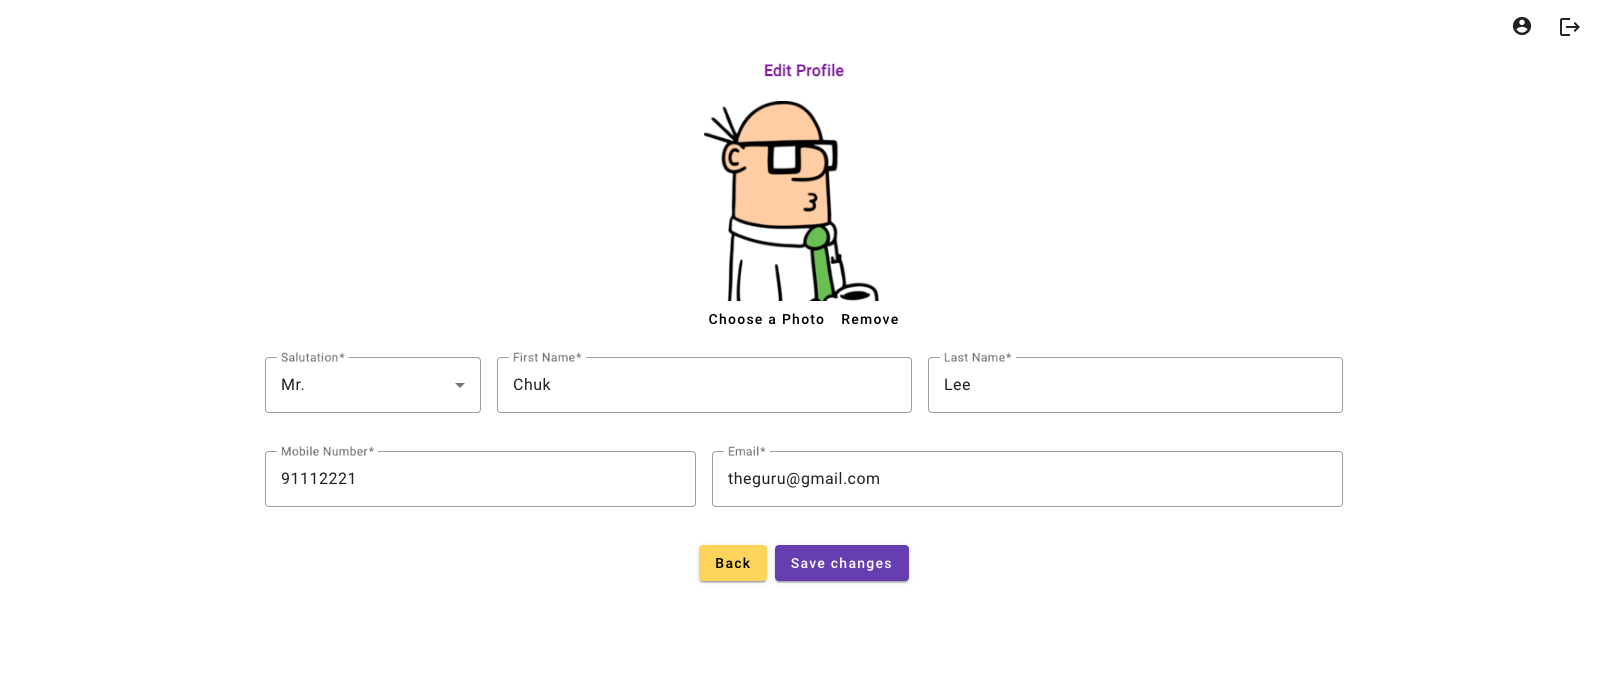
The tutor profile page allows tutors to update their details and change their profile picture.

The Student Directory a.k.a the master list of students. Tutors can toggle between the 'Current Students' and 'Ex-Students' list, and to add new students under their tutelage. Here, tutors can access students' details, academic grades and observation notes.
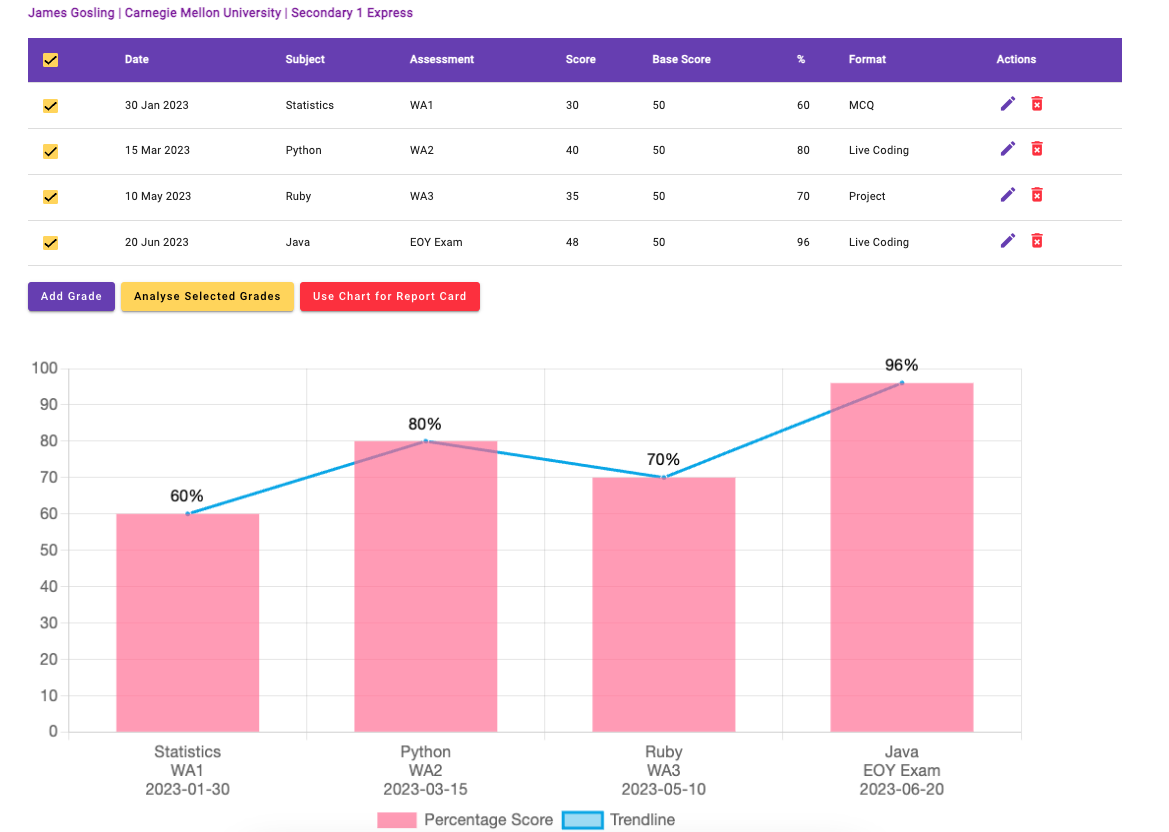
The Grade module allows tutors to add and edit grades, analyse the grades by selecting those that they wish to chart. When tutors click on 'Use Chart for Report Card', this generated chart will be used for the creation of an academic report card.
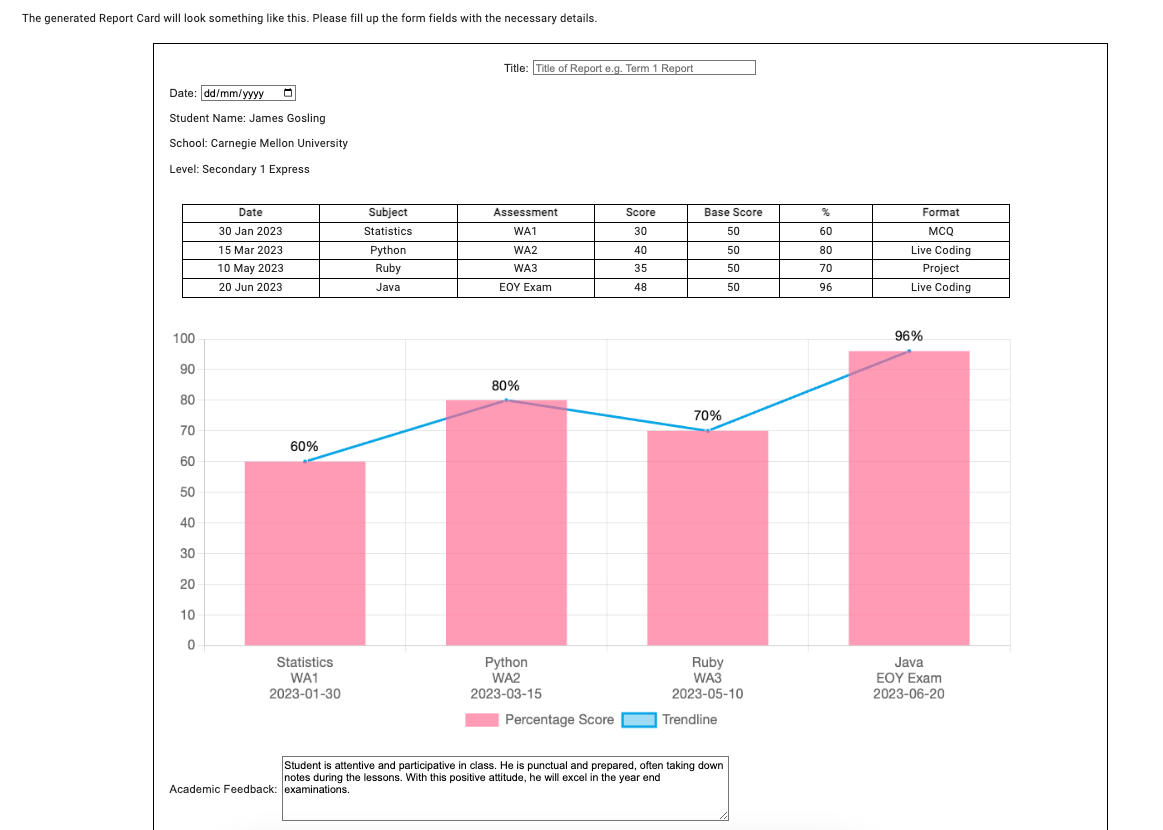
On the Create Report page, tutors see a mock up of the report card. There are fields like 'Title', 'Date', 'Academic Feedback' and 'Conduct Feedback' for tutors to fill up with customised inputs for each student. The 'Generate Report Card' button at the bottom of the page creates a pdf of this Report Card.
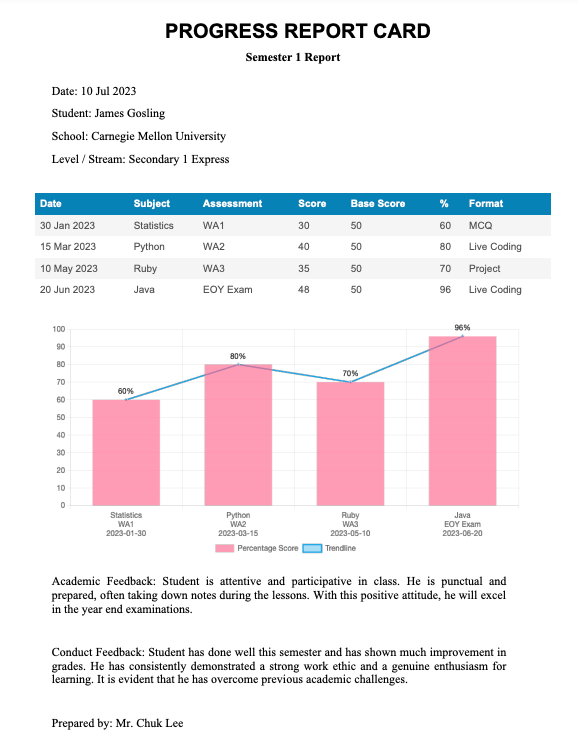
A generated report card looks like this. This is a PDF that can be saved and sent to parents.

Saved reports can be retrieved from the report repository.
Keen to collaborate on this project to make it bigger and better? Reach me at tofuyong@gmail.com.
Esteemed instructors for their expertise and dedication in teaching Java, Spring Boot applications, Persistence and Angular. Thank you for being the guiding light illuminating the intricate pathways of programming.
- Guru Chuk
- Rockstar Darryl
- Prodigy Kenneth


