-
Go to ( https://dashboard.eventengine.run/login). You will be redirected to the page below.
-
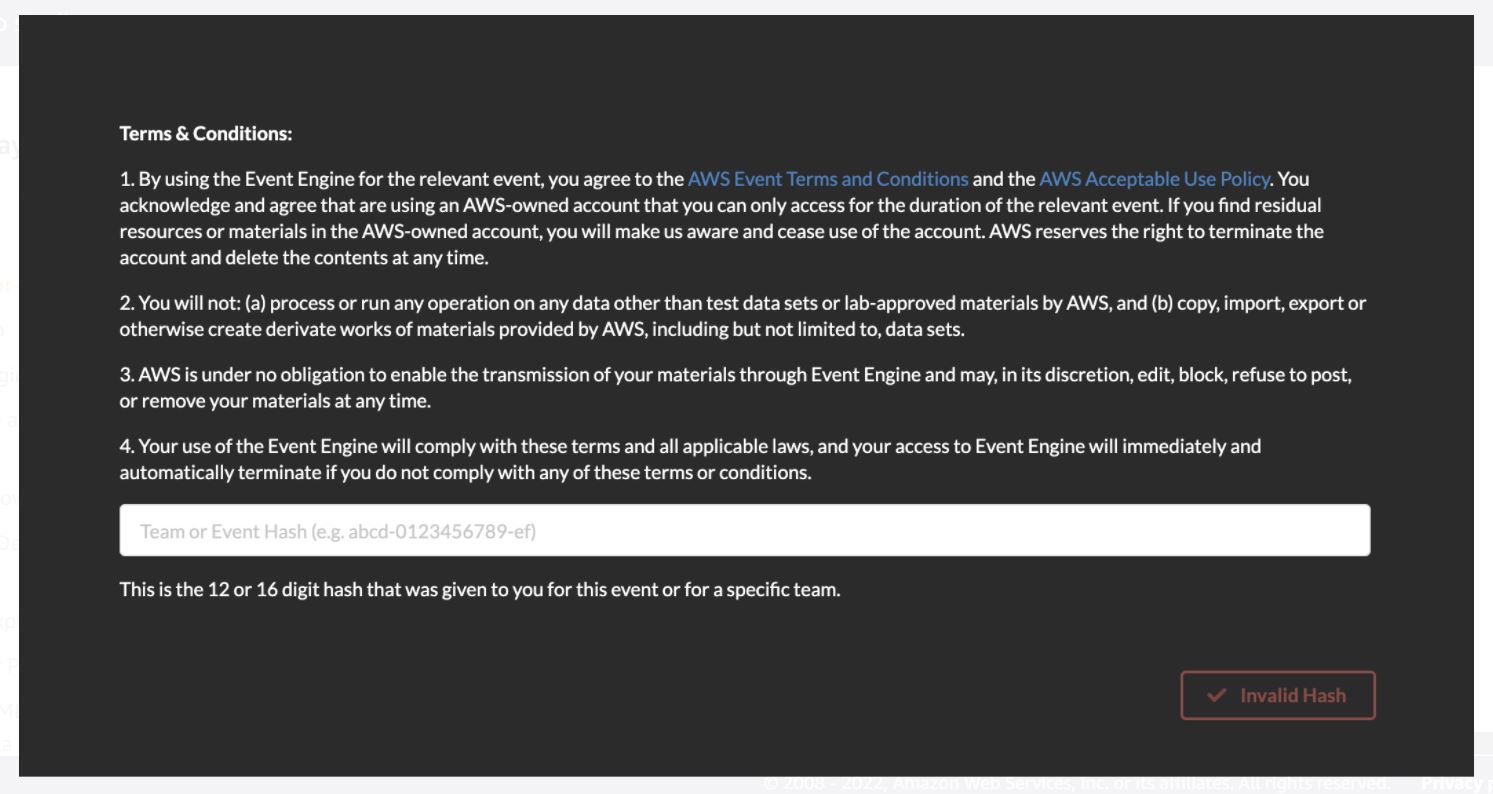
Enter the event hash you have received from your instructor and click on Accept Terms & Login .
-
Click on Email One-Time Password (OTP) .
-
You are redirected to the following page:
-
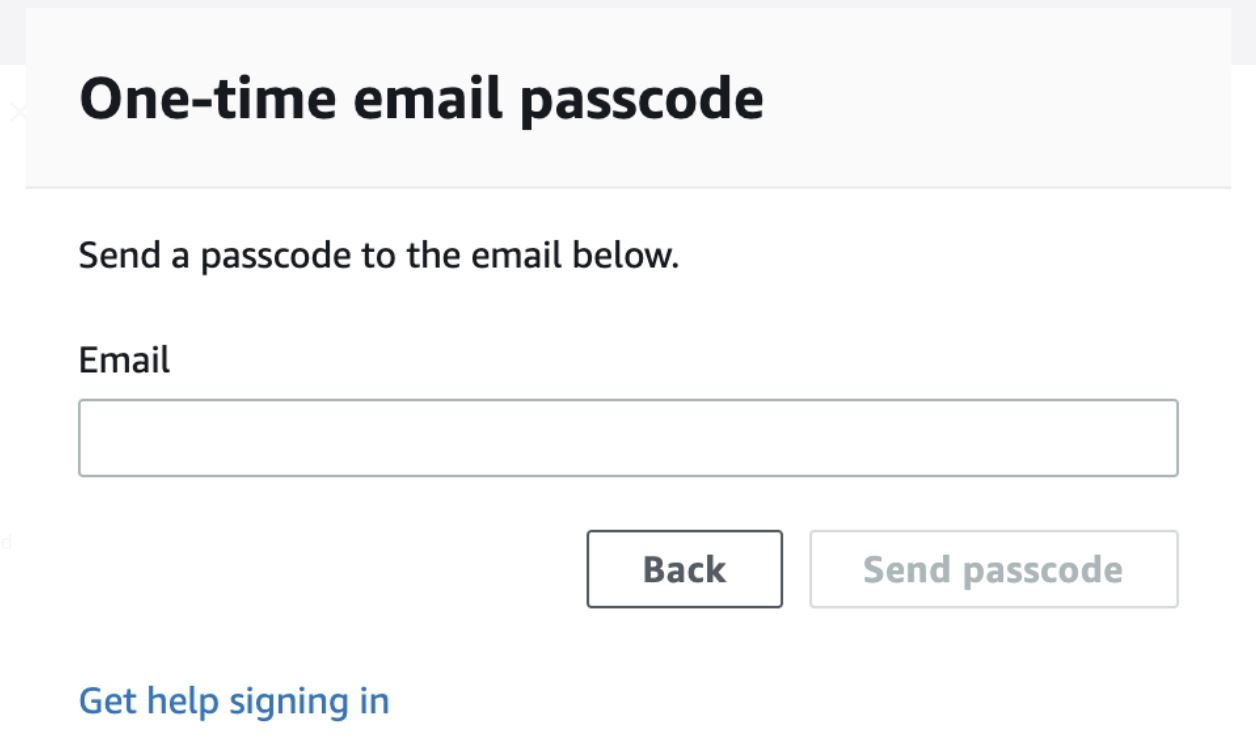
Enter your email address and click on Send passcode
-
You are redirected to the following page:
-
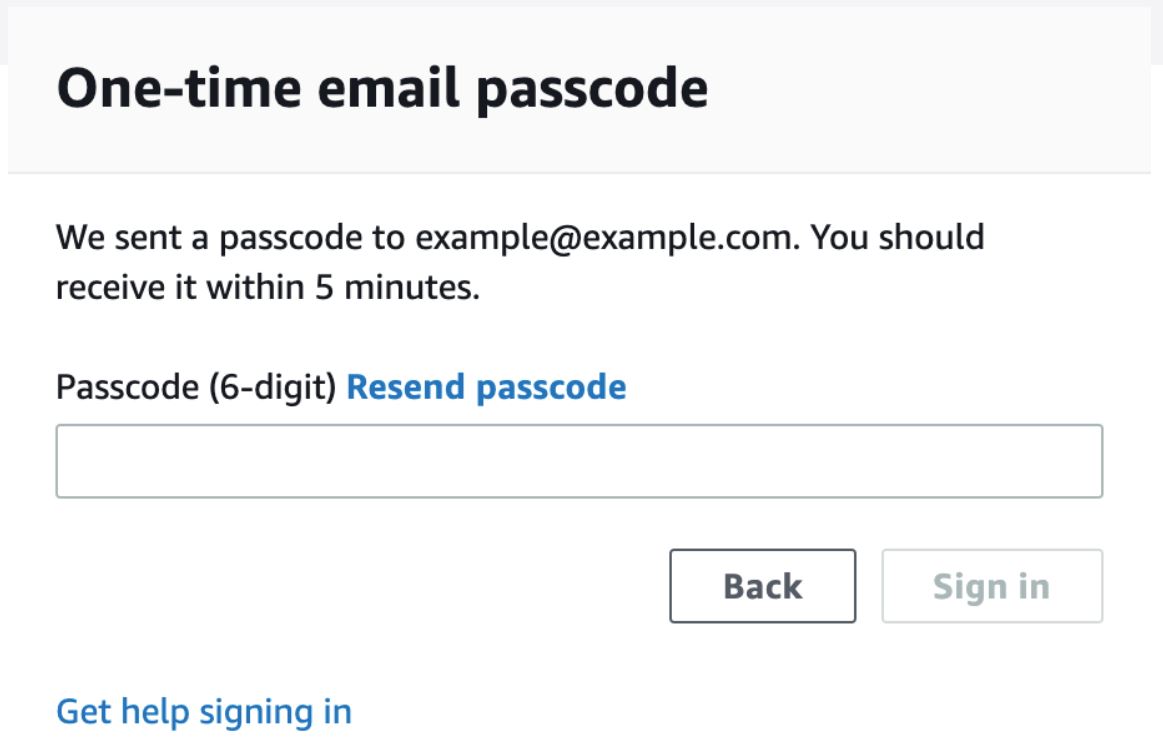
Check your mailbox, copy-past the one-time password and click on Sign In
-
You are redirected to the Team Dashboard . Click on AWS Console .
-
On the next screen, click on Open AWS Console .
-
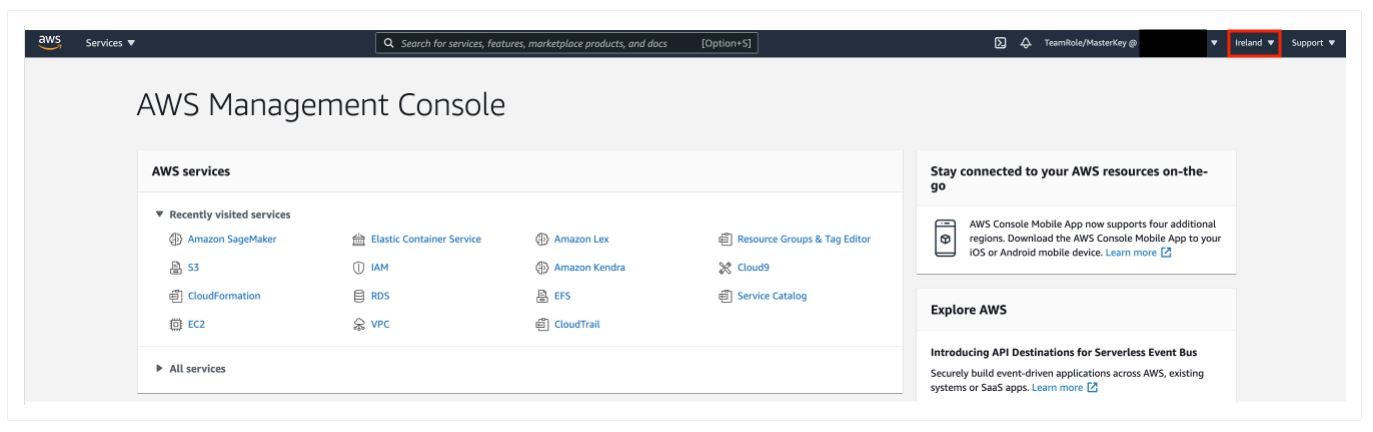
You are then redirected to the AWS Console .


Amazon SageMaker Studio is a web-based, integrated development environment (IDE) for machine learning that lets you build, train, debug, deploy, and monitor your machine learning models. Studio provides all the tools you need to take your models from experimentation to production while boosting your productivity.
-
Open AWS console and switch to AWS region communicated by your instructor.
-
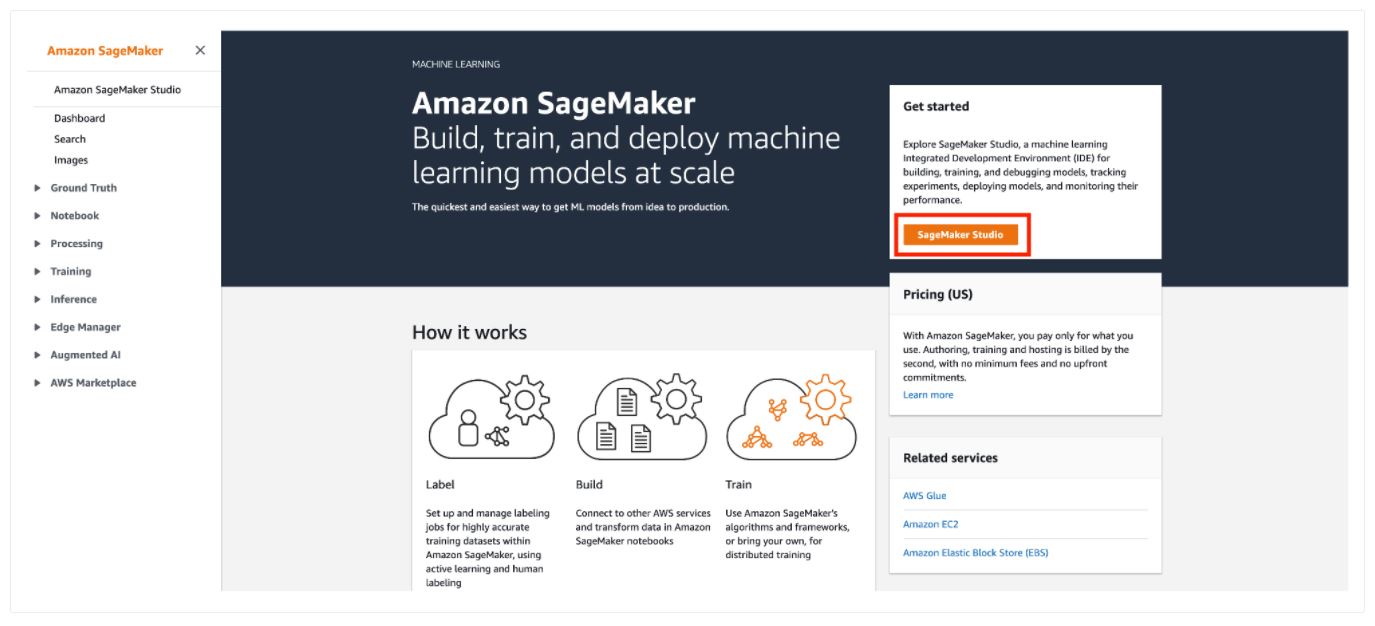
Under services search for Amazon SageMaker .

-
Under Get Started , click on the orange button SageMaker Studio
-
A SageMaker Studio environment should already be provisioned. Click on Launch App and choose Studio (on the right side of the pre-provisioned
sagemakeruserusername).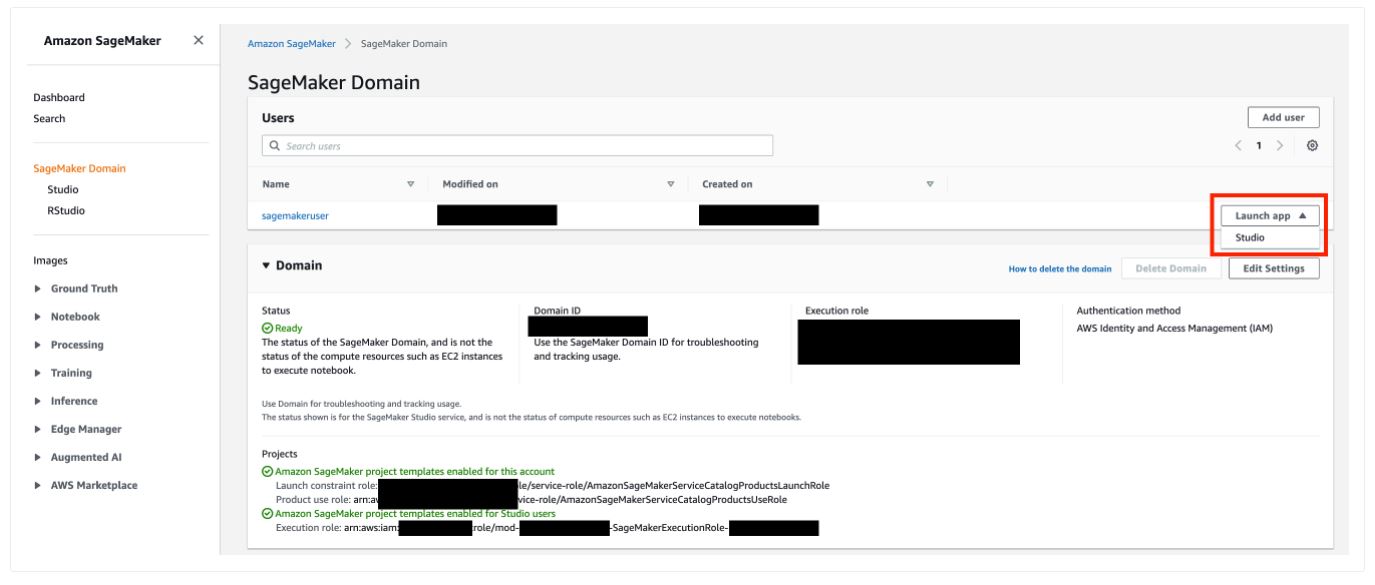
-
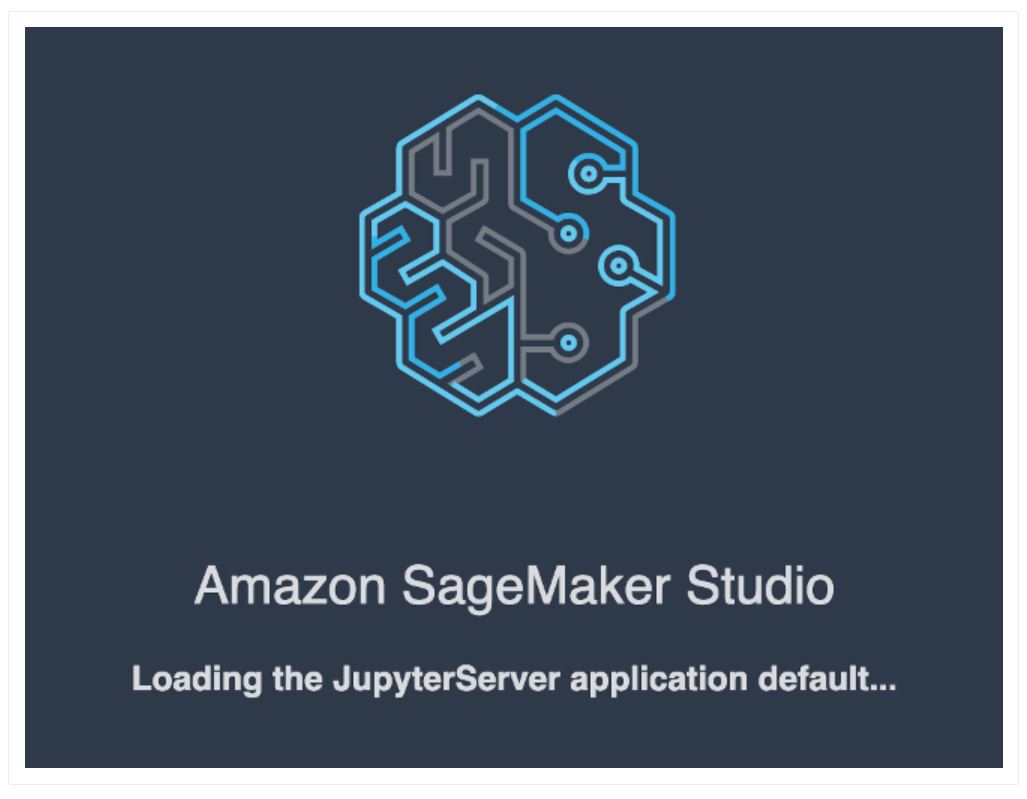
The page can take 1 or 2 minutes to load when you access SageMaker Studio for the first time.
-
You will be redirected to a new web tab for
Amazon SageMaker Studiothat looks like this: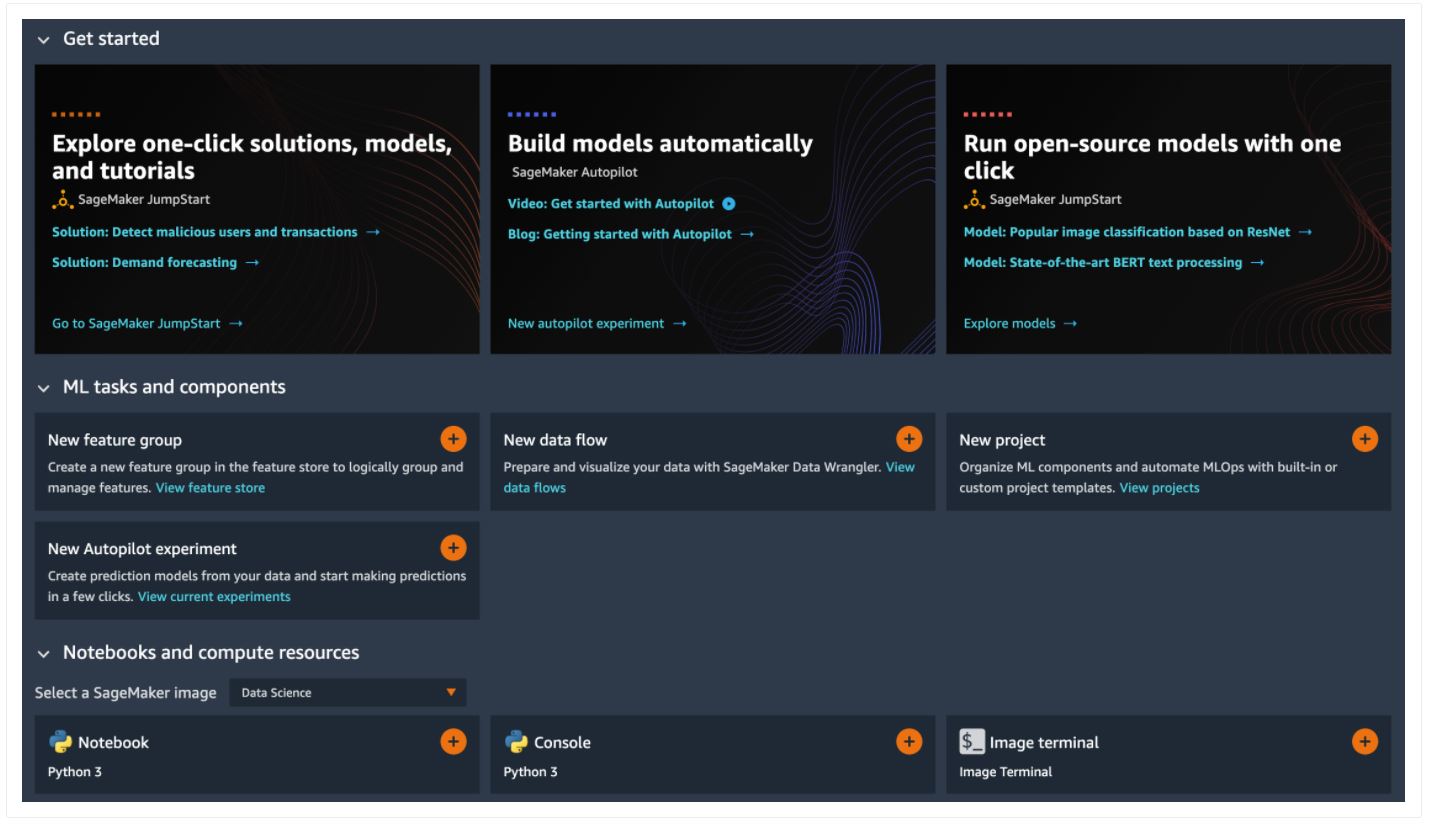
-
Congratulations!! You have successfully launched SageMaker Studio.


-
In SageMaker Studio, from the
Menu, click onFile, thenNewand chooseTerminal. -
In the terminal, type the following command:
git clone https://github.com/tom5610/amazon-sagemaker-mlu-workshop-2022.git
 3. After completion of step 2, you will see a folder
 amazon-sagemaker-mlu-workshop-2022 created in the left panel of SageMaker Studio.
In this workshop, you will work on a typical machine learning (ML) problem which is to predict whether a customer will enroll for a certificate of deposit (CD), after the customer has been contacted through mail, email, phone, etc. Direct marketing is a common tactic to acquire customers. Because resources and a customer's attention is limited, the goal is to only target the subset of prospects who are likely to engage with a specific offer.
The model will be trained on a marketing dataset that contains information on customer demographics, responses to marketing events, and environmental factors. Information about this ML task and a version of the data set used is publicly available from the ML repository curated by the University of California, Irvine (https://archive.ics.uci.edu/ml/datasets/bank+marketing).
This workshop implements a supervised machine learning problem to solve this problem. The steps include:
- Downloading training data into Amazon SageMaker
- Investigating and transforming the data so that it can be fed to Amazon SageMaker algorithms
- Estimating a model using the Gradient Boosting algorithm
- Evaluating the effectiveness of the model
- Deploying the model to an end-point to make on-going predictions
This workshop explores three different options to implement the supervised ML problem.
- Use SageMaker Autopilot to build a ML pipeline to generate the most accurate model to solve the given ML problem
- Use a Jupyter notebook to manually implement all the phases of the ML life-cycle using SageMaker Python SDK
- Use SageMaker Pipeline to orchestrate an end-to-end ML workflow process
NOTE
- You can progress through all the three labs in this workshop one after the other or you can jump to an indvidual lab that you may be interested to learn more about.
- All labs will be implemented within Amazon SageMaker Studio environment
-
This step must be completed prior to any of the labs.
-
On the left panel of SageMaker Studio, please click on icon
File Browserand double click on the file setup_and_data_prep.ipynb under folderamazon-sagemaker-mlu-workshop-2022/0.setup/to open the Jupyter notebook.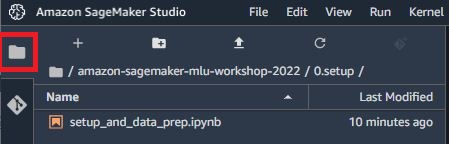
-
You may see prompted to specify an
imageandkernelas per the image below (depending on the AWS region, where this workshop is run). Ensure you selectData Scienceas theimageandPython 3as the kernel.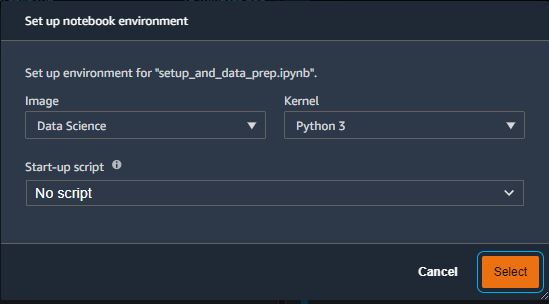
-
The kernel may take a few minutes to start. Once provisioned, a Jupyter notebook should be opened. Now, follow the instructions outlined in the Jupyter notebook to download the
Direct Marketingdata set.


In this lab, you will use SageMaker Autopilot to automate the process of building a ML model. Here, you will learn about two different options to create an Autopilot Experiment job:
- Using Amazon SageMaker Studio UI, without writing code
- With code using SageMaker Python SDK for Autopilot
Click on Direct Marketing with Amazon SageMaker Autopilot to complete Lab 01.
In this lab, you will manually generate a machine learning workflow to build, train and deploy a ML model using SageMaker Python SDK from within a Jupyter notebook. This lab will use the SageMaker built-in algorithm XGBoost.
Click on Direct Marketing with SageMaker Python SDK to complete Lab 02.
In this lab, you will use SageMaker Pipeline to orchestrate an end-to-end workflow process.
Click on Direct Marketing with Amazon SageMaker Pipelines to complete Lab 03.
Congratulations! You have completed all the labs in this 1-Day MLU Workshop.