This is a project for controlling lights using ESP8266 You should be able to build an example project using this manual. With this you are able to:
- Control LED using LAN (through Wi-Fi)
- Control LED using hardware button
- (Coming soon) Control LED with server running on a Wi-FI Access Point
- board with ESP8266
- 8* 220 ohm resistor
- 4* LEDs
- 4 buttons
- Same number of controlled lights and switches!


In case you need to switch higer currents (use the following schematic, but...):
- Connect GND of source to the GND of the development board
- Connect a wire from transistor to the light's pin
- -> int lights[] = {D5, D6, D7, D8}; // HW lights


Note: 3,4V power source and the blue switch simulates arduino pin (turn on/turn off) More or less it is the same as this schematic
To install this code on an ESP8266 board you need to have:
- Arduino IDE tool
- Also, you need to add ESP8266 to Arduino IDE's boards. See this manual before continue.
After installation, you need to set matching board. For this just select in Arduino IDE Tools -> Boards -> (scroll down) {your prefered ESP8266 board}
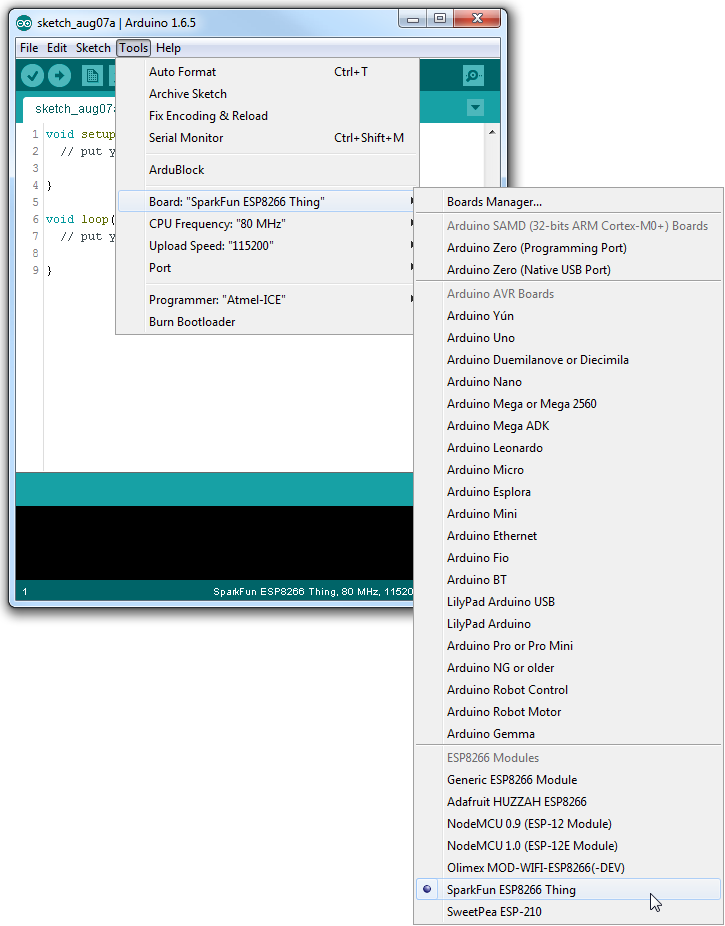
In general, it's up to you which board you select. Depends on the model you have at the moment. This project was built for NodeMCU 1.0.
Finally, you need to set port where the development board is connected. Tools -> Port -> Select connected board. On Ubuntu, it is something like /dev/USBtty0.
You have to change a few variables before uploading the program to ESP8266.
const char* ssid = "SSID";  // SSID of the network you want to connenct to
const char* password = "PASSWORD";  // PW of the network you want to connenct to
int button[] = {D0, D1, D2, D3};  // HW buttons
int lights[] = {D5, D6, D7, D8};  // HW lights
Add as many columns to the folowing code as you have lights:
// for 4 lights and 4 buttons
int now_light[] = {0, 0, 0, 0};
int required_light[] = {128, 128, 128, 128};

int now_button[] = {LOW, LOW, LOW, LOW};
int last_button[] = {LOW, LOW, LOW, LOW};
// for 5 lights
int now_light[] = {0, 0, 0, 0, 0};
...
If you want to use a web interface, you should connect ESP8266 with a USB cable and open serial monitor with baud rate 115200. After connecting to the Wi-Fi it should write down an IP you can use to connect to the web interface.
Note: your IP addresses might be different. You should be connected to the same wi-fi network
http://192.168.0.40/
Here are commands you can use to control your lights by sending GET requests (e.g. via the URL line in your browser).
Turn on all lights
Note: IP addresses might differ according to your Wi-Fi network settings You should be connected to the same Wi-Fi network
GET http://192.168.0.40/all_lights=255
Turn off all lights
Note: IP addresses might be different.
GET http://192.168.0.40/all_lights=0
Turn off on lights to a specific intensity
You can use values from 0 to 255. PWM is used.
GET http://192.168.0.40/all_lights=42
Turn on/off a specific light You can also turn on/off a specific light.
You can use values from 0 to 255. PWM is used. Indexed from zero (0)
int lights[] = {D5, D6, D7, D8}; // HW lights indexes = {0 , 1 , 2 , 3 };
http://192.168.0.40/light[0]=255 // turns light 0 to maximal value (255)
http://192.168.0.40/light[1]=42 // turns light 1 to value 42
http://192.168.0.40/light[2]=0 // turns of light number 2
Turn lights on/off using an NFC stick
- Note: Your phone needs to be NFC compatible. If you're not sure, check it here.
- To use this feature you need to buy some NFC tags. Want to buy some?
- To write on NFC tags use this (or similar) app (Android only)
- Write URL address to control it. These addresses were already mentioned a few lines ago.
After successful writing just approach your tag to your phone.
You can also control lights using a web interface with buttons. You can also turn on/off a specific light.
Note: IP addresses might be different Note2: Be patient. This option is not 100% working. Sometimes it might not work well, since ESP8266 is a low-cost device and hadnling a webserver takes a lot of effort. Indexed from zero (0)
int lights[] = {D5, D6, D7, D8}; // HW lights indexes = {0 , 1 , 2 , 3 };
http://192.168.0.40/
- Sometimes while using a web interface your browser wants a specific file which is not on the server -> it's needed to refresh the page several times.
(I need to decide. Possibly MIT)