The sections of this tutorial are structured as follows
- Goal
- Pre-requisites
- Clone the repository
- Directory structure of the project
- Overview of the application
- Building the docker images (optional)
- Run the application - before configuration phase
- Dynamic Instrumentation (DI), Remote configuration (RC) and Source code integration (SCI) set-up
- Run the application - after configuration phase
- Testing the application
- Configuring probes & results
- Conclusion
In each section, we'll describe the required steps to take in order to reach the goal.
The purpose of this lab is to help familiarizing and practising the various steps required to set up and use the Dynamic Instrumentation feature.
- About 90 minutes
- Git client
- A Datadog sandbox account with a valid API key
- Your favorite text editor or IDE (Ex Sublime Text, Atom, vscode...)
- Docker and Docker compose
COMP10619:~ pejman.tabassomi$ git clone https://github.com/ptabasso2/ese_dynamic_instrumentation
The example below is the structure after having clone the project.
COMP10619:ese pejman.tabassomi$ tree
.
├── Dockerfiles
│   ├── Dockerfile.cassandra
│   ├── Dockerfile.springback
│   ├── Dockerfile.springfront
│   ├── cassandra.yaml
│   └── start.sh
├── README.md
├── dd-java-agent.jar
├── docker-compose.yml
├── img
├── springback
│   ├── build.gradle
│   ├── gradle
│   │   └── wrapper
│   │       ├── gradle-wrapper.jar
│   │       └── gradle-wrapper.properties
│   ├── gradlew
│   ├── logs
│   │   └── springback.log
│   ├── settings.gradle
│   └── src
│       └── main
│           ├── java
│           │   └── com
│           │       └── datadog
│           │           └── pej
│           │               └── back
│           │                   ├── BasicController.java
│           │                   ├── Quote.java
│           │                   ├── SpringBackApplication.java
│           │                   ├── Value.java
│           │                   ├── model
│           │                   │   └── Guide.java
│           │                   └── repository
│           │                       └── GuideRepository.java
│           └── resources
│               ├── application.properties
│               └── application.yml
└── springfront
    ├── build.gradle
    ├── gradle
    │   └── wrapper
    │       ├── gradle-wrapper.jar
    │       └── gradle-wrapper.properties
    ├── gradlew
    ├── settings.gradle
    └── src
        └── main
            ├── java
            │   └── com
            │       └── datadog
            │           └── pej
            │               └── front
            │                   ├── BasicController.java
            │                   ├── Quote.java
            │                   ├── SpringFrontApplication.java
            │                   └── Value.java
            └── resources
                └── application.yml
The main components of this project can be described as follows:
- Two distinct microservices (
springfrontandspringback) communicating with each other through Rest calls and acassandradatabase accessed by the backend microservicespringback - The various docker files needed to build the images and the docker-compose configuration to spin up the four containers (
dd-agent,springfront,springbackandcassandra).
Building the images (Optional)
For the sake of effectiveness, you will find the required images preloaded into the following registry https://hub.docker.com/repositories/pejese
But if you ever need to change the Dockerfiles and rebuild the images you may consider the following steps:
First change the image key in the docker-compose.yml file to specify your repository/registry details. And then run the build command as follows
[root@pt-instance-7:~/rest]$ docker-compose build springfront
Building springfront
Sending build context to Docker daemon  113.8MB
Step 1/9 : FROM adoptopenjdk/openjdk11:ubuntu-nightly-slim
 ---> 86b175442692
Step 2/9 : ENV PS1A="[\[\e[1m\]\[\e[38;5;46m\]\u\[\e[0m\]@\h:\[\e[1m\]\[\e[38;5;21m\]\w\[\e[0m\]]$ "
 ---> Using cache
 ---> 9dcefd8d3438
Step 3/9 : ENV TZ="Europe/Paris"
 ---> Using cache
 ---> bcb97c6f5f66
Step 4/9 : RUN ln -snf /usr/share/zoneinfo/$TZ /etc/localtime && echo $TZ > /etc/timezone
 ---> Using cache
 ---> a8b6630325b4
Step 5/9 : RUN apt update  && apt -y install net-tools iputils-ping curl vim procps netcat wget gnupg2 apt-transport-https sudo lsof unzip git  && echo "alias ll='ls -lrt'" >> /root/.bashrc && echo 'PS1=$PS1A' >> ~/.bashrc && echo 'HISTFILESIZE=20000' >> ~/.bashrc && echo 'HISTSIZE=10000' >> ~/.bashrc
 ---> Using cache
 ---> 64764127c101
Step 6/9 : WORKDIR /app
 ---> Using cache
 ---> c4eba2e16573
Step 7/9 : COPY springfront/build/libs/spring-front.jar spring-front.jar
 ---> a7b7bbf726ed
Step 8/9 : EXPOSE 8080
 ---> Running in a2f715871d26
Removing intermediate container a2f715871d26
 ---> 3a3356283968
Step 9/9 : CMD java -jar spring-front.jar
 ---> Running in ba034aba438f
Removing intermediate container ba034aba438f
 ---> 6da31b8131d0
Successfully built 6da31b8131d0
Successfully tagged sbf0:latest
And then pushing it to the image registry (docker push).
Make sure you are authenticated to your registry through the docker logincommand.
[root@pt-instance-7:~/rest]$ docker login -u=pejese -p=xxxxxxxxxxx
WARNING! Using --password via the CLI is insecure. Use --password-stdin.
WARNING! Your password will be stored unencrypted in /root/.docker/config.json.
Configure a credential helper to remove this warning. See
https://docs.docker.com/engine/reference/commandline/login/#credentials-store

Login Succeeded
And then
[root@pt-instance-7:~/rest]$ docker push pejese/springfront:v0Another way of building the images is shown below and relies on docker commands instead of the docker-compose ones:
[root@pt-instance-7:~/rest]$ docker build -f Dockerfiles/Dockerfile.cassandra -t pejese/cassandra:v0 .
...
[root@pt-instance-7:~/rest]$ docker login -u=pejese -p=xxxxxxxxxxx
...
[root@pt-instance-7:~/rest]$ docker push pejese/springfront:v0
...
[root@pt-instance-7:~/rest]$ docker run -it -p9042:9042/tcp -p9160:9160/tcp -p7199:7199/tcp -v /root/rest/Dockerfiles/cassandra.yaml:/opt/cassandra/conf/cassandra.yaml -d --name cass -h cassandra pejese/cassandra:v0Note: For the cassandra image, you would need two additional files (cassandra.yaml and start.sh) which are respectively specifying the configuration details for the instance and preloading dummy data when running the image for the first time.
Running the application
Simply run this command:
[root@pt-instance-7:~/rest]$ docker-compose up -d
Creating network "app" with driver "bridge"
Creating dd-agent-dogfood-jmx-di ... done
Creating cass                    ... done
Creating springback              ... done
Creating springfront             ... done
Checking status
[root@pt-instance-7:~/rest]$ docker-compose ps
         Name                        Command                  State                                                                Ports
--------------------------------------------------------------------------------------------------------------------------------------------------------------------------------------------------
cass                      docker-entrypoint.sh ./sta ...   Up             7000/tcp, 7001/tcp, 0.0.0.0:7199->7199/tcp,:::7199->7199/tcp, 0.0.0.0:9042->9042/tcp,:::9042->9042/tcp,
                                                                          0.0.0.0:9160->9160/tcp,:::9160->9160/tcp
dd-agent-dogfood-jmx-di   /bin/entrypoint.sh               Up (healthy)   0.0.0.0:8125->8125/tcp,:::8125->8125/tcp, 8125/udp, 0.0.0.0:8126->8126/tcp,:::8126->8126/tcp
springback                /bin/sh -c java -jar sprin ...   Exit 1
springfront               /bin/sh -c java -jar sprin ...   Up             0.0.0.0:8080->8080/tcp,:::8080->8080/tcp
At this point you may see that springback exited. This is expected behavior as the cassandra database container wasn't ready yet by the time springback started.
Starting springback one more time will just work fine by sending some requests to the 8080 port on the same host (localhost)
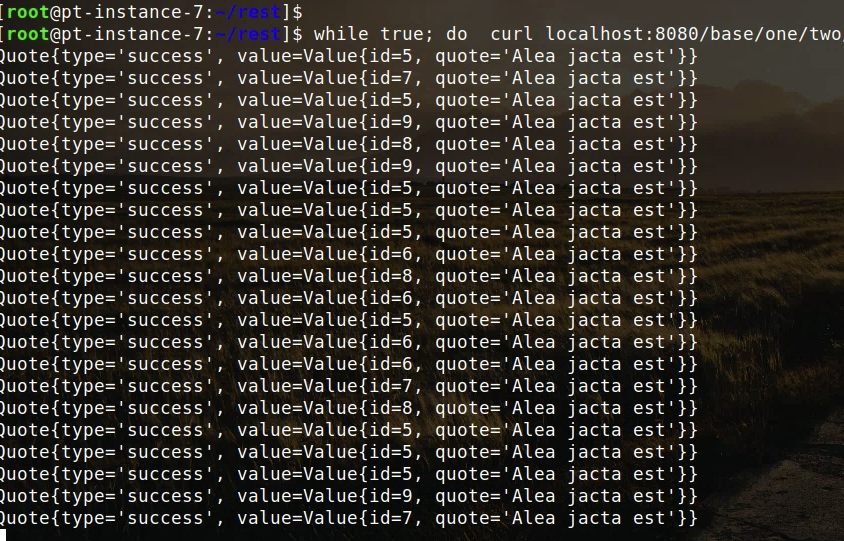
[root@pt-instance-7:~/rest]$ curl localhost:8080/base/un/deux/trois
Quote{type='success', value=Value{id=9, quote='Alea jacta est'}}
Now as all the components are up and running, and every pieces work well together. It's time to move on to the next step and set up dynamic instrumentation.
When you are done with those services, you can tear them down by running this command
[root@pt-instance-7:~/rest]$ docker-compose down
...Enabling Dynamic Instrumentation
Details can be found below: Enable Dynamic Instrumentation
This set up will have to be done by modifying the provided docker-compose.yml file.
Here are some the tasks you will need to accomplish
On the DD Agent side
- Having the latest version of the DD Agent (7.39.1+)
- Having APM enabled (trace agent up and running and listening on port 8126 - UDS is not yet supported -)
- Having
Remote configenabled (see further details in the following section)
On the tracing library side (java agent)
- Use the
dd-java-agent.jarprovided with the project or download a newer version - Dynamic Instrumentation enabled by setting
-Ddd.dynamic.instrumentation.enabledflag orDD_DYNAMIC_INSTRUMENTATION_ENABLEDenvironment variable totrue. Specifydd.service,dd.env, anddd.versionUnified Service Tags so you can filter and group your probes and target active clients across these dimensions - Enabling remote config also at the java agent level by setting the
-Ddd.remote_config.enabledflag set to true orDD_REMOTE_CONFIG_ENABLEDenvironment variable totrue. (Cf further details in the following section)
Enabling Remote Config In the previous section we surfaced the remote config details. Remote config is actually a feature that is common to several other functionalities than Dynamic Instrumentation. It is used alongside DI as probes set up are managed through the UI (This will be covered in the the next sections).
Enabling remote config consists of 3 parts
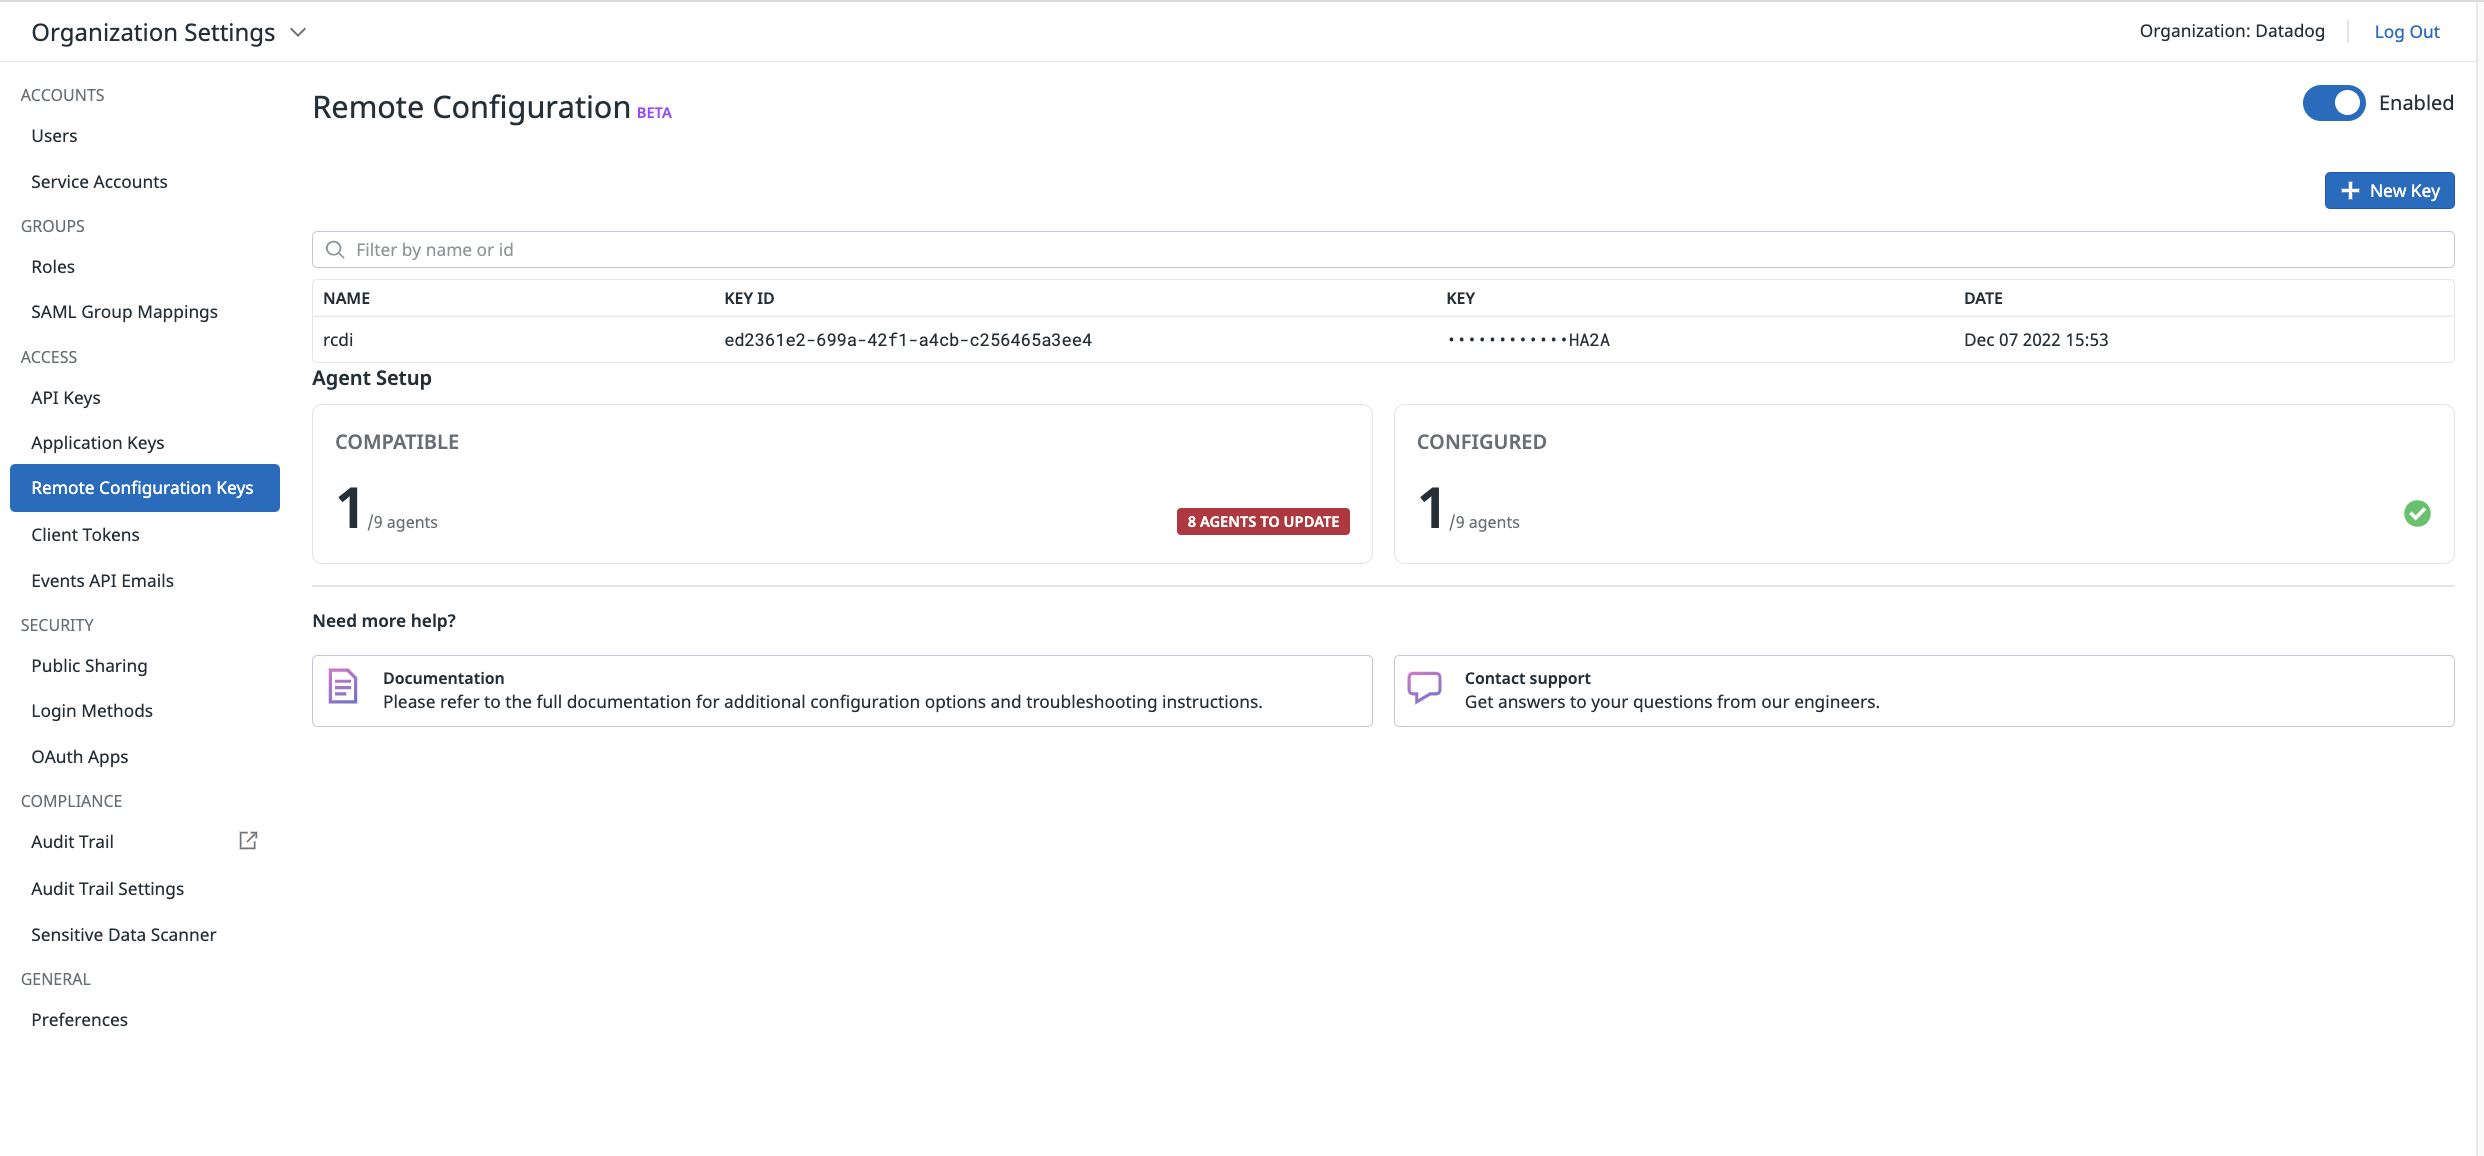
- In the UI first (https://app.datadoghq.com/organization-settings/remote-config) where a
remote config keyneeds to be generated - At the DD Agent level by enabling two env variables (the key being generated in the UI)
DD_REMOTE_CONFIGURATION_ENABLED=true
DD_REMOTE_CONFIGURATION_KEY=DDRCM_QORW64THZYAAGQKLUJSGHLDVOMYS44DSN5SC4ZDPM6RWWZLZ3EUDKZRYGQ4DSN5SC4ZDPM6RWWZLZ3EUDKNJSMVSDAMRTGNTDKNDCGA4DOMRYHA2A
- At the tracing library level by setting the
-Ddd.remote_config.enabledflag set to true orDD_REMOTE_CONFIG_ENABLEDenvironment variable totrue
When remote config is enabled in the UI, you should see something along the lines of
Enabling Source code integration
The two first sections are the bare minimum required to be able to use the DI feature. And we are now ready to configure probes and review in details how they can be used.
But before that we will also enable Source Code Integration that will facilitate much more probe configuration details. The purpose of SCI is to link a project repository (ex GitHub) and allow access to the source code details to configure probes in the DI section of the UI.
SCI relies on the GitHub Integration
For further details Enable Source Code Integration
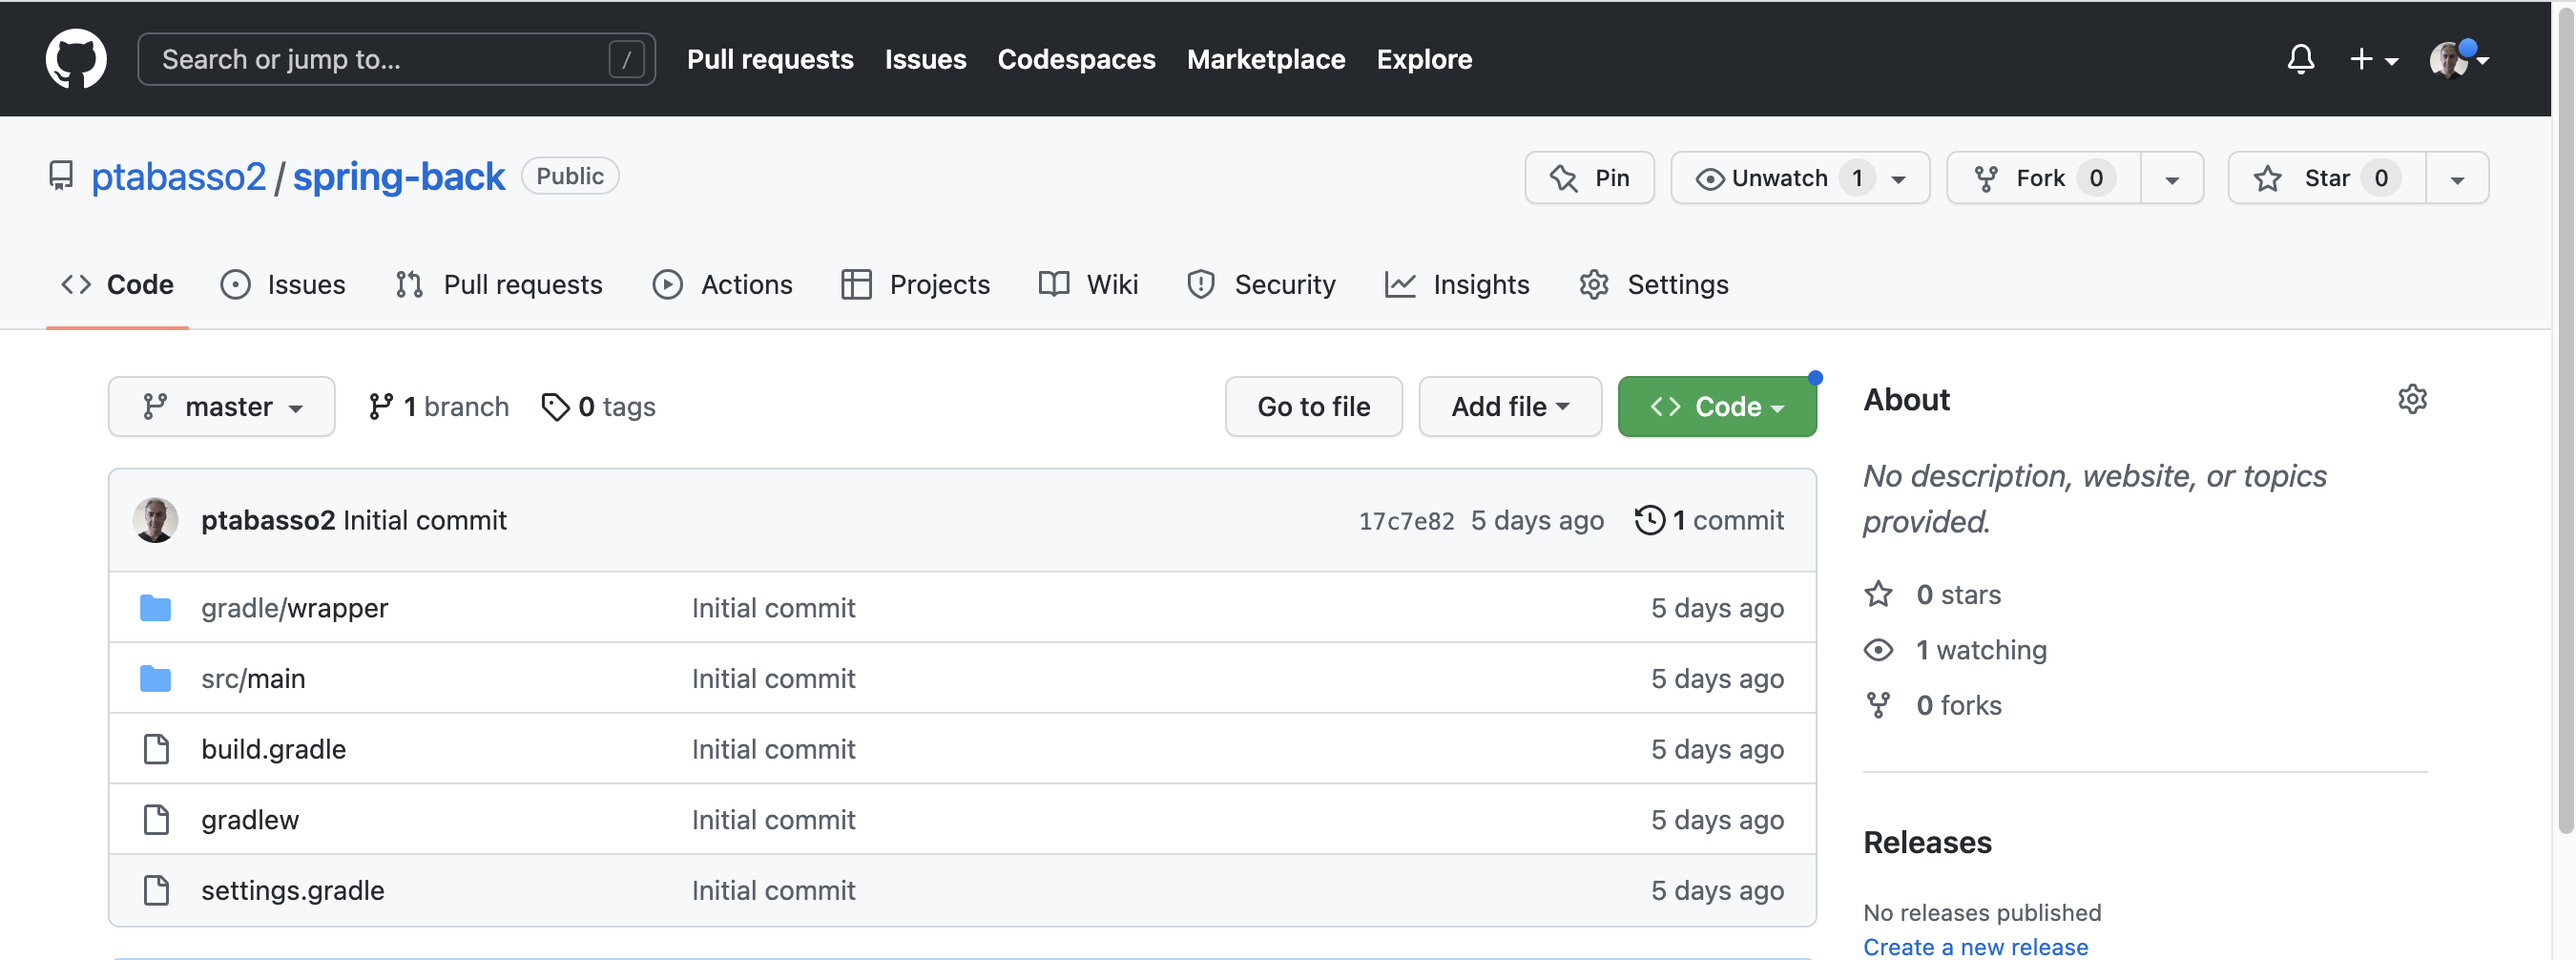
- Push the two microservices code to your github account (
springfront&springback). You should have two distinct repos, see example below for one of the projects.
- Once done, save both the git
commit.shaandrepository_urlfor the two projetcs above. You should have something equivalent to
git.commit.sha:17c7e82807d1ca54ff5aaf032a5aca2b52beab3fand git.repository_url:github.com/ptabasso2/spring-back at hand for the springback project.
-
Start the services and run some traffic (See above Above)
-
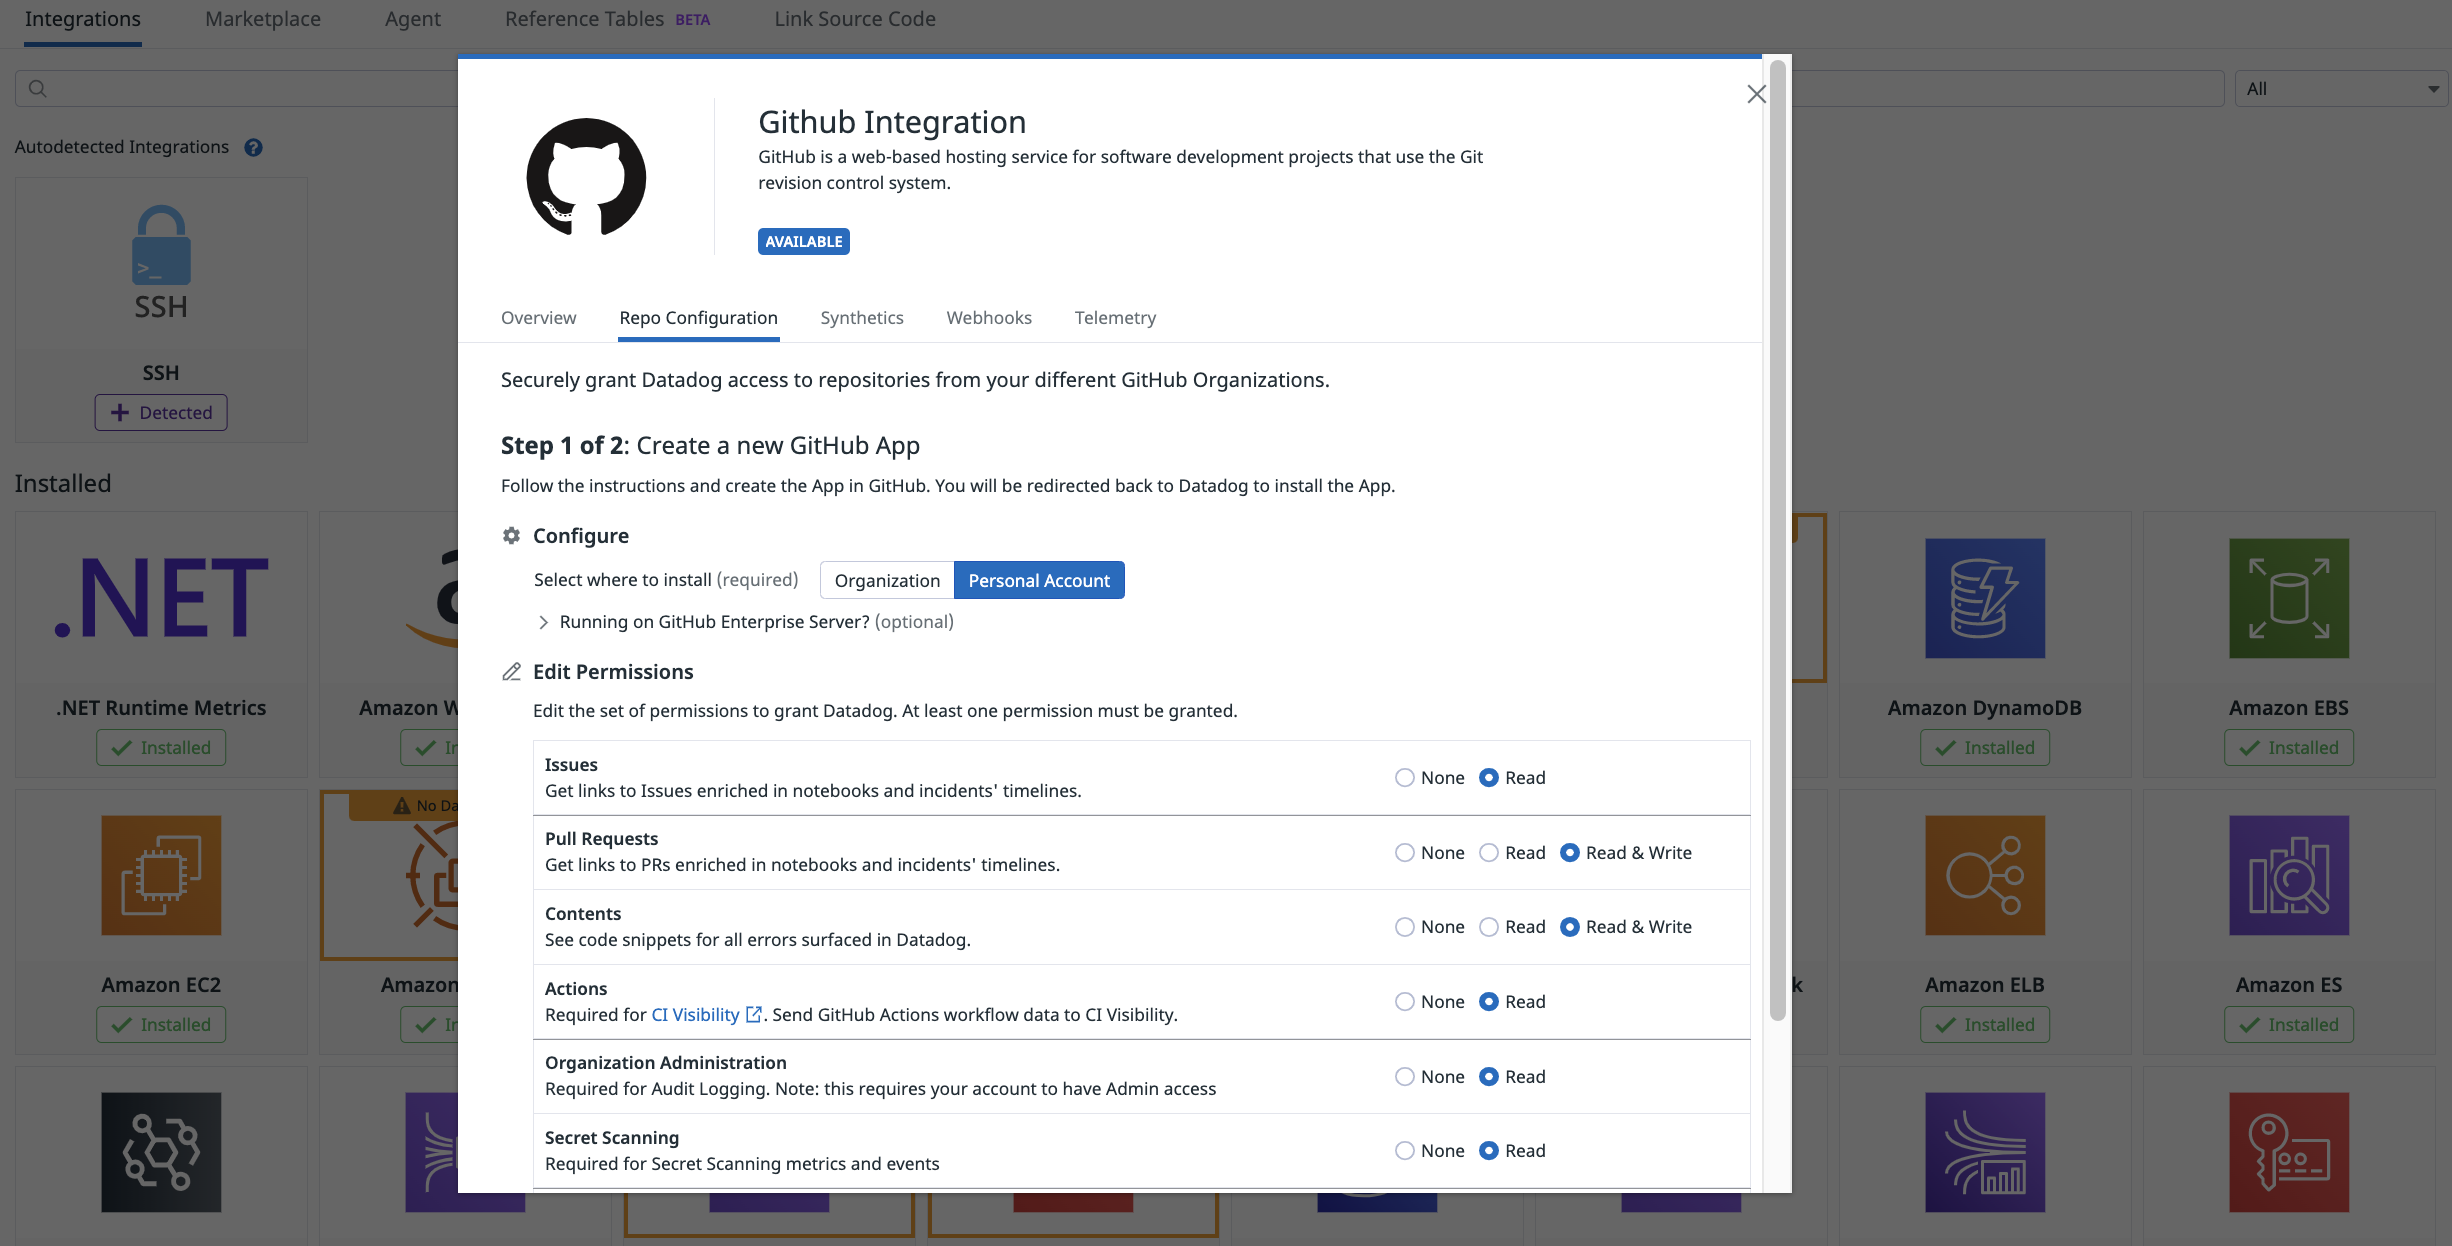
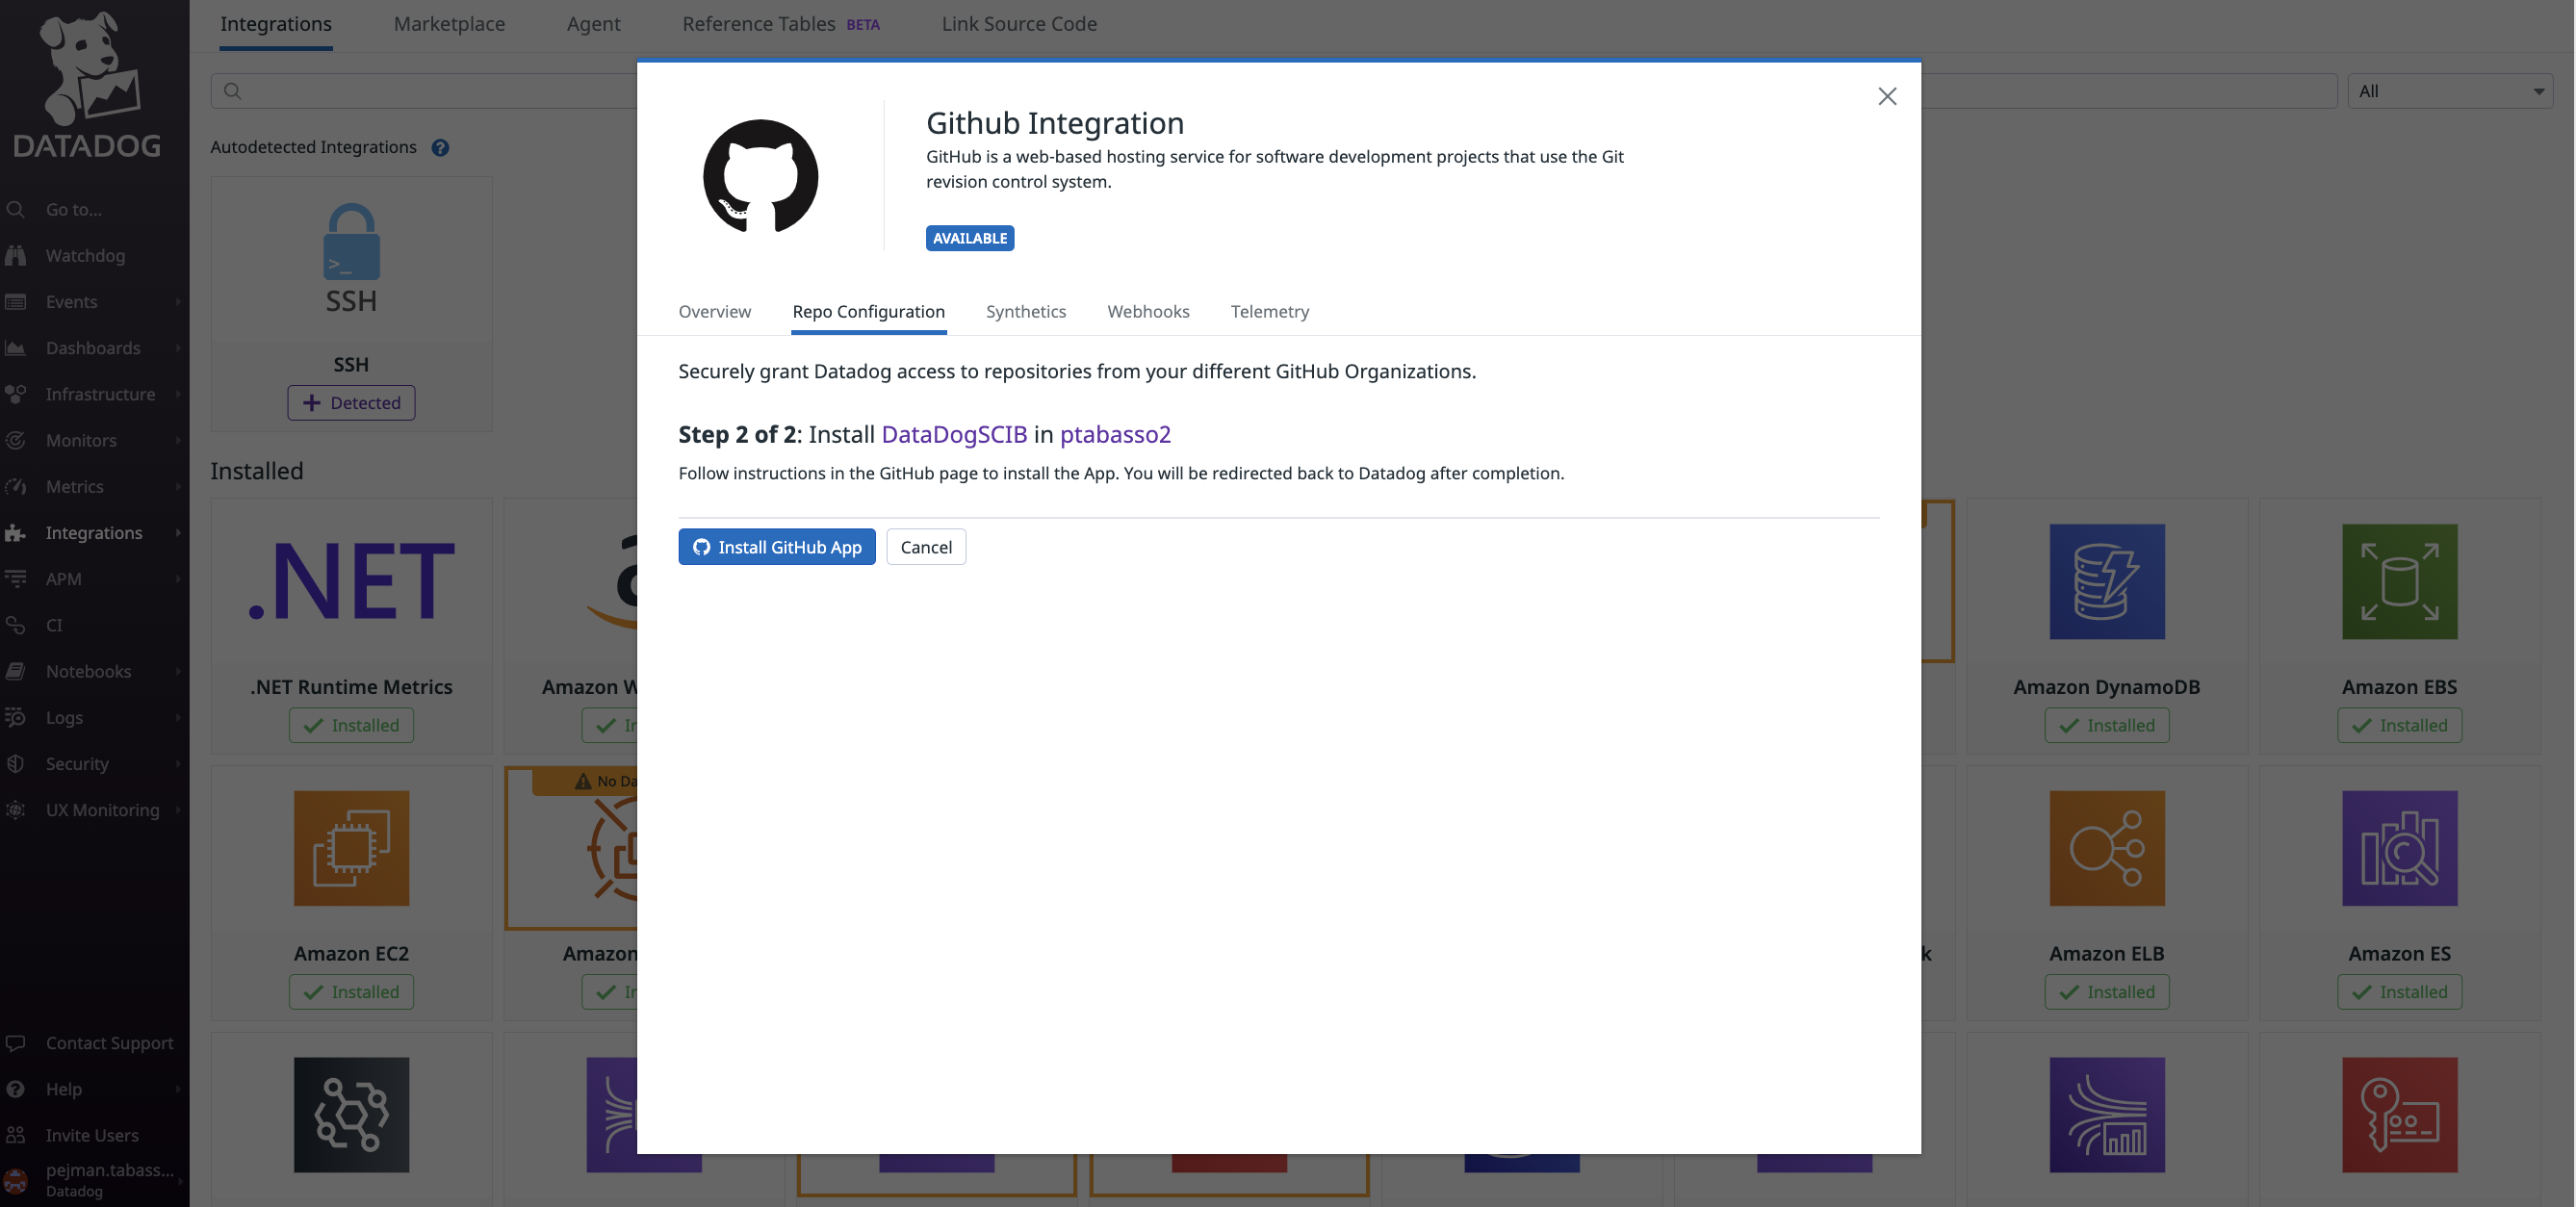
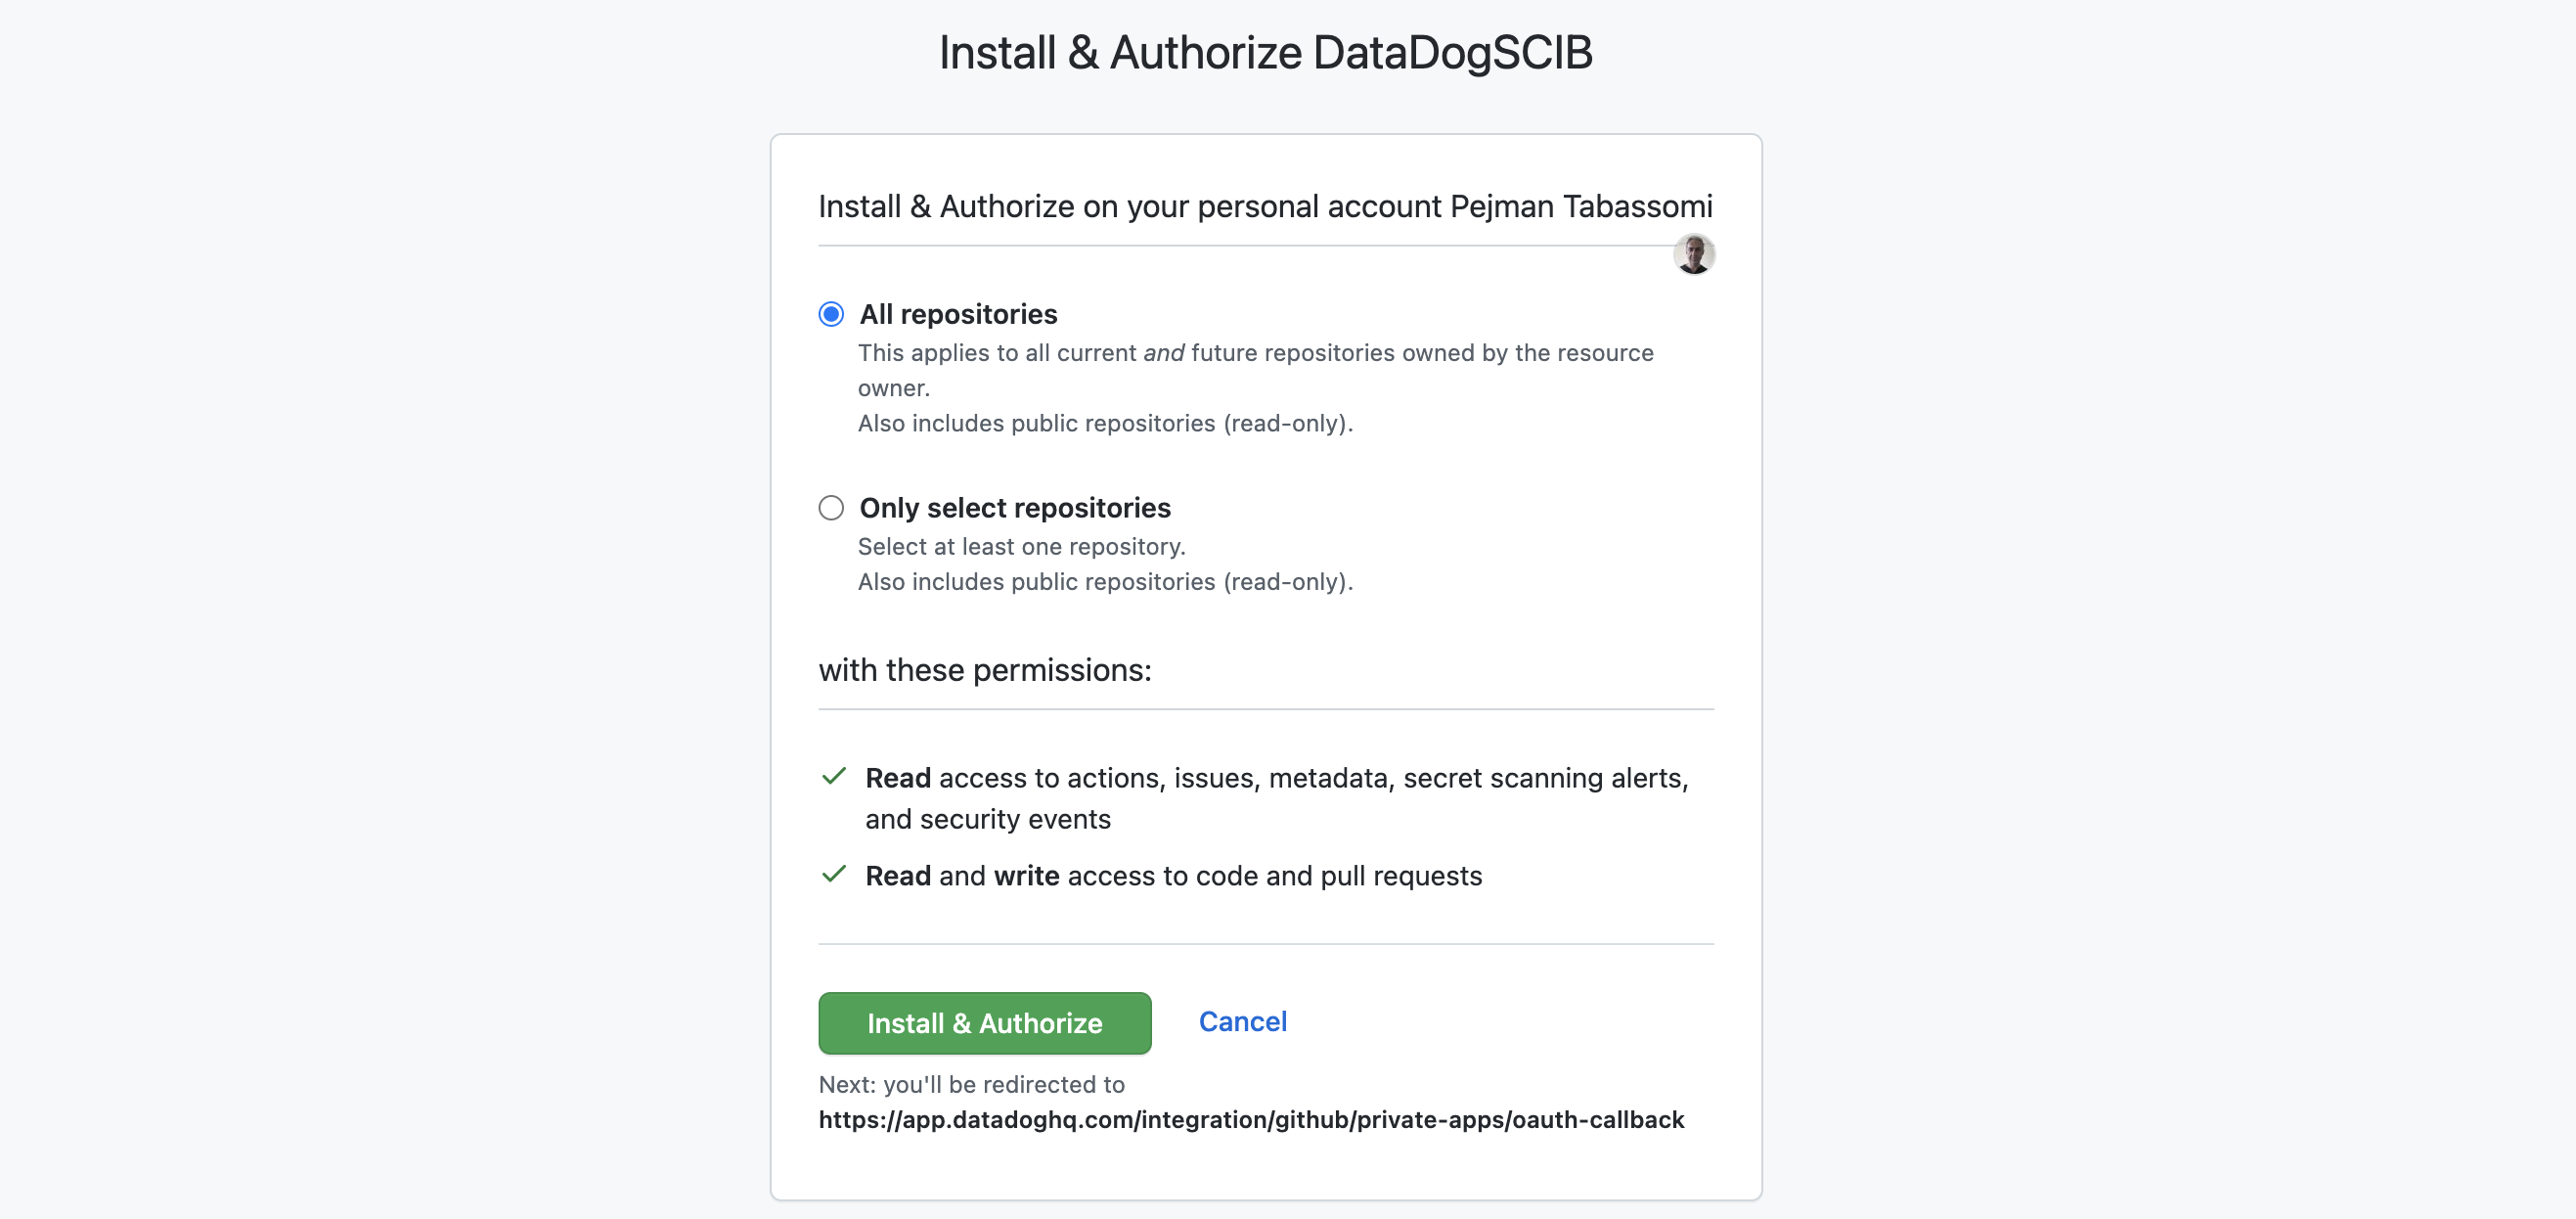
Go to https://app.datadoghq.com/source-code/setup/apm which will guide you through the configuration of the GitHub Integration. After a short while, in step 1 at the top of the in-app instructions, pick the
springfrontservice
There will be four parts in this process
- Creating the GitHub App
- Installing and configuring the GitHub App
- Manage permissions for the GitHUb App
Once you are done with that part, the last remaining bit is the tracing library configuration to get it working. This is also described in the docs Source Code Integration - Configuration
But in a nutshell, the two properties above (git.commit.shaand git.repository_url) are required by the tracing libraries and should be set as tags.
A syntax example based on java system properties you might want to consider when using the Java agent is here under. Environment variables can be used alternatively.
-Ddd.tags=git.commit.sha:9383abbd845cec77c4c65873f6d981bc51d1ead7,git.repository_url:github.com/ptabasso2/spring-frontSummary of the configuration steps
In order to enable these three features, you will need to update the docker-compose.yml file and use the Datadog UI to
- Enable remote config in the UI: https://app.datadoghq.com/organization-settings/remote-config
- Change the DD Agent configuration by adding these two env variables to enable Remote config
DD_REMOTE_CONFIGURATION_ENABLED=true
DD_REMOTE_CONFIGURATION_KEY=DDRCM_QORW64THZYAAGQKLUJSGHLDVOMYS44DSN5SC4ZDPM6RWWZLZ3EUDKZRYGQ4DSN5SC4ZDPM6RWWZLZ3EUDKNJSMVSDAMRTGNTDKNDCGA4DOMRYHA2A
- Enable both dynamic instrumentation and remote config at the tracing level (
-Ddd.dynamic.instrumentation.enabled=true,-Ddd.remote_config.enabled=trueor by using the corresponding env variables form) - Create and install a GitHub app (https://app.datadoghq.com/source-code/setup/apm) to link with source code
- Manage permissions of the GitHub app
- Use the commit hash and github url as tags for the tracing library
Once the changes above have been applied, all the services can be reloaded by using the same instructions specified Here
Generating the load simply consists of using the same curl command specified Here
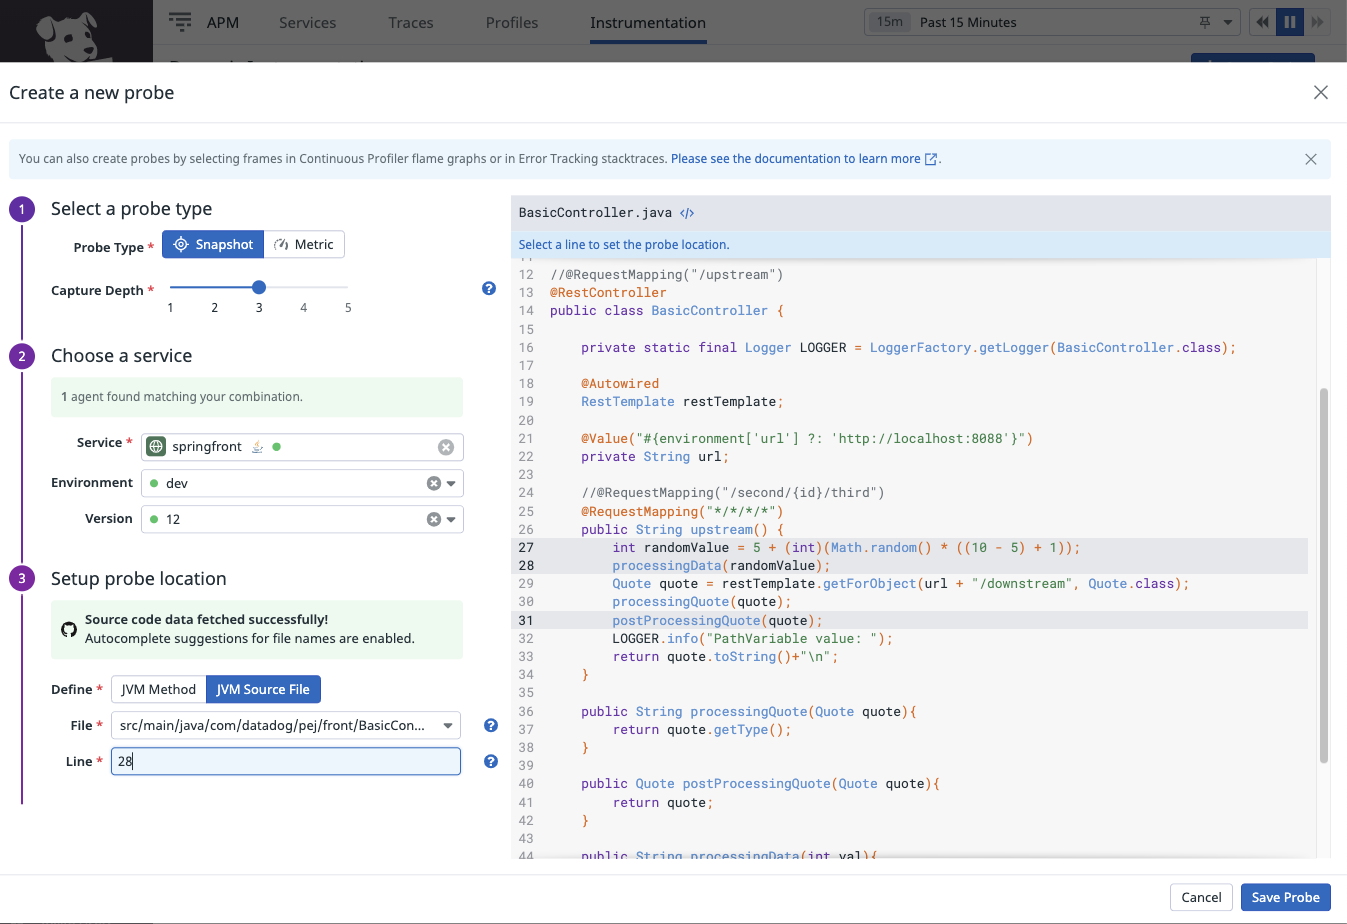
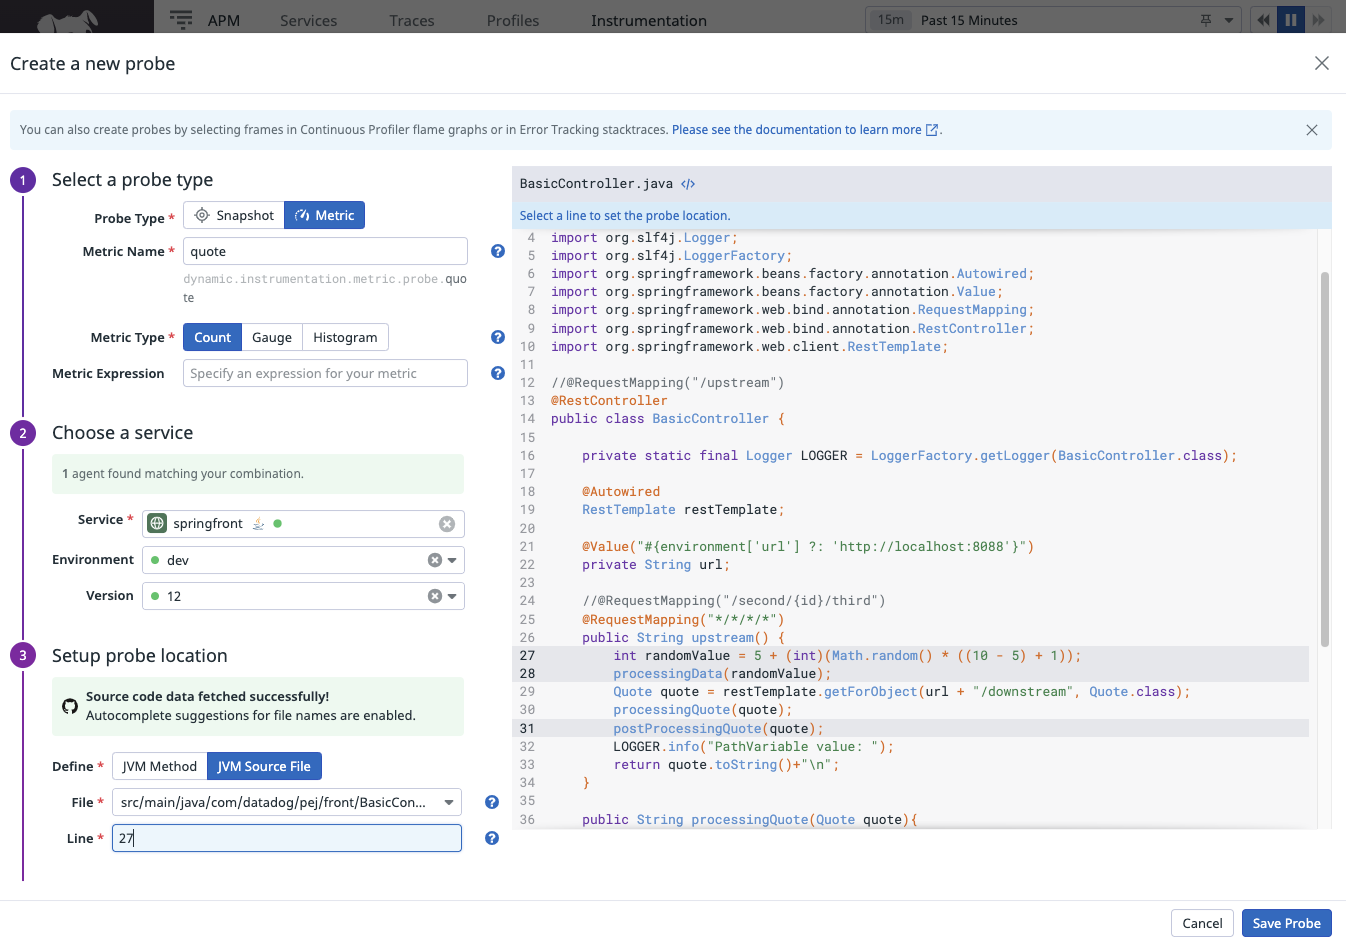
Configuring probes are quite straightfoward when all the pieces are in place
- snapshot probe example
- metric probe example

