OTTO-proto-1
Hardware descriptions and files for the OTTO PROTO #1
Here's the rough BOM for this first prototype:
| Part | Role | Example Store |
|---|---|---|
| Raspberry Pi 3 | Running OTTO | Sparkfun ($39.95) |
| Arduino Pro Micro (x2) | Additionnal GPIO: 1. Handling all the buttons (using QMK Firmware) 2. Handling the rotary encoders |
Sparkfun ($19.95 each) |
| Mechanical Keyboard switches (x48) | Keyboard / Function buttons | NovelKeys Kailh Low Profile ($3.50 each) |
| 1n4148 (x48) | Making a Key Matrix with the keyboard switches. | Sparkfun ($0.14 each) |
| I2S ADC/DAC combo | Audio I/O | Fe-Pi Audio Z V2 ($11.89) |
| A battery pack | ||
| Rotary encoders + push-button combo (x4) | Main OTTO controls | Adafruit ($4.50 each) |
| Coloured encoder caps (x4) | Matching OTTO's colour scheme | DJTechTols CHroma Caps Thin Encoder ($1.99 each) |
| Lasercut enclosure | ||
| 320x240 RGB SPI Screen | Screen |
You will probably require a lot of wire, solder, protoboards and hot glue as well. And patience.
Architecture
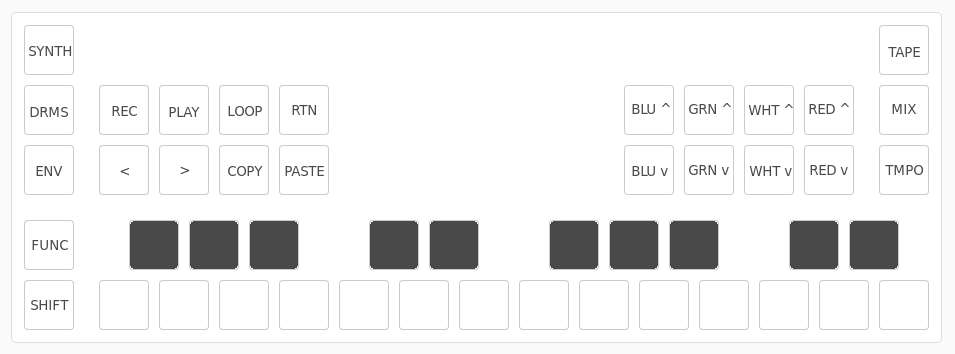
The mechanical switches are wired in a a Key Matrix, and connected to an Arduino Pro Micro, running QMK Firmware. The arduino essentially becomes a keyboard, with only the keys OTTO uses, plugged through USB to the Pi.
KBFirmware.com & keyboard-layout-editor.com make building specific keyboard layouts for QMK Firmware fairly easy. You can find the KBFirmware.com configuration file for the OTTO-proto-1 at arduinos/keyboard/kbfirmware.com.json.
The four rotary encoders are all wired to the second Arduino Pro Micro, which is plugged through USB to the Pi as well. They communicate via Duplex Serial. The arduino tells the Pi what the encoders values are, and the Pi sets the acceleration rate of the encoders, whenever the user changes it in the OTTO menu, and at every boot.
Compiling and Running OTTO
OTTO-proto-1 runs on Raspbian Lite. All info to get the OTTO software to run on Raspbian Lite is available on the OTTO wiki.
