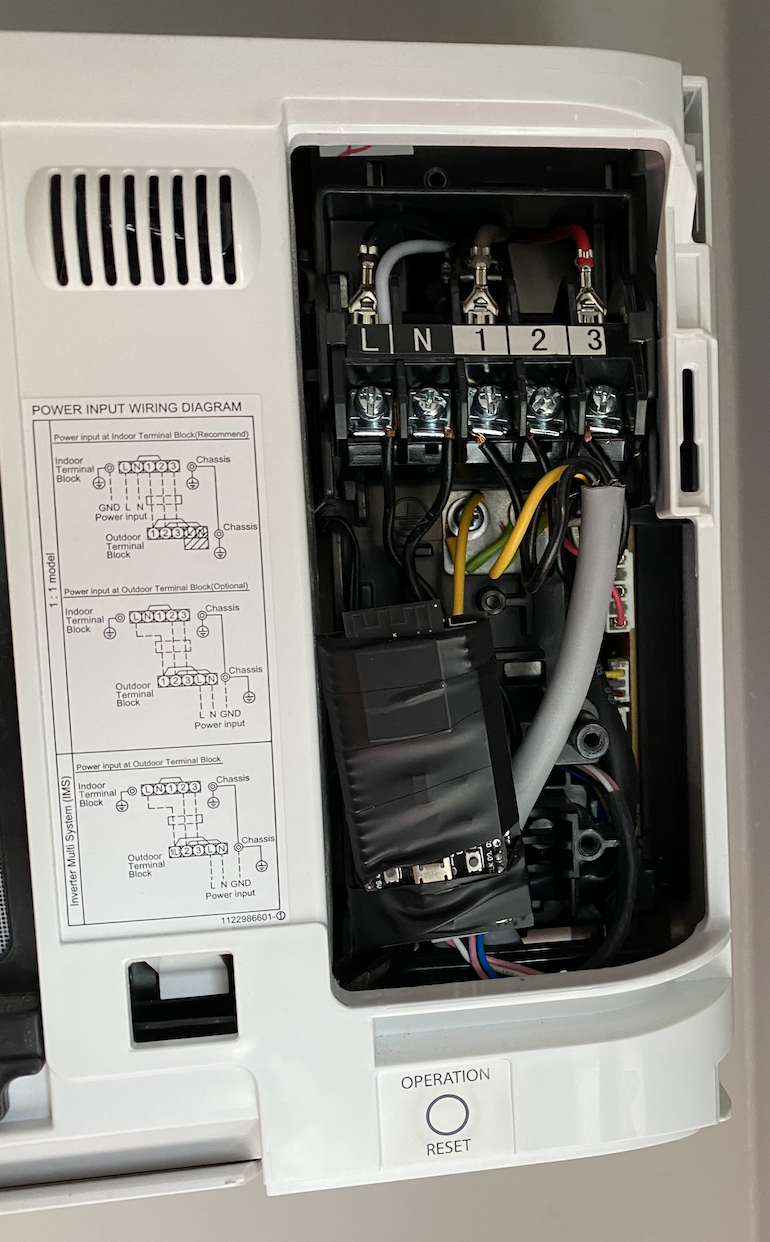
This will work for Toshiba Shorai and Seiya
This works great for me, but is at your own risk!
Hit me up on (https://discord.gg/wYYFawvqfr) if there is anything i can help with
-
Download firmware here: https://github.com/toremick/shorai-esp32/blob/main/firmware/firmware.bin
-
Install esptool.py on your pc. (https://cyberblogspot.com/how-to-install-esptool-on-windows-10/)
-
put firmware.bin i c:\
-
open command prompt and run following from c:\ (edit COM3 to reflect your serial port number)
-
esptool.py --chip esp32 --port COM3 --baud 460800 write_flash -z 0x1000 firmware.bin -
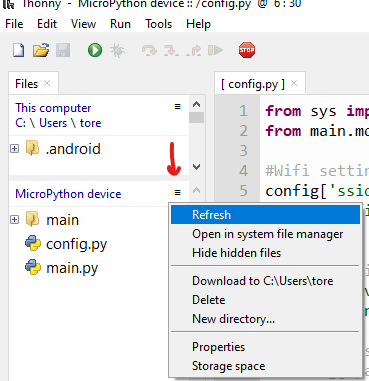
When installed, you need to use thonny (www.thonny.org) or similiar to connect to the esp32.
-
at the repl run the following commands:
import installation
installation.install_now('YOUR-SSID', 'YOUR-WIFI-PASSWD') -
this will install the files needed on your esp32 in /main folder
-
edit config.py to set up your network etc.
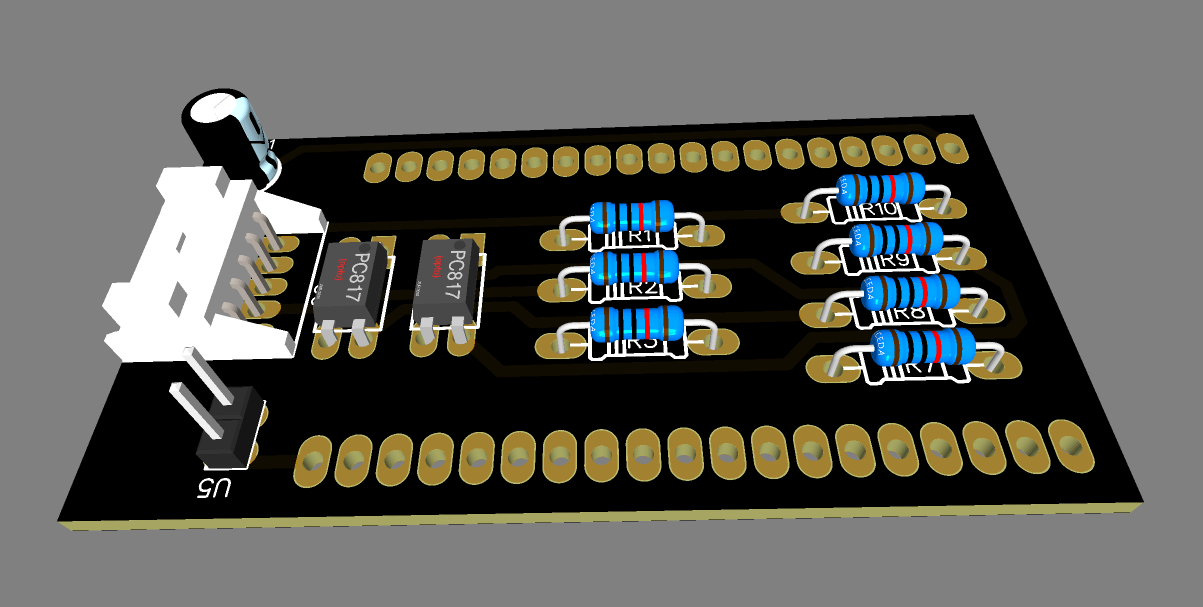
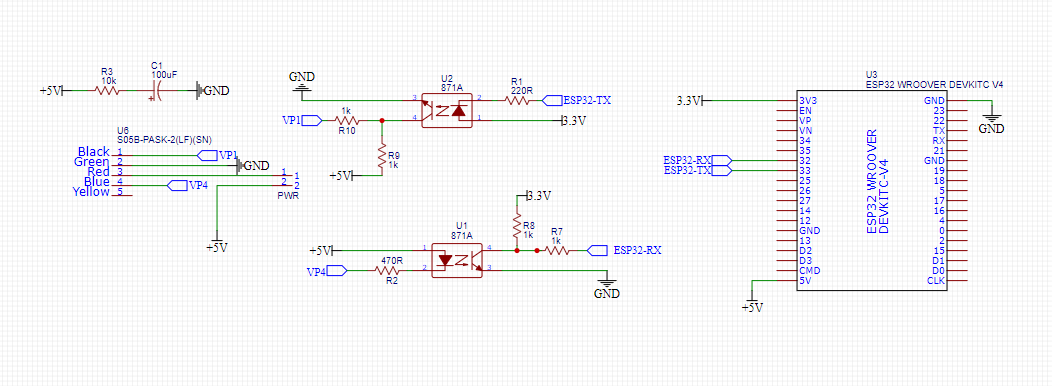
R1: 220R
R2: 470R
R3: 10K
R7,R8,R9,R10: 1K
U1,U2: 817A (Optocouplers)
C1: 100uF
U5: When connected with a Jumper, the pcb is powered from the AC (can be soldered)
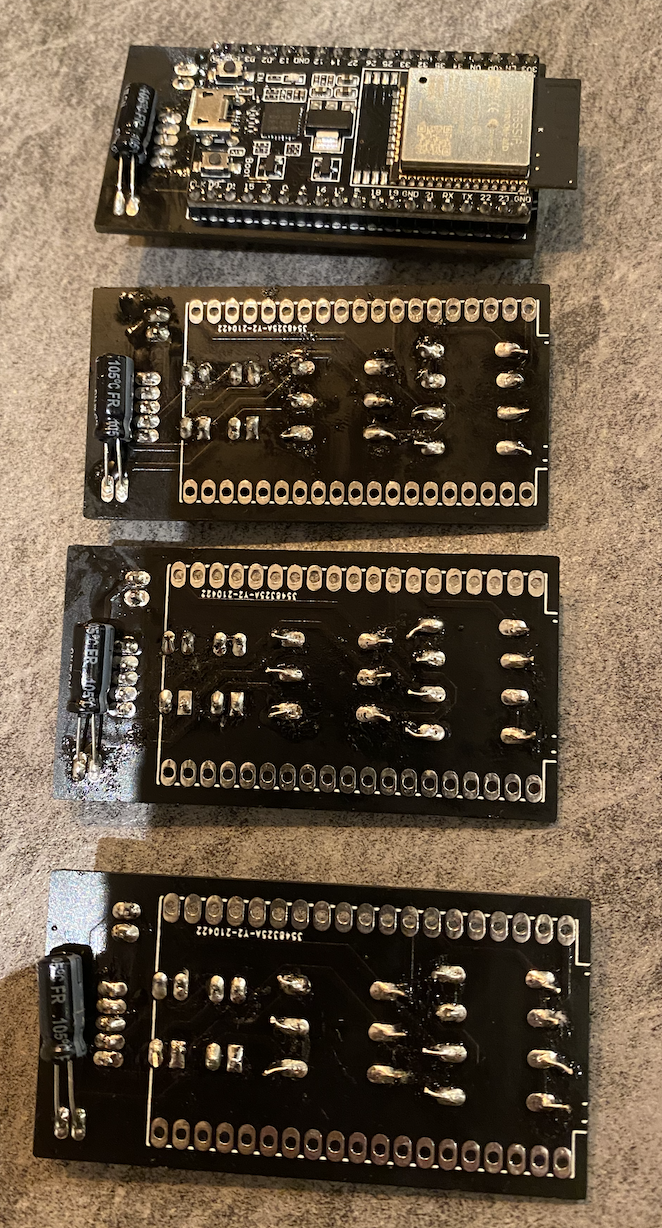
Files for PCB (and possible to order): https://oshwlab.com/toremick/toshiba-ac-heatpump-mqtt
- 1 x ESP32-DevKitC v4 (38 pins)
- 2 x EL817A Optocoupler (https://www.ebay.com/itm/Straight-Plug-Optocoupler-EL817-A-B-C-D-F-DIP-4-Compatible-PC817-Isolator/253795050804?hash=item3b175d2534:g:LjcAAOSwXVNbY~z3)
- 4 x 0.25w 1K resistors
- 1 x 0.25w 470R resistor
- 1 x 0.25w 10K resistor
- 1 x 0.25w 220R resistor
- 1 x 100uF (11mmx5mm) Capacitor
- 1 x S05B-PASK-2 (header for connection cable)
- and 2.54mm header pins and sockets
- JST, PA Female Crimp Connector Housing, 2mm Pitch, 5 Way, 1 Row (https://no.rs-online.com/web/p/wire-housings-plugs/1630360/)
- JST, PA Female Connector Housing, 2mm Pitch, 5 Way, 1 Row (https://no.rs-online.com/web/p/wire-housings-plugs/4766798/)
- JST, PA Female Crimp Connector Housing SPAL-001T-P0.5 (https://no.rs-online.com/web/p/crimp-contacts/1630376/)
- JST, PA, PBV, PHD Female Crimp Terminal Contact 22AWG SPHD-001T-P0.5 (https://no.rs-online.com/web/p/crimp-contacts/6881381/)
This can be skipped if you are solder the capacitor on the solder side laying flat. This way it will fit inside the AC unit
Important note: If you have more than one device, please remember to change the name, unique_id and all the mqtt strings to have unique names. For each device replace the heatpump name with the unique 'maintopic' you have configured in the config.py of your ESP32 device.
mqtt:
  climate:
    - name: HeatPump
      icon: mdi:air-conditioner
      unique_id: toshibaheatpump
      modes:
        - "off"
        - "auto"
        - "cool"
        - "heat"
        - "dry"
        - "fan_only"
      swing_modes:
        - "on"
        - "off"
      fan_modes:
        - "quiet"
        - "lvl_1"
        - "lvl_2"
        - "lvl_3"
        - "lvl_4"
        - "lvl_5"
        - "auto"
      power_command_topic: "heatpump/state/set"
      power_state_topic: "heatpump/state/state"
      mode_command_topic: "heatpump/mode/set"
      mode_state_topic: "heatpump/mode/state"
      current_temperature_topic: "heatpump/roomtemp"
      temperature_command_topic: "heatpump/setpoint/set"
      temperature_state_topic: "heatpump/setpoint/state"
      fan_mode_command_topic: "heatpump/fanmode/set"
      fan_mode_state_topic: "heatpump/fanmode/state"
      swing_mode_command_topic: "heatpump/swingmode/set"
      swing_mode_state_topic: "heatpump/swingmode/state"
      temp_step: 1
      precision: 1
(this will query the heatpump for all values so HA will have current state for everything)
- id: gethpvalues_on_startup
  alias: "HP states on HA start-up"
  trigger:
    platform: homeassistant
    event: start
  action:
  - service: mqtt.publish
    data:
      topic: heatpump/doinit
      payload: startup-ha
