
To use the app first clone the project to the desired location:
git clone https://github.com/tristanratz/ChatApp.git
- Works on iOS, iPadOS and macOS (support for project catalyst)
- UI completely build in SwiftUI
- Python Server included. Build with Twisted
- Client socket class with events (connected, newMessage...)
Before you start a client it is mandatory to start the server. The server is included in the Server/ directory. Make sure python 3.6+ is installed. After that you can install the requirements like this:
pip install -r requirements.txt
After installing the requirements you can already install the server. If you want to you can adjust the port the server will be hosted on in the main.py Starting the server is also very simple:
python main.pyThat's it. Use -p or --port to open the server on another port than the default (which is 8000).
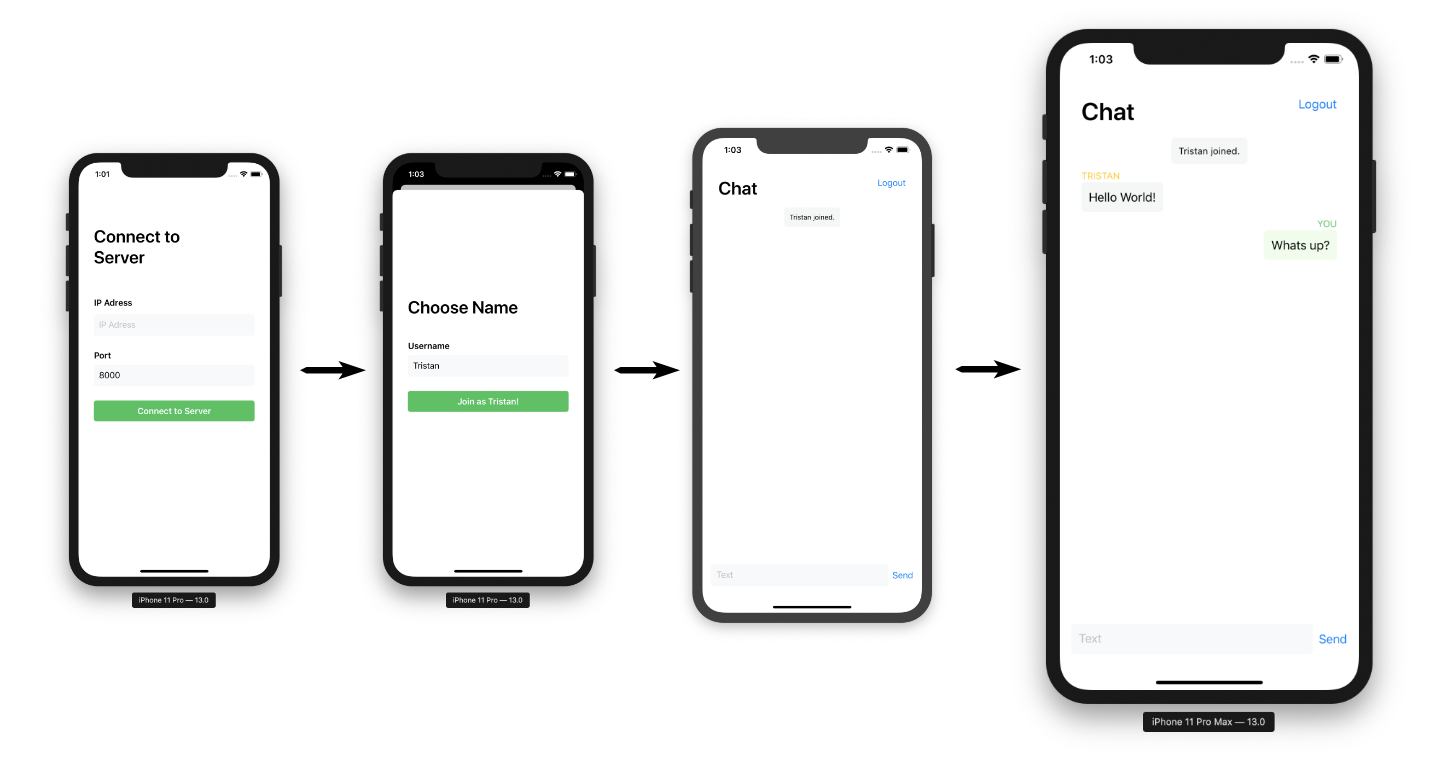
Now the only thing you have to do is to lookup the IP of your computer to connect your client to the server or if your running in simulator on the same computer you simply can enter "localhost" to connect.
The client is compatible with iPhone, iPad and Mac.
The client is implemented in Swift and the user interface in SwiftUI. Thus you need iOS 13, iPadOS 13 or MacOS 10.15 Catalina to run the App, as well as XCode 11 or above.
The App is included in the ClientApp/ directory. To open the client in XCode open the XCode project file (ClientApp.xcodeproj) in the main directory. XCode should open the project. Now you can run it in a simulator or on a private device. It is working on iPhone, iPad and Mac.
If you want to implement a matching client just pull and try to connect to the server. After that you need to implement the protocol
The protocol for sending and receiving messages is very simple. All informations are seperated by a colon: SENDER:TYPE OF MESSAGE:ACTUAL MESSAGE At the moment the message type is whether "inf" for making a request and sending "information" (it is only used by the sever) or "msg" for sending a message. msg can be used by all parties.
After connecting the sever request you to send a name and will make the next mesage your name.
Server:
server:inf:name
When you send a String back and it is not taken yet, it will take it as your name. Otherwise it will send the same message again (and again)
After that you are free to send messages and receive messages in the following format.
Client:
YOUR_NAME:msg:YOUR_MESSAGE