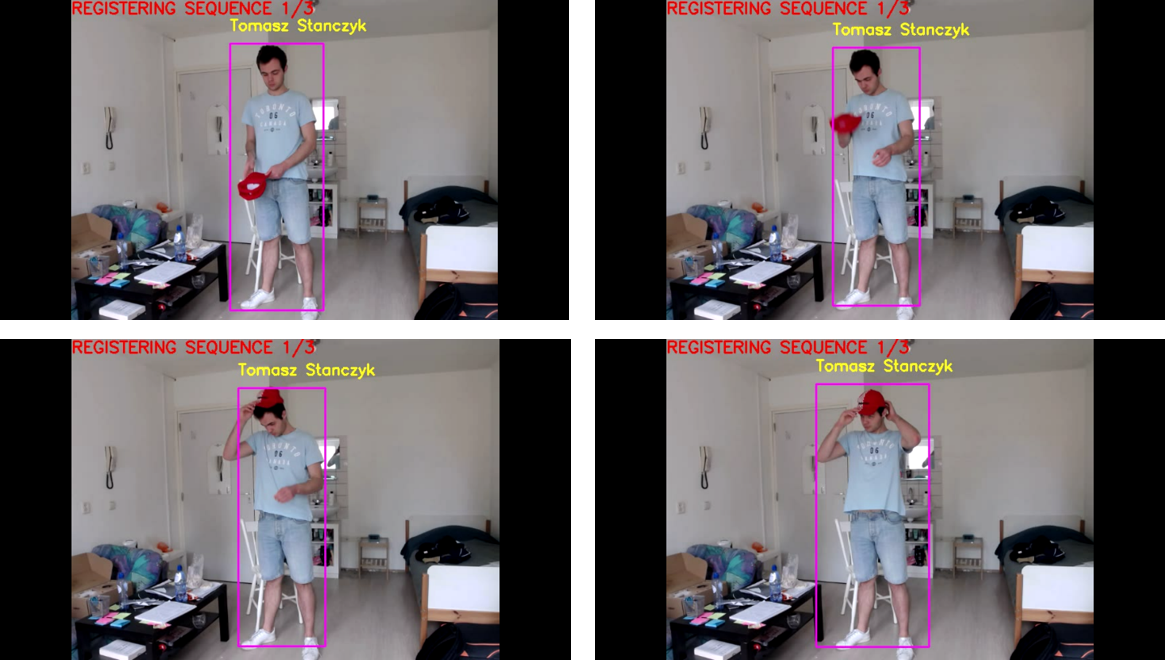
An integrated computer vision system for human recognition and behavior analysis from RGB Camera. Project realized within the master studies internship.
This system was created using the state-of-the-art computer vision components based on the following repositories:
- object detection - PyTorch YOLOv3,
- face detection - Dlib's CNN-based face detection model,
- face recognition - Dlib's face recognition model,
- object tracking - Dlib's correlation tracker,
- facial emotion recognition - Facial-Expression-Recognition.Pytorch,
- human pose estimation - lightweight-human-pose-estimation.pytorch,
- skeleton-based action recognition - 2s-AGCN (MS-AAGCN).
The skeleton-based action recognition component was modified and expanded into practically usable component. The whole pipeline extracting skeletons human pose skeletons from RGB video was created:
The skeleton-based action recognition component was trained on the custom 2D skeleton dataset. Using the same approach with Lightweight OpenPose as for the action recognition pipeline, 2D skeletons were extracted from RGB videos coming from the original NTU-RGB+D dataset. First 60 classes (A001-A060) were taken into account.
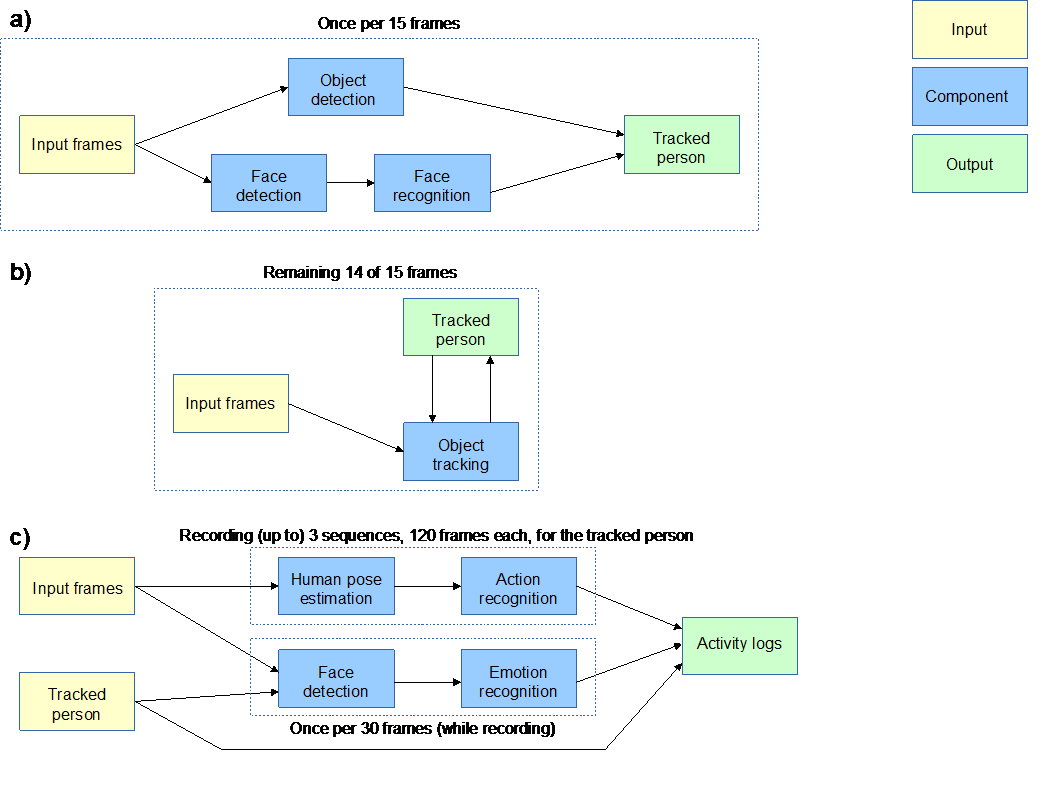
All the components were integrated into one system as presented below:
For more details about the components and the system functionality, please check internship presentation and abstract.
An RGB camera is required.
The following packages need to be installed, with the newest versions recommended:
- pytorch (torch)
- torchvision
- h5py
- sklearn
- pycocotools
- opencv-python
- numpy
- matplotlib
- terminaltables
- pillow
- tqdm
- dlib (with GPU support)
- argparse
- PIL
- imutils
As described in PyTorch YOLOv3 installation guidelines,
$ cd pytorch_yolo_adapted/weights/
$ bash download_weights.sh
$ cd pytorch_yolo_adapted/data/
$ bash get_coco_dataset.sh
Following the guidlines of Facial-Expression-Recognition.Pytorch, create a new folder: facial_recognition_pytorch_adapted/FER2013_VGG19/, download the pre-trained model from link1 or link2 (key: g2d3)) and place it in the FER2013_VGG19/ folder.
Further, download Dlib's human face detector model from here as well as Dlib's shape predictor from here, unpack both files and place them inside facial_recognition_pytorch_adapted/
As described in lightweight-human-pose-estimation.pytorch installation guidelines, download the pre-trained model from here and place it in lightweight_openpose_adapted/models/.
Finally, download: Dlib's human face detector model from here and Dlib's shape predictor as well as Dlib's recognition resnet model from here, unpack all files and place them inside data/face_recognition/
In order to generate more facial descriptors,
$ face_descriptor_generator.py shape_predictor_5_face_landmarks.dat dlib_face_recognition_resnet_model_v1.dat /path/to/the/input/image "name of the person"
Move the generated descriptor to face_descriptors/ . Note that the input image should contain photo of only one person. In case of multiple faces detected, only the first one will be processed and saved to the file.
Launch command prompt or terminal and go to the project main folder (HumanRecognitionBehaviorAnalysis/).
python main.py
The camera input window will appear and the processing will start.
In order to stop the processing, set the focus on the output video window (e.g. by clicking on it) and press 'Q' from the keyboard.
The generated output files will include:
- the processed video sequence (no sound), saved in the format: "output_processed_video_[year]_[month]_[day]_[hour]_[minute]_[second].avi",
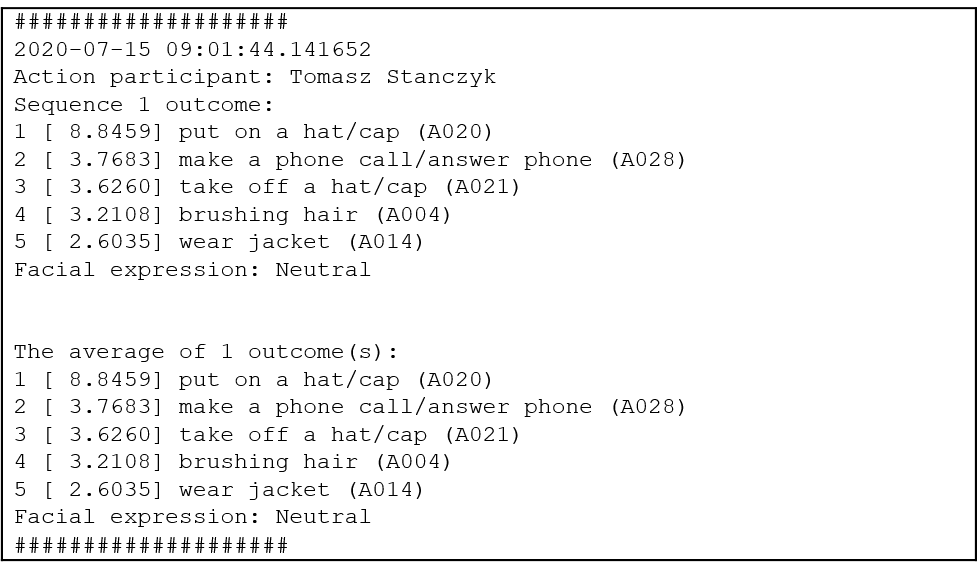
- the activity log text file (in case of successful and sufficient registration of the frames for action recognition) with potentially identified person, the performed action and corresponding facial emotion. The activity log file will be saved in the following format: "activity_logs_[year]_[month]_[day]_[hour]_[minute]_[second].txt".


