Contact: stefan.mijin@ukaea.uk
This is the repository used for the ReMKiT1D Workshop held at UKAEA on 30-31st Jan 2024. It contains material for learning the basics of ReMKiT1D, and is associated with version 1.1.0 of the framework. NOTE: If you've participated in the workshop note that the framework has released v1.1.0, which was used during the workshop, so you will likely have to rebuild the Docker images.
This workshop assumes basic Python and Jupyter notebook knowledge. Basic knowledge of the following libraries is desirable but not essential:
- numpy
- matplotlib
- xarray
- holoviews
A Dockerfile is supplied with this repository containing a prepared environment for running both ReMKiT1D as well as the Python support package.
Docker is a prerequisite for this workshop.
NOTE: Docker Desktop requires a commercial license under certain conditions. If you are unable to install Docker Desktop, you can still install Docker Engine on Mac or Windows.
NOTE: If you are using a UKAEA Windows laptop, please contact the organisers for internal instructions.
NOTE: If you are using a macOS computer with an Apple silicon chip (M1,M2,M3 etc.), use the alternative Dockerfile found within the ./mac_dockerfile/ folder when performing step 2 (replace the repository root directory with it). All other steps can be followed as usual.
Attendees who do not have experience with working within Docker containers are advised to use VS Code as the IDE for this workshop. The remainder of these instructions will assume we are working in VS Code. If you are on Windows and prefer using WSL, note that it is also possible to use VS Code by connecting to a remote folder in WSL.
After cloning this repository, and opening that folder in VS Code, the user should be prompted to install workspace recommended extensions. These are the Docker and Dev Containers extensions and should be installed before proceeding.
To build and run the Docker image used in this workshop:
- Open up the terminal in VS Code (refer to VS Code Keyboard shortcuts for your system: Windows,Linux,macOS)
- In the terminal run
docker build --tag remkit1d-workshop:latest .
This will start the build process for the Docker image, which can take a while. If you've not set up a user group for docker on your machine you might need to run docker commands with sudo. However, we suggest that you enable Docker for non-root users.
- Once the image is built run the following in order to start the Docker container and to make it visible to the Docker extension
docker run -it remkit1d-workshop
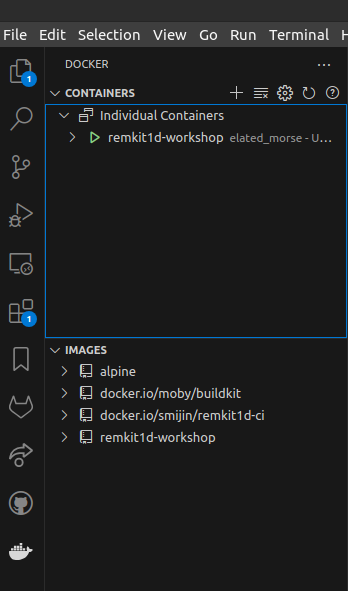
- The container will now be running interactively in the terminal. Navigate to the Docker extension in the VS Code sidebar (the bottom icon in the left sidebar in the image below)
-
Under the Containers tab right click on the running remkit1d-workshop container and select
Attach Visual Studio Codeform the right-click menu. This will open a new VS Code window within that container. You might be prompted to open a folder in the container. If so, navigate to the /home directory. -
In the new VS Code window navigate again to the sidebar, this time to the Extensions menu
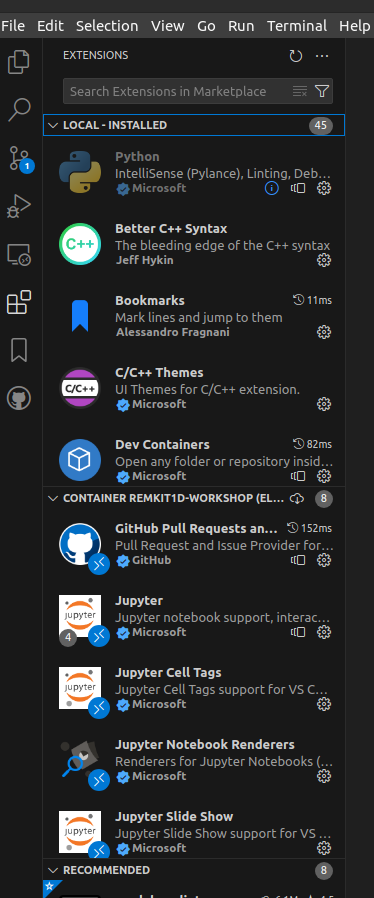
- The Extensions menu will display multiple collapsible sections, including
LOCAL-INSTALLEDandCONTAINER REMKIT1D-WORKSHOP(might have a slightly different name depending on your system).
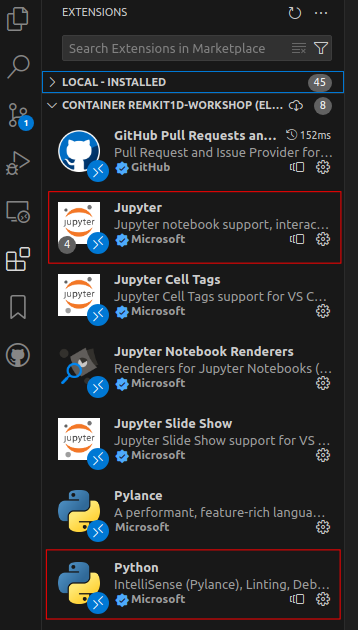
Make sure that the Python and Jupyter extensions are installed in the container. They should be present as in the below image (you might need to move the collapsible sections around, and the container section will most likely be thin)
If you cannot see the extensions try searching the Extensions Marketplace (the search bar at the top of the Extensions menu). You can find the Python and Jupyter extensions there. To see which extensions are installed again simply clear this search bar. If you are missing any of the required extensions, you will be prompted to install them once you attempt running the supplied Jupyter notebooks.
Once the environment has been set up the following can be done to confirm that the setup was performed correctly:
-
Check that all tests have passed. The outputs of these will be in
/home/ReMKiT1D_build_test.out,/home/ReMKiT1D_debug_test.out,/home/RMK_support_test.out. -
Navigate to
/home/ReMKiT1D-Workshop-2024/hands_on_sessionsusing the VS Code Explorer at the top of the left sidebar and openday_1_1.ipynb -
In the Jupyter menu of the notebook select
Run All
-
The first time this is done you will be prompted to select a kernel. Select the recommended kernel corresponding to the Python installation in the container (should be 3.8.10)
-
Check that all cells have been executed successfully (have a green checkmark) up to and including the cell below
Create config. Cells below this require running ReMKiT1D to obtain output and will fail (marked with a red X and displaying error messages).
The workshop consists mostly of interactive hands-on sessions using Jupyter notebooks. Most of them have a short set of slides associated with the hands-on session, meant to explain key concepts. The slide decks are numbered in order as ${day}0${session} and are in the slides folder.
The hands-on session notebooks are all in the hands_on_sessions folder, where the RMKOutput folder and folders within are used to store the outputs of the sessions.
Most hands-on sessions are set up with missing fields, to be filled out as exercises. Solutions are supplied in the hands_on_sessions/solutions folder.
To run ReMKiT1D for the hands-on sessions, navigate to the hands_on_sessions folder in the Docker container. Once a config.json file is generated by a notebook in the folder, you can use it by running the following in the command line
mpirun -np N /home/ReMKiT1D/build/src/executables/ReMKiT1D/ReMKiT1D
where N is the number of MPI processes to be used, and depends on the exact run settings used when creating config.json.
-
The ReMKiT1D repositories:


