This tutorial is designed to introduce TensorFlow Extended (TFX) and help you learn to create your own machine learning pipelines. It runs locally, and shows integration with TFX and TensorBoard as well as interaction with TFX in Jupyter notebooks.
Key Term: A TFX pipeline is a Directed Acyclic Graph, or "DAG". We will often refer to pipelines as DAGs.
You'll follow a typical ML development process, starting by examining the dataset, and end up with a complete working pipeline. Along the way you'll explore ways to debug and update your pipeline, and measure performance.
Please see the TFX User Guide to learn more.
You'll gradually create your pipeline by working step by step, following a typical ML development process. Here are the steps:
- Setup your environment
- Bring up initial pipeline skeleton
- Dive into your data
- Feature engineering
- Training
- Analyzing model performance
- Ready for production
- Linux or MacOS
- Virtualenv
- Python 2.7
- Git
The code for this tutorial is available at: https://github.com/tensorflow/tfx/tree/master/examples/
The code is organized by the steps that you're working on, so for each step you'll have the code you need and instructions on what to do with it.
The tutorial files include both an exercise and the solution to the exercise, in case you get stuck.
- taxi_pipeline.py
- taxi_utils.py
- taxi DAG
- taxi_pipeline_solution.py
- taxi_utils_solution.py
- taxi_solution DAG
You’re learning how to create an ML pipeline using TFX
- TFX pipelines are appropriate when datasets are large
- TFX pipelines are appropriate when training/serving consistency is important
- TFX pipelines are appropriate when version management for inference is important
- Google uses TFX pipelines for production ML
You’re following a typical ML development process
- Understanding our data
- Feature engineering
- Training
- Analyze model performance
- Lather, rinse, repeat
- Ready for production
The tutorial is designed so that all the code is included in the files, but all
the code for steps 3-7 is commented out and marked with inline comments. The
inline comments identify which step the line of code applies to. For example,
the code for step 3 is marked with the comment # Step 3.
The code that you will add for each step typically falls into 3 regions of the code:
- imports
- The DAG configuration
- The list returned from the create_pipeline() call
- The supporting code in taxi_utils.py
As you go through the tutorial you'll uncomment the lines of code that apply to the tutorial step that you're currently working on. That will add the code for that step, and update your pipeline. As you do that we strongly encourage you to review the code that you're uncommenting.
You're using the Taxi Trips dataset released by the City of Chicago.
Note: This site provides applications using data that has been modified for use from its original source, www.cityofchicago.org, the official website of the City of Chicago. The City of Chicago makes no claims as to the content, accuracy, timeliness, or completeness of any of the data provided at this site. The data provided at this site is subject to change at any time. It is understood that the data provided at this site is being used at one’s own risk.
You can read more about the dataset in Google BigQuery. Explore the full dataset in the BigQuery UI.
Will the customer tip more or less than 20%?
The setup script (setup_demo.sh) installs TFX and
Airflow, and configures
Airflow in a way that makes it easy to work with for this tutorial.
In a shell:
virtualenv -p python2.7 tfx-env
source tfx-env/bin/activate
mkdir tfx; cd tfx

pip install tensorflow==1.13.1
pip install tfx==0.12.0
git clone https://github.com/tensorflow/tfx.git
cd tfx/examples/workshop/setup
./setup_demo.sh
You should review setup_demo.sh to see what it's doing.
In a shell:
# Open a new terminal window, and in that window ...
source tfx-env/bin/activate
airflow webserver -p 8080

# Open another new terminal window, and in that window ...
source tfx-env/bin/activate
airflow scheduler- Open a browser and go to http://127.0.0.1:8080
- Use the button on the left to enable the taxi DAG
- Use the button on the right to trigger the taxi DAG
- Click on taxi
- Wait for the CsvExampleGen component to turn dark green (~1 minutes)
- Use the graph refresh button on the right or refresh the page
- Wait for pipeline to complete
- All dark green
- Use refresh button on right side or refresh page
The first task in any data science or ML project is to understand and clean the data.
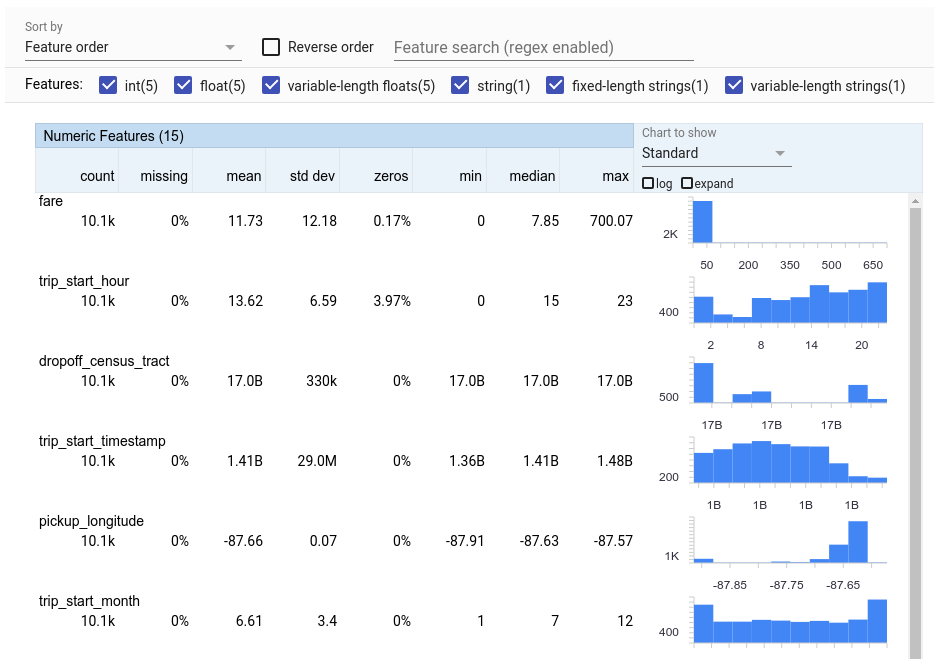
- Understand the data types for each feature
- Look for anomalies and missing values
- Understand the distributions for each feature
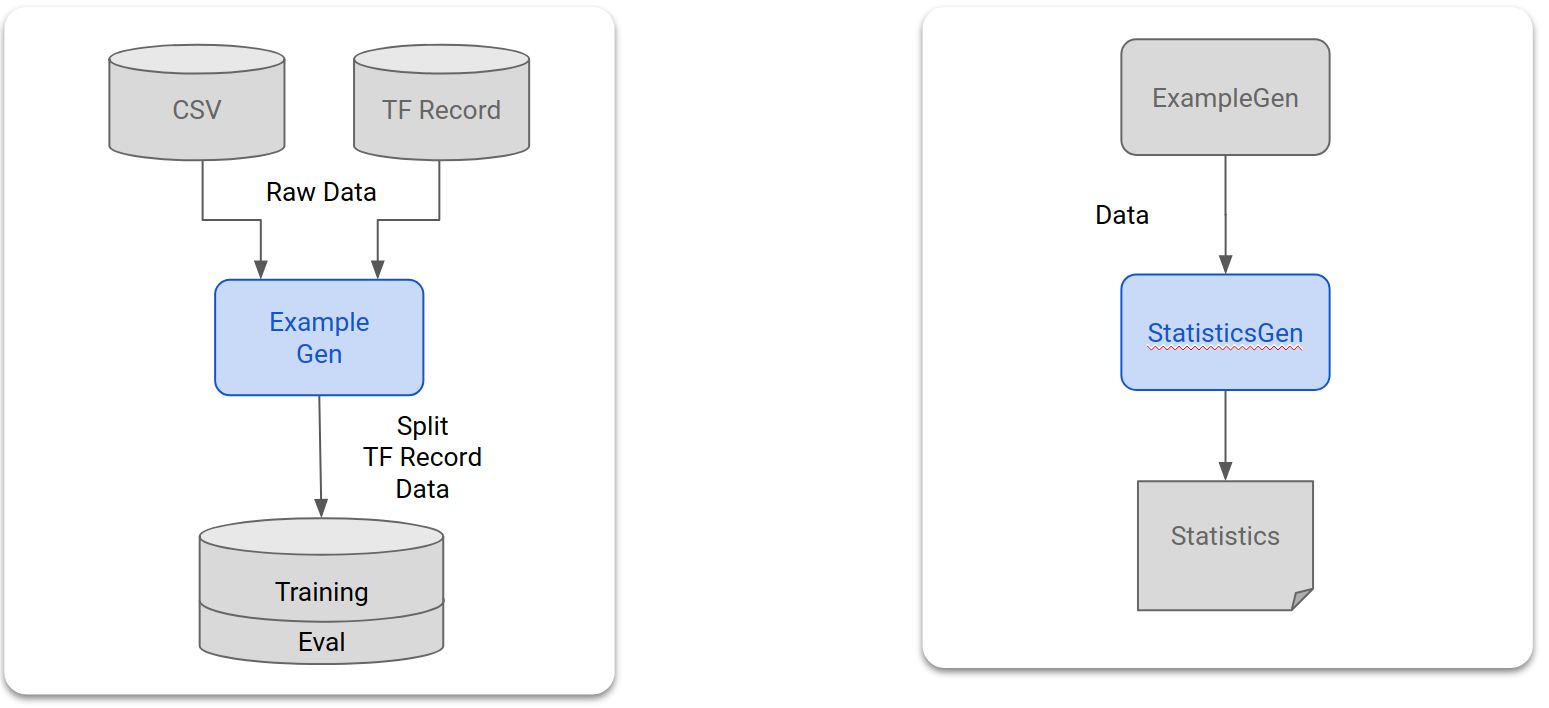
- ExampleGen ingests and splits the input dataset.
- StatisticsGen calculates statistics for the dataset.
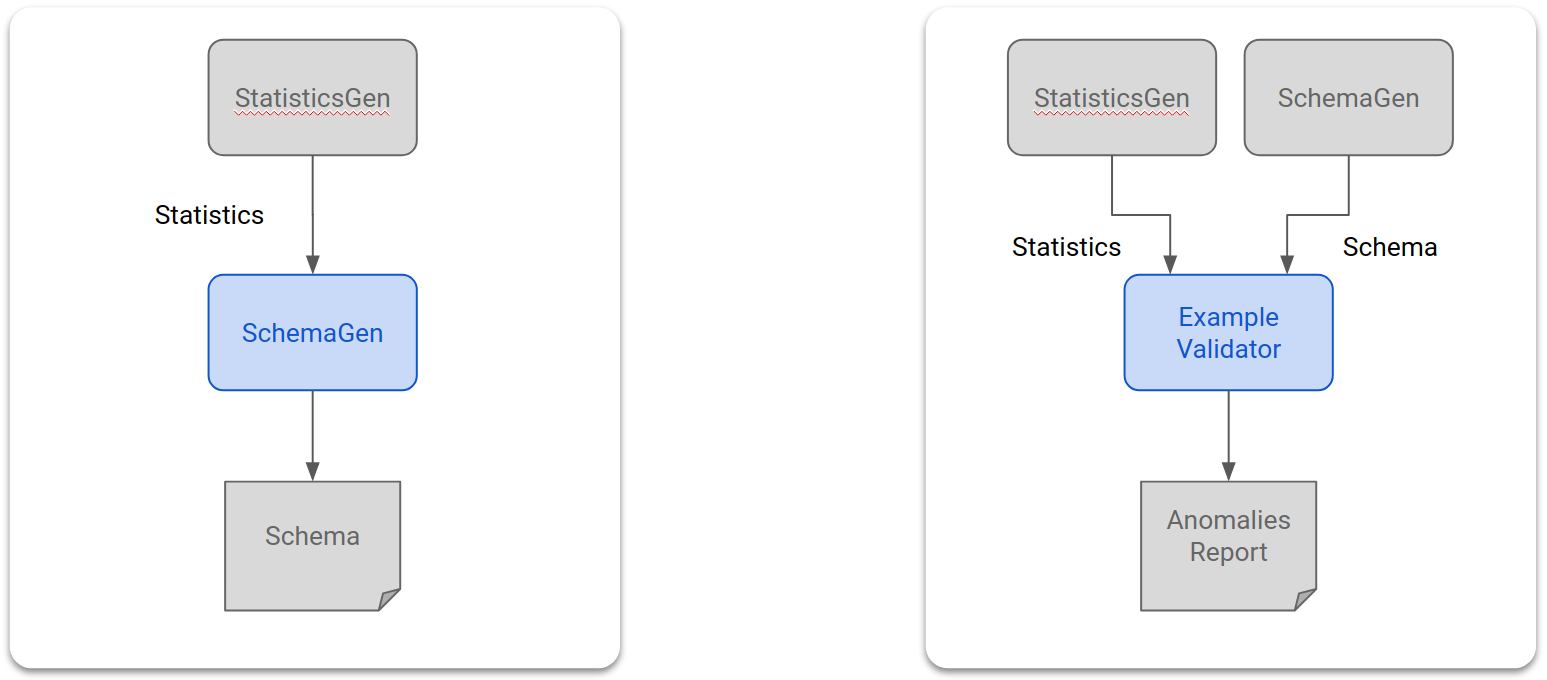
- SchemaGen SchemaGen examines the statistics and creates a data schema.
- ExampleValidator looks for anomalies and missing values in the dataset.
- Uncomment the lines marked
Step 3in bothtaxi_pipeline.pyandtaxi_utils.py - Take a moment to review the code that you uncommented
- Return to DAGs list page in Airflow
- Click the refresh button on the right side for the taxi DAG
- You should see "DAG [taxi] is now fresh as a daisy"
- Trigger taxi
- Wait for pipeline to complete
- All dark green
- Use refresh on right side or refresh page
- Open step3.ipynb
- Follow the notebook
The example presented here is really only meant to get you started. For a more advanced example see the TensorFlow Data Validation Colab
For more information on using TFDV to explore and validate a dataset, see the examples on tensorflow.org
You can increase the predictive quality of our data and/or reduce dimensionality with feature engineering.
- Feature crosses
- Vocabularies
- Embeddings
- PCA
- Categorical encoding
One of the benefits of using TFX is that you will write your transformation code once, and the resulting transforms will be consistent between training and serving.
- Transform performs feature engineering on the dataset.
- Uncomment the lines marked
Step 4in bothtaxi_pipeline.pyandtaxi_utils.py - Take a moment to review the code that you uncommented
- Return to DAGs list page in Airflow
- Click the refresh button on the right side for the taxi DAG
- You should see "DAG [taxi] is now fresh as a daisy"
- Trigger taxi
- Wait for pipeline to complete
- All dark green
- Use refresh on right side or refresh page
- Open step4.ipynb
- Follow the notebook
The example presented here is really only meant to get you started. For a more advanced example see the TensorFlow Transform Colab.
Train a TensorFlow model with our nice, clean, transformed data.
- Include the transformations from step 4 so that they are applied consistently
- Save the results as a SavedModel for production
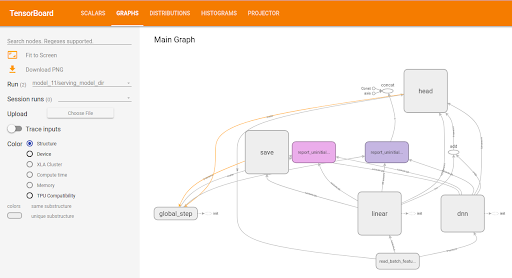
- Visualize and explore the training process using TensorBoard
- Also save an EvalSavedModel for analysis of model performance
- Trainer trains the model using TensorFlow Estimators
- Uncomment the lines marked
Step 5in bothtaxi_pipeline.pyandtaxi_utils.py - Take a moment to review the code that you uncommented
- Return to DAGs list page in Airflow
- Click the refresh button on the right side for the taxi DAG
- You should see "DAG [taxi] is now fresh as a daisy"
- Trigger taxi
- Wait for pipeline to complete
- All dark green
- Use refresh on right side or refresh page
- Open step5.ipynb
- Follow the notebook
The example presented here is really only meant to get you started. For a more advanced example see the TensorBoard Tutorial.
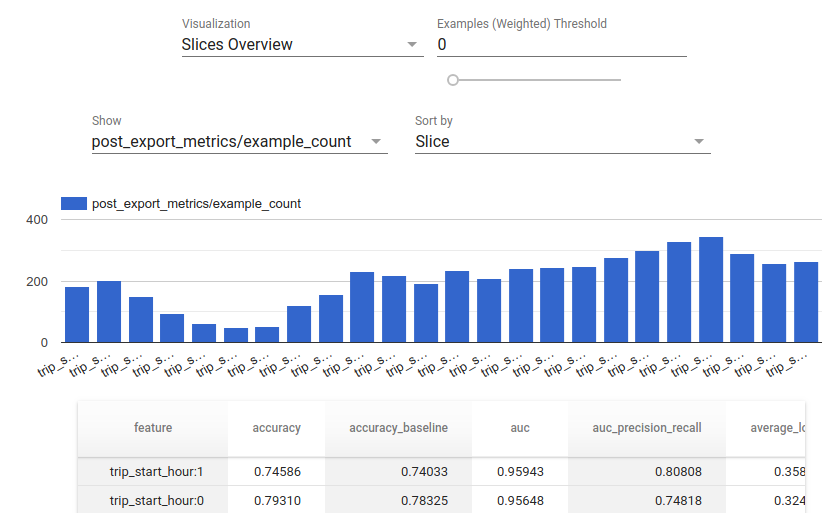
Understanding more than just the top level metrics.
- Users experience model performance for their queries only
- Poor performance on slices of data can be hidden by top level metrics
- Model fairness is important
- Often key subsets of users or data are very important, and may be small
- Performance in critical but unusual conditions
- Performance for key audiences such as influencers
- Evaluator performs deep analysis of the training results.
- Uncomment the lines marked
Step 6in bothtaxi_pipeline.pyandtaxi_utils.py - Take a moment to review the code that you uncommented
- Return to DAGs list page in Airflow
- Click the refresh button on the right side for the taxi DAG
- You should see "DAG [taxi] is now fresh as a daisy"
- Trigger taxi
- Wait for pipeline to complete
- All dark green
- Use refresh on right side or refresh page
- Open step6.ipynb
- Follow the notebook
The example presented here is really only meant to get you started. For more information on using TFMA to analyze model performance, see the examples on tensorflow.org.
If the new model is ready, make it so.
- If we’re replacing a model that is currently in production, first make sure that the new one is better
- ModelValidator tells Pusher if the model is OK
- Pusher deploys SavedModels to well-known locations
Deployment targets receive new models from well-known locations
- TensorFlow Serving
- TensorFlow Lite
- TensorFlow JS
- TensorFlow Hub
- ModelValidator ensures that the model is "good enough" to be pushed to production.
- Pusher deploys the model to a serving infrastructure.
- Uncomment the lines marked
Step 7in bothtaxi_pipeline.pyandtaxi_utils.py - Take a moment to review the code that you uncommented
- Return to DAGs list page in Airflow
- Click the refresh button on the right side for the taxi DAG
- You should see "DAG [taxi] is now fresh as a daisy"
- Trigger taxi
- Wait for pipeline to complete
- All dark green
- Use refresh on right side or refresh page
You have now trained and validated your model, and exported a SavedModel file
under the ~/airflow/saved_models/taxi directory. Your model is now
ready for production. You can now deploy your model to any of the TensorFlow
deployment targets, including:
- TensorFlow Serving, for serving your model on a server or server farm and processing REST and/or gRPC inference requests.
- TensorFlow Lite, for including your model in an Android or iOS native mobile application, or in a Raspberry Pi, IoT or microcontroller application.
- TensorFlow.js, for running your model in a web browser or a Node.JS application.


