💙 Open Source
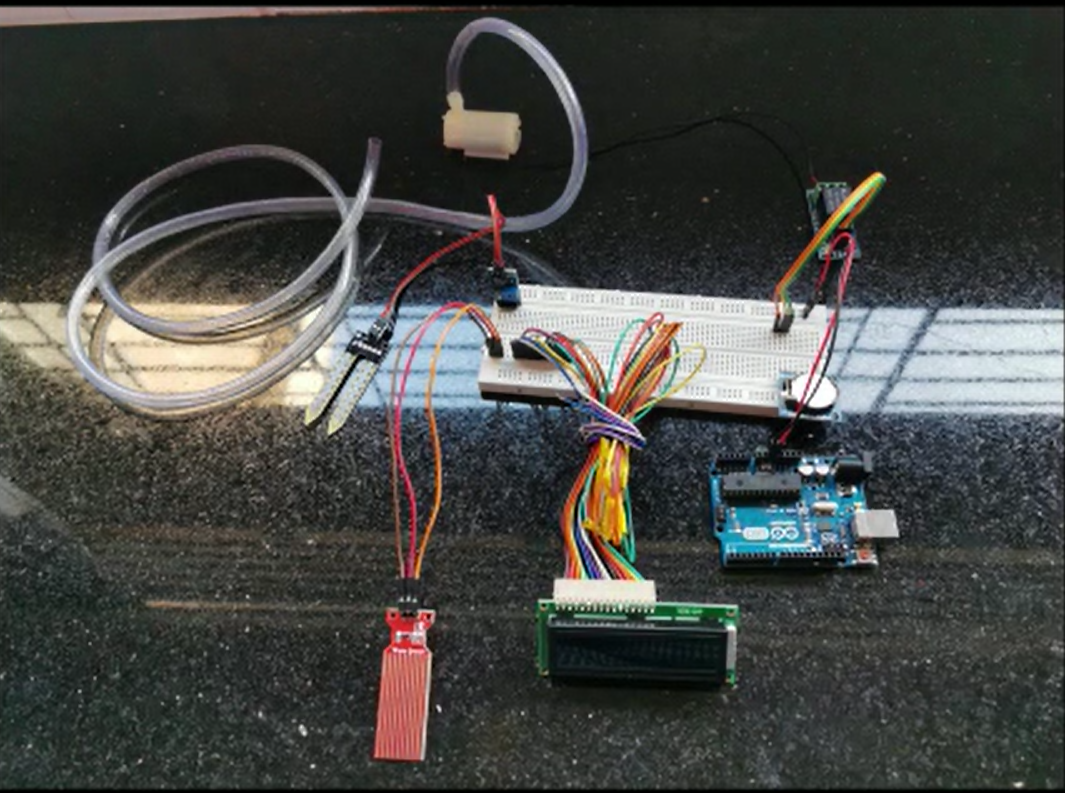
A system that estimates and measures the moisture of soil in order to operate an irrigation system, restoring water as needed while minimizing excess water use and help the user to monitor the data for further use.
- To design an automatic irrigation system thereby saving time & power for the farmer.
- To design a proto-type and test it on small scale so that we can create an effective solution for the problems on large scale.
- Eliminating human interaction as much as possible in the process.
- Providing the plants with water only when they require.
- Providing a more modular system for easy upgrades.
- Easy monitoring from anywhere in the world.
- Arduino Uno.
- NodeMCU.
- DS 1307 RTC.
- Soil Moisture Sensor.
- Water Depth Sensor.
- 5v Single channel Relay.
- 16x2 LCD.
- Arduino IDE.
- Thingspeak READ and WRITE API keys.
- Connect module VCC to Arduino’s 5v out pin.
- Connect module GND to Arduino’s GND.
- Connect module SDA and SCL pins to Arduino SDA and SCL pins.
- Pin 1 to GND.
- Pin 2 to 5v.
- Pin 3 to pin 10.
- Pin 4 to pin 12.
- Pin 5 to GND.
- Pin 6 to pin 11.
- Pin 11 to pin 5.
- Pin 12 to pin 4.
- Pin 13 to pin 3.
- Pin 14 to pin 2.
- Pin 15 to pin 5v.
- Pin 16 to pin GND.
- Connect sensor VCC to Arduino’s 5v pin.
- Connect sensor GND to Arduino’s GND pin.
- Connect sensor analog pin to Arduino A0 pin.
- Connect sensor VCC to Arduino’s 5v pin.
- Connect sensor GND to Arduino’s GND pin.
- Connect sensor analog pin to Arduino A1 pin.
- Connect sensor VCC to Arduino’s 5v pin.
- Connect sensor GND to Arduino’s GND pin.
- Connect sensor IN pin to Arduino 8 pin.
- Connect pump GND to Arduino GND pin.
- Connect pump VCC to Relay.
- Connect NodeMCU Vin to Arduino’s 5v out pin.
- Connect NodeMCU GND to Arduino’s GND pin.
- Connect NodeMCU D1 to Arduino’s pin 0.
- Connect NodeMCU D2 to Arduino’s pin 1.
- Connect NodeMCU D3 to Arduino’s pin 7.
- Set the time for watering plants in morning.
- Set minimum soil moisture level depending on plant.
- Adjust the level for water depth sensor.
- Set the Wi-Fi name to connect to.
- Enter the password of the Wi-Fi network.
- Enter the ThingSpeak Channel ID and API_Key.
If using any part of the code/idea/repository, mention us in comments and in reference.😊


