This project showcases a minimal setup of Keycloak, so you can use it together with Vaadin SSO Kit as an SSO identity manager in the Vaadin application. Please take into account that the tutorial was created in January 2023, and the involved technologies may have changed since then. Especially the screenshots do not have to be 100% accurate anymore.
- SSO Kit documentation: https://vaadin.com/docs/latest/tools/sso
- Keycloak documentation: https://www.keycloak.org/documentation
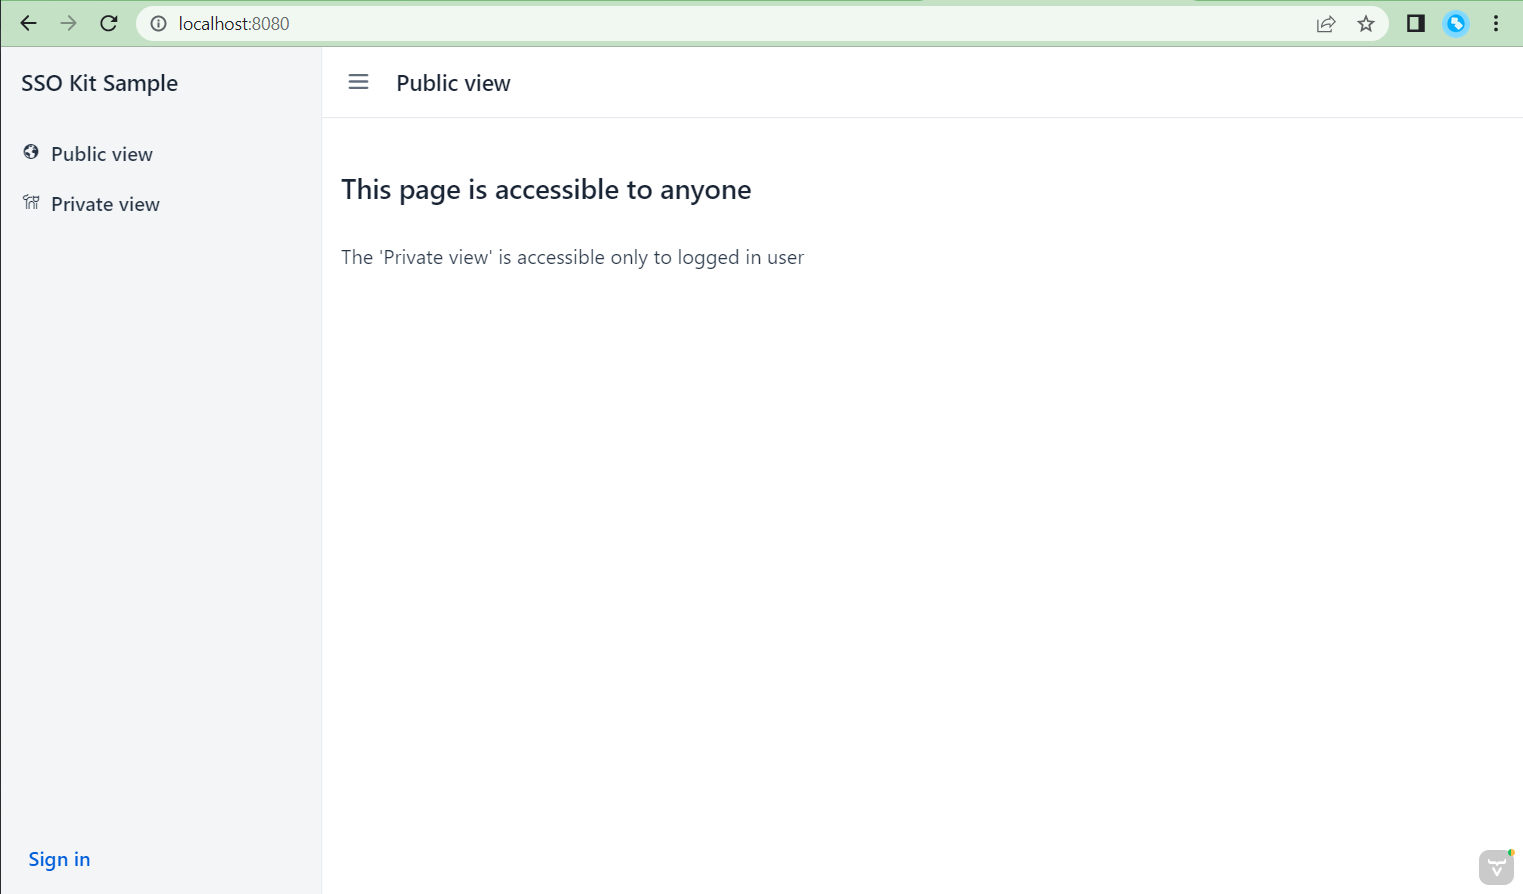
The demo consists of two views:
- Public view, which is accessible without login and which is mapped to http://localhost:8080/
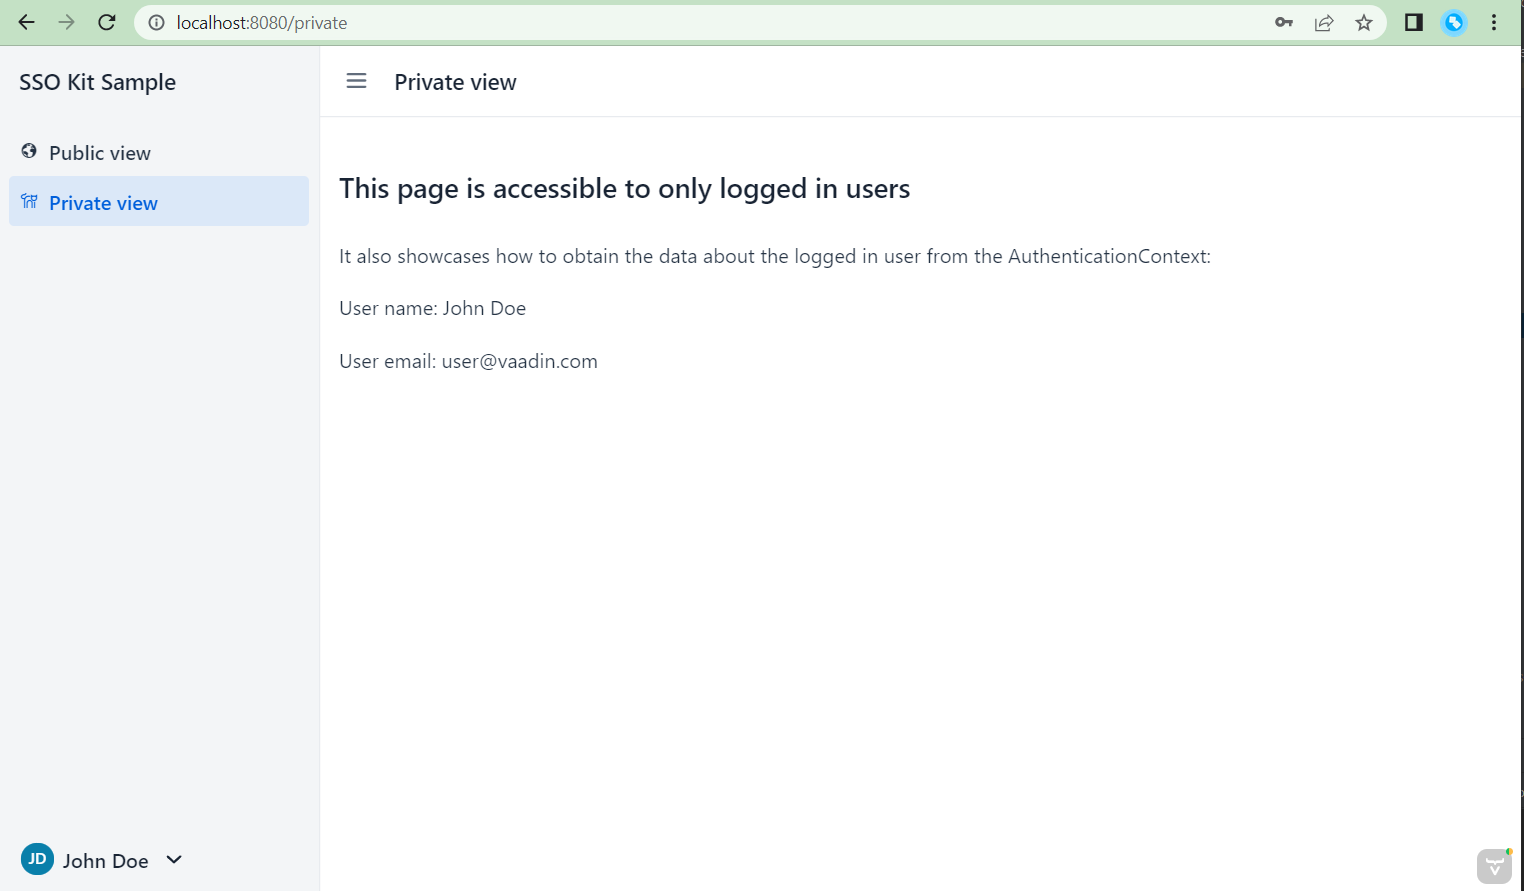
- Private view, which is protected by @PermitAll and requires you to log in. This view is accessible at http://localhost:8080/private


You should be redirected to the configured Oauth Provider Login page when:
- you either attempt to enter the Private view,
- or when you want to explicitly log in using the button in the lower-left corner of the screen
You should be able to log out using the user dropdown button in the lower-left corner of the screen. You should also be able to use the backchannel logout functionality. See the "Testing backchannel logout" chapter below.
To run the demo, you have to run and configure Keycloak first. In this tutorial, we will do the following:
- run Keycloak locally using Docker
- create a new realm in it
- create at least one user in this new realm
- create an OIDC client configuration so our application can use its details for login
Note that the documentation is based on this Keycloak "Getting started" documentation: https://github.com/keycloak/keycloak-quickstarts/blob/latest/docs/getting-started.md
Let's jump in:
- Run Keycloak using
docker run --name keycloak-ssokit -p 8280:8080 -e KEYCLOAK_ADMIN=admin -e KEYCLOAK_ADMIN_PASSWORD=admin quay.io/keycloak/keycloak:20.0.3 start-dev - Go to http://localhost:8280 to open Keycloak UI
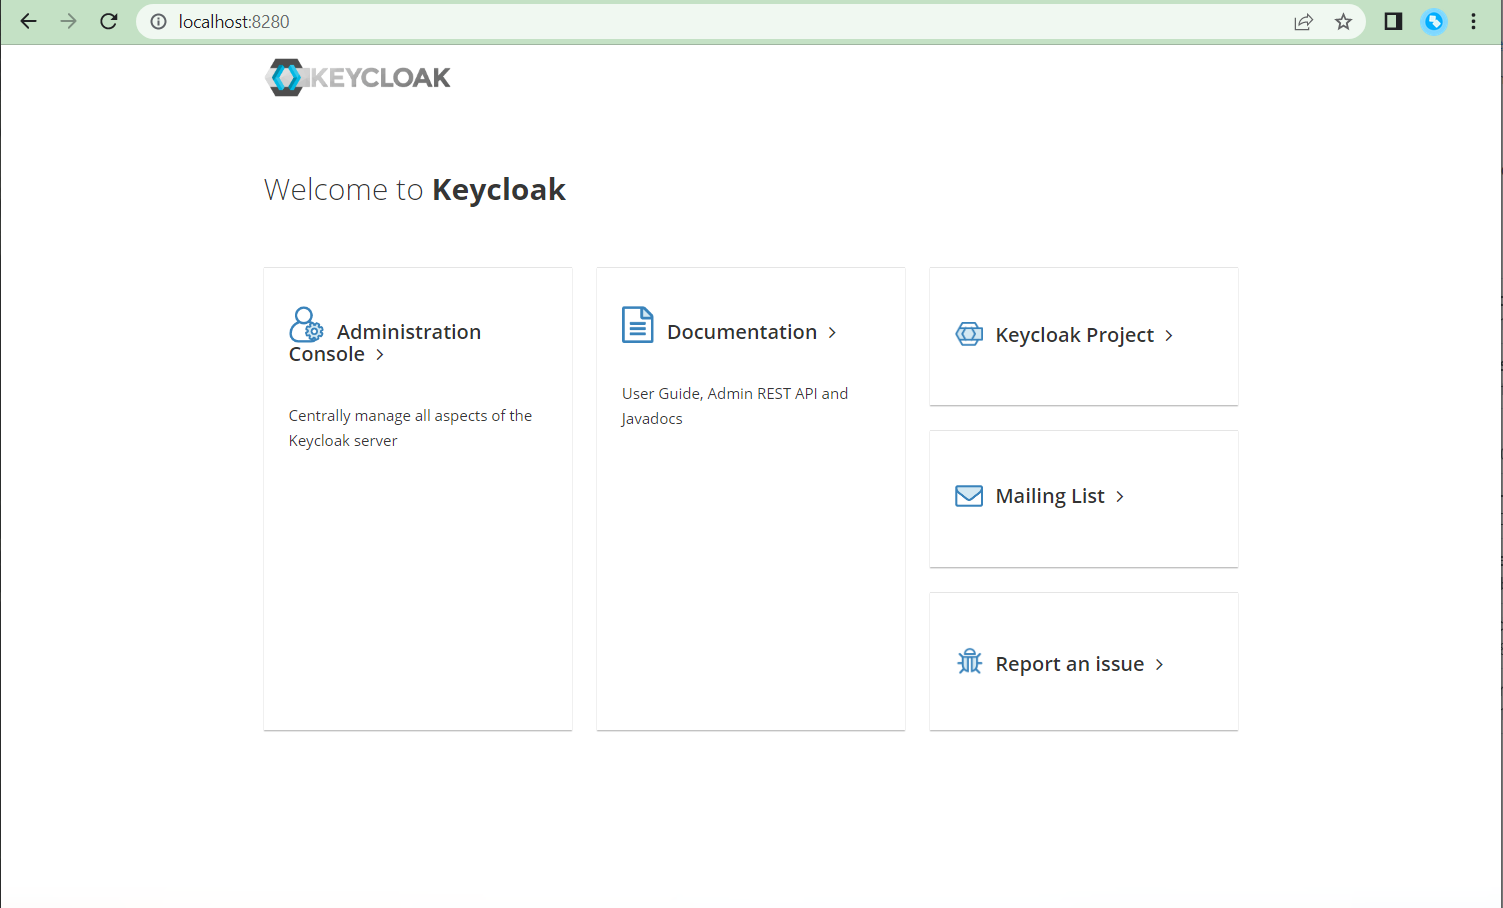
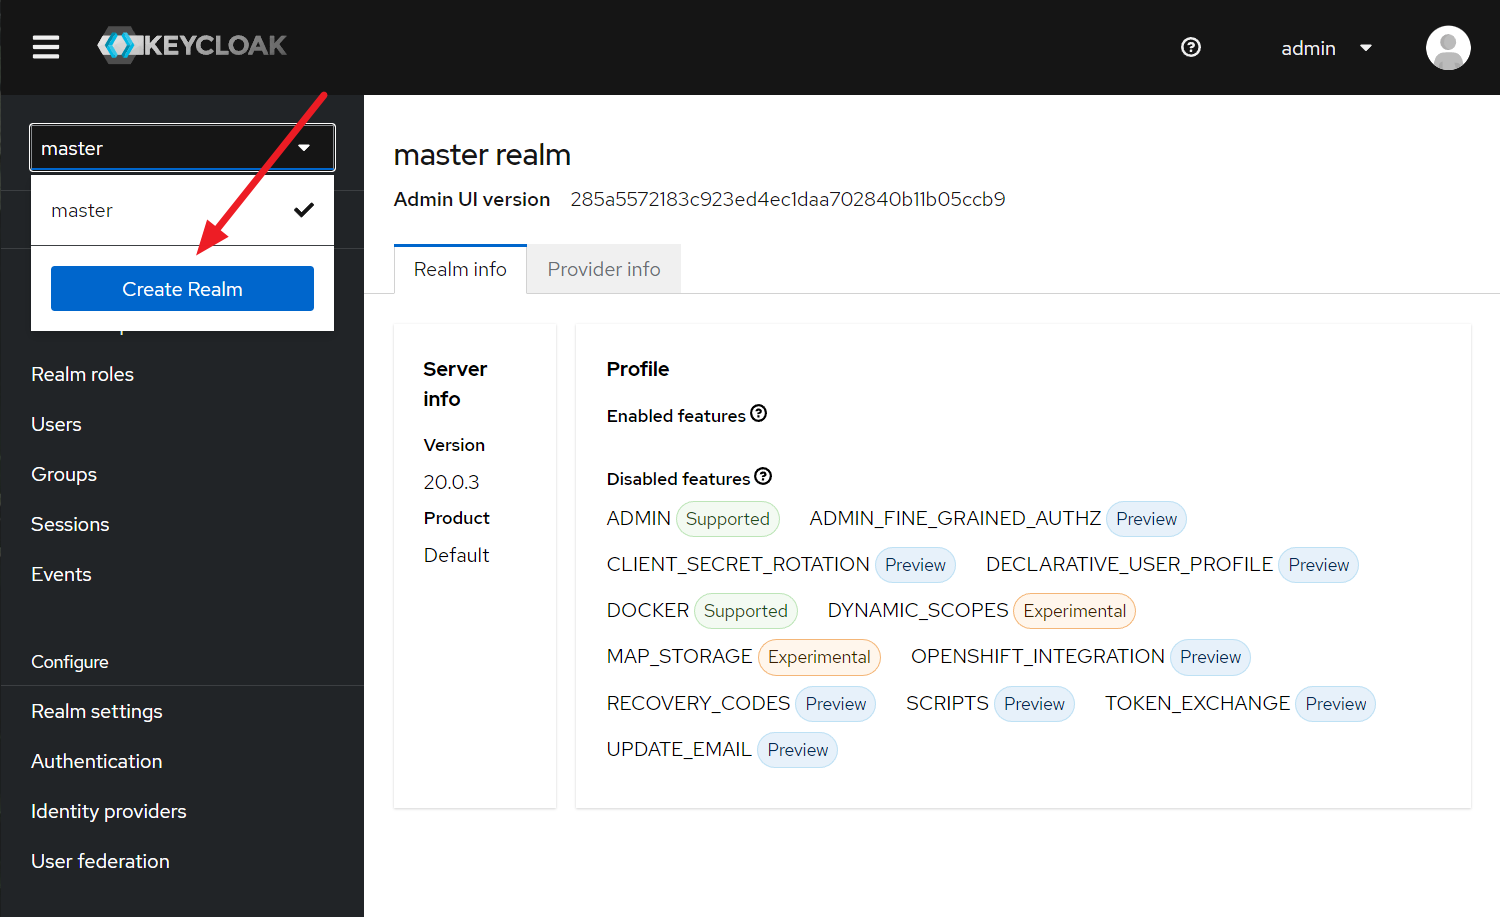
- Click on Administration Console and login to it using admin/admin
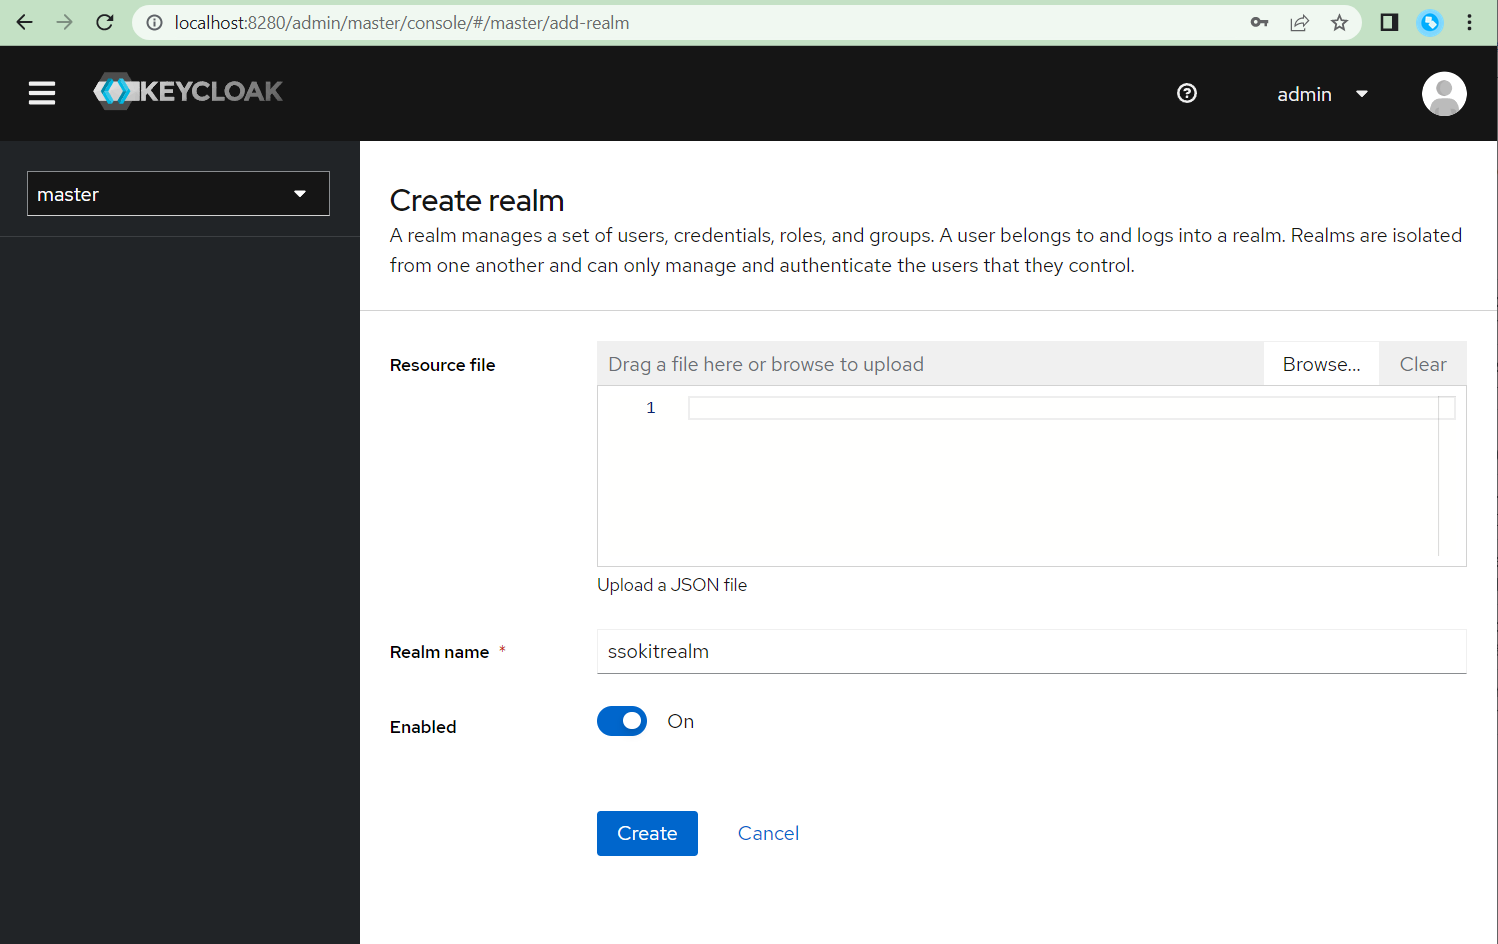
- Create a new realm and name it
ssokitrealm
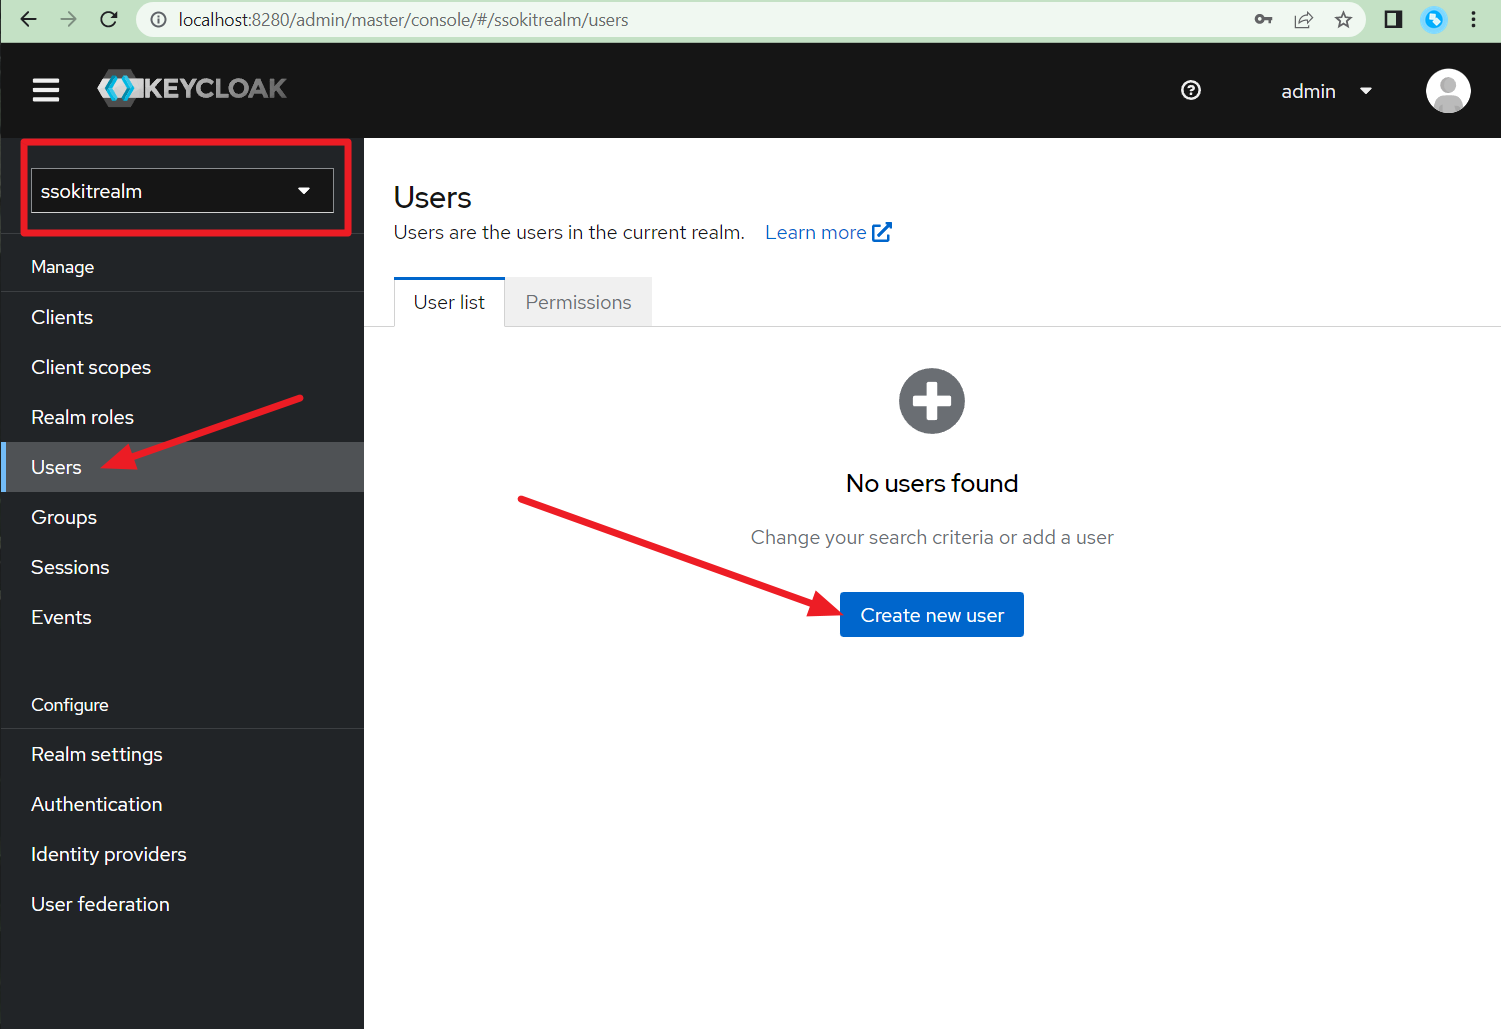
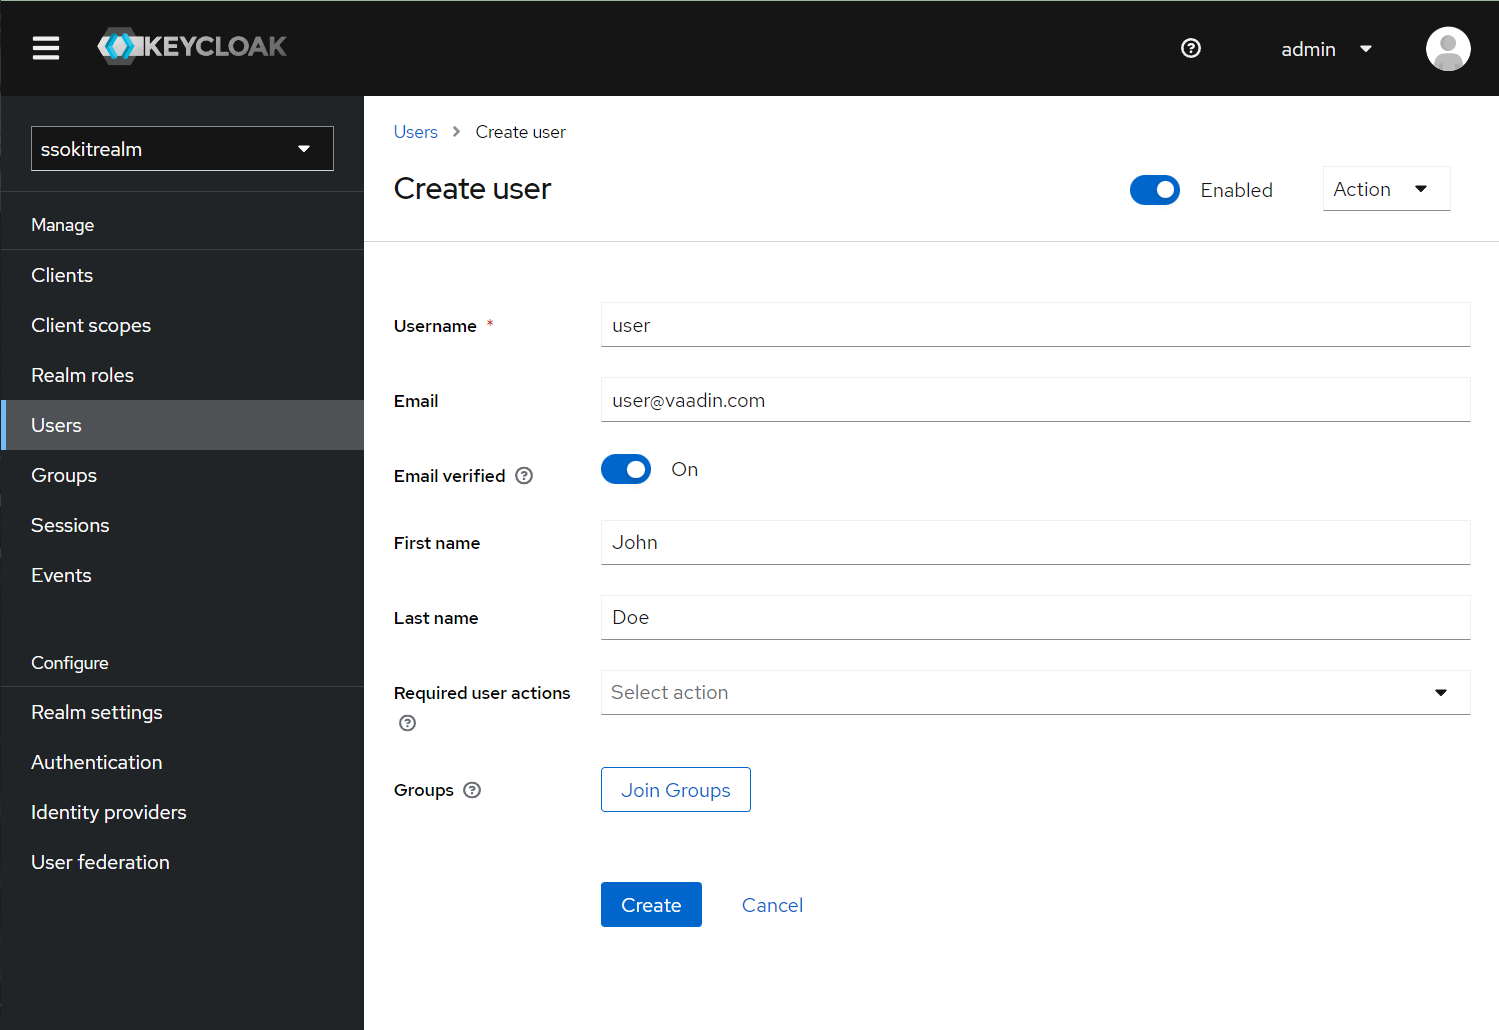
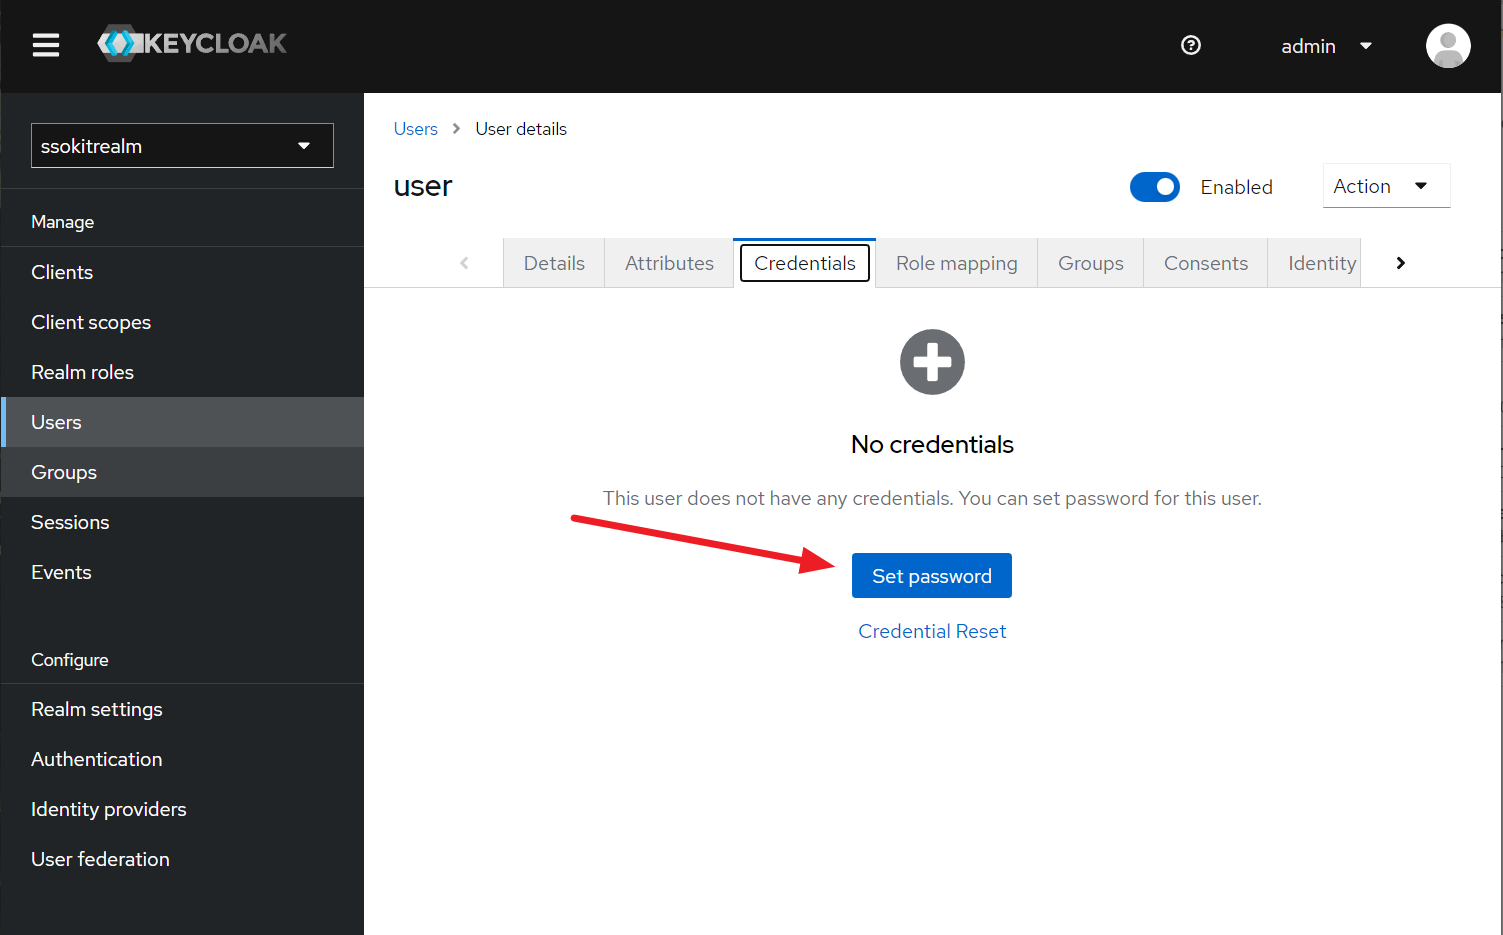
- Go to Users and create a new User. We will use this user to test the login functionality in the demo
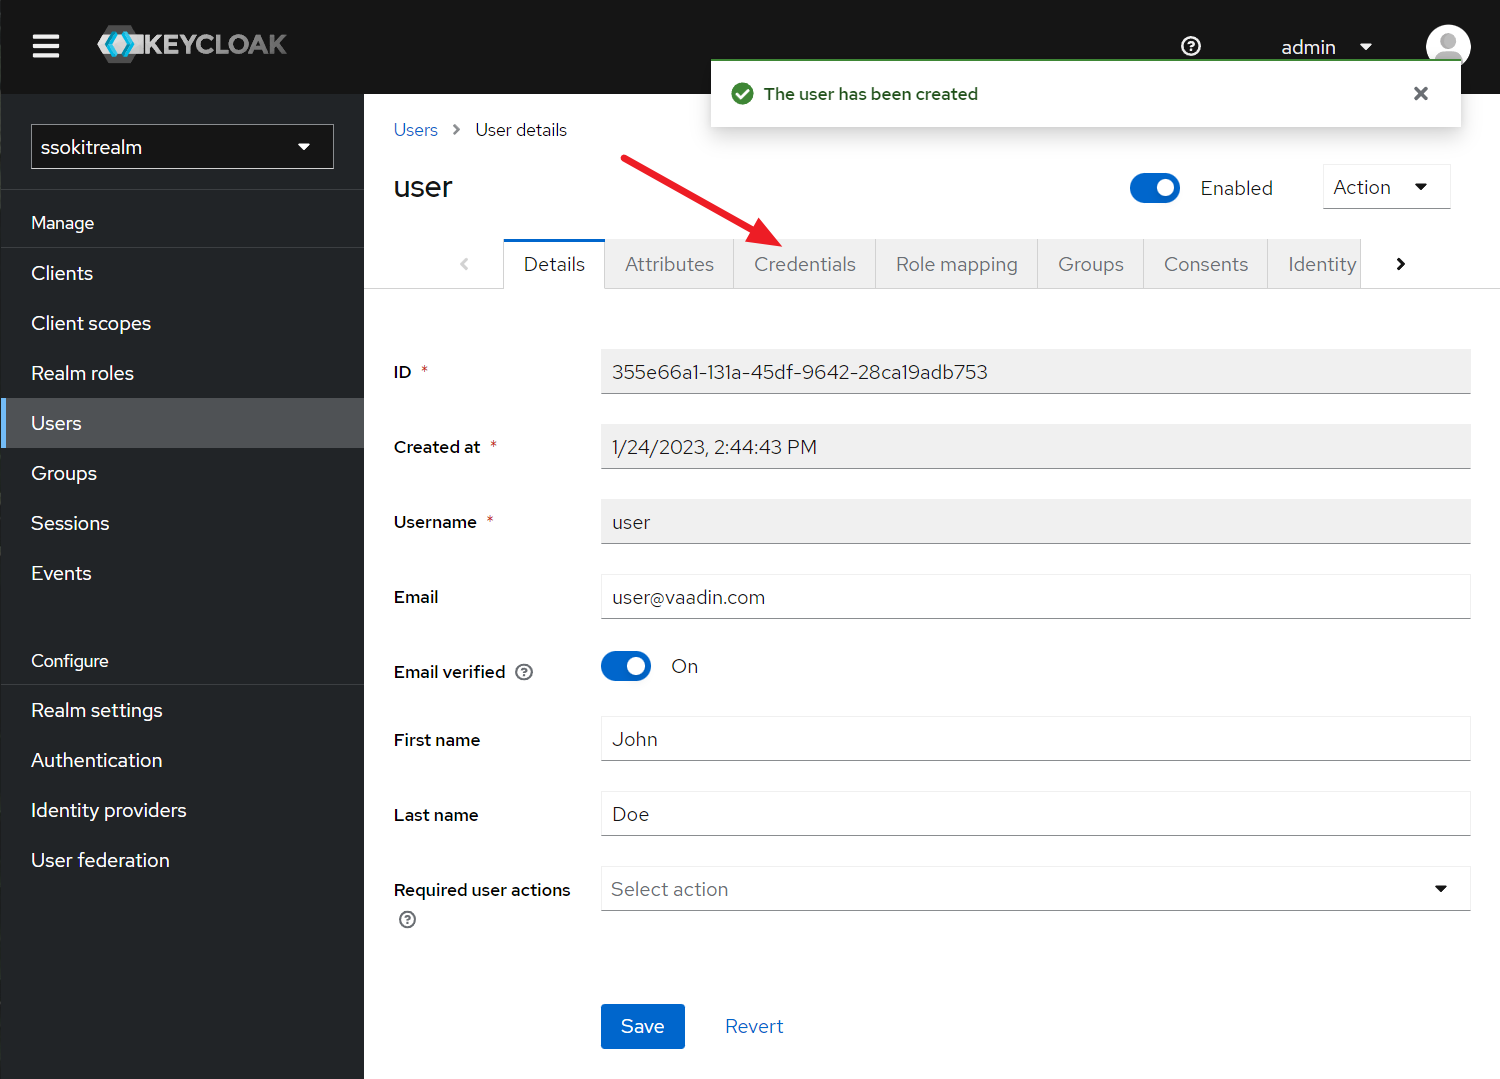
- Go to user Credentials to create a new password for the user
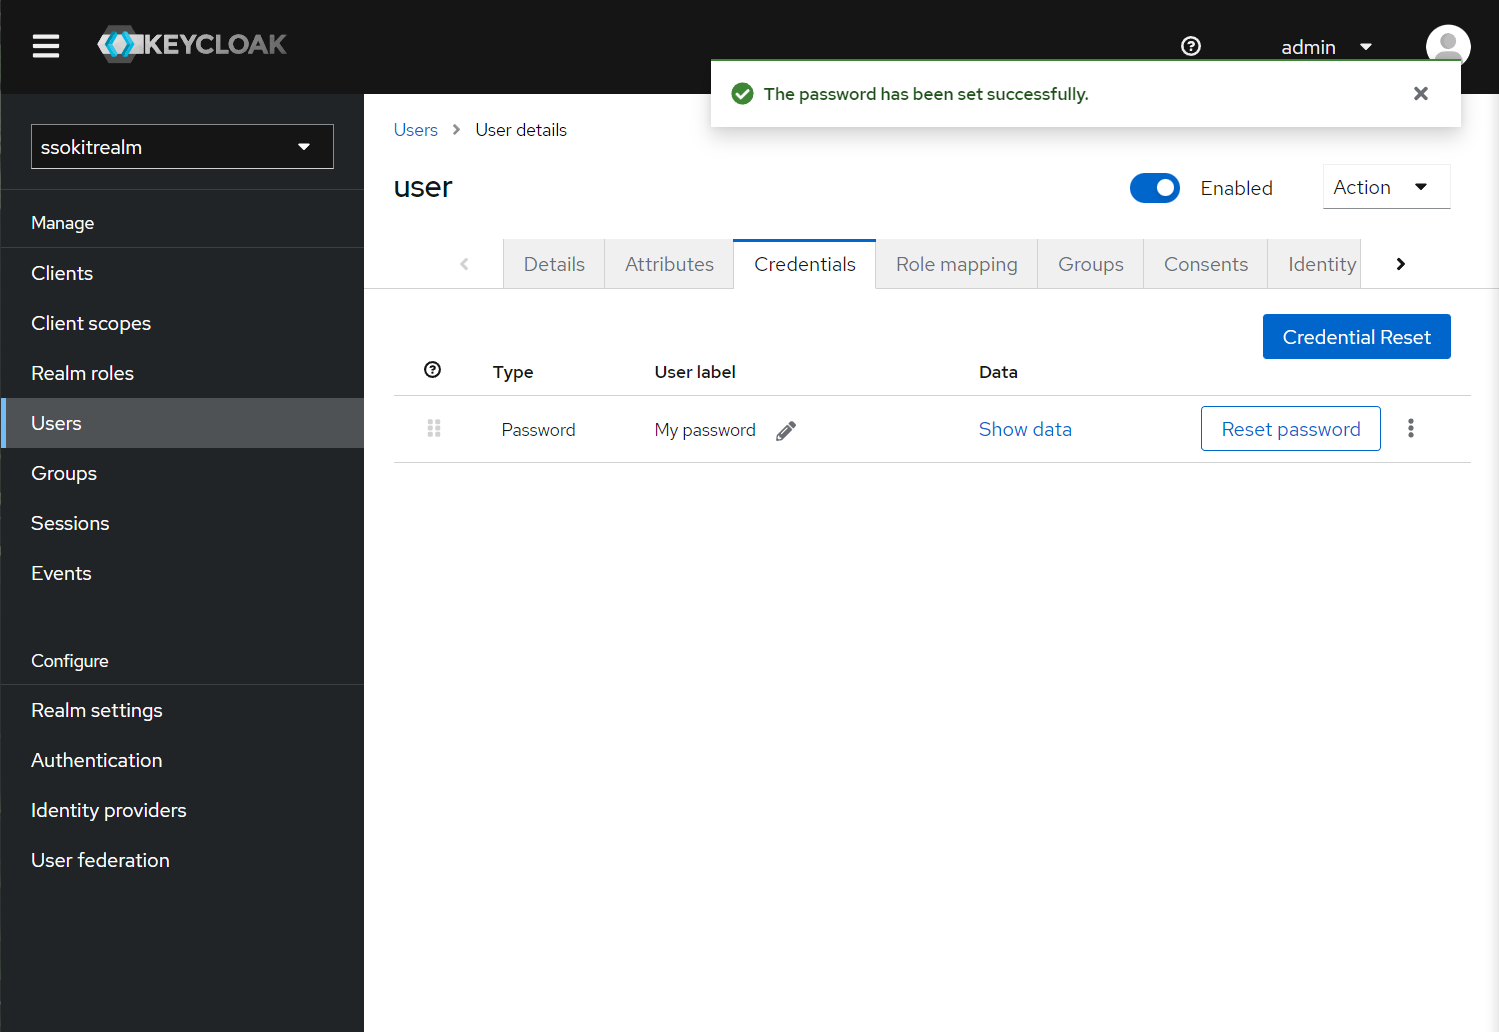
- Once you set the password, you should see in the credentials:
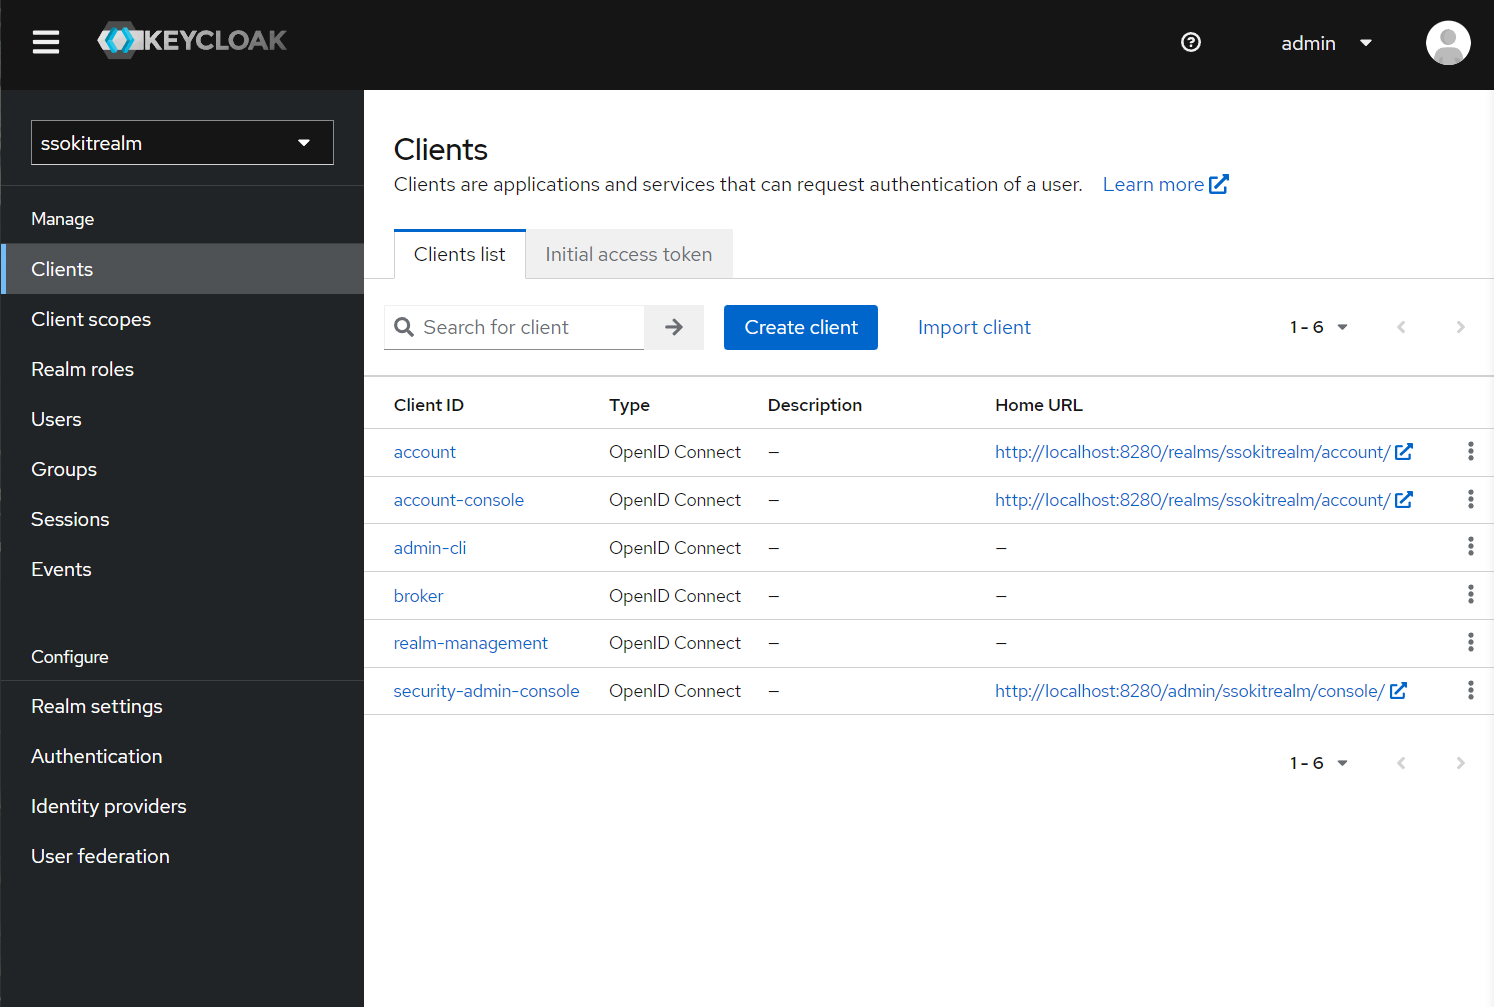
- Go to "Clients" section in the left menu and create a new client:
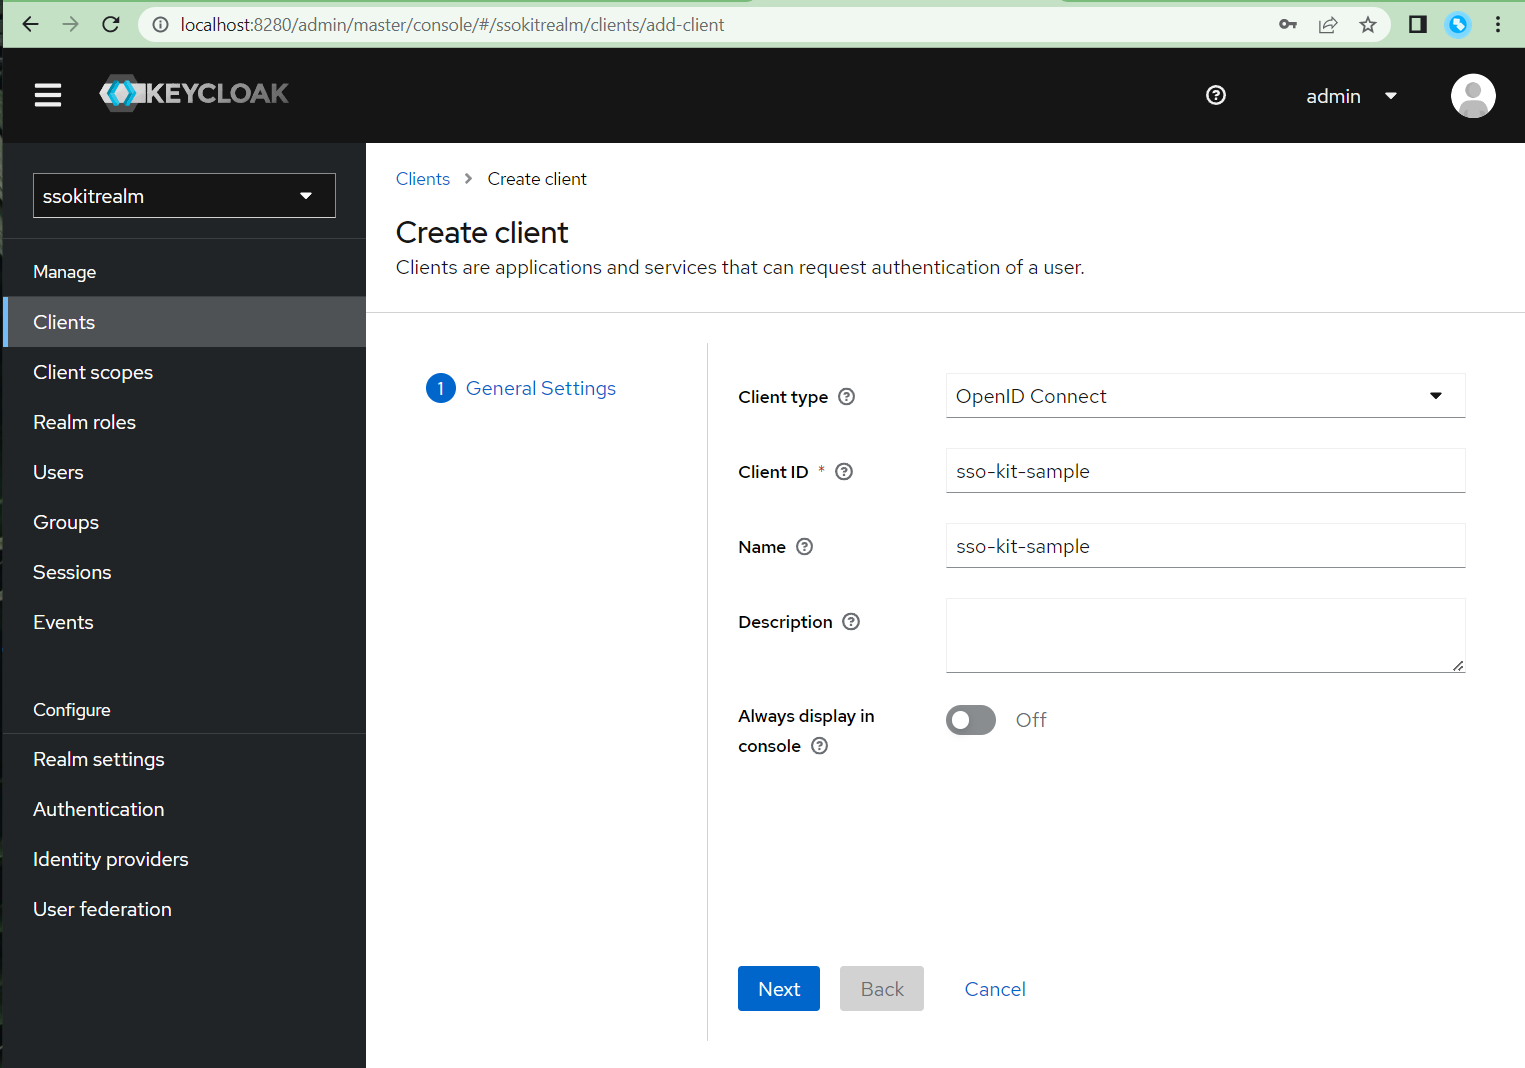
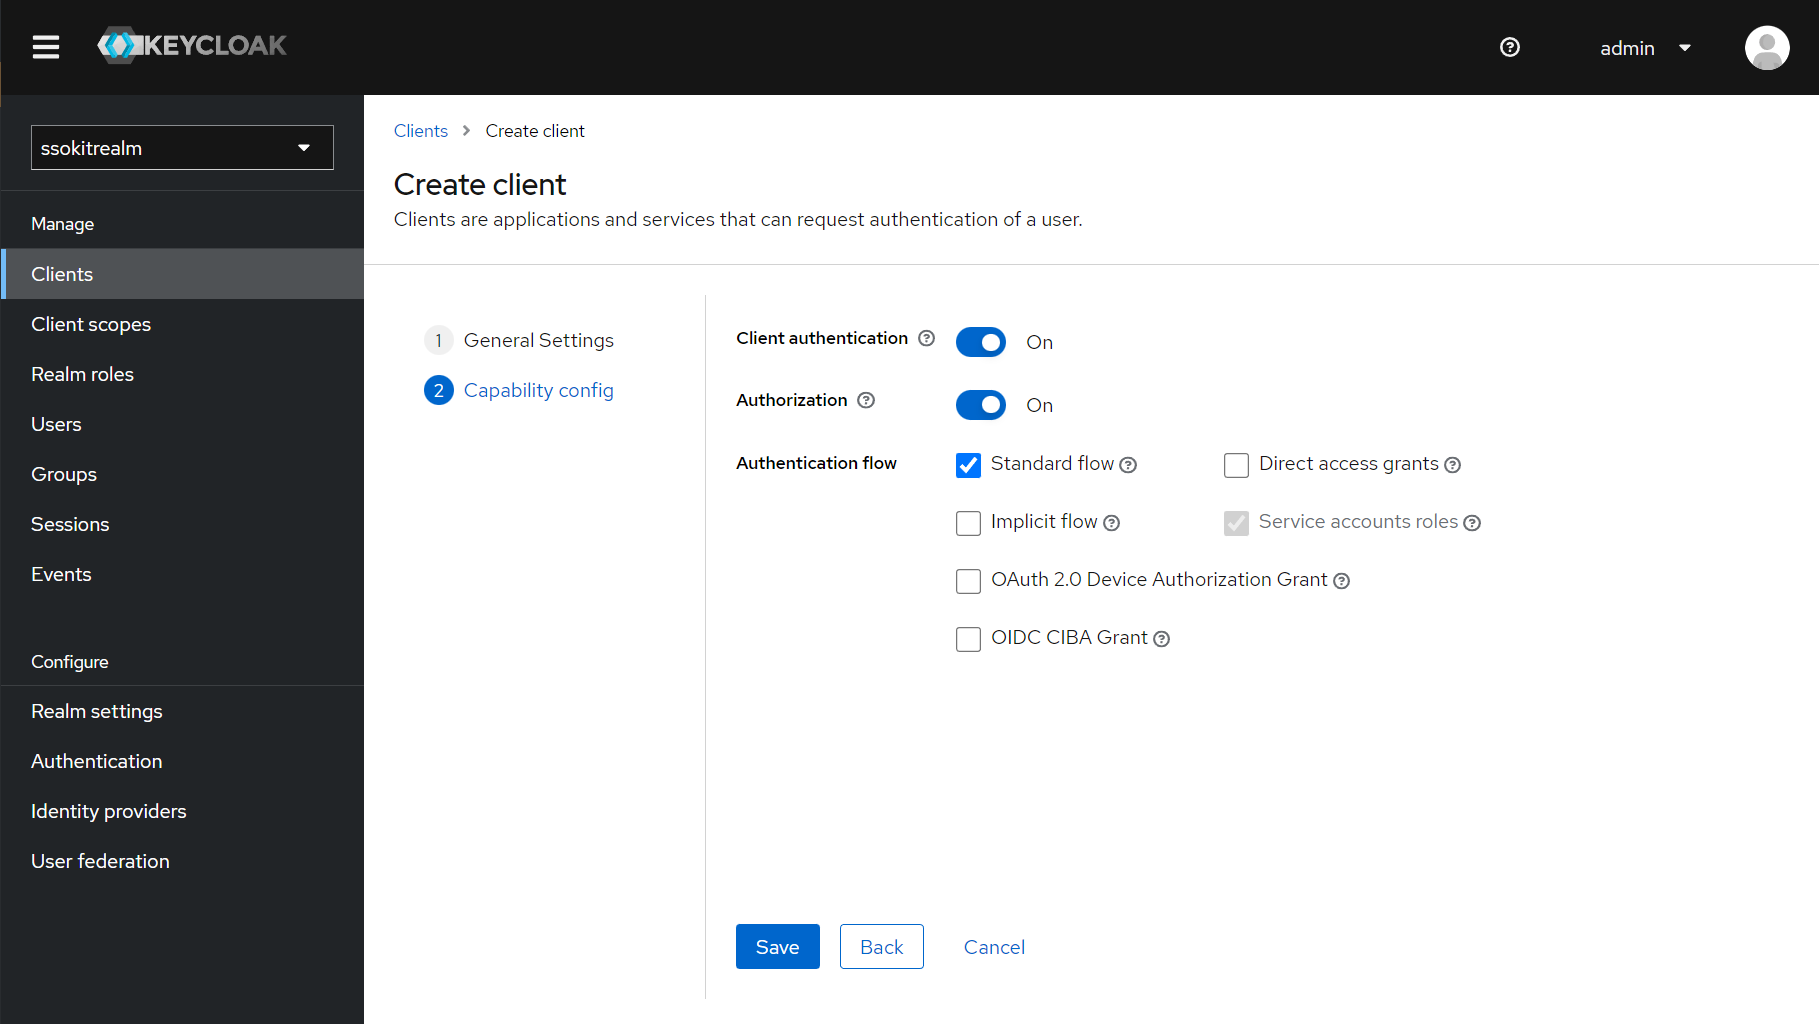
- Use the following values in the client creation wizard:
- Client type: OpenID Connect
- Client ID: sso-kit-sample
- Name: sso-kit-sample
- Client authentication: On
- Authorization: On
- Authentication flow: Check only "Standard flow" (option "Service account roles" is checked and disabled)
- Once you create the client, you are redirected to the Client Details
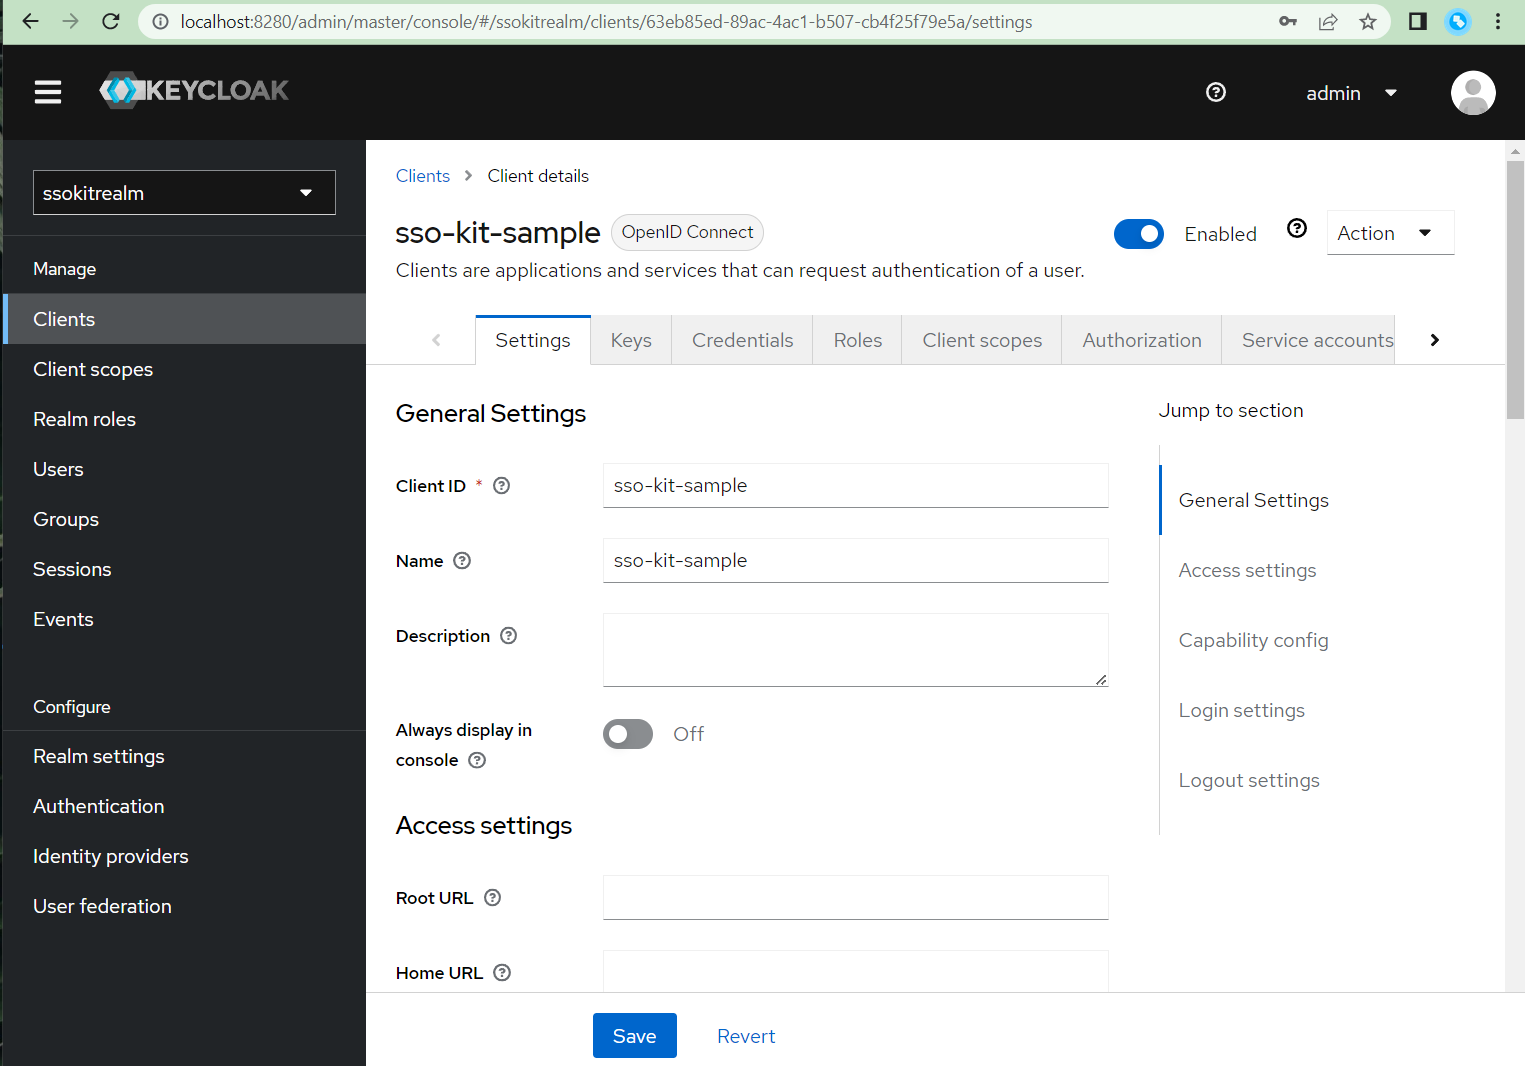
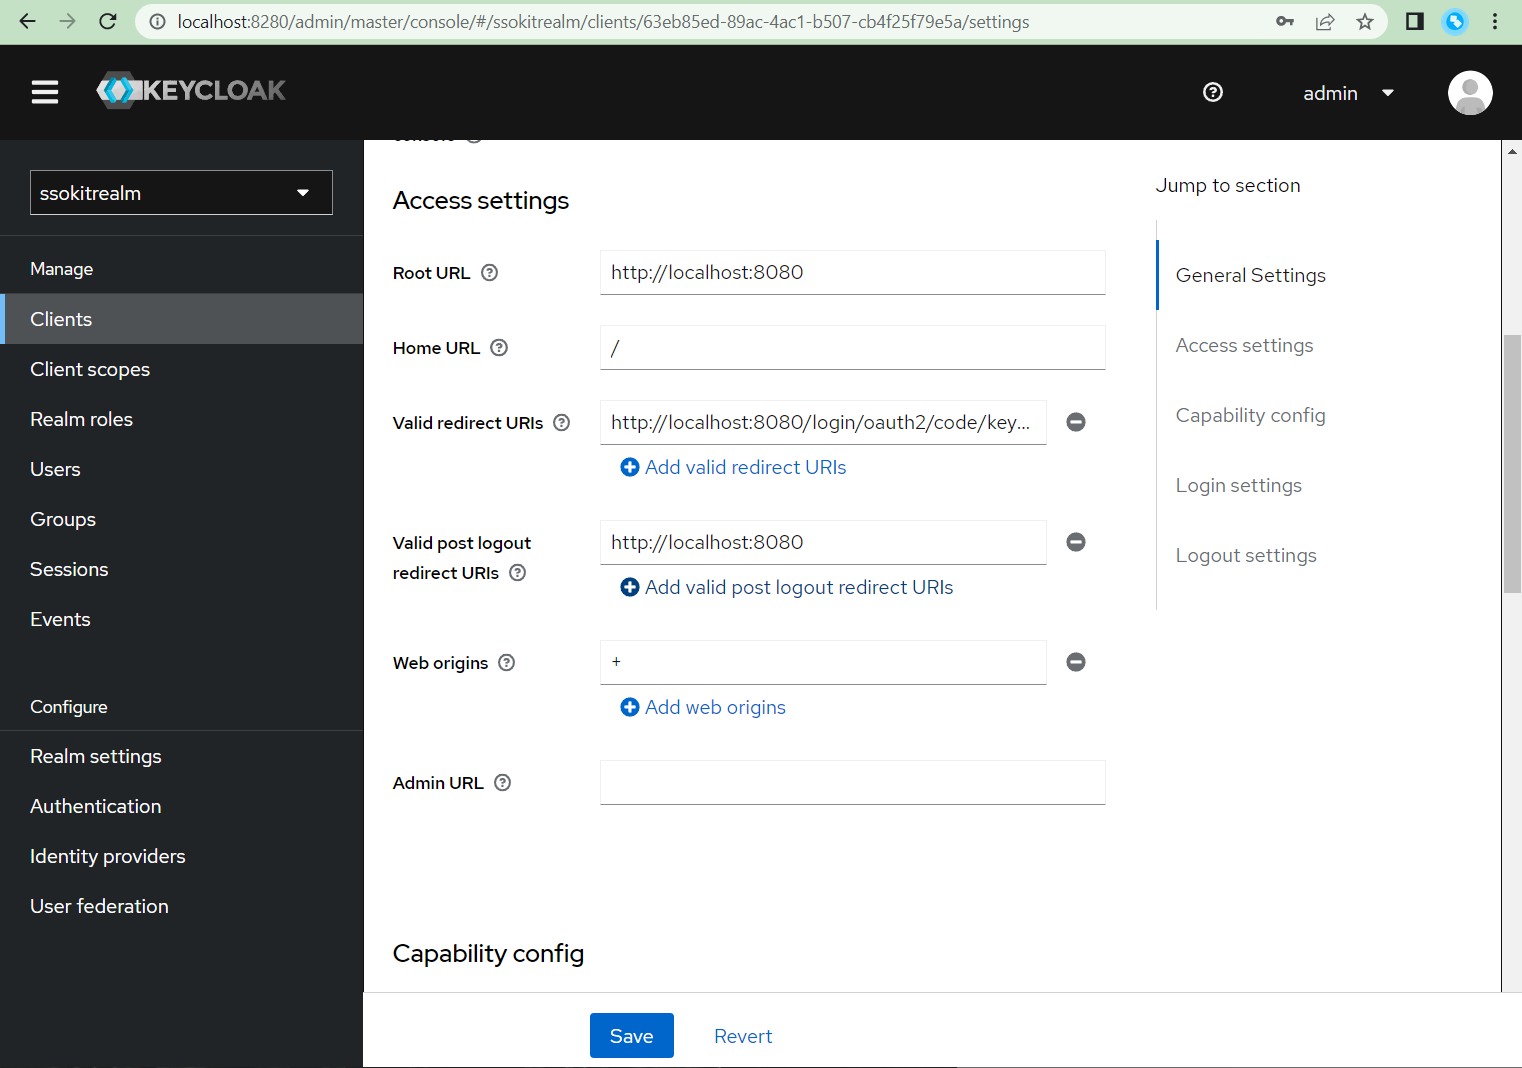
- Scroll down and set the following values:
- Root URL: http://localhost:8080
- Home URL: /
- Valid redirect URIs: http://localhost:8080/login/oauth2/code/keycloak
- Valid post logout redirect URIs: http://localhost:8080
- Web origins: +
- Scroll even lower on the same page to set the Logout settings:
- Front channel logout: Off (if you leave it enabled, the backchannel logout won't work)
- Backchannel logout URL: http://192.168.2.158:8080/logout/back-channel/keycloak (replace
192.168.2.158with the IP of your computer, do not uselocalhosthere) - Backchannel logout session required: Off (backchannel logout won't work when left on On)

- Do not forget to Save changes to your client
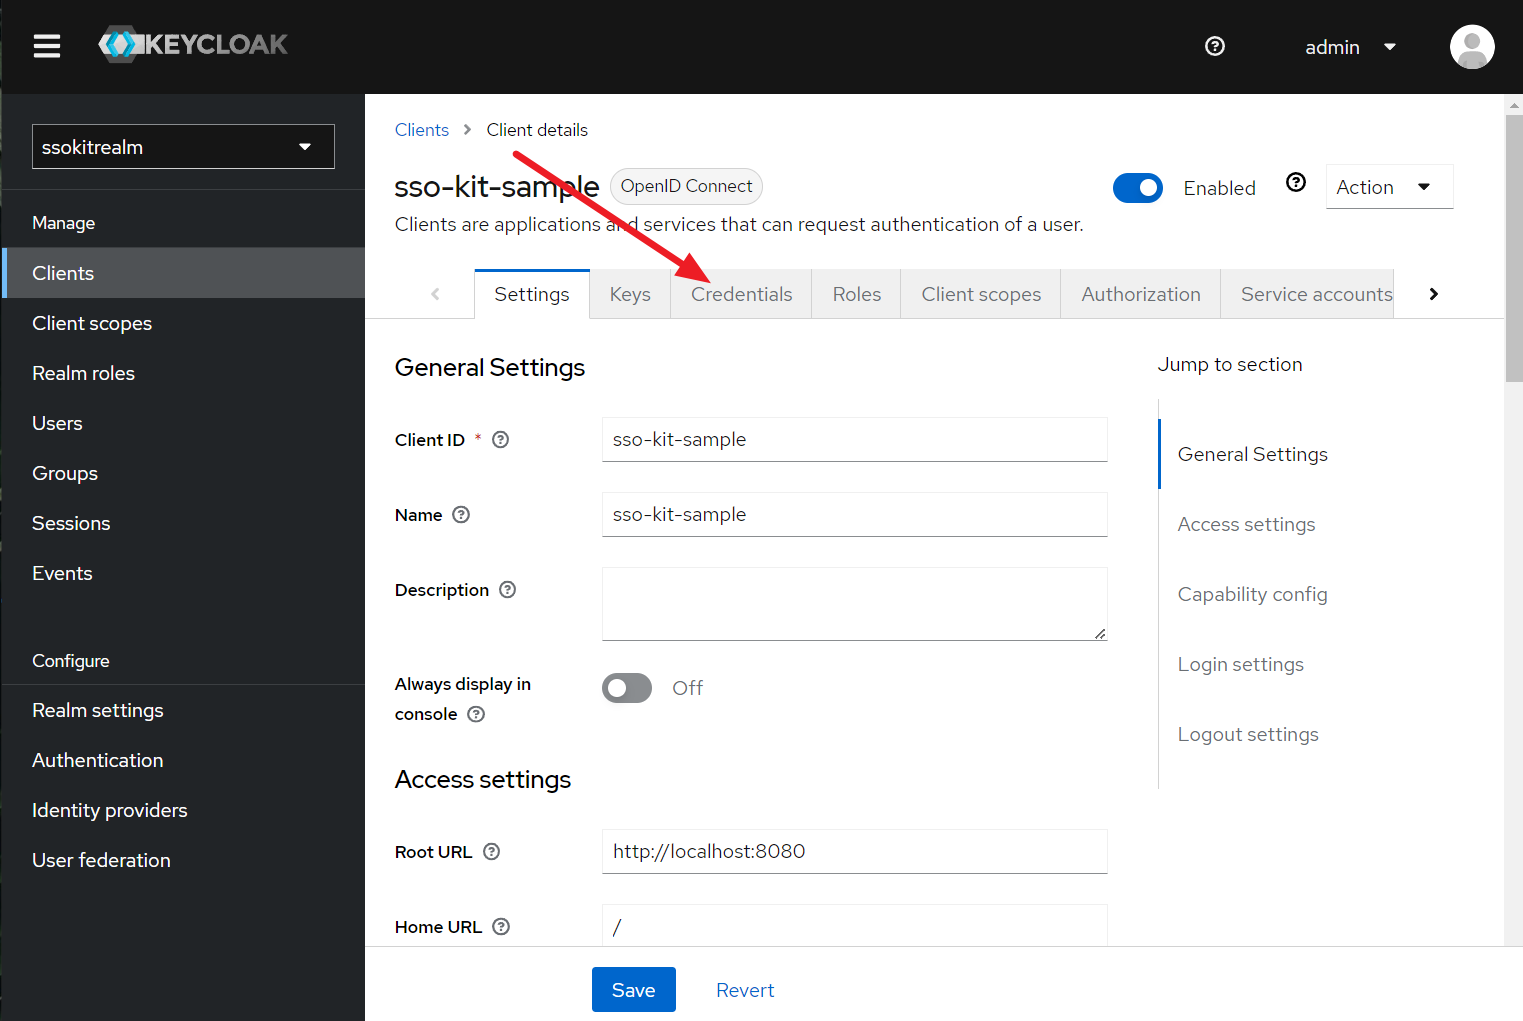
- Scroll all the way up and go to client Credentials, copy the Client secret there and paste it to application.properties
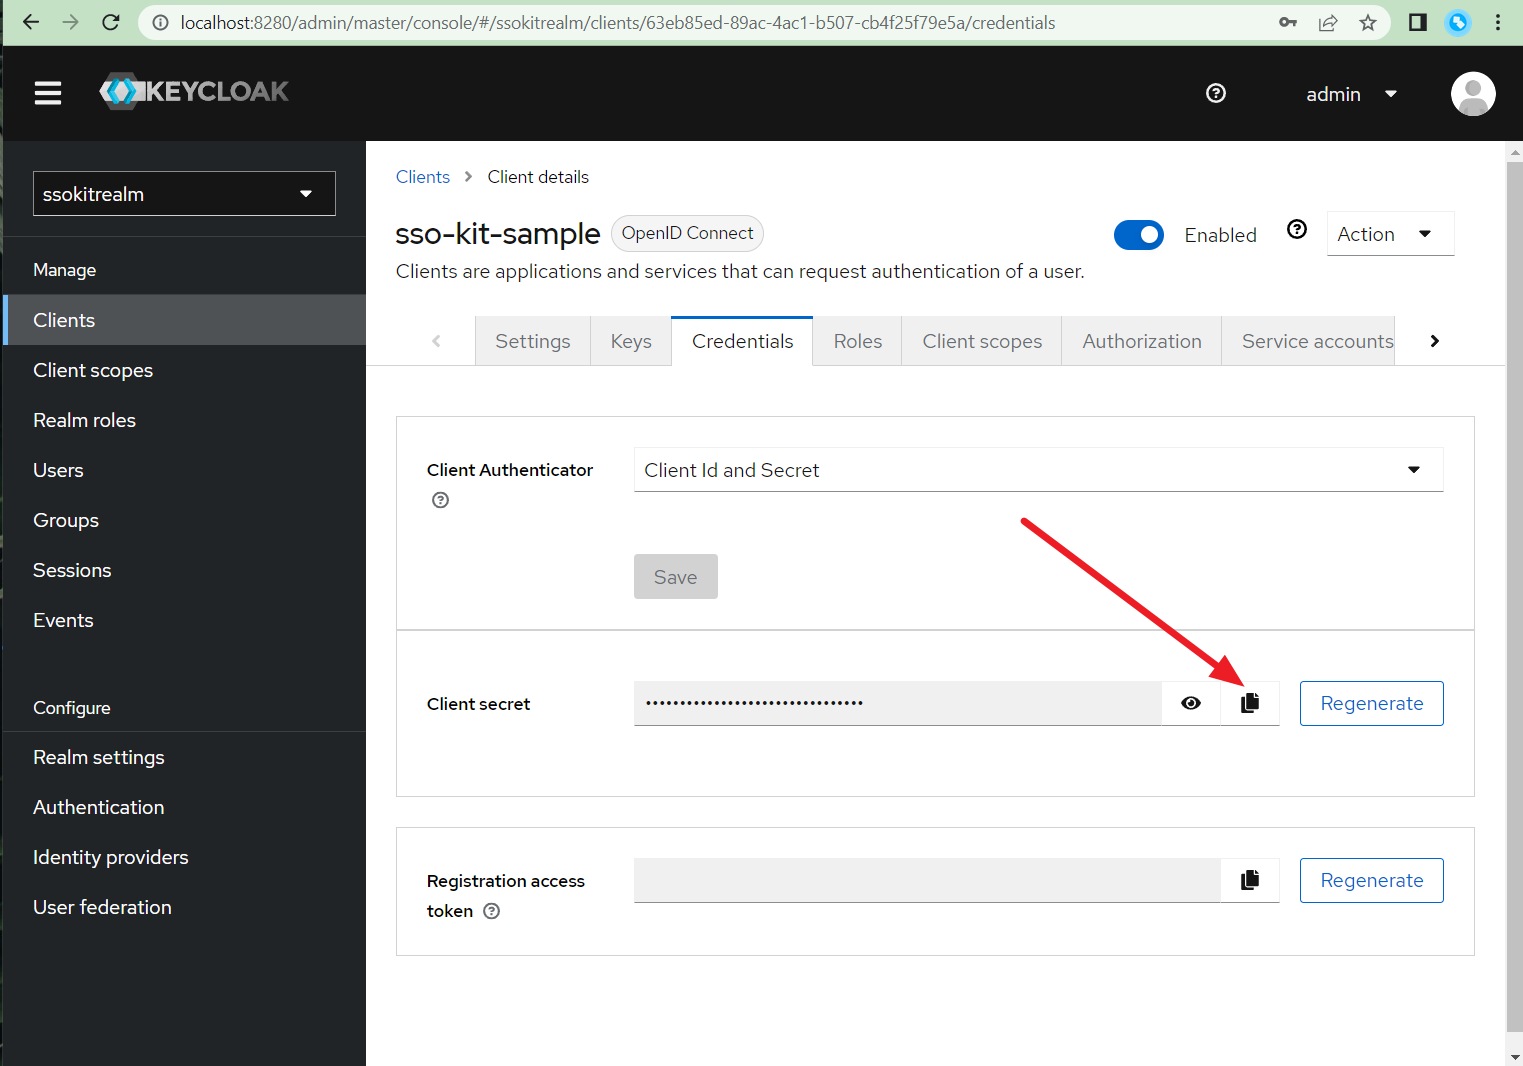
- That's it! Your instance of Keycloak is ready to be used


You must modify the application.properties and only change the client-secret value:
spring.security.oauth2.client.registration.keycloak.client-secret=[client secret can be found in Keycloak client details]Keep the other configuration settings as they are:
spring.security.oauth2.client.provider.keycloak.issuer-uri=http://localhost:8280/realms/ssokitrealm
spring.security.oauth2.client.registration.keycloak.client-id=sso-kit-sample
spring.security.oauth2.client.registration.keycloak.scope=profile,openid,email,roles
vaadin.sso.login-route=/oauth2/authorization/keycloak
vaadin.sso.back-channel-logout=trueThe project is a standard Maven project. To run it from the command line,
type mvnw (Windows), or ./mvnw (Mac & Linux), then open
http://localhost:8080 in your browser.
You can also import the project to your IDE of choice as you would with any Maven project. Read more on how to import Vaadin projects to different IDEs (Eclipse, IntelliJ IDEA, NetBeans, and VS Code).
- Open the app at http://localhost:8080 and login using the "Sign in" button in the lower-left corner:
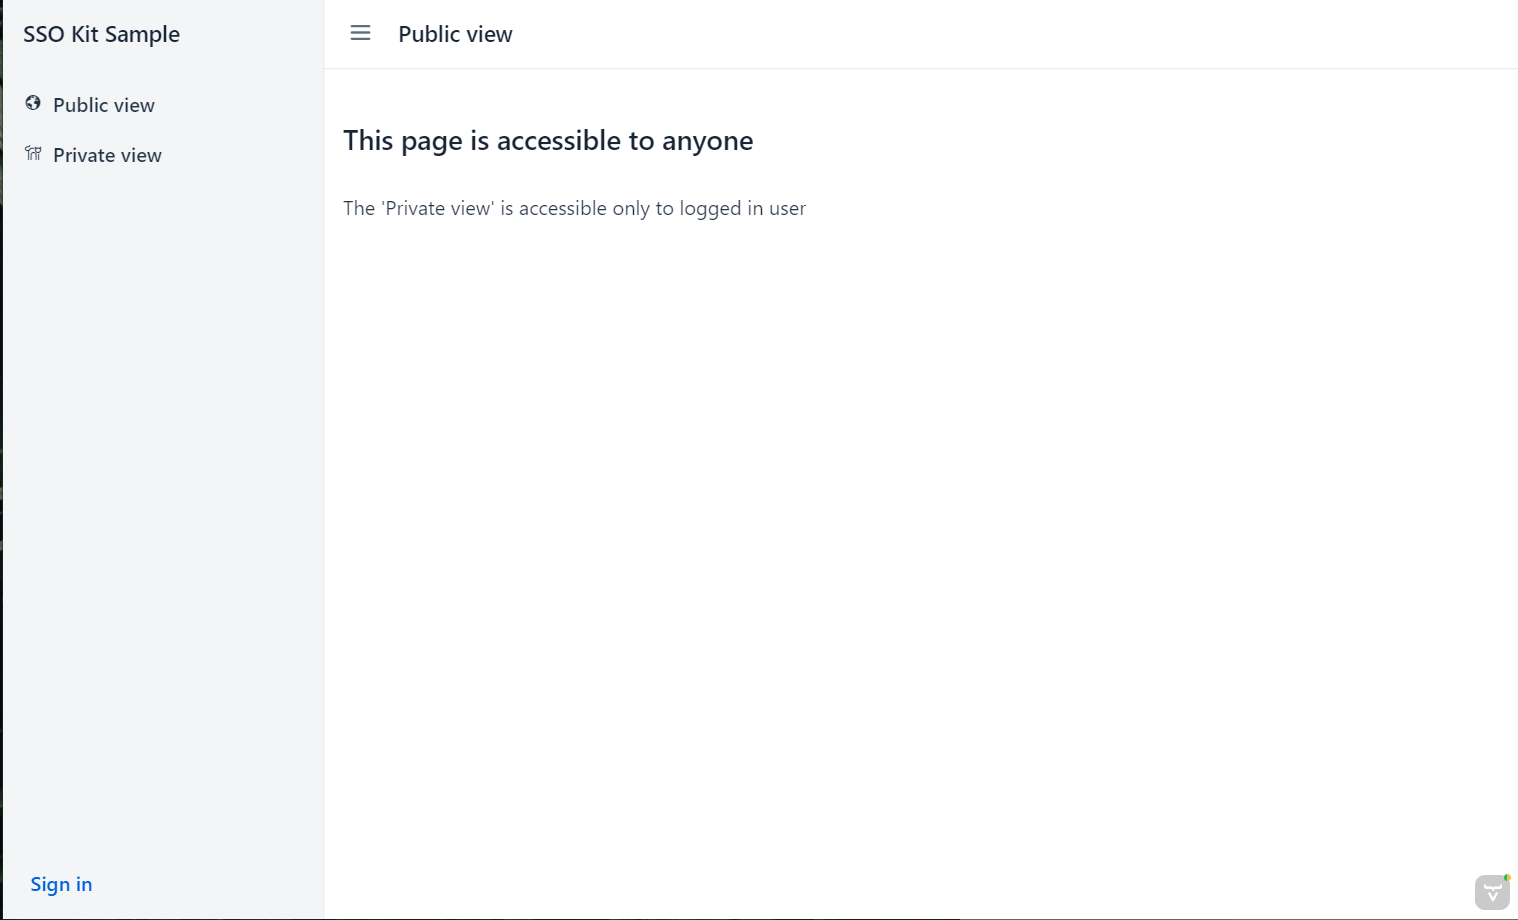
- After login, you now have an authenticated session, and you are allowed to enter the "Private view"
- Go to Keycloak admin, select
ssokitrealm, go to Clients and click on thesso-kit-sampleclient - Scroll the tab bar to the right and select the Sessions tab:
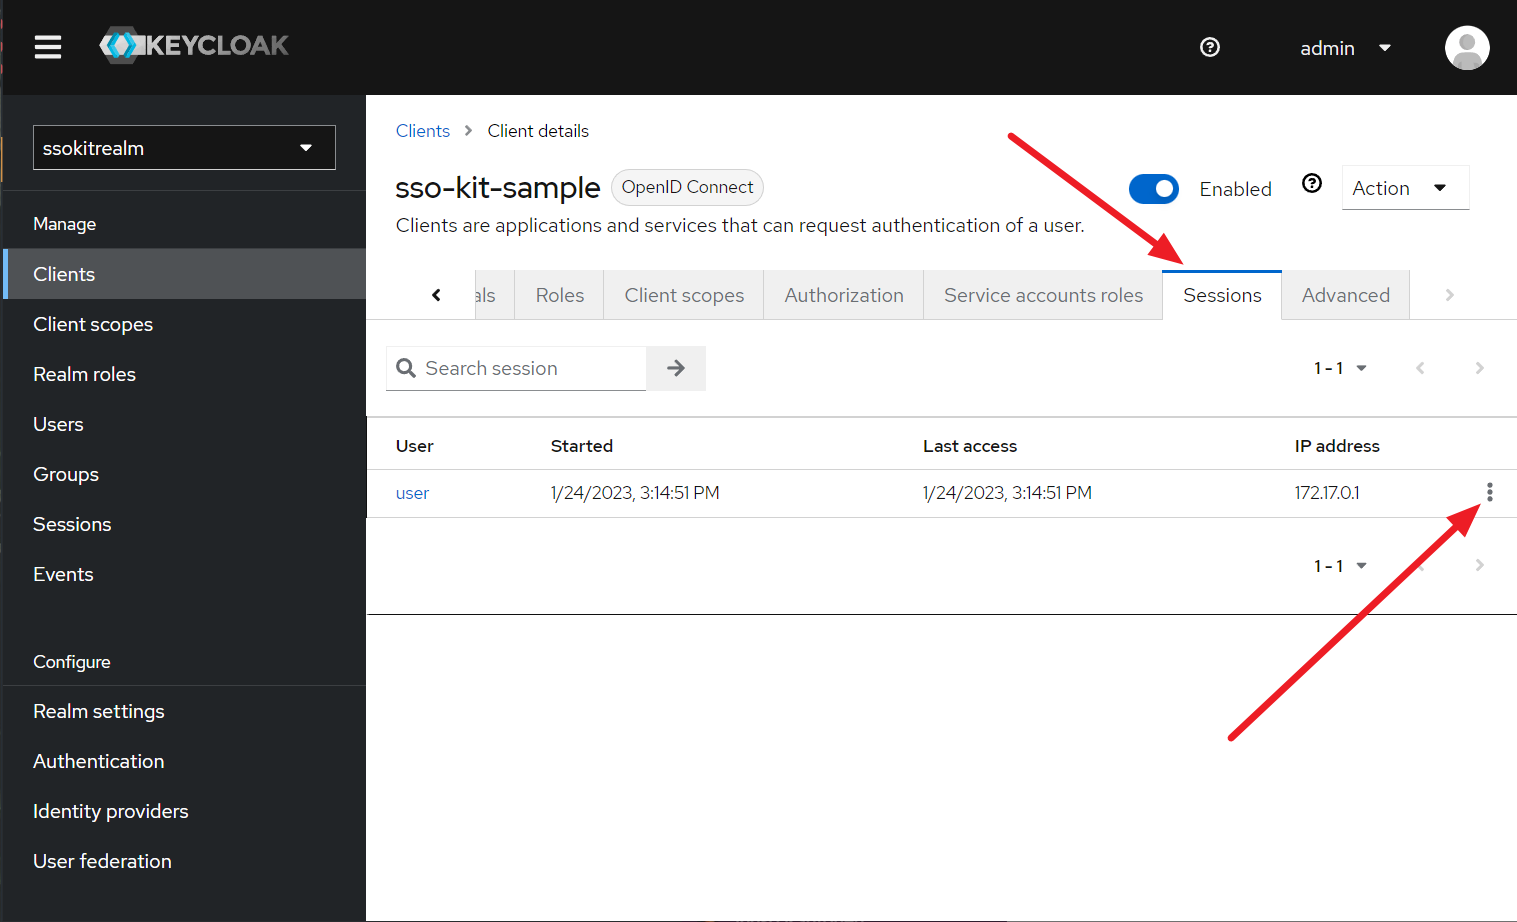
- There should be a session for
useruser listed, click on the three dots drop-down menu like in the picture above - Click on "Sign out"
- This should cause the KeyCloak server to directly call the running demo server and perform backchannel logout of the given user
- Go back to the demo and click, for example, on the "Public view" to open it
- You might have noticed that the page has been reloaded -> that is because the backchannel logout expired the user session, and a new session was created with the click
- You are now not authenticated, and when you try to go to Private view, you are asked to log in

