- This article mainly explains how to use the official demo to output Video Mixer via ADV7511 HDMI on ZC702
Last update: 2024/05/18
-
Vivado Version: 2021.1
-
Vivado 2020.1, 2020.2, and 2021.1 have known bugs related to image processing IPs such as VPSS, Video Mixer, and Video Multi-Scaler, which may cause issues during synthesis. You can refer to the following link for troubleshooting:
Vivado HLS - 2021.1 - Why does synthesis stall when using Windows OS?
0. After downloading the zip file from the above link, extract it to the C drive. Then, add an environment variable and restart Vivado to resolve the issue
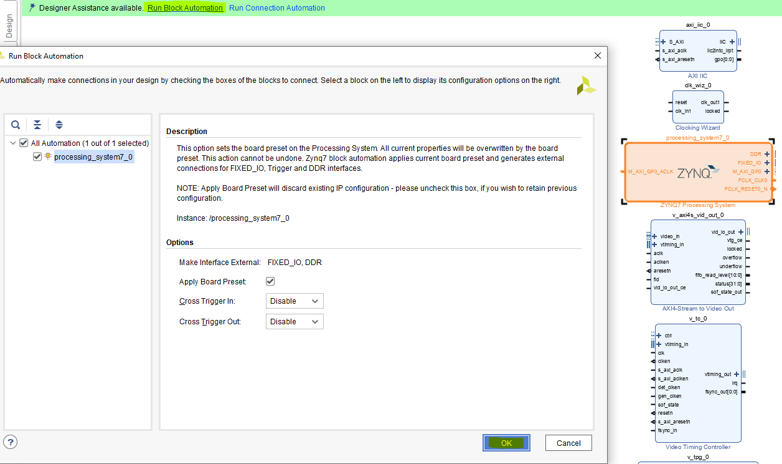
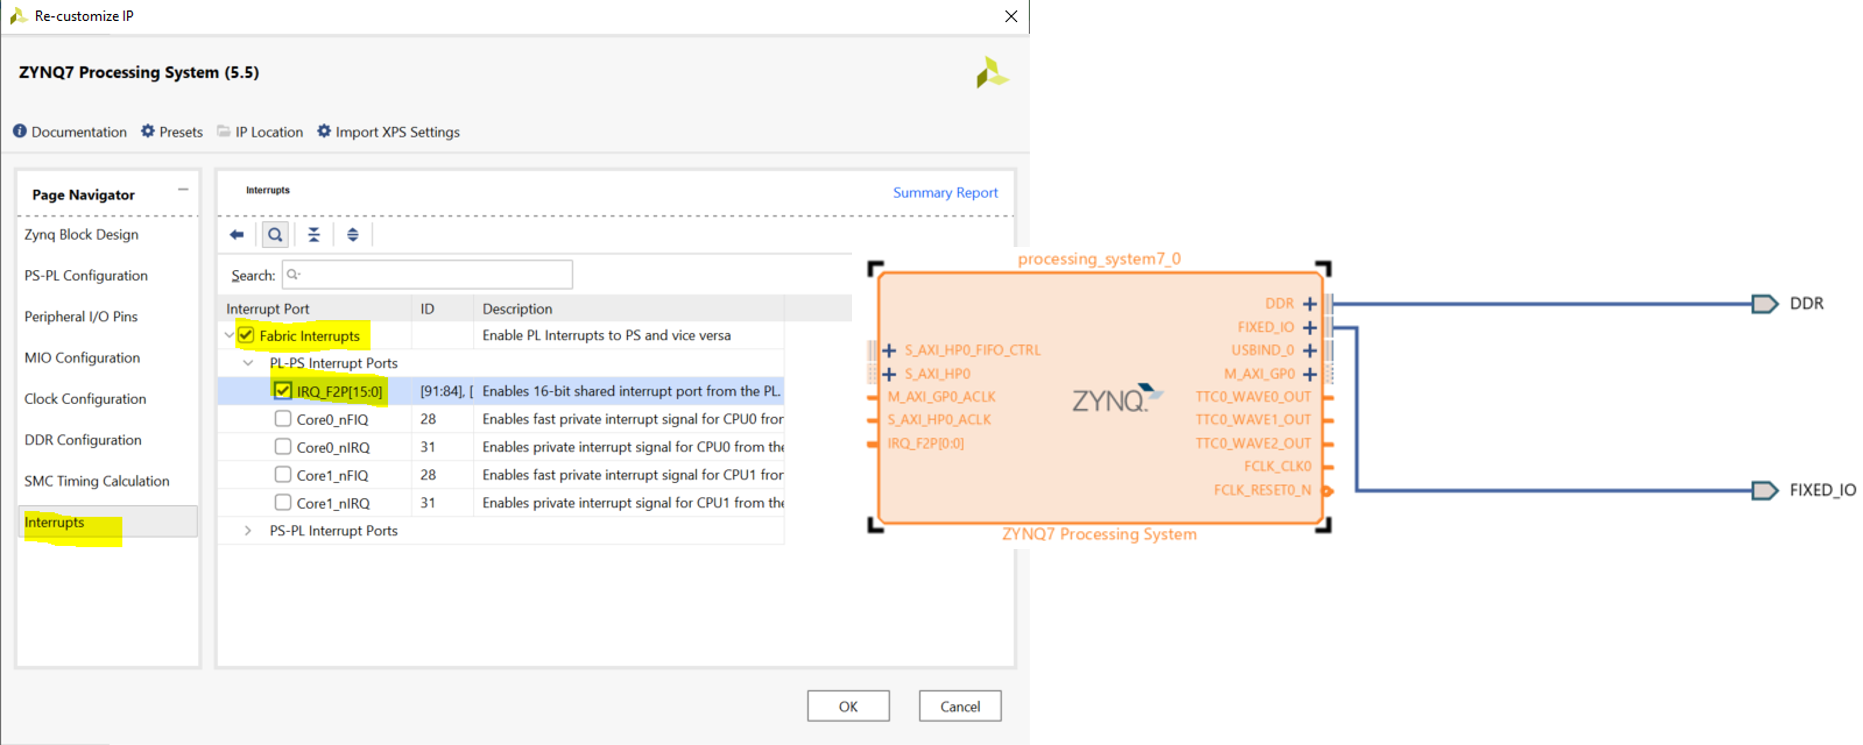
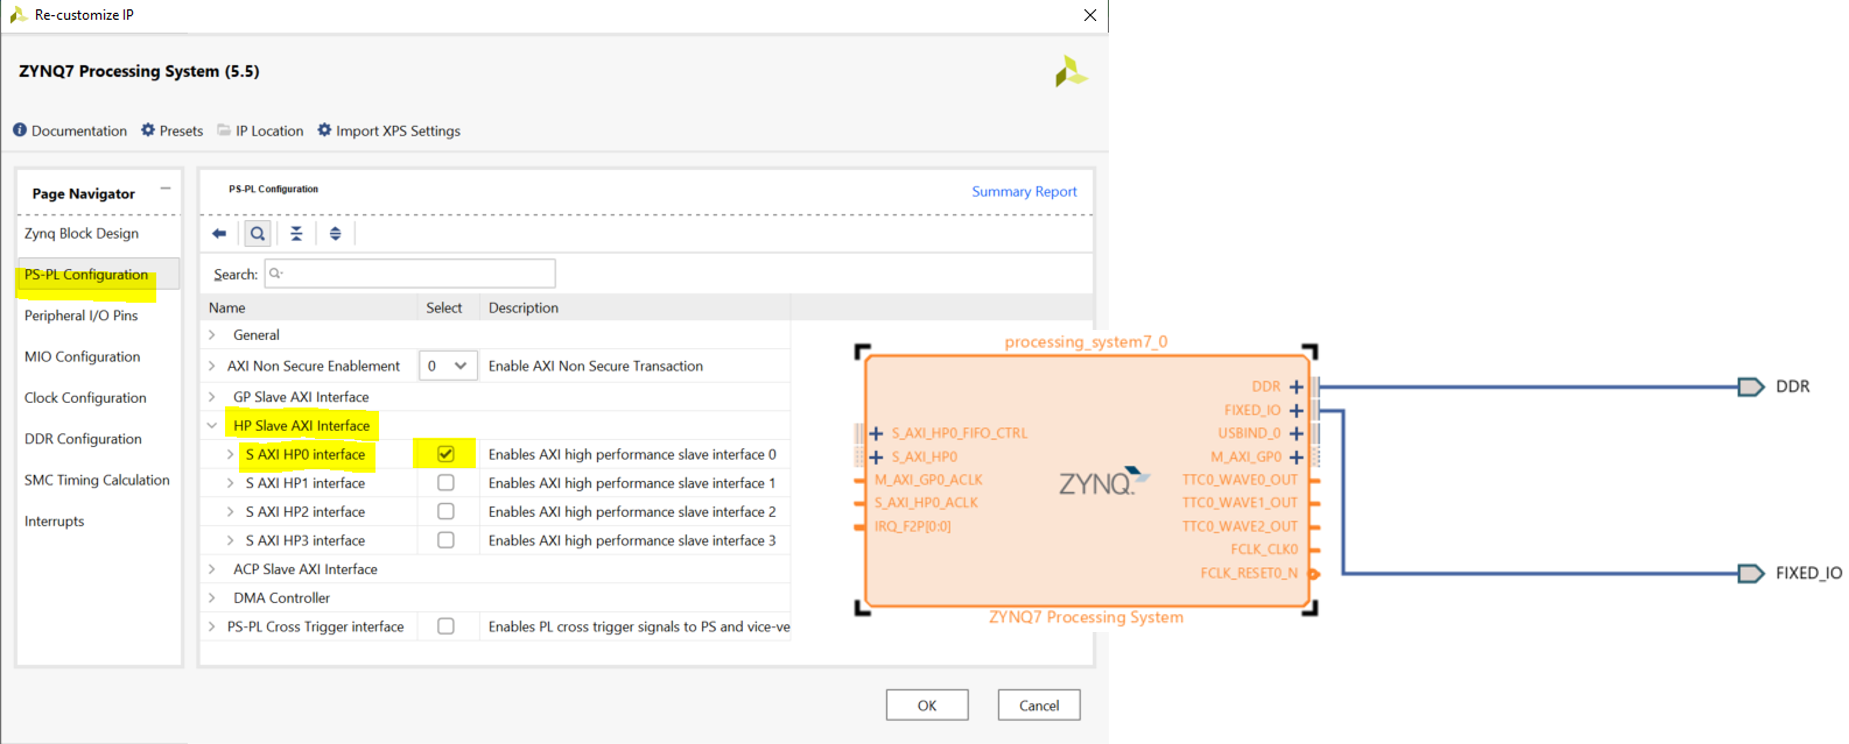
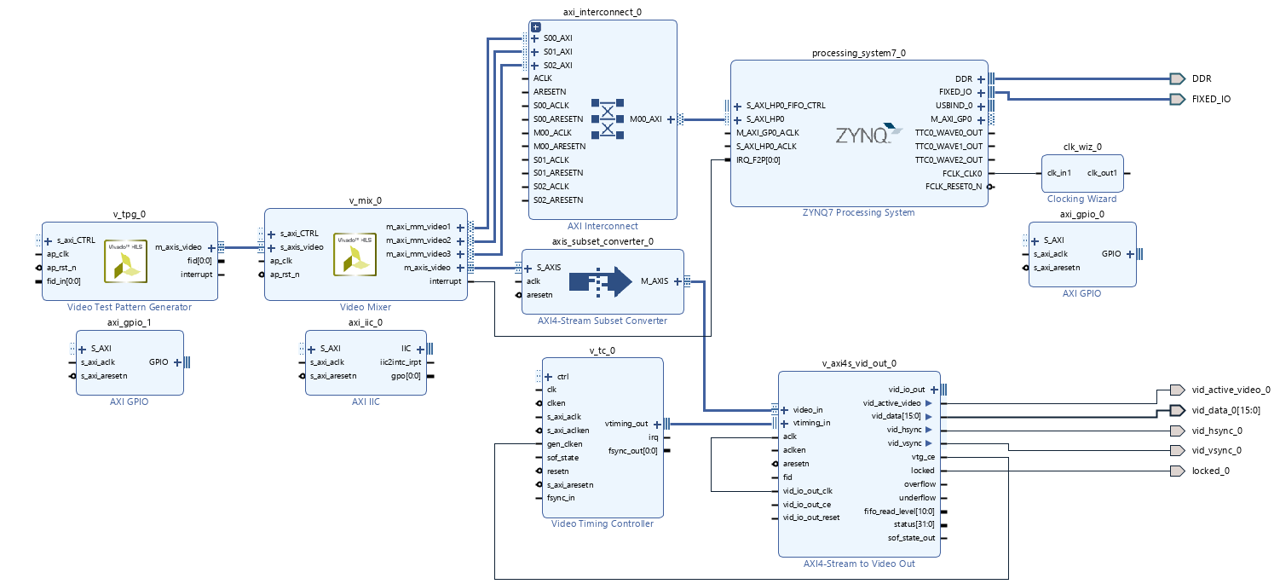
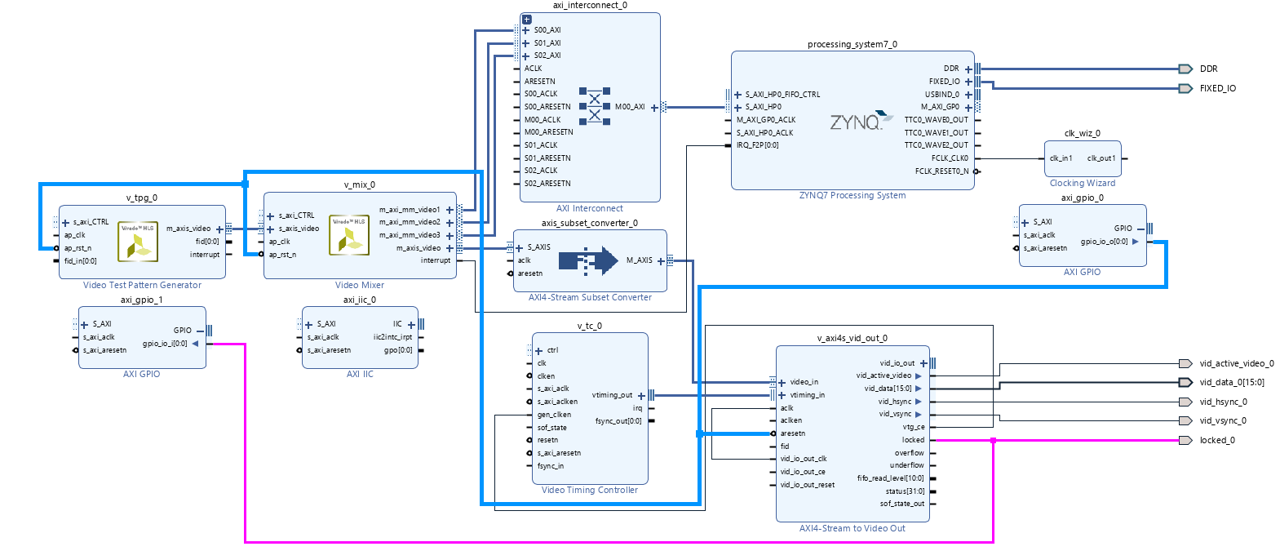
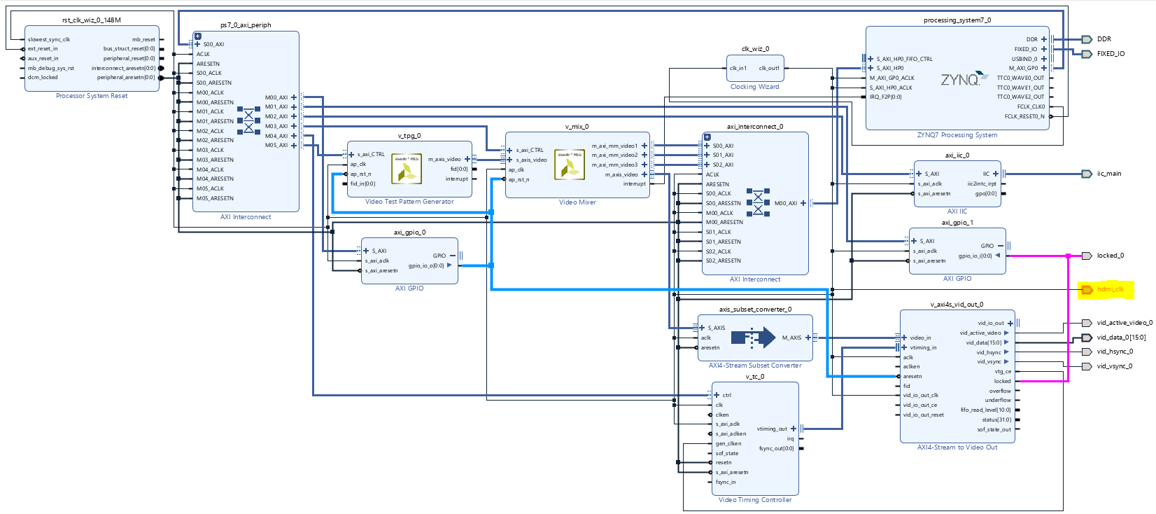
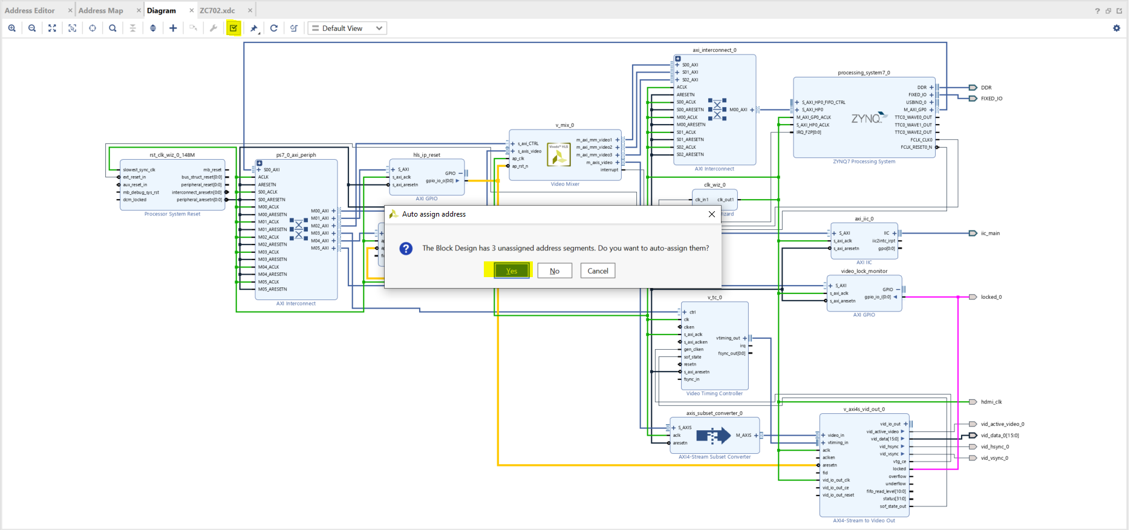
- ZYNQ7 Processing System
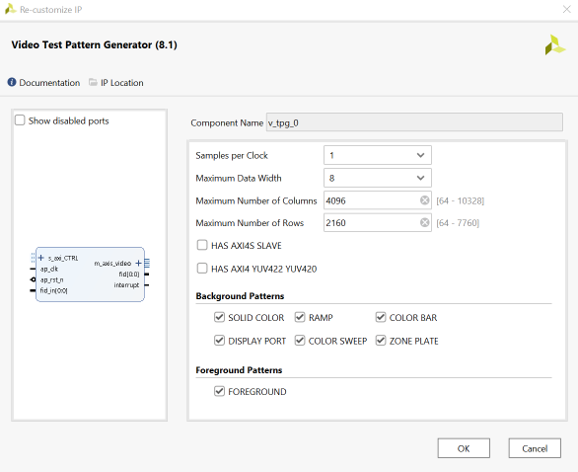
- Video Test Pattern Generator
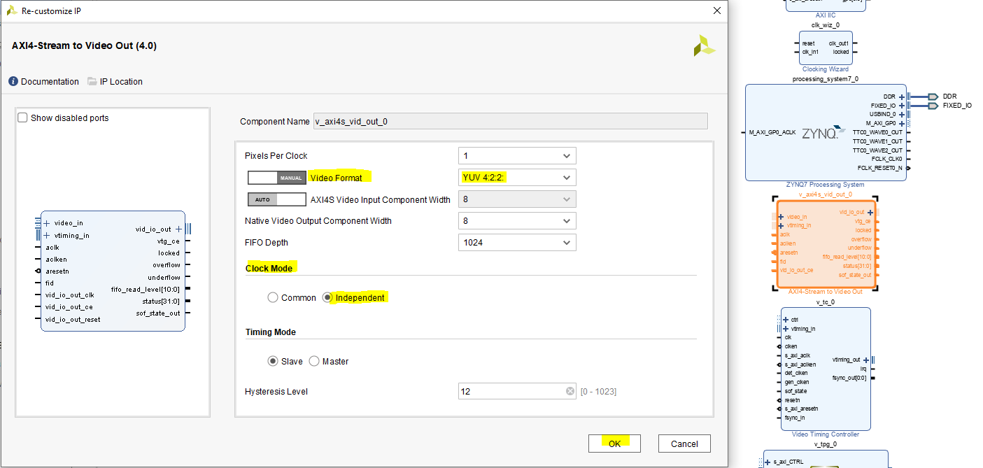
- AXI4-Stream to Video Out
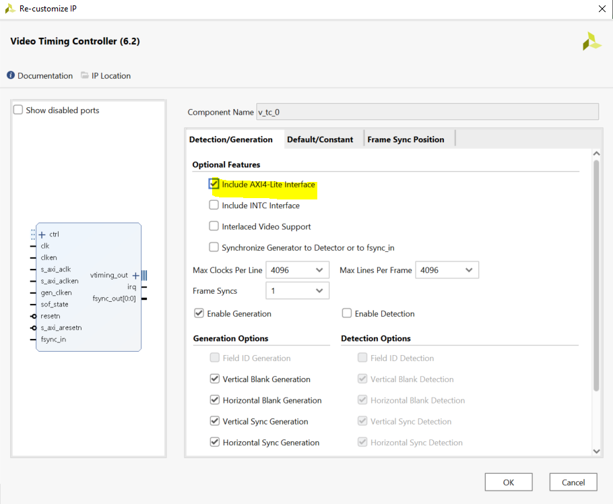
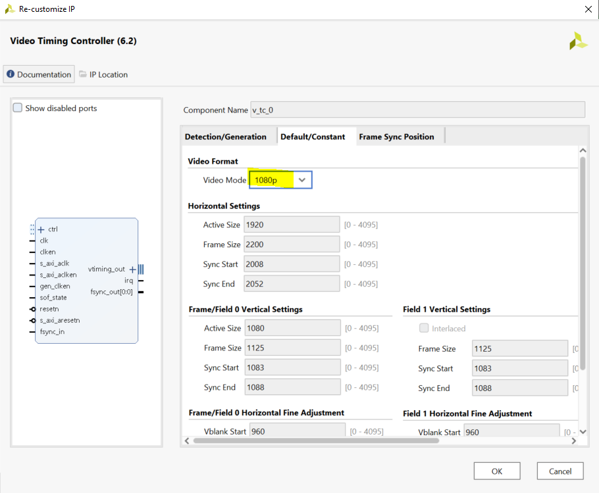
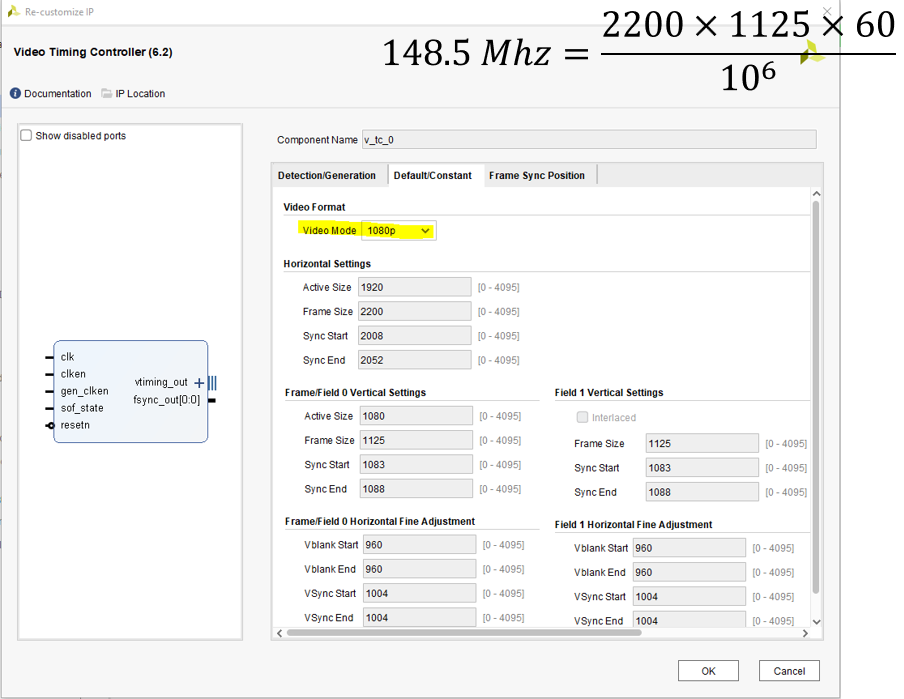
- Video Timing Controller
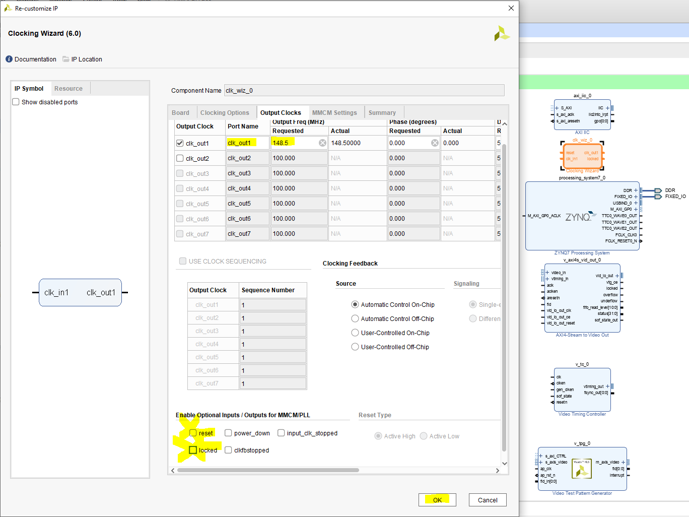
- Clocking Wizard
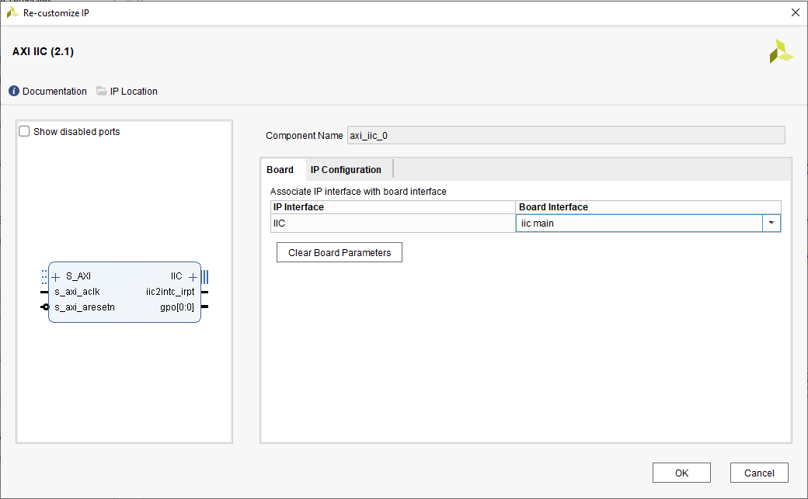
- AXI IIC
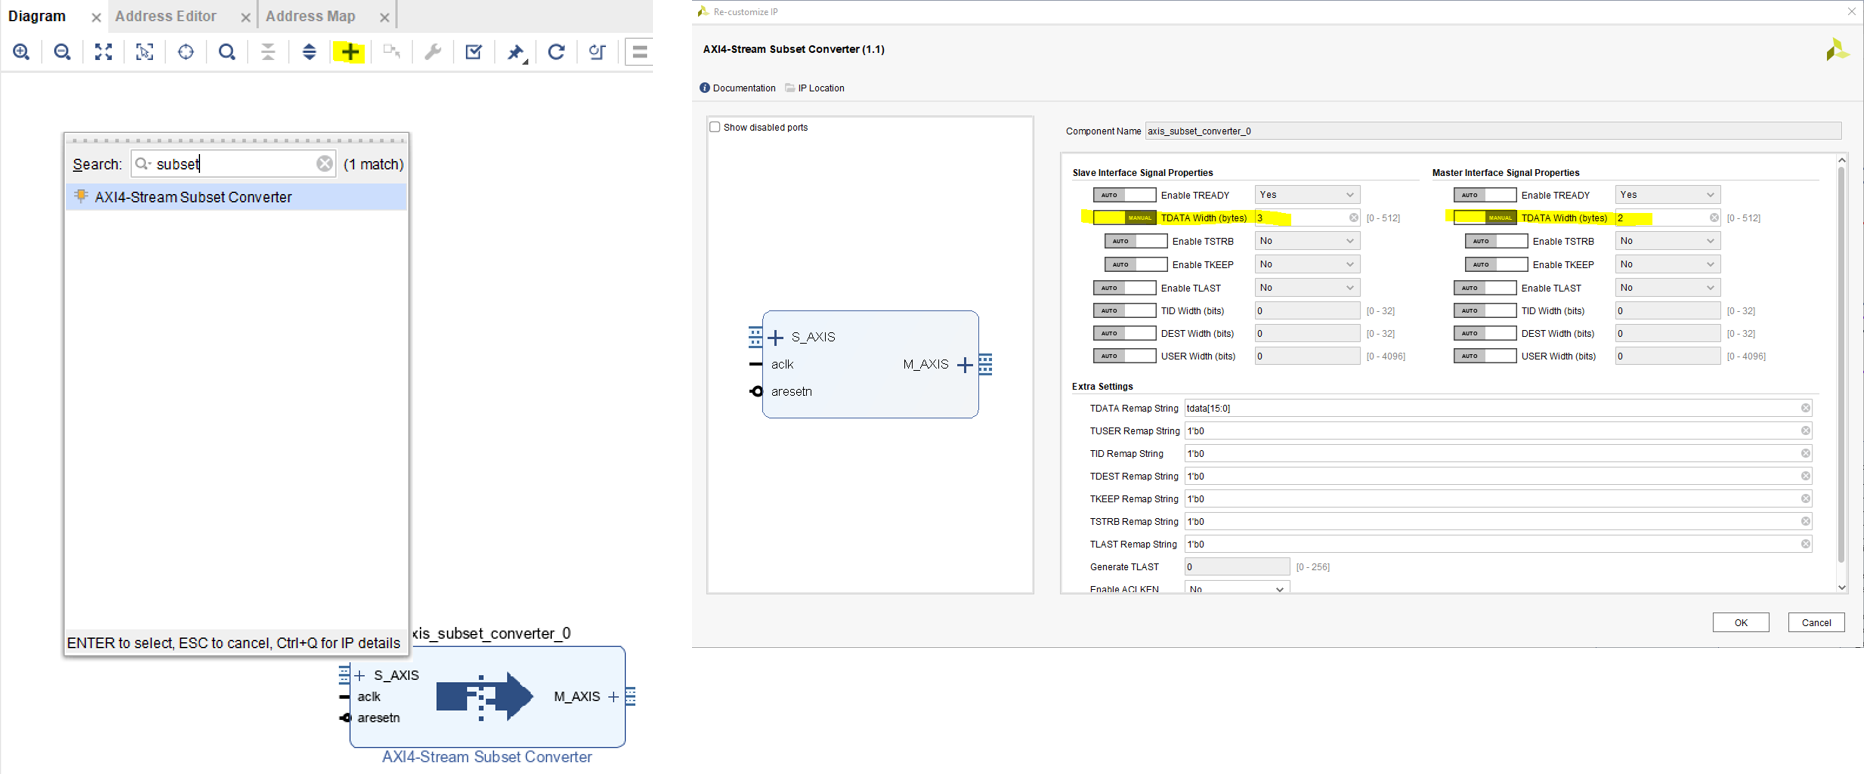
- AXI4-Stream Subset Converter
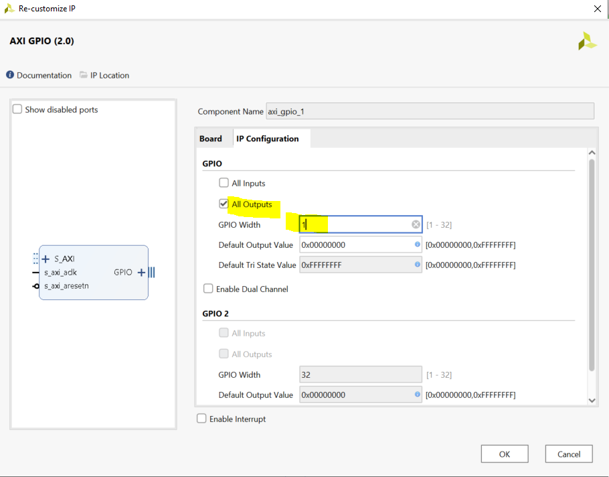
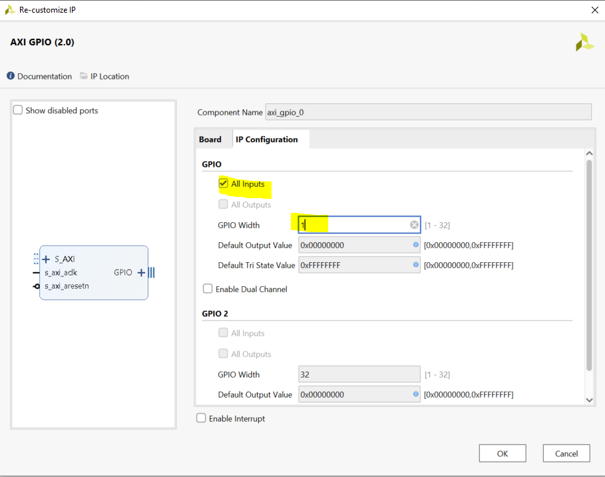
- GPIO-0
- GPIO-1
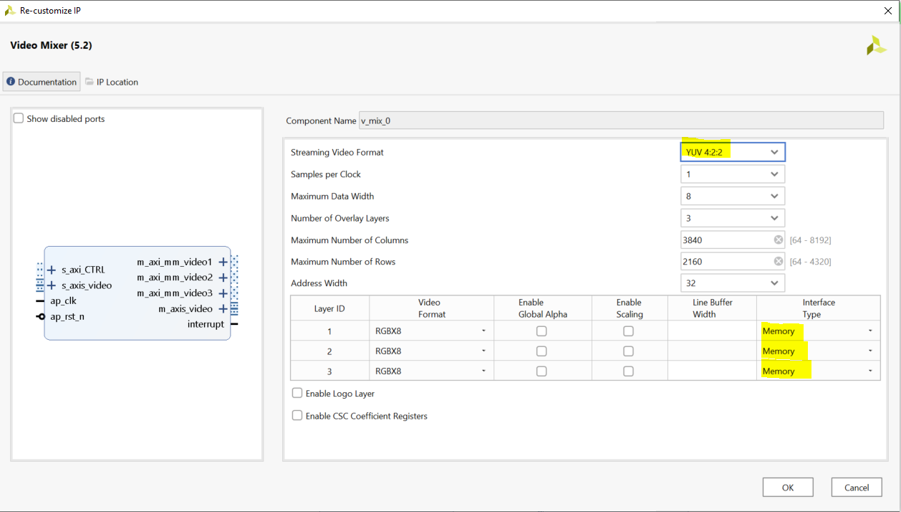
- Video Mixer
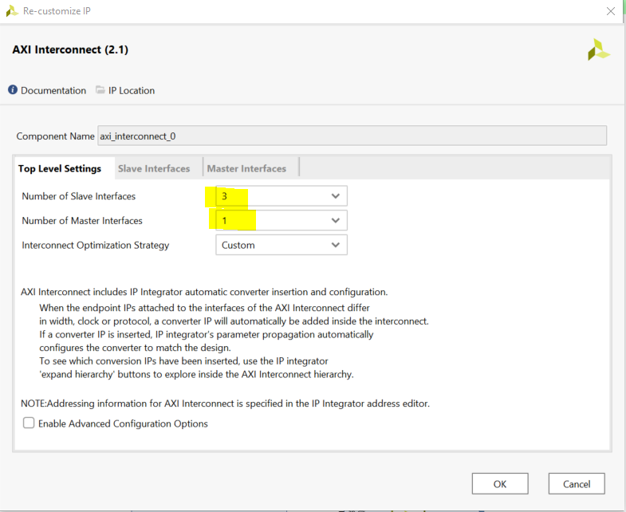
- AXI Interconnect
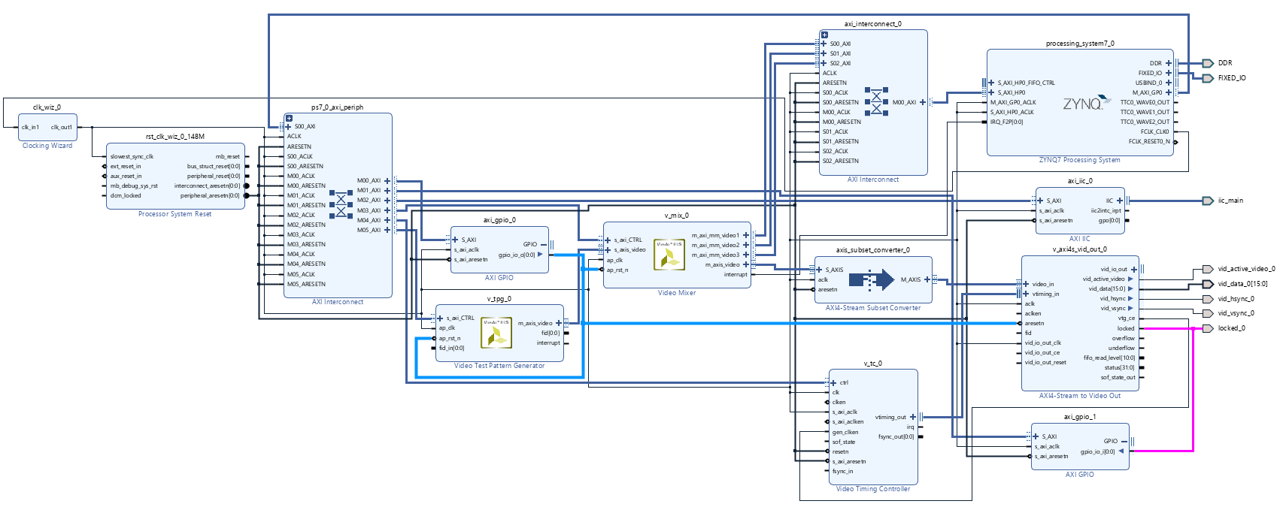
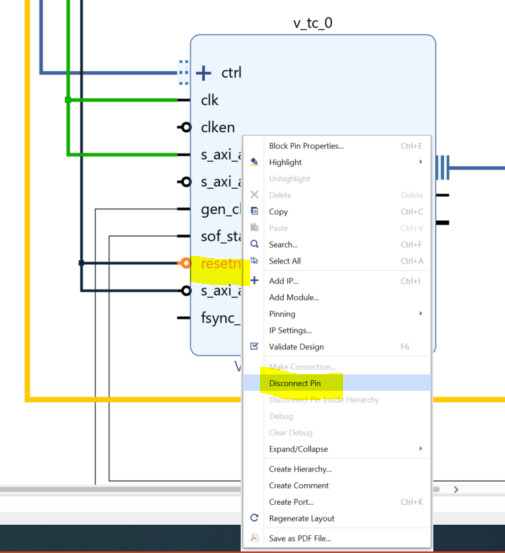
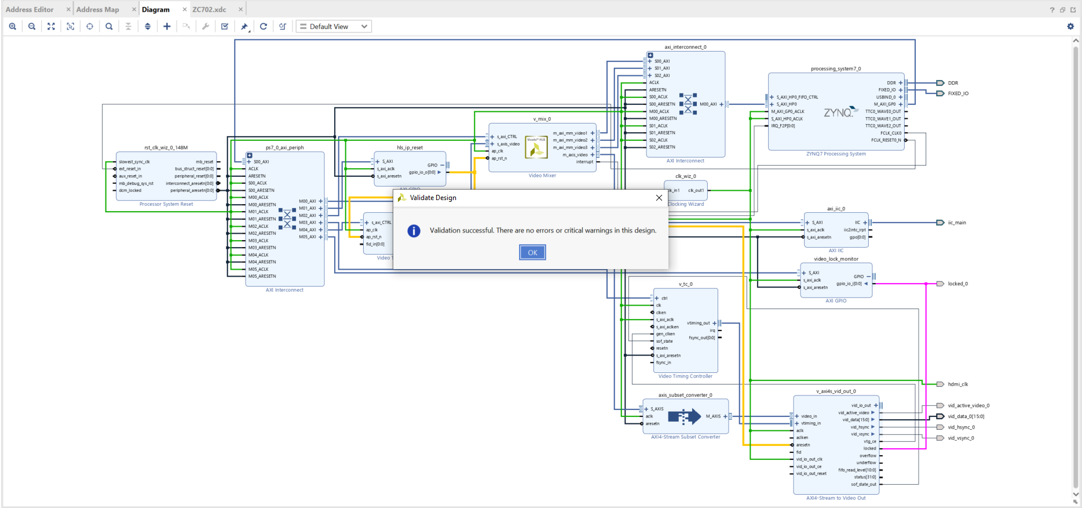
- Connect the above IPs – do not connect 'sof_state_out'
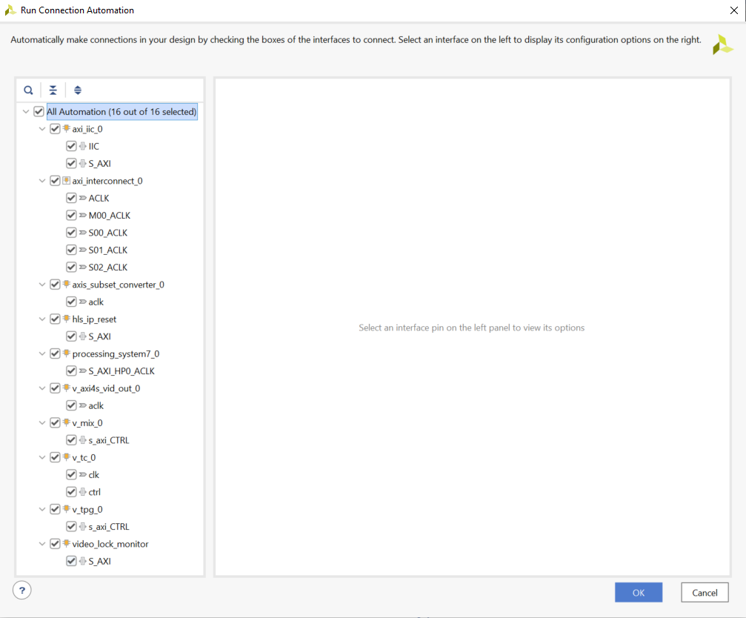
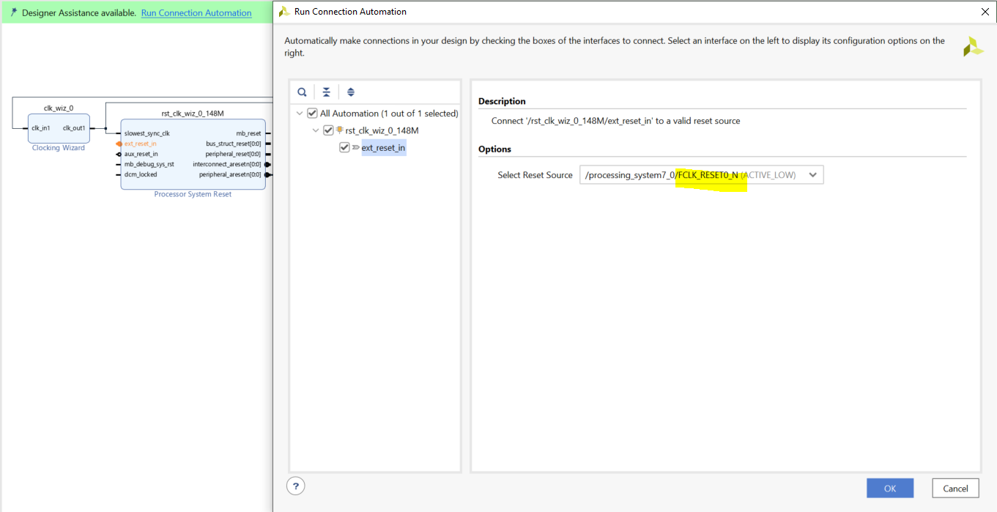
Run Connection Automation – Select 148 MHz for all Clock Sources
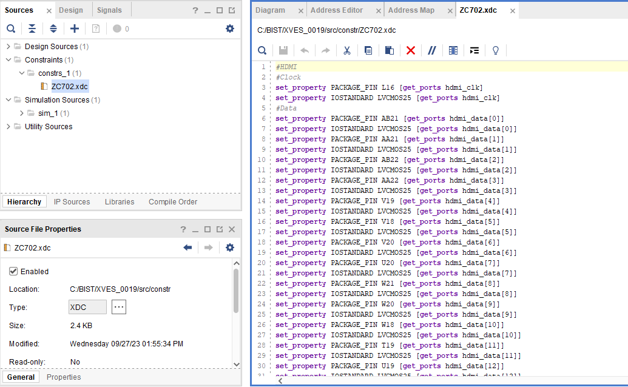
2. Add the XDC content, which can be downloaded from this link
Alternatively, you can find the file in 'XVES_0019\src\constr\ZC702.xdc'
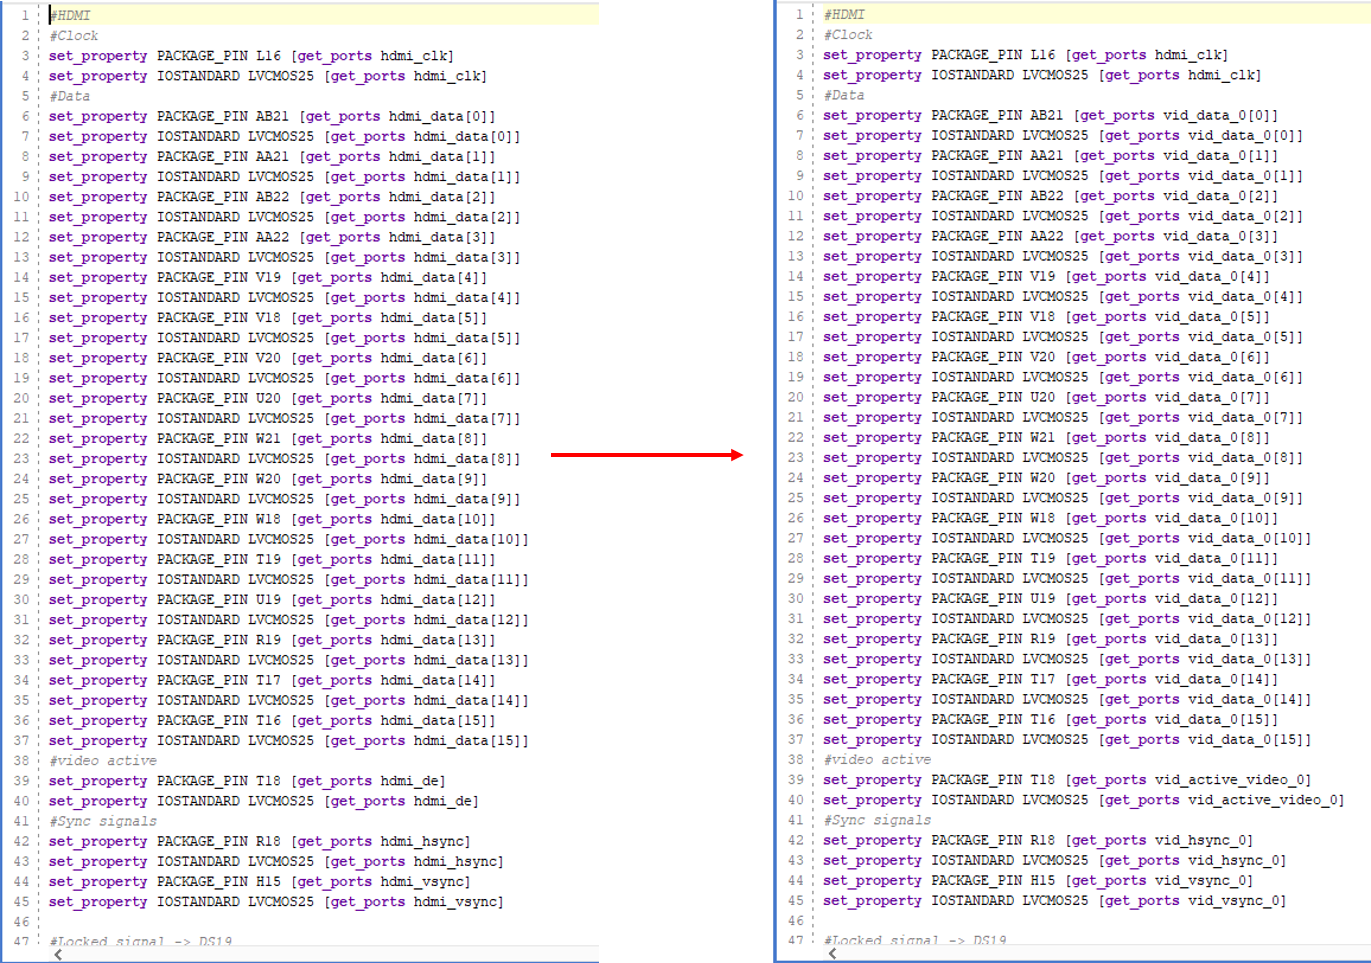
Remember, the HDMI output port must match the port names specified in the XDC file
Modify the XDC content
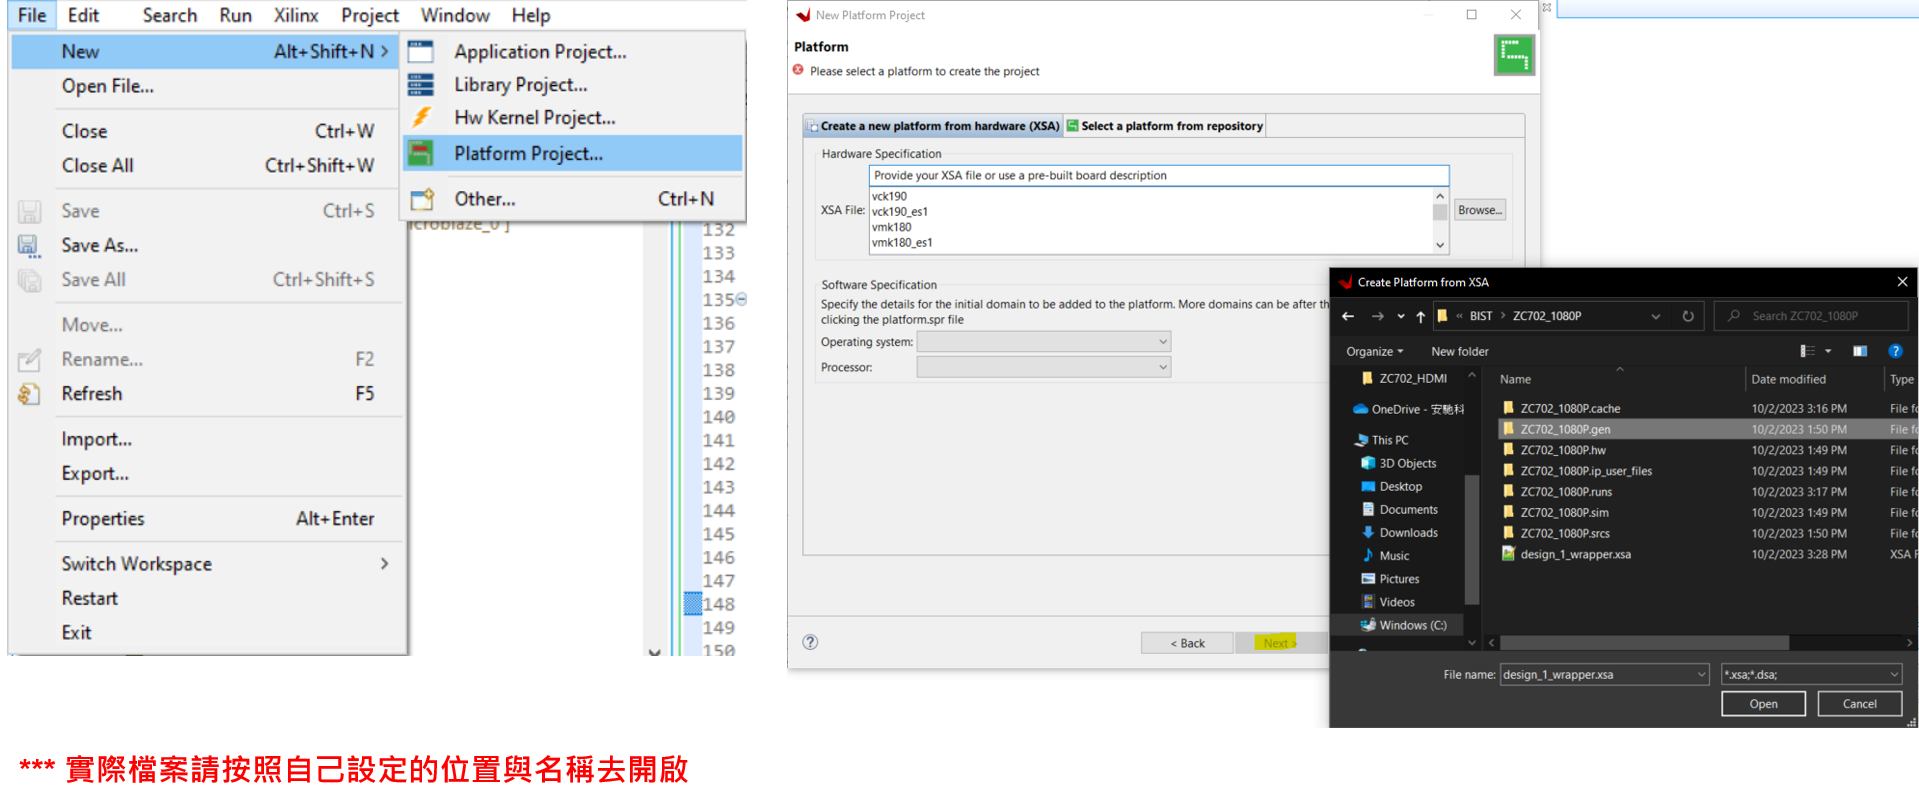
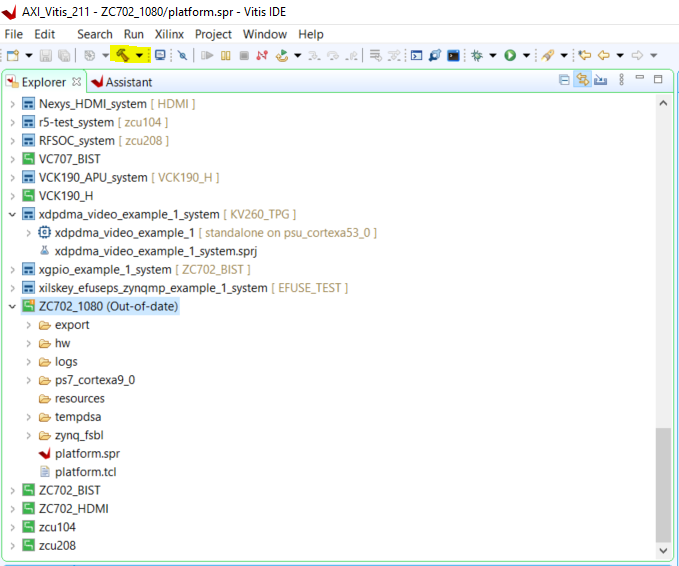
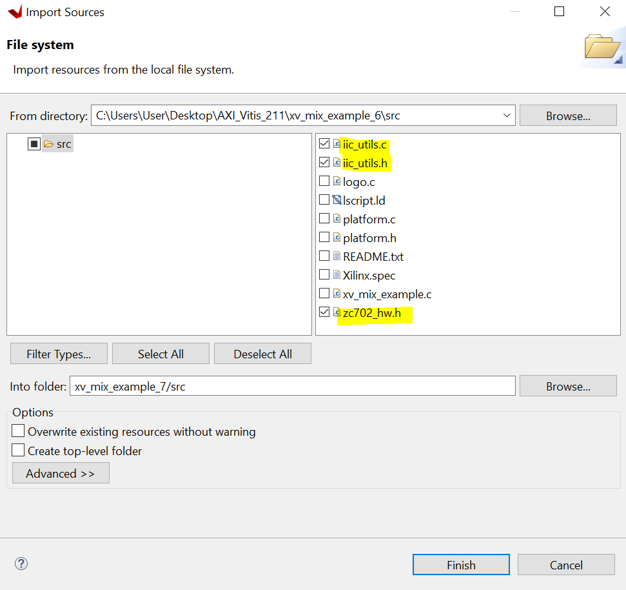
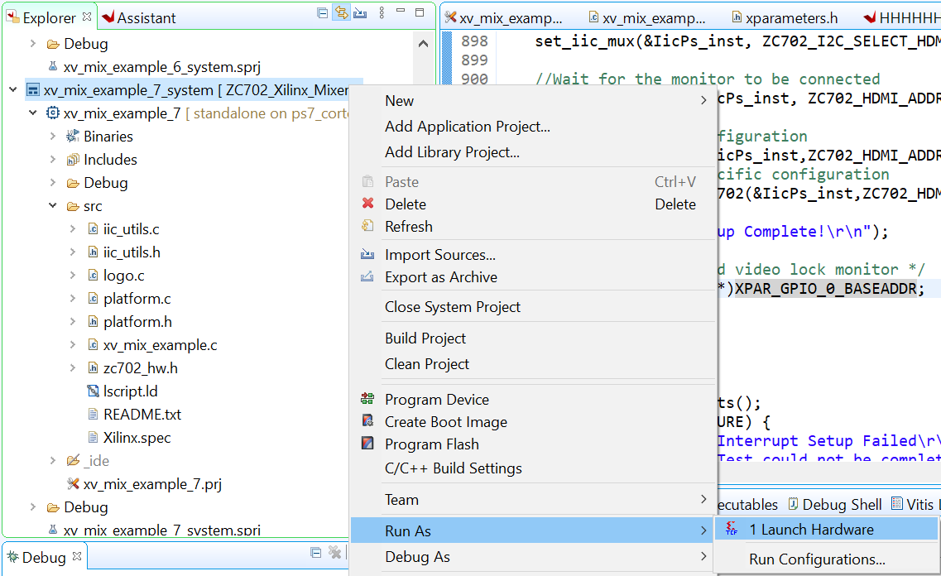
- After creating the Platform, proceed with the Build to generate the linking files
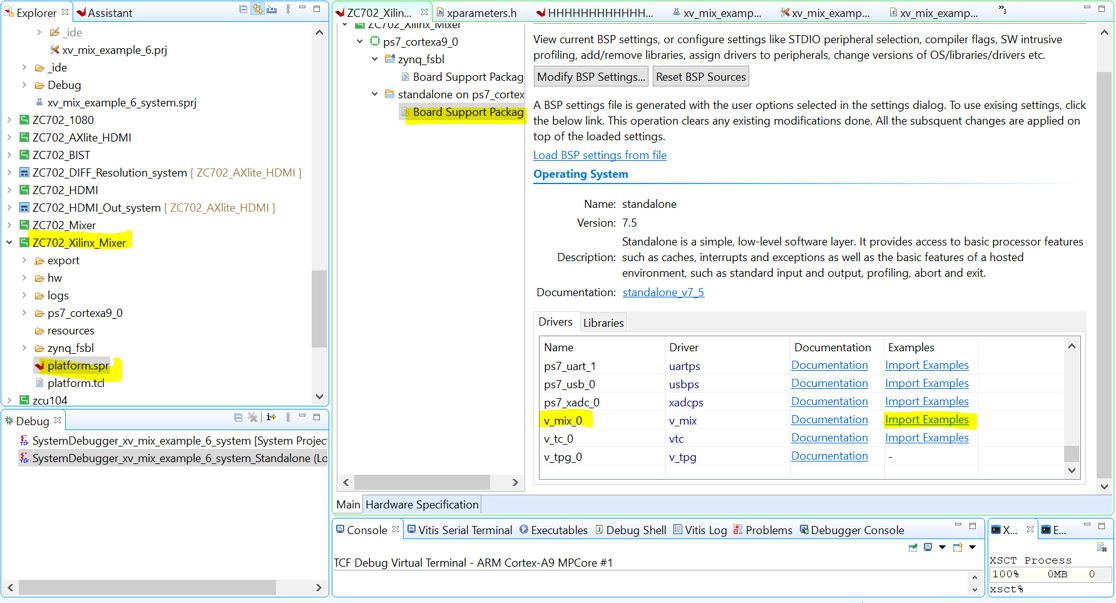
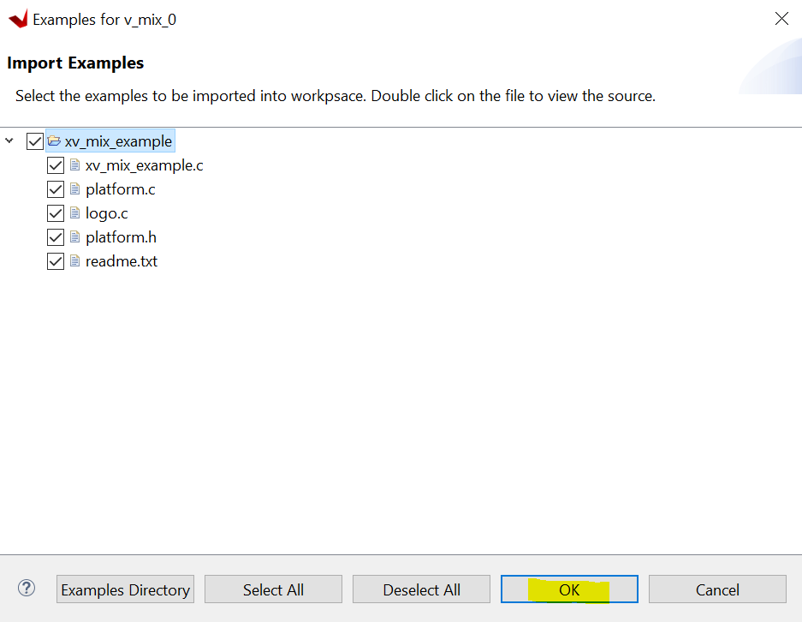
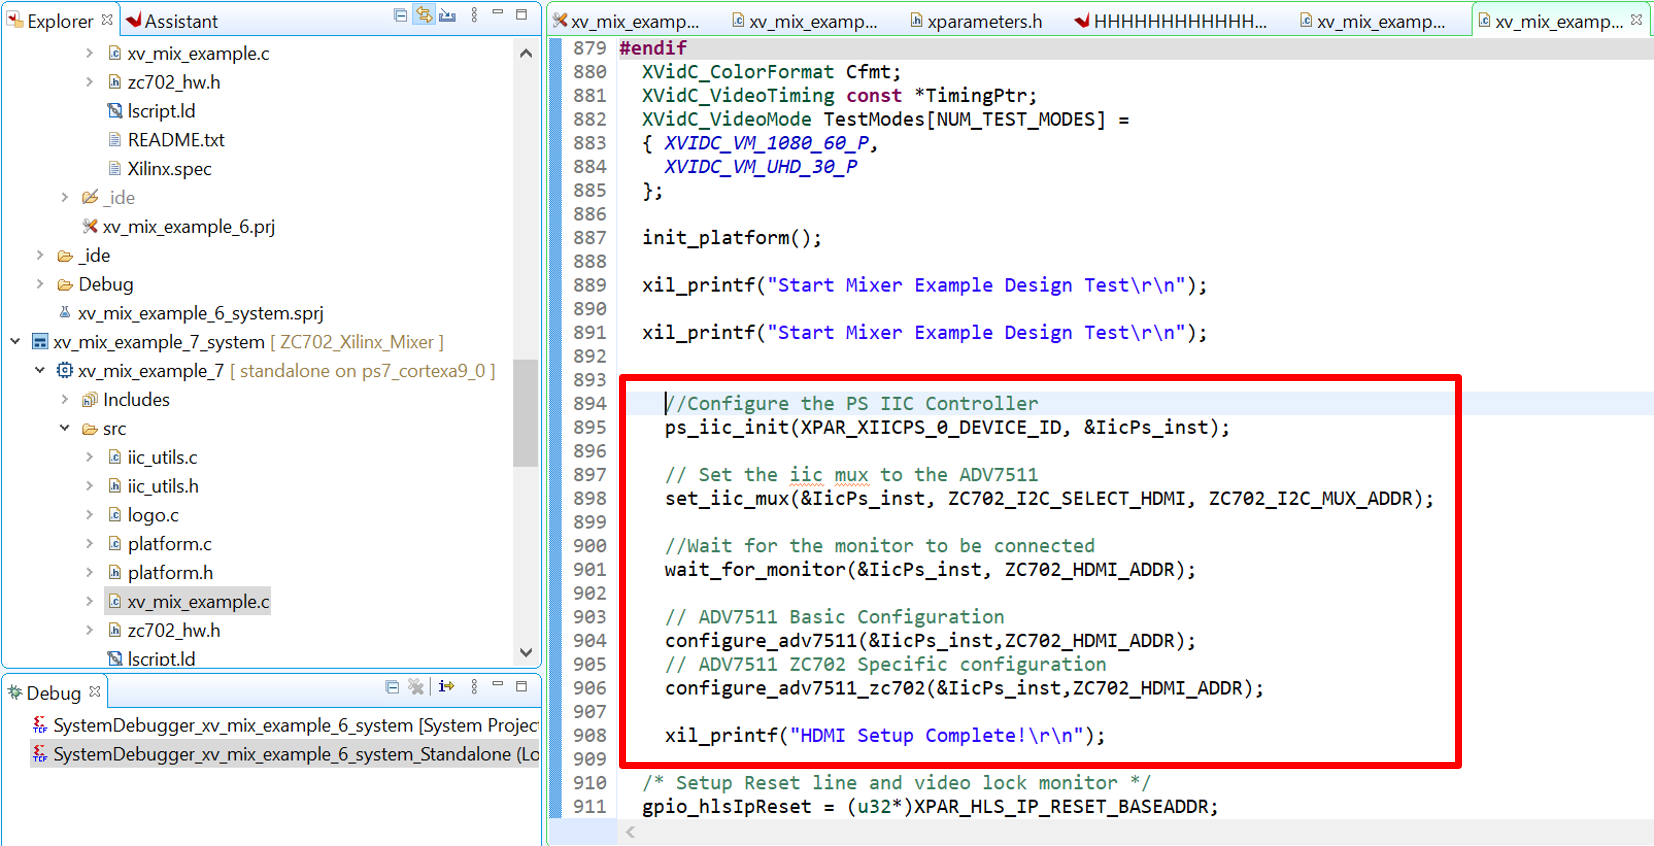
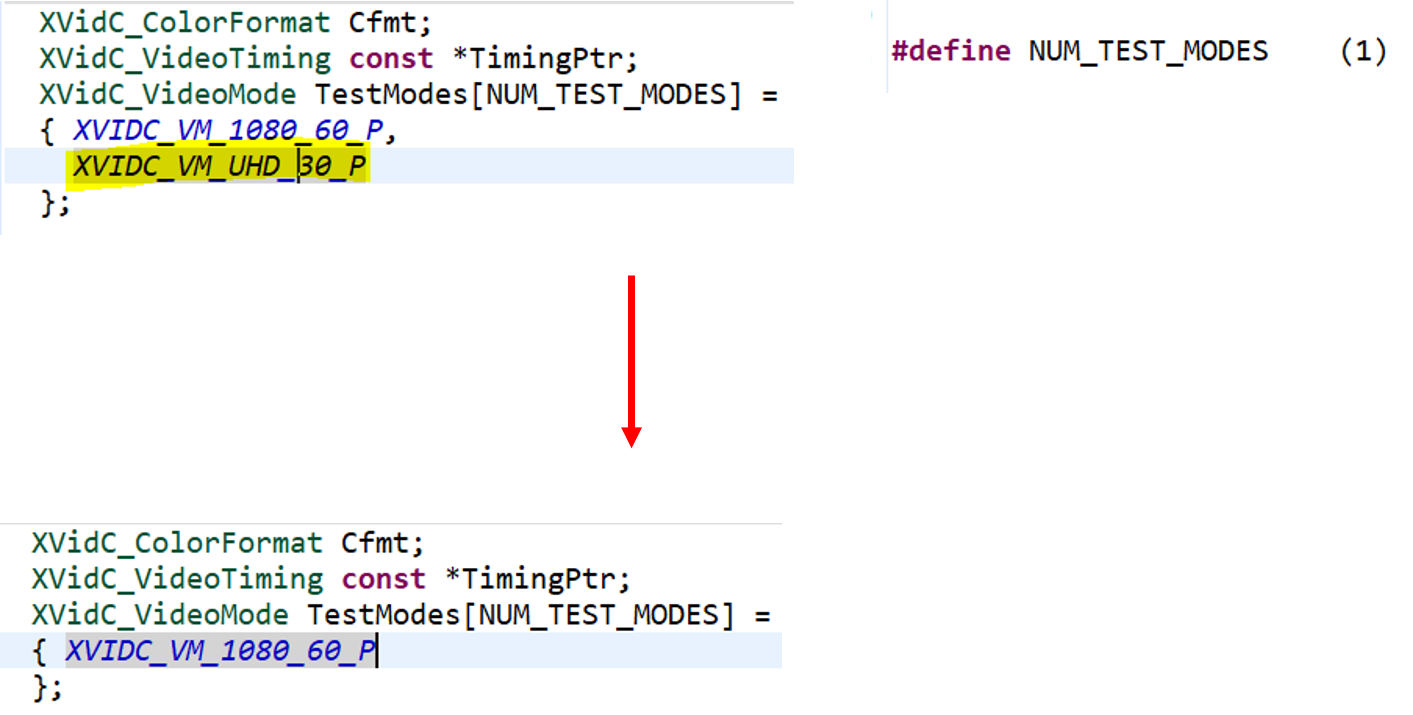
- main function
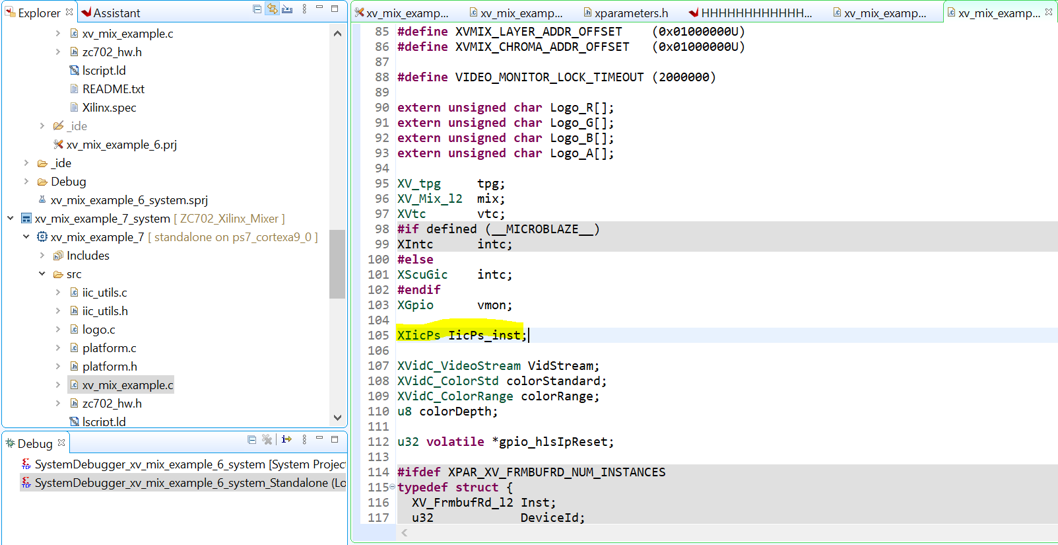
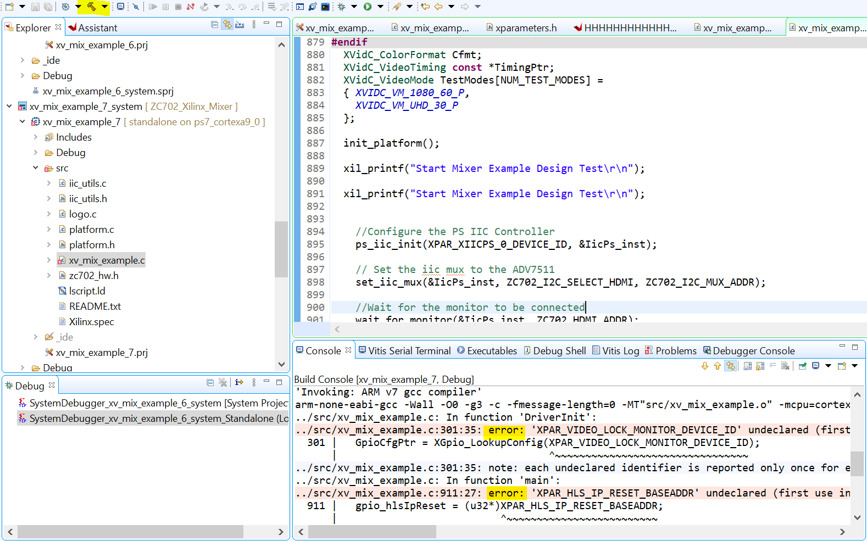
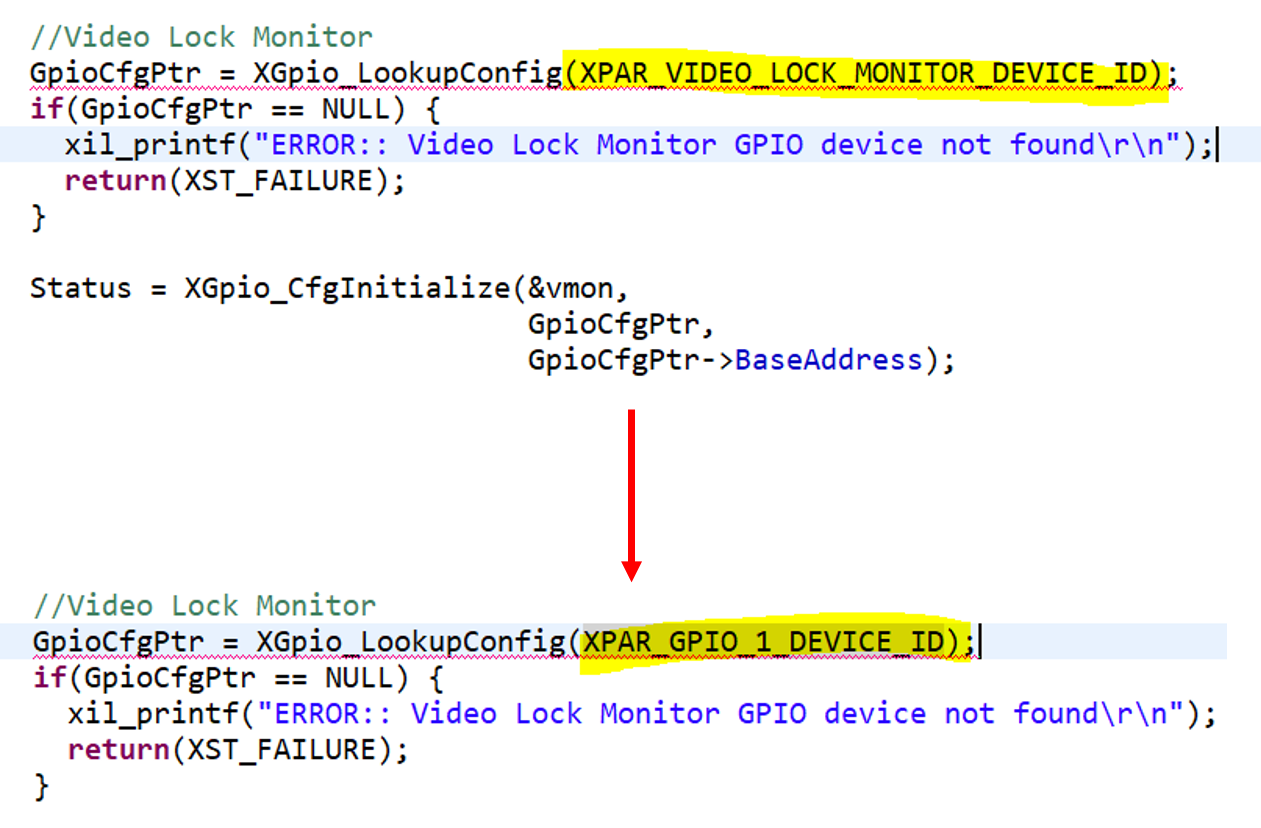
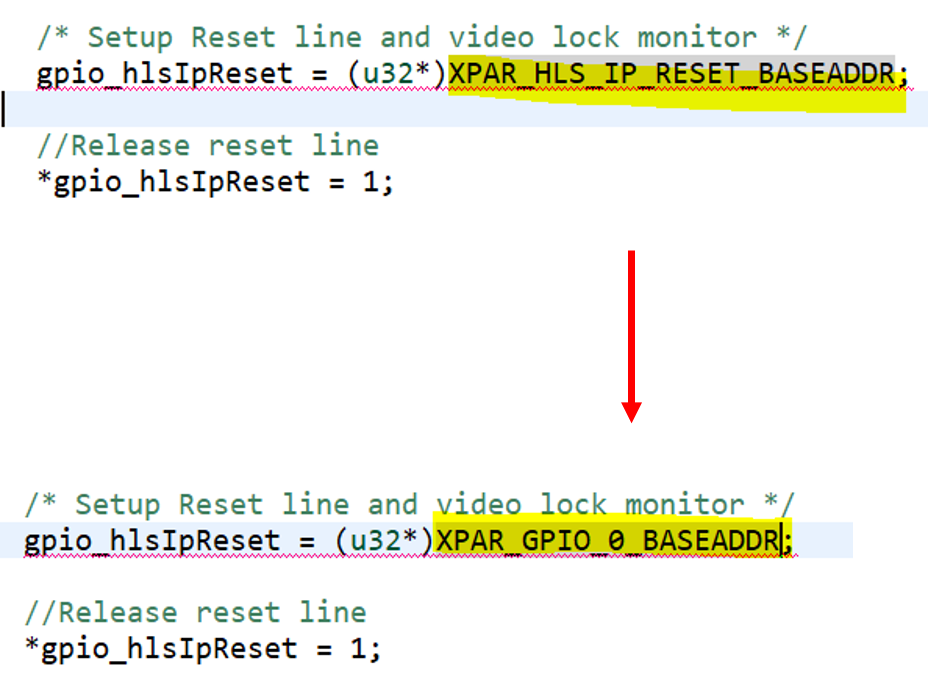
- The build has an error because the GPIO names do not match Vivado. They need to be changed
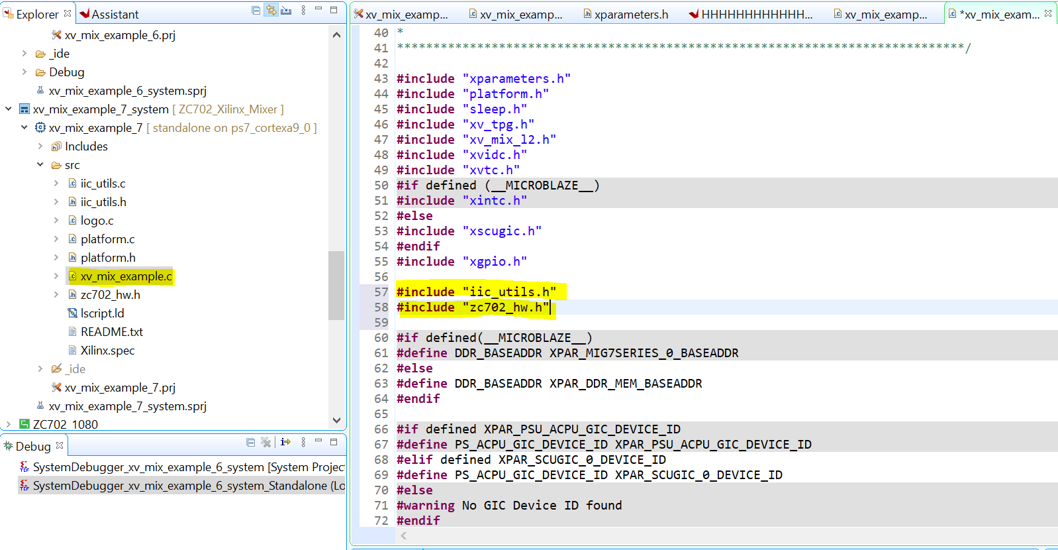
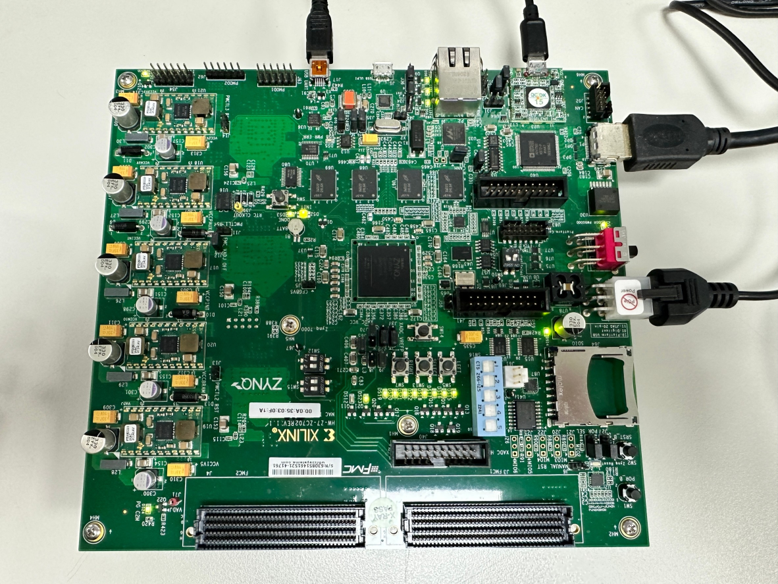
- ZC702 Hardware Configuration
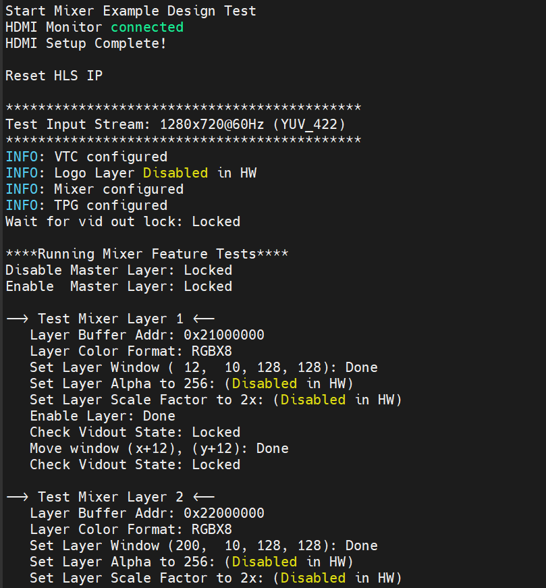
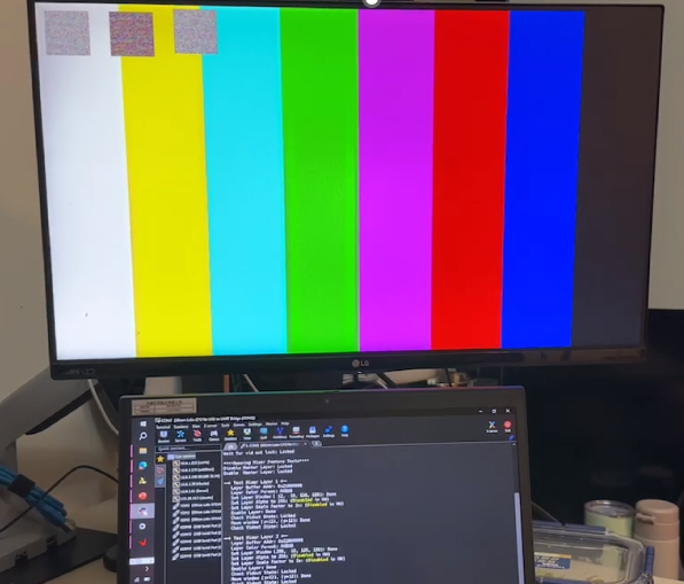
- Result

