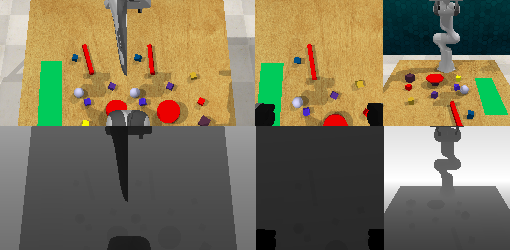
In this project, we develop a Deep Deterministic Policy Gradient (DDPG) approach toward robotic control, aimed at exploring it's uses for surgical depridement (removal of dead tissue). A simulation called CoppeliaSim is used as the agent's environment for interaction. The project is developed on Ubuntu 19.04 with a CUDA-enabled GPU.
In this section, the required installation procedures are outlined.
The CoppeliaSim v4.0.0 simulation software is used. Install it using the following script.
#!/bin/bash
wget https://www.coppeliarobotics.com/files/CoppeliaSim_Edu_V4_0_0_Ubuntu18_04.tar.xz
tar -zxvf CoppeliaSim_Edu_V4_0_0_Ubuntu18_04.tar.xz
cd CoppeliaSim_Edu_V4_0_0_Ubuntu18_04
chmod +x coppeliaSim.sh
./coppeliaSim.sh
Add the following to your ~/.bashrc file and remember to source your bashrc (source ~/.bashrc) or zshrc (source ~/.zshrc) after this:
export COPPELIASIM_ROOT=EDIT/ME/PATH/TO/COPPELIASIM/INSTALL/DIR
export LD_LIBRARY_PATH=$LD_LIBRARY_PATH:$COPPELIASIM_ROOT
export QT_QPA_PLATFORM_PLUGIN_PATH=$COPPELIASIM_ROOTThe project has been developed with Python 3.7.5. Lastest version of Python is also accepted. Install Python and Pip using the following script:
#!/bin/bash

# Check and  i n s t a l l  Python3
!  [−x ”$ (command−v python3)” ] && sudo apt install python3;

# Check and install Pip3
!  [−x ”$ (command−v pip3 )”] && sudo apt install python3−pip;
The project has been developed based on CUDA Toolkit 10.2. Refer to installation procedures at this link.
The following script was used for installing cuDNN for a cuda installation at location usr/lib/cuda/:
#!/bin/bash
cd ~/Downloads

# Unzip and copy cuDNN to CUDA folder
tar -xzvf cudnn-10.2-linux-x64-v7.6.5.32.tgz
sudo cp cuda/include/cudnn.h /usr/lib/cuda/include
sudo cp cuda/lib64/libcudnn* /usr/lib/cuda/lib64
sudo chmod a+r /usr/lib/cuda/include/cudnn.h /usr/lib/cuda/lib64/libcudnn*
For further information, refer to the official cudNN website.
First update pip and then install Python virtual environment:
python3 -m pip install --user --upgrade pip
python3 -m pip install --user virtualenv
Create and activate a virtual environment called env:
python3 -m venv env
source env/bin/activate
First, update pip, setuptools and virtualenv packages:
python3 -m pip install --upgrade pip setuptools virtualenv
The project depends of few external libraries. Some of them are still under development, requiring local copying and modification such as PyRep, RLBench and keras-rl2. Therefore, in order to simplify installation procedure, execute the setup.sh script:
#!/bin/bash
# Change script to execution mode
chmod +x setup.sh

# Execute script
./setup.sh
If a virtual environment is used, say called env, then we can install a Jupyter kernel inside the environment:
ipython kernel install --user --name=env
Next, launch Jupyter Lab using jupyter lab and change the execution kernel to env.
Special thanks to all contributors of the following open-source projects: PyRep, RLBench and keras-rl2
