Understanding and Working with Git
Syncing Your Fork with the Main Repository
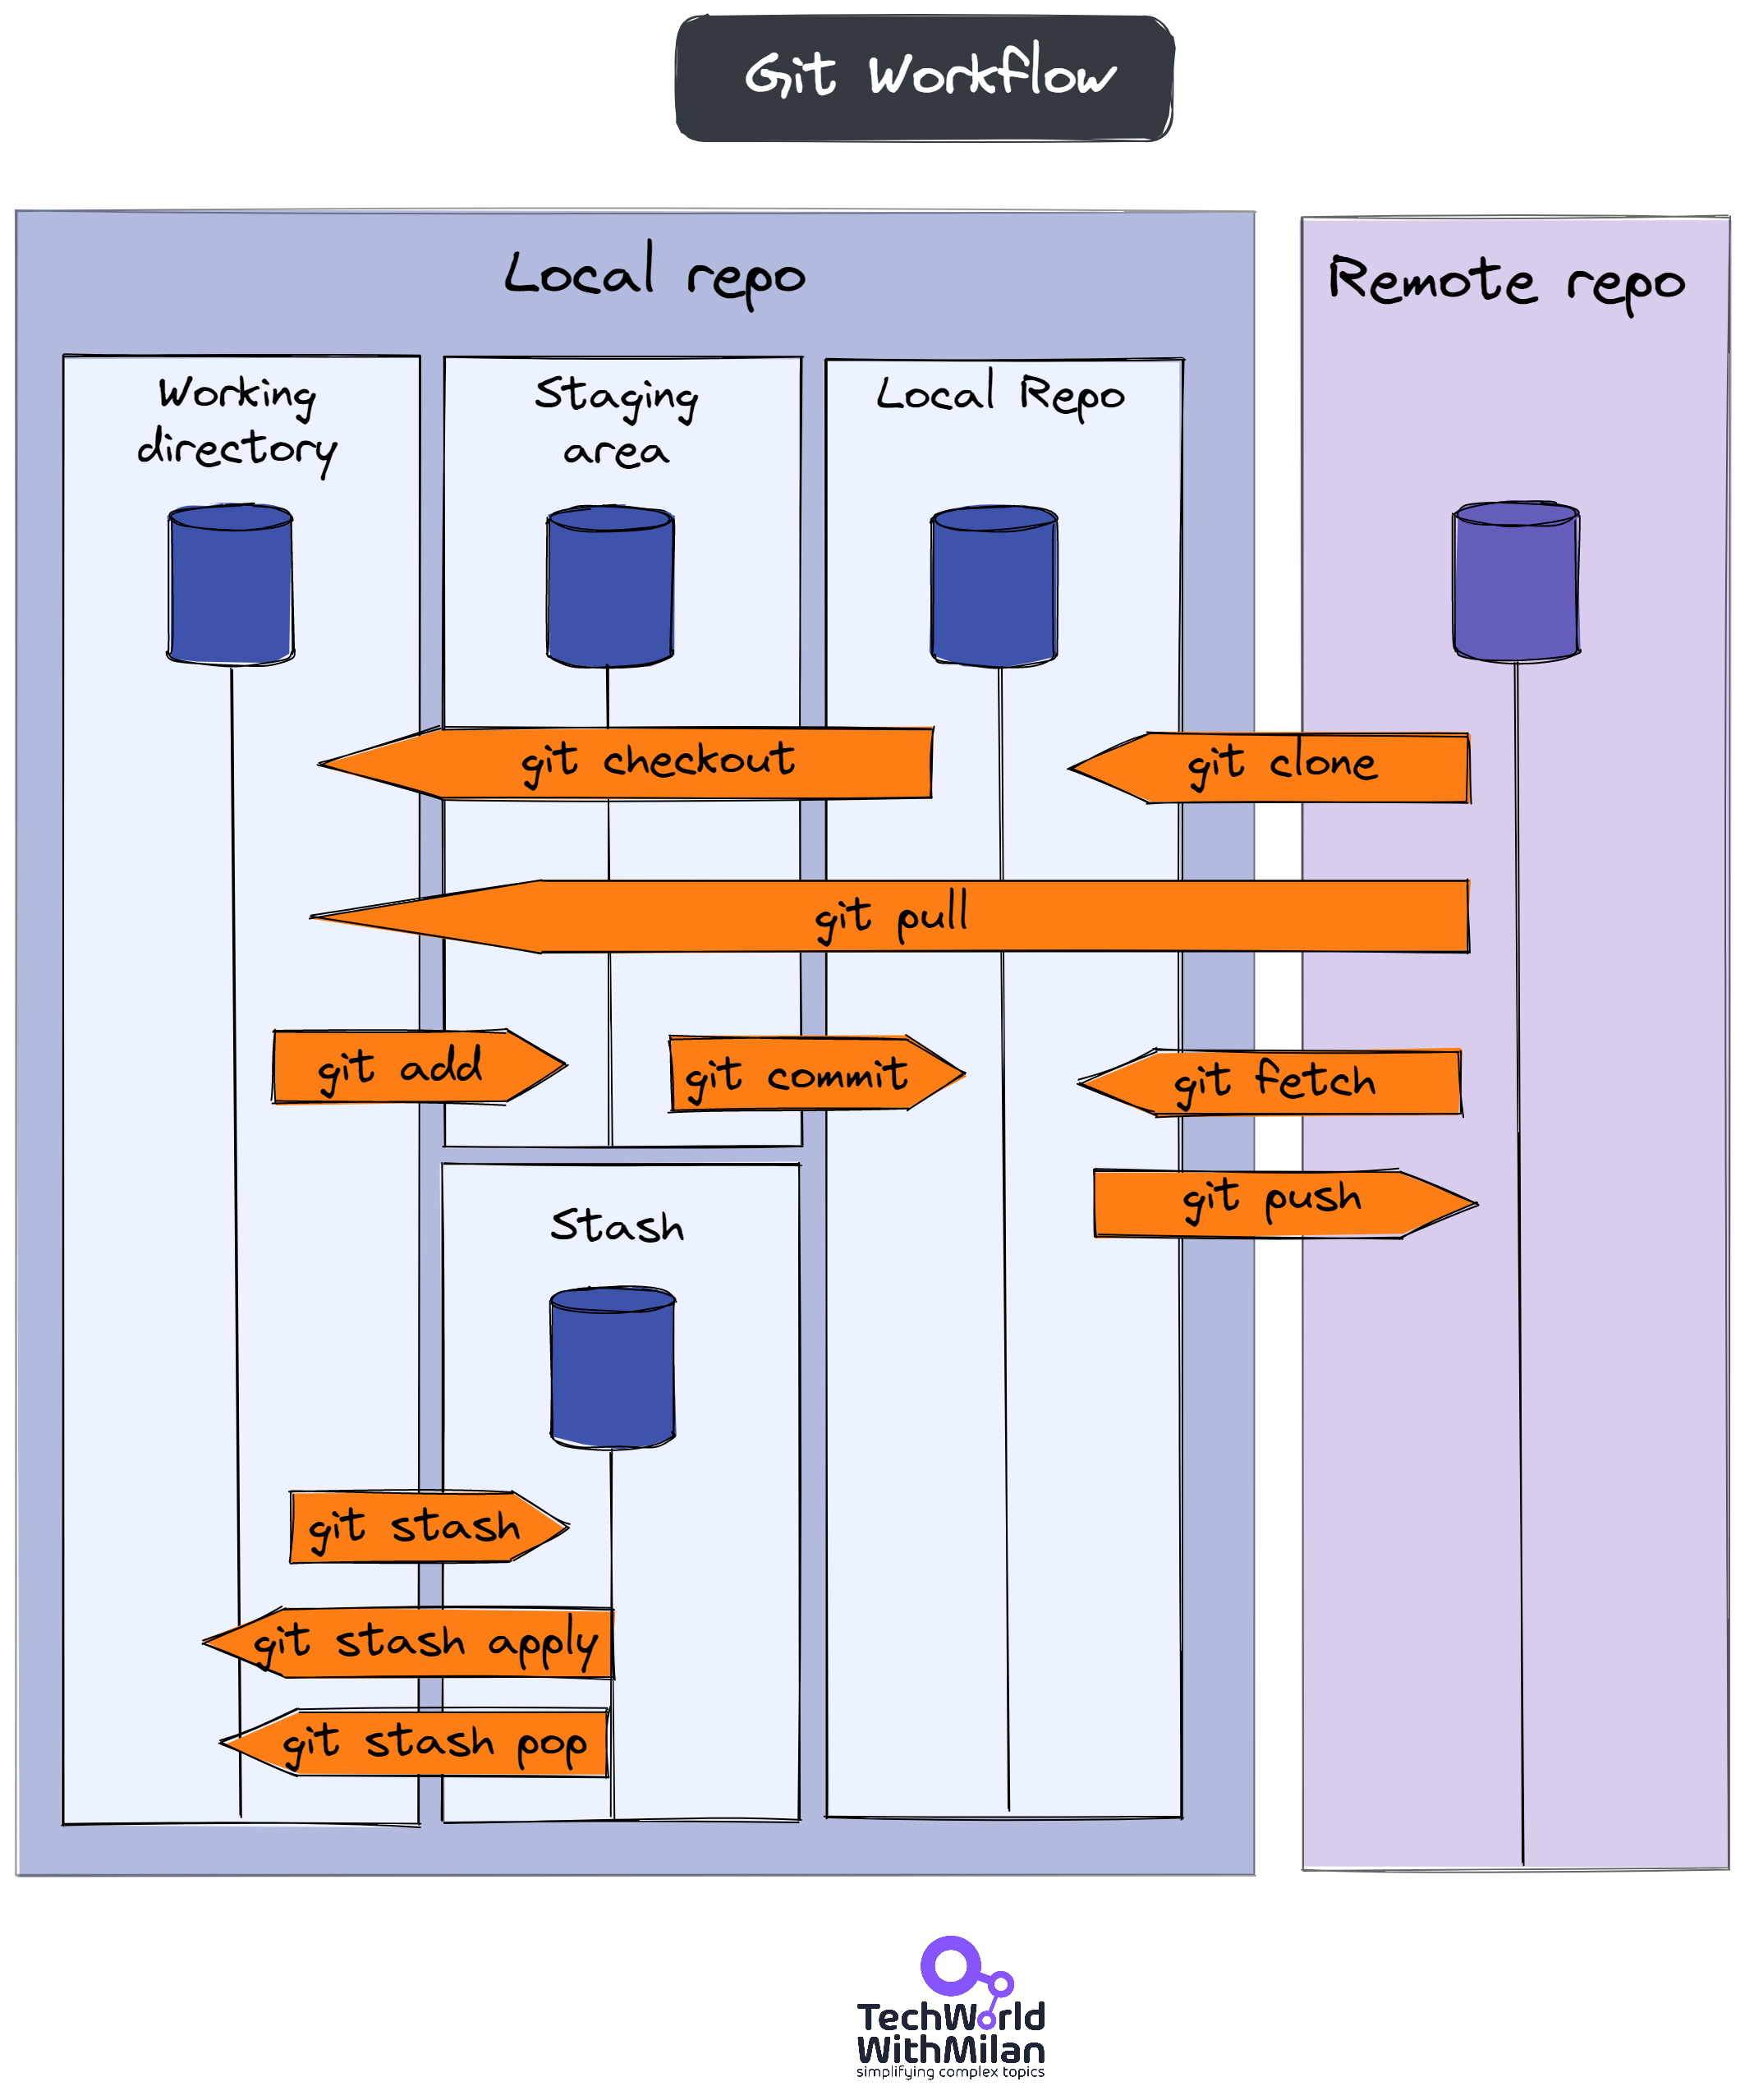
Flowcharts to Help Visualization
Click here if you are using your own device
In this README we will be referring to PowerShell, but if you are using a Mac the instructions are the same in the terminal.
In order to access PowerShell, press the windows button on your keyboard and type in Windows PowerShell, press enter and you will be faced with a blue screen and command line.
Before we can create a new directory and clone the repository onto your machine, you must do two things.
-
Go to github.com and create an account.
-
Type the following commands into PowerShell:
git config --global user.email "your school email address"
git config --global user.name "your group members names"Next, go into your GitHub account and go to the following URL:
https://github.com/nschmidtfrcc/CSC1061FA23
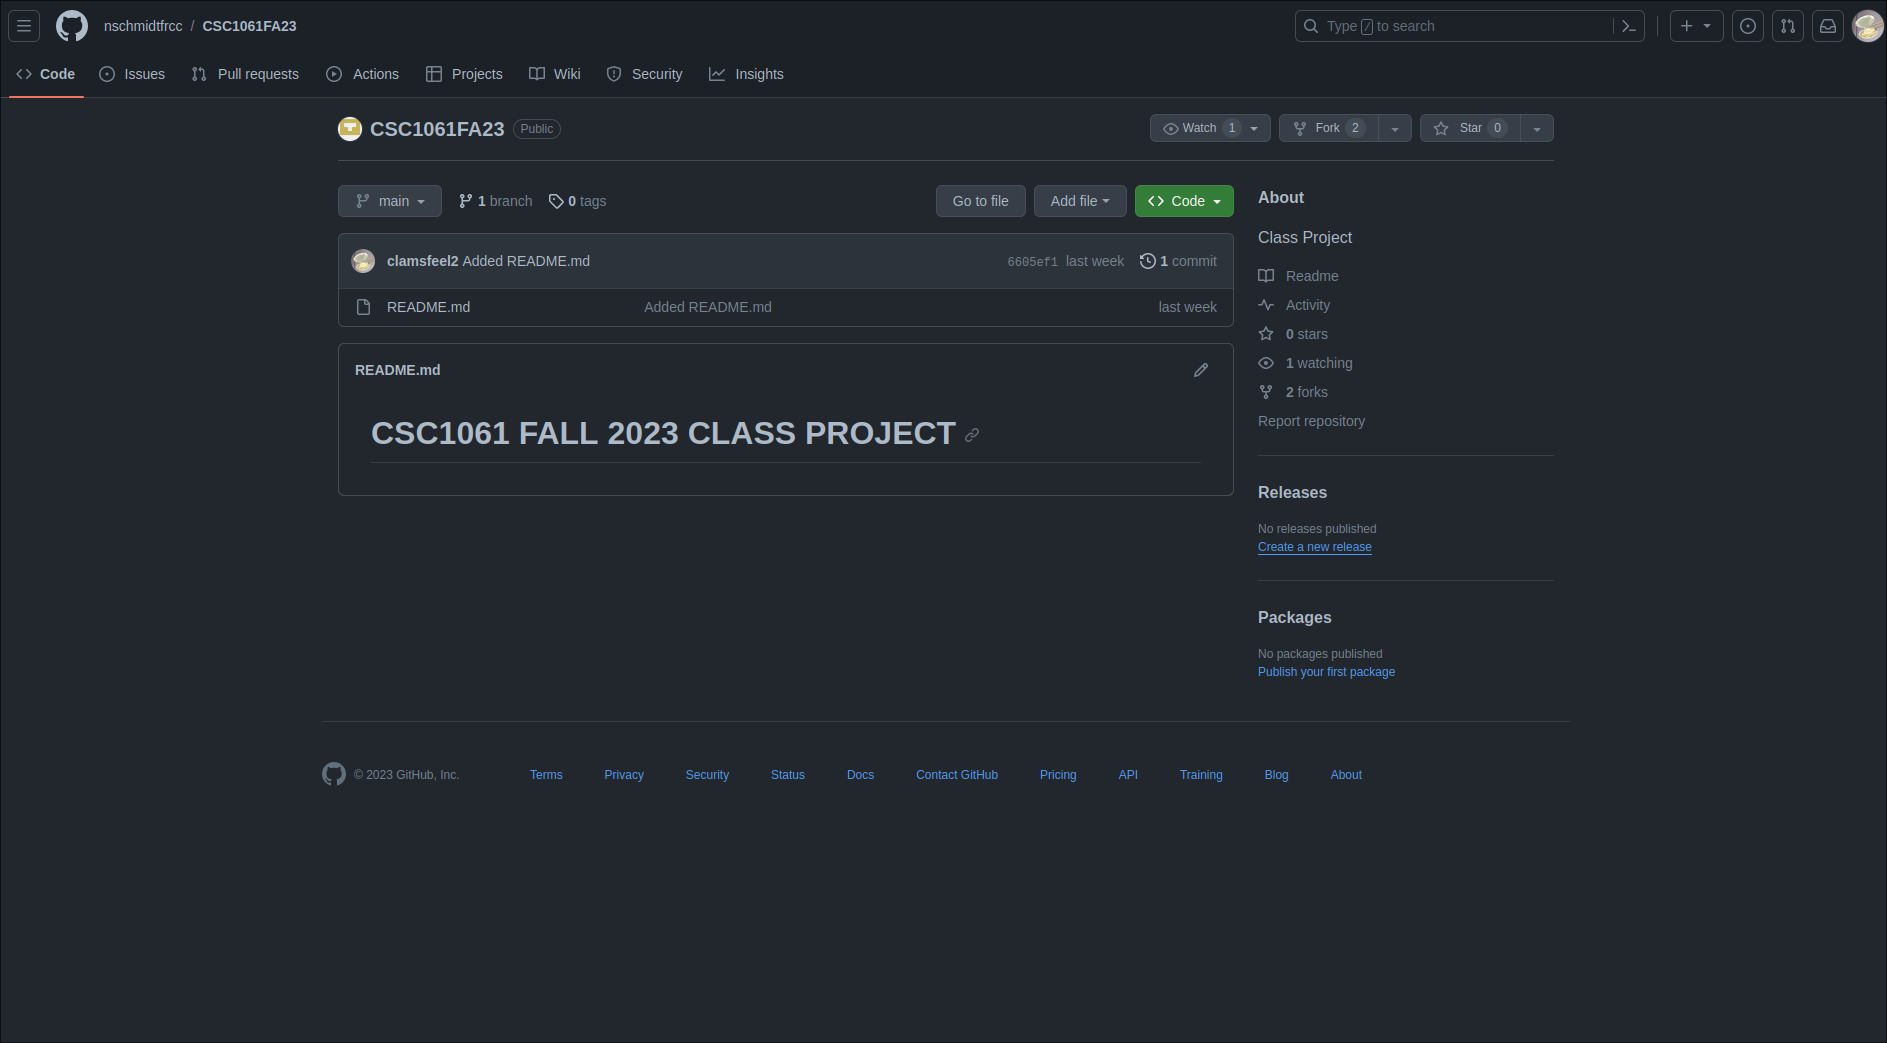
The following screen should come up:
Now navigate to the Fork button, which looks like this:
Now click the arrow directly to the right of the Fork button. Once the arrow has been pressed, you should see this:
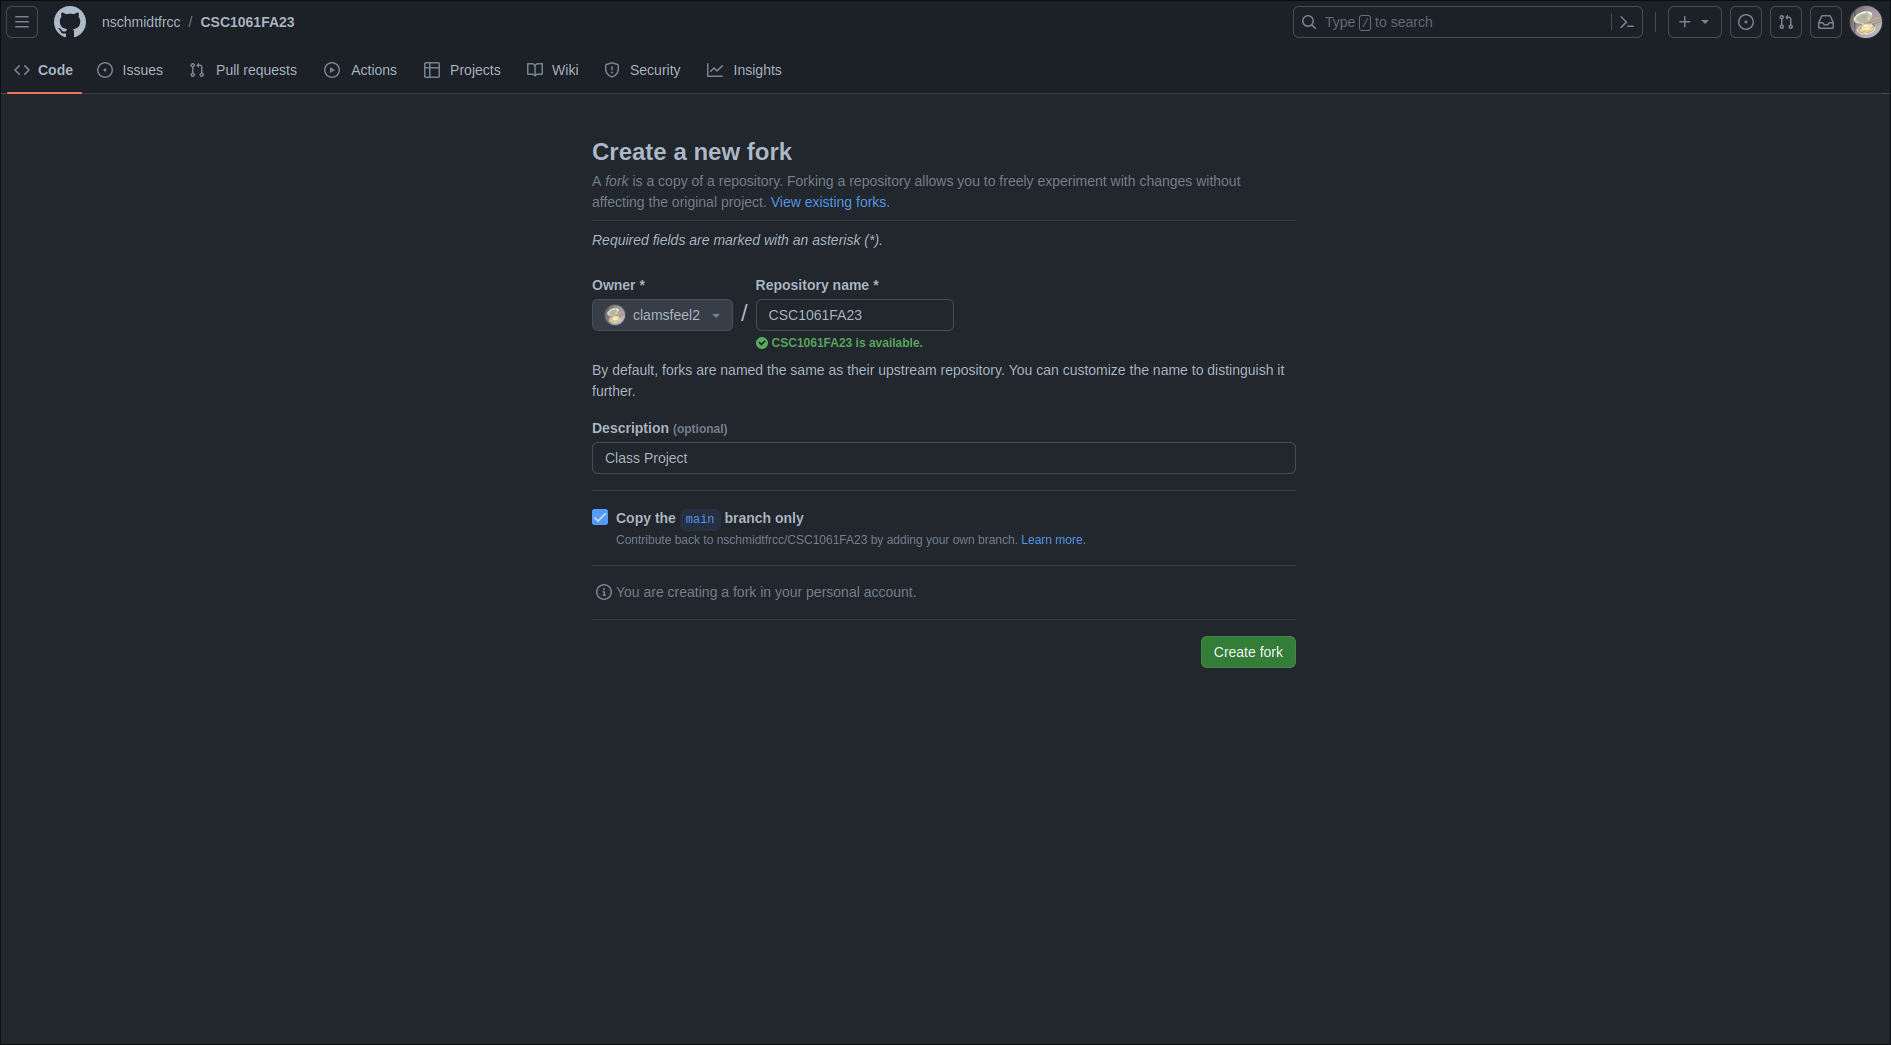
Click on the + Create a new fork. Once you do that, your screen should be looking at this:
Please change the Repository name to that of you and your group member, for example, Tanner_Van-Es--Eli_Blume. Leave everything else the same and press the Create Fork button.
Perfect! Now, you have successfully created a Fork of the main repository. This newly created Fork is where you and your partner will be working.
Before we can do anything, we must clone a copy of our new Forked repository onto our machines. First, we can create a directory to clone the repo. Type the following into PowerShell or terminal:
mkdir ClassProject
cd ClassProject
That created a new directory named ClassProject which you will work out of. We need to clone a copy of our Git repository to work directly with it. To do that, press the following code button on the front page of your newly Forked repo:
Ensure the HTTPS option is selected, then copy the link. The link should look something like this:
https://github.com/<github-username>/<forked-repo-name>.gitNow reopen the PowerShell and type in this command:
git clone <the url you copied from your Forked repo>Some IDEs will prompt you when they detect that you are in a Git repository, and if you allow the IDE, it will help abstract some of these command-line commands and run them for you through the graphical user interface. Depending on the IDE the rest of the readme might not be applicable
If you then type ls into PowerShell, you should see the name of your Forked repository. Awesome!
Now you have a local copy of the codebase on your machine, and it can be opened via your favorite IDE; navigate to the ClassProject directory like you would any directory and start the project. You can now begin freely working on your code.
The beauty of Git is its ability to share and help version our code.
Three primary levels of Git are important to understand. The local repository (the cloned Fork in your ClassProjects directory), the staging area (intermediate reviewing step before committing and pushing to your remote repository), and the remote repository (your GitHub Fork).
The local repository (local repo) is the copy of the repository on your machine (the repo we just cloned). The staging area is something we have yet to come across. After you have written some code, you can add the changes you have made to the staging area. The staging area allows the files you have changed to sit before you are ready to commit and push them into the remote repo, much like laying out the things you want to take on the bed before putting them in your suitcase.
To add modified files into the staging area so they are ready for a commit, come back to your Terminal or PowerShell window and run:
git add <filenames>You may also run:
git add .The . refers to the current directory and will add every file within your current working directory to be tracked.
Next, type the following command in PowerShell:
git commit -m "Your commit message here"It is essential that your commit message is concise and clearly explains what you have modified or added so one of your peers/group members can see what you have done. Treat your commit messages as seriously as you would inline comments.
Committing should be done semi-frequently. If you have completed a section of code and successfully got it to compile and run, make a commit!!
Finally, we can push our changes into the remote repository. To do so, run:
git push origin <forked repo name>At the start of each class you may want to sync your Forked repository with the main repository. This may be helpful if you see changes made in the main repository that you want mirrored within your Fork.
In order to do this press the Sync fork button that is located directly under the Code button you used to clone your Fork:
You should then see an option to sync the changes. After this is done, open PowerShell and run the following commands:
cd ClassProject
cd <forked repository name>
git pull
You must run git pull in order to sync any changes made from the remote repository into your local repository. You also must be inside of the directory containing the forked repository in order for the Git command to work.
If you are using an IDE, there should be an option to run git pull
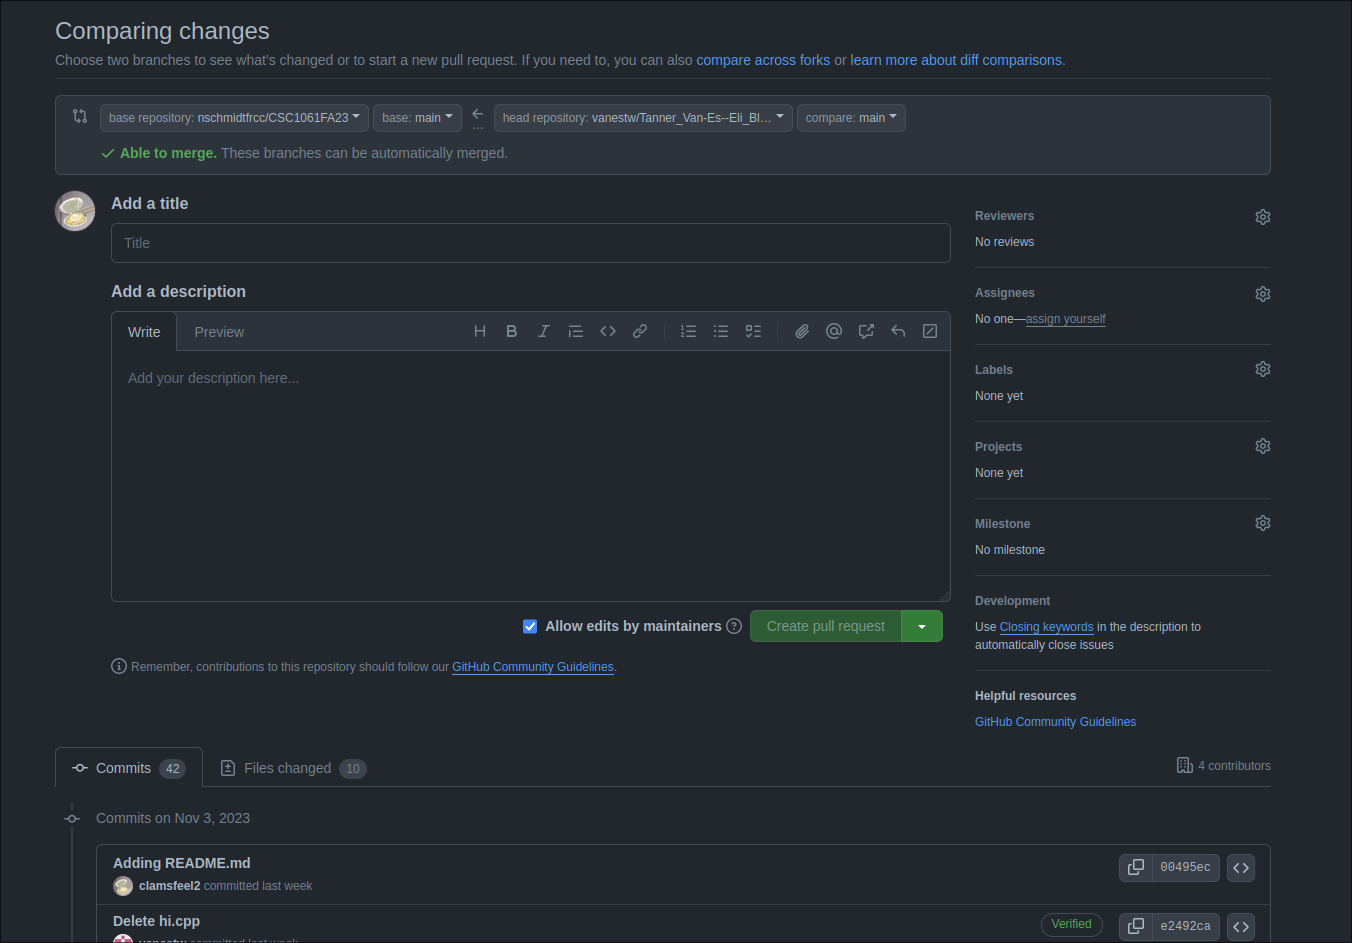
If your group feels good about the code you have written and want to "submit" it, create a pull request. In order to do that look for the Contribute button directly to the left of the Sync fork button (as seen above). This will open a new screen:
A pull request is a way for you to request that your code be pulled into the main repository. As you can see, there is space for you to add a title and a description. Also note that at the bottom of the screen it shows all the commits and files changed that are apart of this pull request.
Once you write a sufficient title and add a description explaining your code press the Create pull request button. You have successfully created a pull request thread, in which the pull request lives. From this point your code will be reviewed and any discussion, changes, or announcements regarding that pull request will happen within the thread.
If you are using your personal device you will need to install Git onto your computer. The following instructions go though those steps.
On Windows, first install Git. Then open up the program Windows PowerShell.
On Mac you will first need to install the Homebrew package manager. You can do so by opening the program Terminal and run this command:
/bin/bash -c "$(curl -fsSL https://raw.githubusercontent.com/Homebrew/install/HEAD/install.sh)"Learn more about Homebrew here
After Homebrew is installed, you need to install the Git package. To do so, just run the following command in PowerShell:
brew install git
Click here to return to instructions
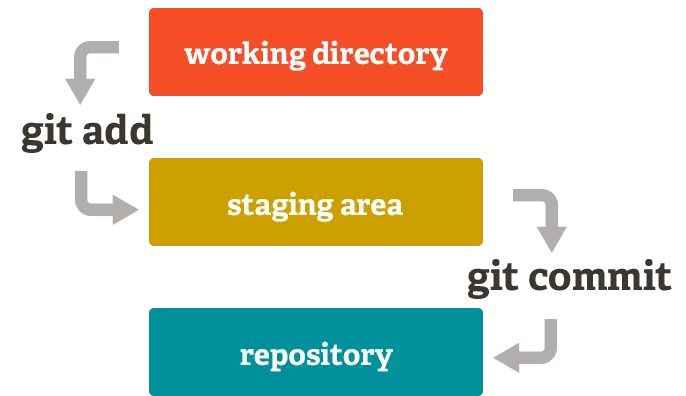
This is a very simple flowchart, but can help show what the git add and git commit commands are doing with your code:
This is a bit more complex, but shows more commands and what they are doing.
