- This is a QRCode Scanner that will submit scanning result to web-hooks of your choice.
- You can pre-define many scan-actions so that scan results will be submitted to different web-hooks.
- The app using WebRTC protocol to invoke a camera/webcam, so the app must be run with https support
- Due to technical limit, it could not be run on iPhone or iPad.
- This an WPA app that could run on a Chrome browser on Windows or Android Phone
- This app supports a pre-defined list of scanning actions, so you can quickly switch between actions.
- With the pre-defined actions, you can use the app for warehouse management, for events with multiple activities like entrance checkin, lunch checkin, exit-checkin..., or you can design games with many activity checking.
- First you need to prepare a web-hook url.
- The url must be https supported. Example: "https://192.168.x.y/path/?key=%scanValue%&activityName=checkin&key1=val1&key2=val2"
- The url is anything of your choice, the scanAgent will do replace %scanValue% with the ScanContent.
- The system behind the web-hook will receive the ScanContent as you want.
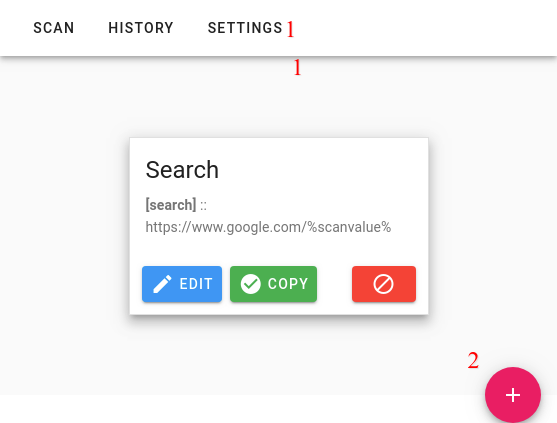
- Click on the SETTINGS tab (1)
- then Click on ADD new setting (2)
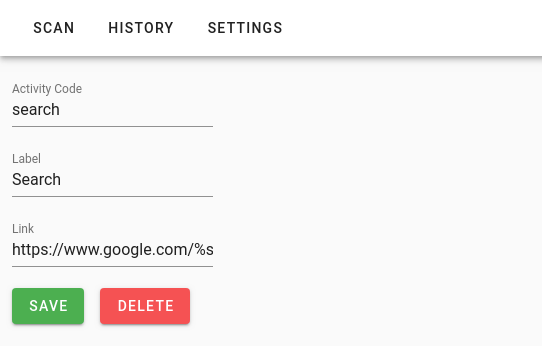
- Activity Code: the unique code for this scanning action.
- Label: the human readable label for this scanning action.
- Link: the web-hook's url will be submitted data to.
- You can repeat the Step1,2 to add as many actions as you want
- At the Step1, you can choose to edit an action.
- You have to define the same-configuration for all scanning devices. This version does not support transferring configuration between scanning devices.
- Todo: you can implement the settings-transferring using https://js.ipfs.com
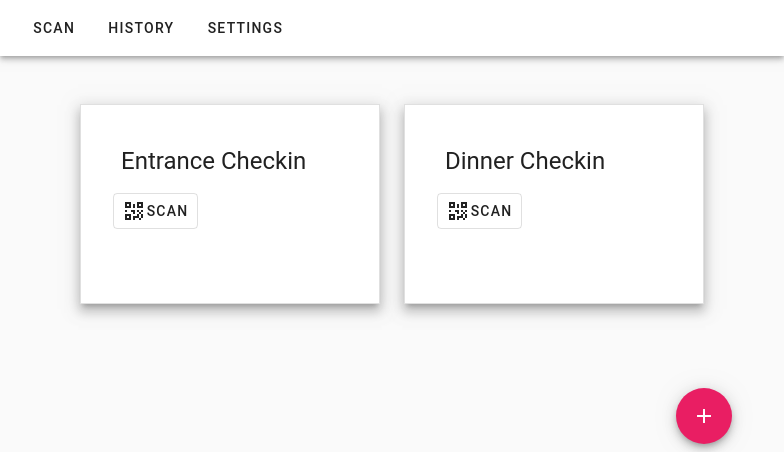
- Click on the SCAN tab.
- All pre-defined scanning actions will be listed here.
- To start a SCANNING, just click on the appropriate SCAN button.
- All scanning content will be submitted to correspondent web-hook.
- You can review the scanning history through HISTORY tab.
npm install
npm run serve
npm run build
The final build artifacts will be put in folder ./dist. You can copy artifacts in this folder on to your deployment environment.
npm run test:unit
npm run tdd:unit
npm run test:e2e
npm run tdd:e2e
npm run lint
./deploy.sh
npm install --save Alexander1984z/instascan#snyk-upgrade-29cee0455d838185d41dd3b09a18312c npm install --save vantt/instascan#1.1.1
https://cli.vuejs.org/guide/deployment.html#github-pages
https://www.qrcode.com/en/codes/microqr.html
https://github.com/cozmo/jsQR https://github.com/kig/zxing-cpp-emscripten https://github.com/zxing-js/library https://github.com/zxing-js/browser https://github.com/dlbeer/quirc http://boofcv.org/index.php?title=Tutorial_QRCodes
https://github.com/schmich/instascan https://github.com/nimiq/qr-scanner https://github.com/dynamsoft-dbr/javascript-barcode
https://filesamples.com/categories/video https://stackoverflow.com/questions/52095416/how-can-i-correctly-provide-a-mock-webcam-video-to-chrome https://stackoverflow.com/questions/31859459/how-can-i-pass-a-fake-media-stream-to-firefox-from-command-line/63312430#63312430
ffmpeg -i oldfile.mp4 newfile.mjpeg
google-chrome --use-fake-device-for-media-stream --use-file-for-fake-video-capture=newfile.mjpeg

https://trackingjs.com/examples/face_camera.html
await page.evaluate(() => {
const video = document.createElement("video");
video.setAttribute('id', 'video-mock');
video.setAttribute("src", 'https://woolyss.com/f/spring-vp9-vorbis.webm');
video.setAttribute("crossorigin", "anonymous");
video.setAttribute("controls", "");
video.oncanplay = () => {
const stream = video.captureStream();
navigator.mediaDevices.getUserMedia = () => Promise.resolve(stream);
};
document.querySelector("body").appendChild(video);
});Todo: configuration transferring between devices
-
https://www.vuemastery.com/courses/real-world-vue-js/vue-cli/
Transfer data using Animated QRCode