Tools to call an agent in DialogFlow Essential, or to create a Fullfilment
This nuget package allows you to quickly create a webhook for your DialogFlow agent
Install-Package DamienVdk.DialogFlowNetTools.FulfillmentIntentThe configuration is done in the program.cs file. The first step is to add the necessary dependencies. This is easily done through an extension method, which adds the methode AddDialogFlowFulfillment to the IServiceCollection interface.
var builder = WebApplication.CreateBuilder(args);

// Add services to the container.

builder.Services.AddControllers();
// Add services ...
builder.Services.AddDialogFlowFulfillment();
The second step is to map an endpoint that will be used by DialogFlow. As with AddDialogFlowFulfillment, a extension method UseDialogFlowFulfillment is available in the package.
var app = builder.Build();

app.UseDialogFlowFulfillment("/DialogFlow");When you create an intent in DialogFlow, you can respond to it via a fulfillment (webhook). In order to respect the Single Responsabilty Principle (SRP), the goal is to create a class by intent.
In order not to have to write a long code composed of several if/else to detect which class called according to the intent, the package can automatically find the class to call and formulate the answer based on the name of the intent.
To create a class that will create the response of an intent, it is necessary to create a class with an attribute Intent which takes as a parameter a regex expression to know to which intent the class must respond. This class must also implement the IIntentHandler interface which has a method GetResponseAsync.
This class must have a constructor with a parameter of type IServiceProvider. From the latter, you can recover all the dependencies that your class needs.
[Intent("^Hello$")]
public class HelloIntentHandler : IIntentHandler
{
    public HelloIntentHandler(IServiceProvider serviceProvider)
    {
        //_superDependency = serviceProvider.GetServices<ISuperDependency>()
    }

    public Task<WebhookResponse> GetResponseAsync(WebhookRequest request)
    {
        return Task.FromResult(new WebhookResponse() { FulfillmentText = "Hello response!" });
    }
}This package allows you to easily integrate your DialogFlow agent into your .Net application.
Install-Package DamienVdk.DialogFlowNetTools.FulfilIntegrationlmentIntentThe configuration is done in the program.cs file. The only step is to add the necessary dependencies. This is easily done through an extension method, which adds the methode AddDialogFlowIntegration to the IServiceCollection interface. This method takes an Action<DialogFlowIntegrationOption> parameter that allows you to configure the following options.
| Parameter name | Required | Description |
|---|---|---|
| ProjectId | ✔️ | Project ID in DialogFlow |
| GoogleKeyFilePath | ✔️ | Path to key file for authentication |
| DefaultLanguage | Language used by the agent to understand the text (Default: en-US) |
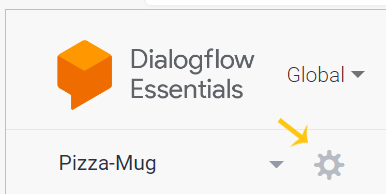
Log in to the DialogFlow console and select your agent. Then, click on the settings button.
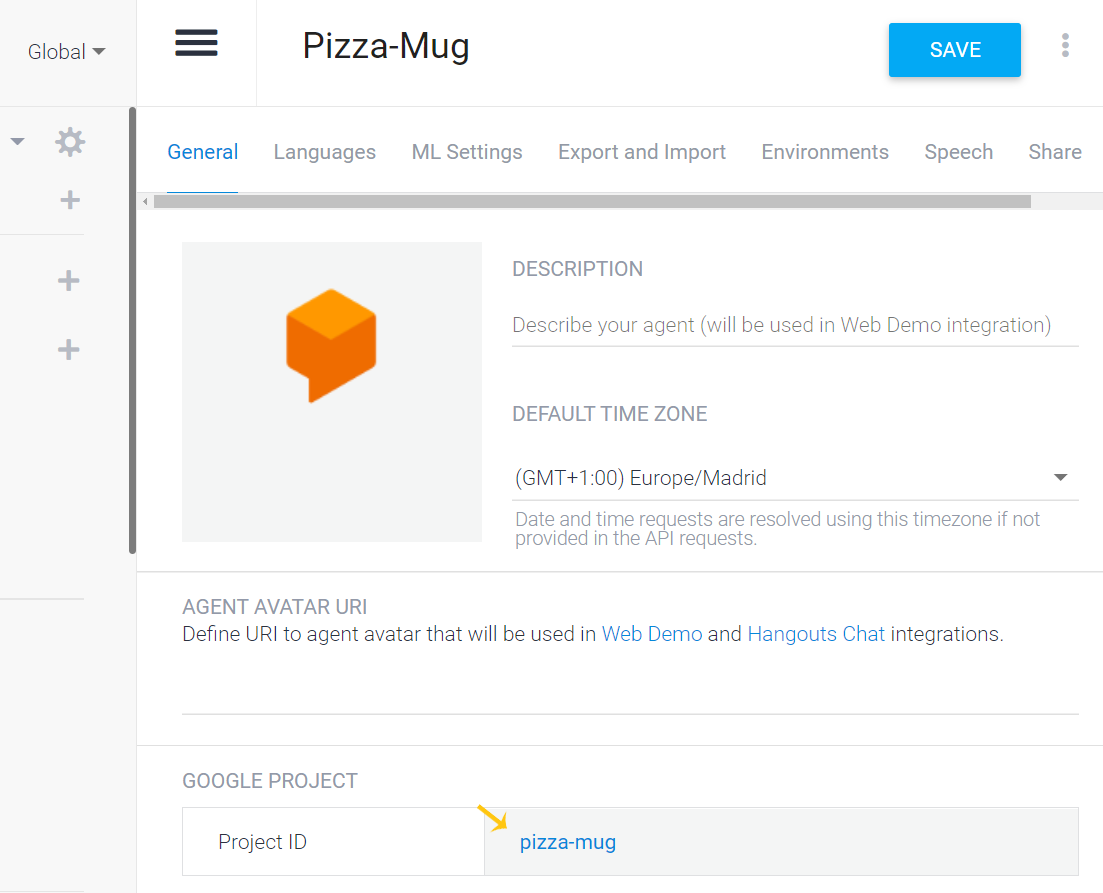
You will arrive on a page where you can get your ProjectId.
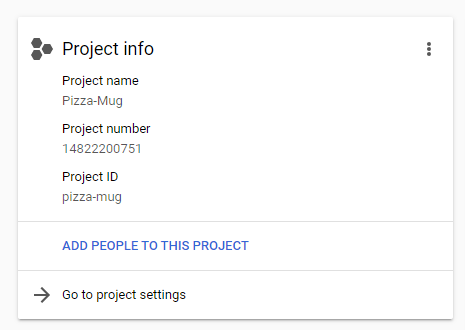
This file must be downloaded from the Google Cloud Platform. On this site, you can search for your project based on the ProjectId. Then click on Go to project settings.
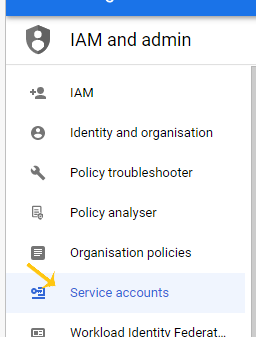
Choose the menu Service accounts
Then click on Create a service account.
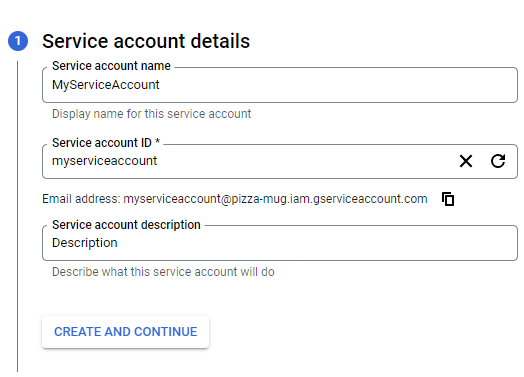
The first step is to enter your service account name, id, and description.
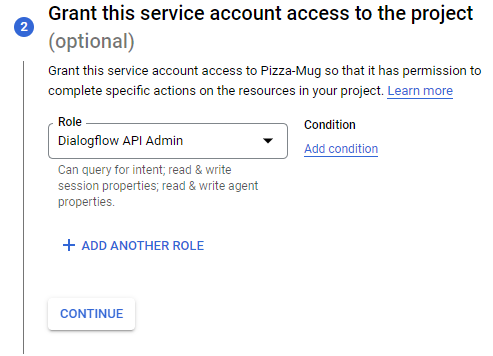
Select the role DialogFlow API admin.
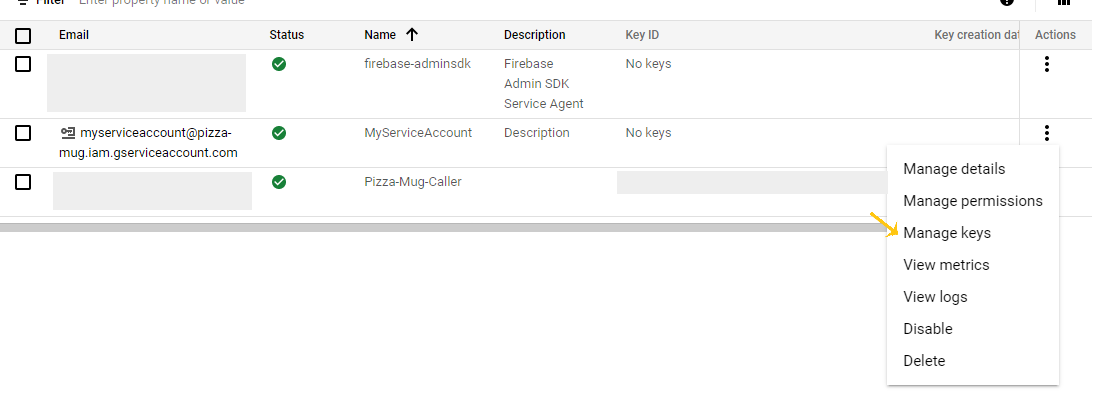
And finally click on Done. On the new page, click on the Actions button corresponding to the service account you just created, and choose the Manage keys menu
You can now click on the add key button, and select the json format to download your GoogleKey file.
Now that you have your ProjectId and GoogleKey file, you can add your dependency with the AddDialogFlowIntegration method, as shown in the code snippet below.
services.AddDialogFlowIntegration(options =>
{
    options.GoogleKeyFilePath = "pizza-mug.json";
    options.ProjectId = "pizza-mug";
    options.DefaultLanguage = "fr-FR";
});When you need to detect an intent and get a response in a class, you need to inject the IDialogFlowIntentDetecter service into your constructor.
public class MySuperClass
{
    private readonly IDialogFlowIntentDetecter _dialogFlowIntentDetecter;

    public MySuperClass(IDialogFlowIntentDetecter dialogFlowIntentDetecter)
    {
        _dialogFlowIntentDetecter = dialogFlowIntentDetecter;
    }
}
A conversation has a session name that remains the same throughout that conversation. It allows, for example, to manage contexts. I advise you to create a session name via the Guid.NewGuid().ToString(). You are free to follow this advice. This session number must be called to call the DetectIntentAsync method, which retrieves the intent name and the bot's response.
var session = Guid.NewGuid().ToString();
// Some super code
var text = Console.ReadLine();
var response =  await dialogFlowIntentDetecter.DetectIntentAsync(session, text/*, you can override default language here*/);
Console.WriteLine($"Intent : {response?.Intent?.DisplayName}");
Console.WriteLine($"Message : {response?.FulfillmentText}");You have all the keys in hand to create your super bot. Do not hesitate to create issues in case of bugs encountered, but also to give suggestions for improvements for these two nuget packages.
