During this Workshop/Blueprint you will learn the basics about proper automation of infrastructere and how to bootstrap ArgoCD. A similar Approach also applies to FluxCD.
Here is what we want to achieve:


The following services we will deploy later
- Admin Dashboard
- Basic Auth Gateway
- Storage Classes
- Elastic Stack (kibana/elasticsearch/filebeat)
- Kyverno
Please keep in mind this workshop just teaches the basics. For a proper and secure production setup please contact us at kontakt@iits-consulting.de
- Install Terraform in the Version 1.3.5. We would recommend to use the tool tfenv
- Install otc-auth. We need to it to be able to login over CLI and getting the kube config
- A proper Shell. If you are using Windows please use GitBash
- kubectl cli
- jq
- git
- Github Account
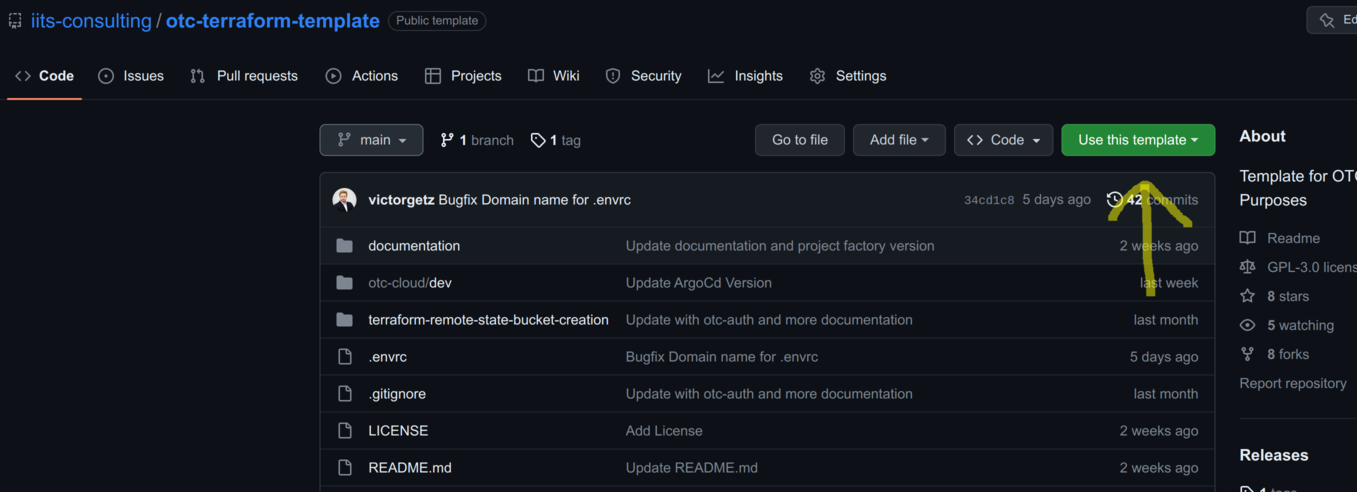
- Please go to this site: https://github.com/iits-consulting/otc-terraform-template and click on Use this template

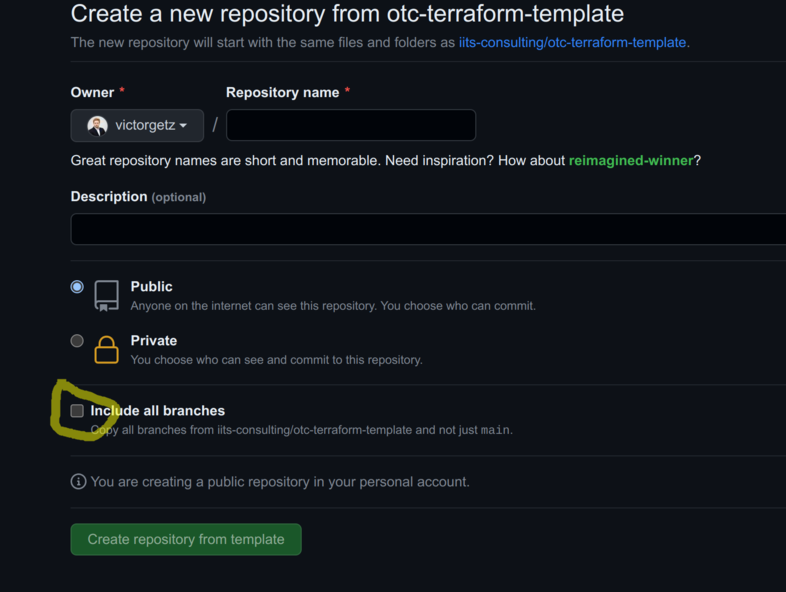
- Click on Create a new repository and then select Include all branches and private repo

-
Next step is to do the same as in Step 1 with this project: https://github.com/iits-consulting/otc-infrastructure-charts-template
-
Create now a Github Access Token of your Fork for the repo from step 2. It is needed for ArgoCD to be able to pull information from there
- Click here to do that
- Select Only select repositories and choose your fork of the infrastructure-charts
- The token should be able to see branches and pull from the repo
-
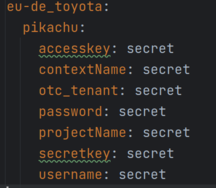
You should have got an E-Mail with your credentials the format looks like this
-
Login here: https://auth.otc.t-systems.com/authui/login.action and set a proper password
-
Docker Account
- To avoid the docker rate limit problem you need to create a docker.io account first or use your existing credentials/token. If you don't have a docker account you can create a free one here
-
Adjust the .envrc file. The .envrc is needed to set environment variables which are used by terraform or by the otc-auth cli tool
- replace all "REPLACE_ME" Placeholder with the correct values
- source the updated .envrc file like this "source .envrc"

First thing we create is a remote OBS/S3 Bucket. Within this bucket we store the current state of the OTC infrastructure which we will create.
- Go to the folder terraform-remote-state-bucket-creation and execute terraform init and apply
- The output from terraform should look like this:
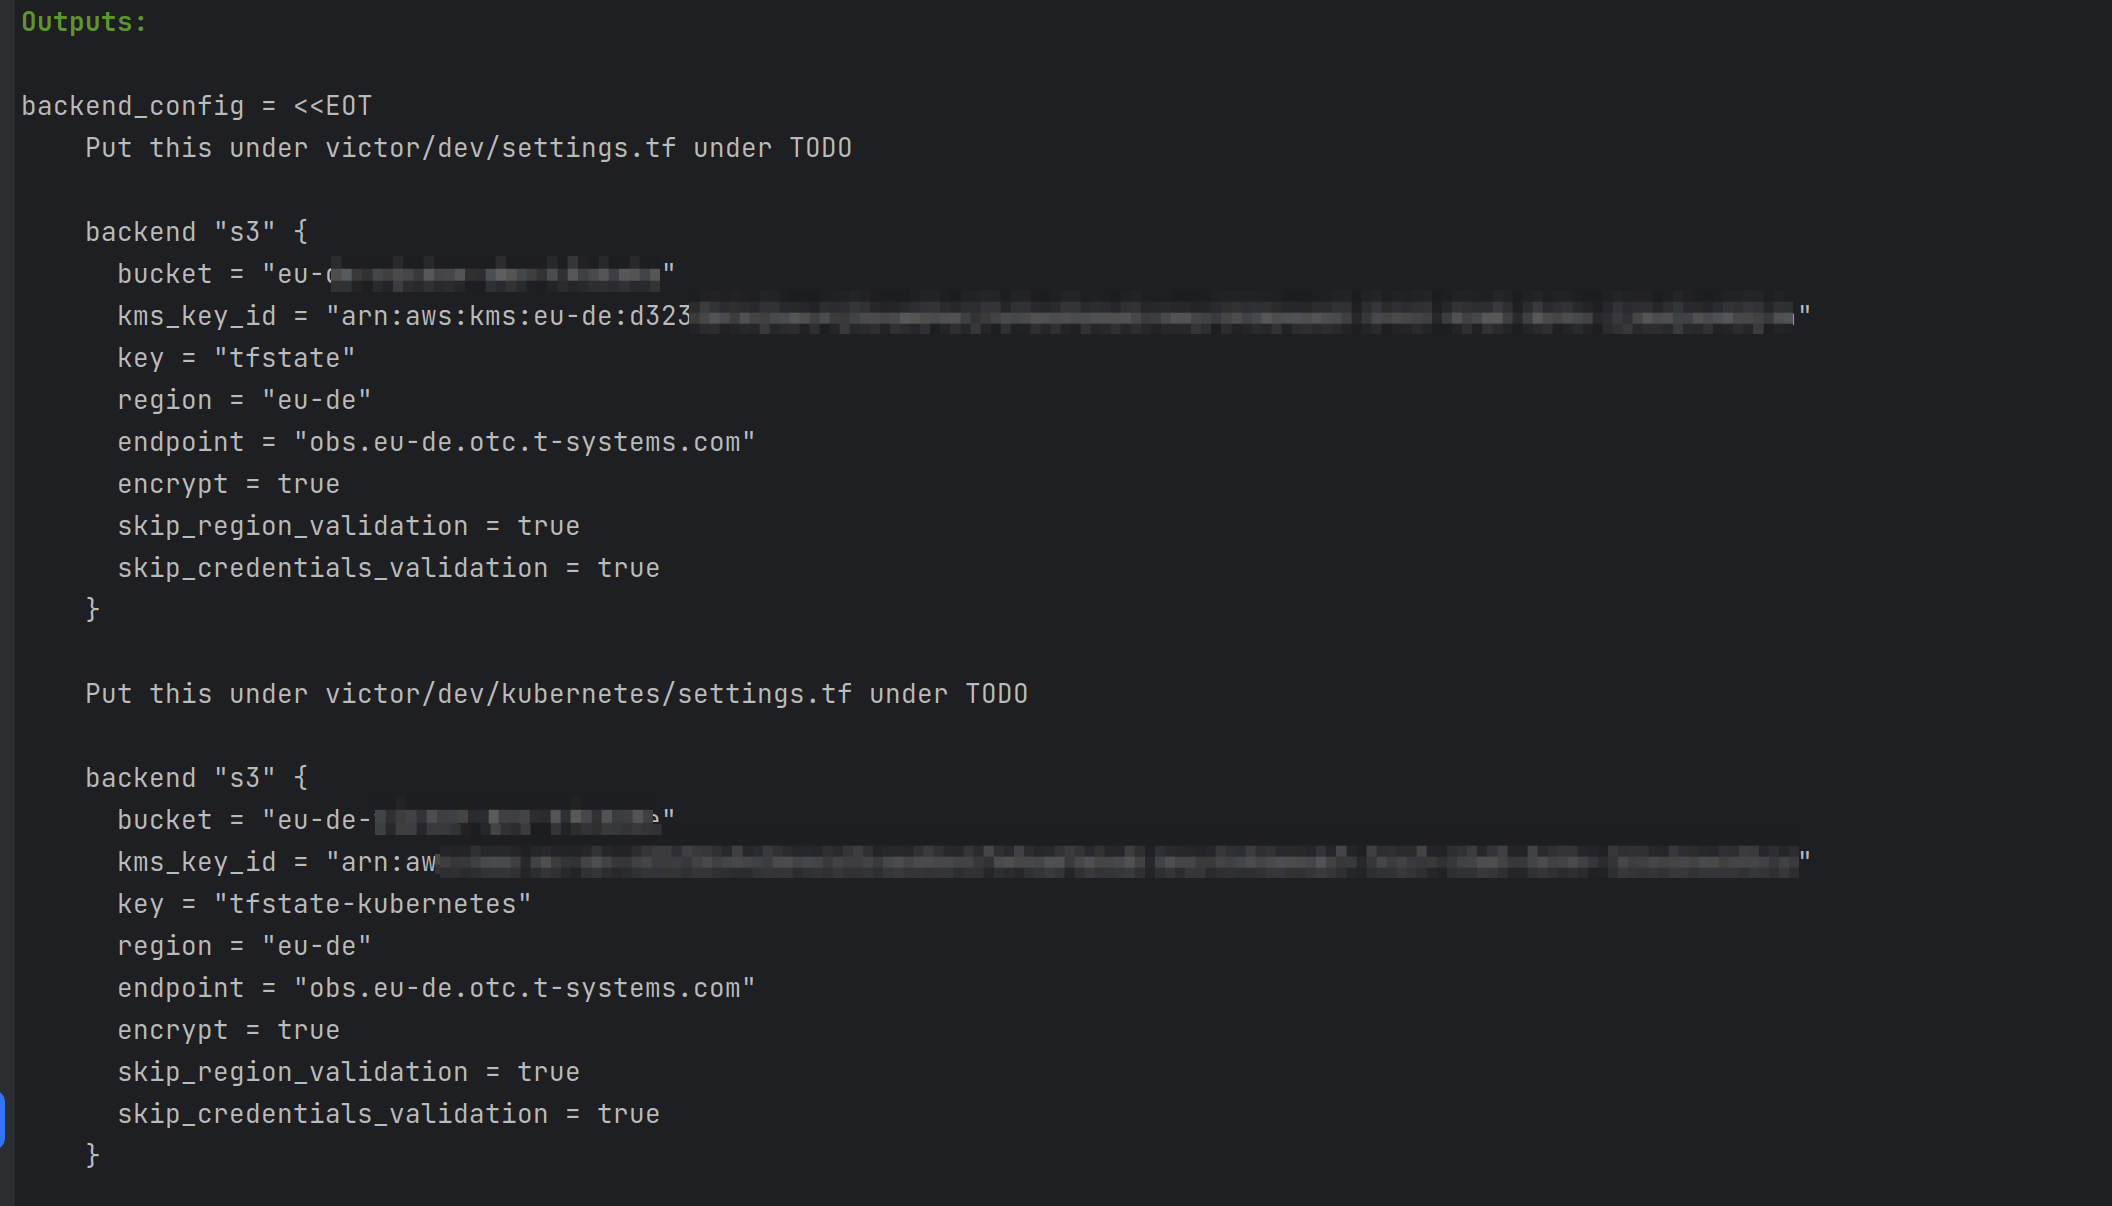
- Add the remote state configuration under:
- ./otc-cloud/dev/settings.tf
- ./otc-cloud/dev/kubernetes/settings.tf

- Go into the folder otc-cloud/dev
- Take a look at the main.tf and try to understand what we want to set up
- (Optional) Add or remove some modules from main.tf if you like
- Execute Terraform init and apply
- It will take like 10-15 Minutes till everything is up
- Check Kubernetes
-
source the file otc-cloud/dev/stage-dependent-env.sh
-
the output should look like this:

-
execute inside your cli the following command:
kubectl get nodes
-
- Check DNS
- execute inside your cli the following command:
nslookup $TF_VAR_domain_name- It should point to some 80...* Address

Congrats your infrastructure is working properly
Now we want to bring some life into our cluster. For that we will deploy everything from our Fork from the Preparation & Requirements Step 5
- Go into the folder ./otc-cloud/dev/kubernetes
- Take a look at the main.tf and try to understand what we want to achieve
- Execute Terraform init and apply
- ArgoCD should slowly start to boot and after around 3-4 Minutes it should be finished
First we will access ArgoCD over a kubectl port-forward. To do that execute the following commands in your cli:
# This command will make the argo command available
source shell-helper.sh
# Opens a tunnel to your kubernetes cluster and exposes ArgoCD under http://localhost:8080/argocd
# It will print out the Username and the Password on the first line and the browser should open automatically.
argoWe are finished with the terraform part and will switch now over to this repository: https://github.com/iits-consulting/otc-infrastructure-charts-template