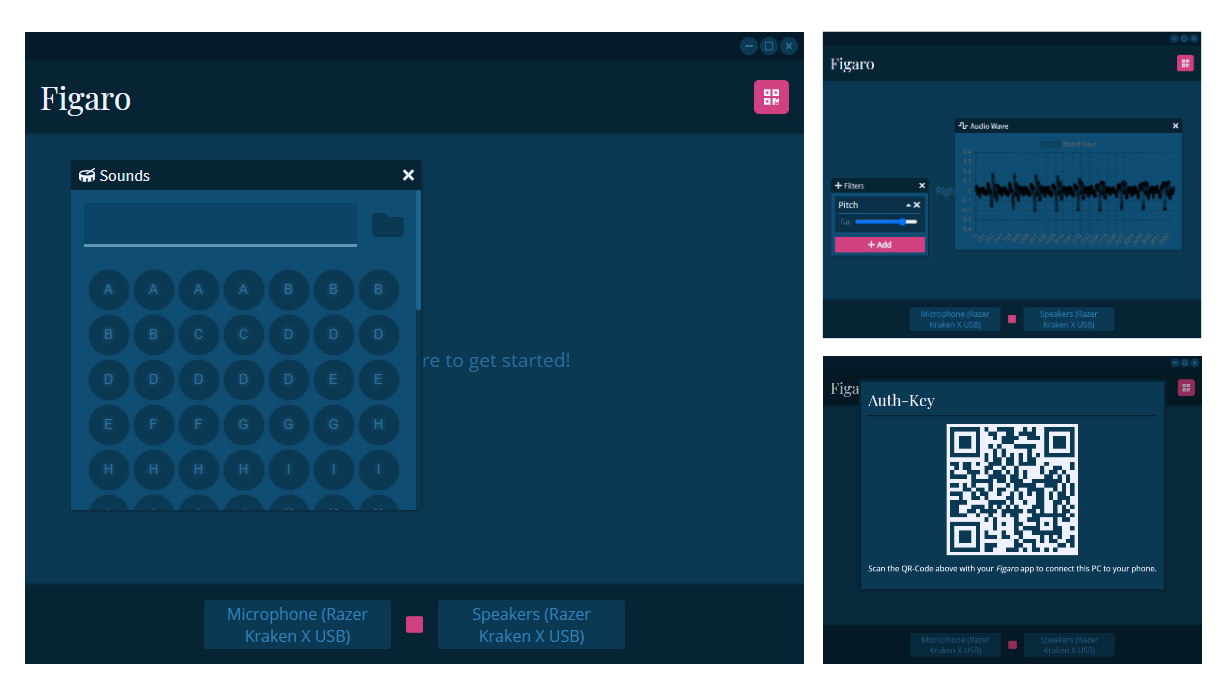
Real-time open-source voice modification program & sound board. Can be useful for many things, especially when used in combination with virtual sound i/o devices.
If you're just looking to use Figaro and not work on it, then there's no reason to set up the development environment like described below, simply download the appropriate release for your platform from the releases page and you're good to go!
If you're on Linux, Windows or Mac, then setting up should be easy! Simply run the appropriate setup script and it will guide you through the whole process.
Make ./setup.sh executable ... (or run it with an appropriate interpreter) ...
chmod 755 ./setup.sh... execute it: ./setup.sh ... and have fun with python figaro.py!
The same as the Linux Setup, just use ./setup-mac.sh instead of ./setup.sh.
First, in order to allow the setup powershell script to run, you need to execute the following command in an administrator powershell:
Set-ExecutionPolicy RemoteSigned... afterwards, executing .\setup.ps1 will guide you through the whole setup process! You can now execute python figaro.py.
First of all, for Figaro to be able to work with audio files other than wav, you need to download and install ffmpeg.
- Linux:
pip install -r requirements-unix.txt - Mac:
pip install -r requirements-unix.txt - Windows:
pip install -r requirements-windows.txt
... if you're on Windows and you get an error when installing PyAudio try downloading a PIP wheel suitable for your Python version.
If everything works out, you're good to go!
The following steps will explain how to use this program with the commonly used voice-chat application Discord on Windows:
- Download and install a virtual audio input device.
- When selecting an output device at the startup of
Figaro, choose the virtual input device you just installed (e.g.:CABLE Input). - In Discord, go to
User Settings > Voice & Video > Input Deviceand select the virtual input device from the dropdown (e.g.:CABLE Output). - There you go, your friends should only be able to hear your filtered voice now.
CLI-Usage is explained here.
GUI-Usage is explained here.
You can now also use figaro script (.fig) for defining hotkeys and their behaviour. Whether you want a sound effect to be played, or an attribute to be shown, it can all be bound to a certain keypress.
Figaro-Script was heavily inspired by AutoHotkey, so, if you are capable of defining hotkeys and their functionality with ahk-script, think of this as a very, very simplified version of that.
But, if you aren't aware of AHK, let me introduce you to the basic syntax very quickly:
Your script, the.fig file, consists of multiple hotkey-definition blocks that tell Figaro which key combinations should result in what behavior. Apart from that, you can also have comments to make your script more readable and easier to understand for future readers.
In order to define which keys make up your hotkey, you just need to write all of them in one line and end it with ::. After this first line, you write all your commands and end the definition block with return. This could look something like the following:
...

q::
start sound tmp/asdf.mp3 2
return

...
This hotkey would be triggered every time the q is pressed.
Certain control keys need alternative symbols (this is equivalent to ahk-script):
altis represented by!ctrlis represented by^shiftis represented by+
Keep in mind that the definition of hotkeys is usually case insensitive, which means in order to, for example, only trigger the hotkey on an uppercase Q, you would need to use +q:: as your definition.
This is fairly easy to explain. If you have ever used a popular programming language such as C, C++, Java, etc. you already know how to use comments. The only thing to bear in mind is that so far, I have only implemented single-line comments.
For people who have never used such a programming language before, this is the correct syntax for comments in Figaro-Script:
...

// triggered by pressing `lower-case q`
// will play the mp3 file "tmp/asdf.mp3" at 200% of the original volume ...
q::
start sound tmp/asdf.mp3 2
return

...
Despite the CLI commands, certain builtin functions are also available to you (at the moment there aren't many, but I will at more should the need to do so arise):
You can use this command in order play a sound effect, or do anything else for that matter, after waiting for a given amount of milliseconds. E.g.:
...
start sound tmp/1.mp3
pause 3000
start sound tmp/2.mp3
...
... this would play the sound effect tmp/1.mp3, wait for 3 seconds and then play the next sound effect tmp/2.mp3.
More docs coming soon! Disclaimer: Some of the commands described above might still be removed or altered...
Just a small preview of what is about to come. It's very likely that this roadmap will continue to grow in the future, as I get more ideas or if somebody wants to contribute.
- CLI
- I/O device selection
- Live status (live audio graph in console)
- Filter control
- Sound effects (soundboard-like abilities)
- GUI
- I/O device selection
- Live sound wave graph
- Filter control
- Soundboard
- Functionality
- Advanced features
- Filters
- Volume
- Pitch-Shift
- "Trippy"-Filter
- Echo
- Noise
- Crackle
- Randomized
- Figaro-Script
- Using CLI commands
- Hotkeys
- Advanced builtins
- Security
- Remote Authentication
- Encrypted sockets
- Fine-grained settings
You can find more about me and my projects on my GitHub profile.


