
This library implements a SPI driver for the ILI9341 screen controller providing the ability to display memory framebuffers onto the screen very efficiently. The following advanced features are available:
-
Differential redraws. The driver compares the framebuffer to be uploaded with the previous one and uploads only the pixels that differ. It does so in a smart way to minimize SPI transactions. Uploading only parts of the screen makes it possible to achieve very high frame rates even with low SPI speeds.
-
Asynchronous updates via DMA. Upload can be performed directly or asynchronously using DMA so the MCU is free to do other tasks - like generating the next frame - during updates.
-
adjustable framerate. The screen refresh rate can be adjusted between 40hz and 130Hz and a fixed framerate can be set within the driver. Uploads are timed to meet the requested framerate.
-
VSync and screen tearing prevention. This is the best part 😃. The driver monitors the position of the current scanline being refreshed on the screen and orders the pixel updates so that they trail behind this scanline. This makes it possible to completely suppress screen tearing in most cases.
-
Multiple buffering methods. Support direct upload and double buffering. Partial updates of the screen, with direct or deferred redraw, are also available.
-
Optimized for use with the LVGL library Easy to integrate with the lvgl library. Blazzingly fast (tear free) GUI is obtained using partial differential updates.
-
driver for a XPT2046 touchscreen. Some ILI9341 screens have an associated resistive touchscreen. The driver can also manage this touchscreen on the same SPI bus. Thus, only one (or two if using the touch interrupt) additional wires are required.
(1) This library only works with Teensy 4/4.1/Micromod.
(2) The library's sole purpose is to perform framebuffer upload from memory to the screen. It does not provide any drawing primitive. You must use another canvas library to draw directly onto the memory framebuffer. To do so, you may use my TGX library which provides optimized drawing primitives for 2D and 3D graphics.
The library can work with any SPI bus. Multiples instances of the driver can manage multiple displays on different SPI buses. A significant speedup is possible when the DC pin from the ILI9341 screen is connected to a hardware CS (chip select) capable pin on the Teensy... Yes, this requirement may seems weird at first ! In that case, the library will use the SPI FIFO and DMA to their full capabilities which increases the framerate (around 35% faster) while reducing CPU usage (by around 20%).
ADVICE: Set DC to a hardware chip select capable pin of the Teensy whenever possible (the CS pin from the screen can be connected to any pin on the Teensy, it does not matter...)
On teensy 4/4.1, one can use either SPI0 or SPI1 (SPI2 should also work but is not readily accessible and untested). Here are possible wirings in both cases:
| ILI9341 SCREEN | TEENSY 4/4.1 (SPI0) | TEENSY 4/4.1 (SPI1) | NOTE |
|---|---|---|---|
| VCC | power from +3.6V to +5.5V | ||
| GND | connects to ground, obviously | ||
| CS | PIN 9 | PIN 30 | Optional (but recommended). Any digital pin will do, 255 if not connected |
| RESET | PIN 6 | PIN29 | Optional (but recommended). Any digital pin will do, 255 if not connected |
| DC | PIN 10 | PIN 0 | Mandatory. Any pin will do but choose a CS capable pin whenever possible |
| SDI (MOSI) | PIN 11 | PIN 26 | Mandatory. Must be a MOSI hardware pin |
| SCK | PIN 13 | PIN27 | Mandatory. Must be a SCK hardware pin |
| LED | connect to +3.3V through a small resistor (50 Ohm) | ||
| SDO (MISO) | PIN 12 | PIN 1 | Required to unlock all the driver features (but if the screen has no MISO line, then set this to 255) |
Remarks
- If CS = 255, do not forget to connect the CS pin from the display (if present) to GND.
- If RST = 255, do not forget to connect the RST pin from the display to 3.3V
- If MISO = 255, then the driver cannot query the screen status/scanline and will therefore operate without vsync (but diff. updates will still be available).
- Do not connect any other device (apart from the optional XPT4046 touchscreen) on the same SPI bus.
The library can be installed directly from Arduino's or PlatformIO's library manager (search for ILI9341_T4). Alternatively, one can simply copy this git repository into arduino's /libraries subfolder.
In order to use the library, we only need to include the library's main header:
#include <ILI9341_T4.h>
Everything in the library is located under the ILI9341_T4 namespace to prevent polluting the global namespace.
First, we must create a screen driver object and set the pins connected to the display.
ILI9341_T4::ILI9341Driver tft( CS_PIN, DC_PIN, SCK_PIN, MOSI_PIN, MISO_PIN, RST_PIN, TOUCH_CS_PIN, TOUCH_IRQ_PIN);
The TOUCH_CS and TOUCH_IRQ pin should be specified only if the screen has an associated XPT2046 touchscreen on the same spi bus as the screen, otherwise, just omit the last two parameters.
Remark. The DC_PIN, SCK_PIN, MOSI_PIN, MISO_PIN are mandatory, the other ones can be set to 255. As already mentioned, use a hardware CS pin for DC whenever possible to benefit from hardware speedup.
We need at least one memory framebuffer that we will use to draw onto:
uint16_t fb[240*320]; // our memory framebuffer. The screen has size 240 x 320 with color in 16 bits - RGB565 format
Also, if we want to activate double buffering (we do!), we need another framebuffer that we will give to the driver for internal use:
DMAMEM uint16_t fb_internal[240*320]; // the 'internal' frame buffer that will be used for double buffering
The above buffer has been placed in the upper 512K (dmamem) portion of the memory to preserve the RAM in the faster lower portion (dtcm). Buffers can be placed anywhere in RAM (even in EXTMEM if external ram is present but there will be a speed penalty in that case).
Remark. Not using an internal framebuffer is possible but it will disable asynchronous and differential updates, thus removing most of the library benefit... ADVICE: always use double buffering !
When the library is working in double buffering mode, it can take advantage of the fact that the last internal buffer uploaded to the screen mirrors the screen content. Therefore, when a new framebuffer is to be uploaded, the library can quickly check which pixels have changed and only upload those. This provides a huge speed bump when only a fraction of pixels changes at each frame (which is common when displaying a user interface for instance). The library is said to use differential updates in that case. When performing differential updates, the library first creates a diff log of all the changes between the new framebuffer and the previous one. Once this is accomplished, it can overwrite the internal frame buffer containing the old frame with the new one and, when an update is needed, just read the diff to select the pixels that must be pushed onto the screen. Updates can be carried away asynchronously while the user code draws the next frame.
So, in order to store the diff log, we must allocate some memory for a diff buffer which is an object that stores diff logs:
ILI9341_T4::DiffBuffStatic<4096> diff1; // a first diff buffer with 4K memory (statically allocated)
ILI9341_T4::DiffBuffStatic<4096> diff2; // and a second one.
The template parameter above specifies the size (in bytes) of the buffer. It should range from 1K to 10K depending on the kind of content displayed. The method diff1.printStats() can be used to check the diff buffer memory consumption at runtime to help choose its correct size.
Remark. You can set either 0, 1 or 2 diff buffers. Not providing any diff buffer will disable differential updates. On the other hand, providing 2 diff buffers allows the driver to compute the new diff while the previous one is currently in use for an upload and thus provides a nice speed bump. ADVICE: always use two diff buffers !.
The constructor of the main ILI9341Driver object tft does not initialize anything. We must do that when ready by calling the ubiquitous arduino begin() method (usually within setup()) like so:
void setup()
  {
  ...
  if (!tft.begin(SPI_WRITE_SPEED, SPI_READ_SPEED))
      Serial.print("ouch !")
  ...
This method returns true if the screen was correctly initialized. Note that there is no corresponding end() method so begin() should normally be called only once (but it can still be called again to issue a hard reset). The SPI_WRITE_SPEED and SPI_READ_SPEED parameters can be omitted so default speeds for write/read SPI will be used. The SPI read speed does not really matter and should not be changed. On the other hand, the maximum possible framerate is proportional to the SPI write speed so it should be set as high as possible while still keeping a stable connexion. With short wires, many displays will easily accept speeds upward of 60Mhz...
There are 4 possible orientations for the display (matching, of course, to the four physical orientations). Each one is obtained from the previous one by rotating the screen 90 degrees clockwise. Orientation 0 and 2 are in portrait mode 240x320 whereas orientation 1 and 3 are in landscape mode 320x240. In all cases, the framebuffer layout is in row-major format: if the screen has size LX x LY, then
Pixel(i , j) = framebuffer[ LX * j + i] with 0 ≤ i < LX and 0 ≤ j < LY.
The "natural" orientation is orientation=0 for which the pixels in the framebuffer are ordered the same way that they are refreshed on the screen. This orientation will give the best possible upload rate and should be favored if possible.
To set the screen orientation, use the method setRotation():
tft.setRotation(0); // use orientation 0 (portrait mode 240x320)
To activate double buffering, we must register the internal framebuffer previously created like so:
tft.setFramebuffer(fb_internal); // registers the internal framebuffer
The method can be called again to change the buffering mode on the fly. Calling this method without a parameter removes the current internal framebuffer (and the drivers switches to the inefficient direct upload mode).
To enable differential updates, we must also register the diff buffers:
tft.setDiffBuffers(&diff1, &diff2); // registering the 2 diff buffers. This activates differential update mode
Note that, without an internal framebuffer, differential updates cannot be performed so any registered diff buffers will be ignored (until an internal framebuffer is set). Whenever an internal framebuffer and at least 1 diff buffer are registered, differential updates are automatically enabled. As mentioned before: always favor 2 diffs buffers instead of 1 !
The refreshrate is the number of times per second that the display redraws the pixels on the screen. Each screen refresh starts from the top-left corner and progresses along horizontal lines toward the bottom-right corner (with the display held in 240x320 portrait orientation mode 0). The row of pixels currently being refreshed is referred to as the scanline.
The framerate on the other hand is the number of times the screen content is actually updated by the driver every second. When pixel upload and pixel refresh are not synchronized, we end up with the screen displaying part of the old and the new frame simultaneously which create a visual defect called screen tearing.
In order to prevent this, the driver keeps track of the refresh times and tries to upload pixels trailing behind the scanline. However, if the upload rate is much slower than the refresh rate, then the scanline will still eventually catch up with the pixels being uploaded and screen tearing will occur. In order to get prevent visual artifact and insure a stable framerate, the following two conditions should be met:
- The time to upload a whole frame must take no longer than 2 refresh periods.
- The framerate must divide the refreshrate (ie framerate=refreshrate/N for some positive integer N).
The first condition depends heavily on the SPI speed. For example, with SPI set at 60Mhz, it is possible to upload up to 45 full frames per second. Being cautious, we can set a refresh rate at 80Hz and a framerate at 40Hz = (80/2) to obtain tear free frames on the screen. However, this computation is a worst case scenario: for most usage, differential updates boost the upload speed tremendously so it is often possible to get "tear free" display at 60Hz framerate (and 120Hz refresh rate) with only 20Mhz SPI speed !
The refresh rate is set with the setRefreshRate() method:
tft.setRefreshRate(120); // set the display refresh rate around 120Hz
The exact refresh rate varies from display to display. The driver will select the closest refresh rate available for this particular display. The actual refresh rate can subsequently be queried with the getRefreshRate() method.
Now, we must tell the driver the actual framerate/vsync method that we want. This is done with the tft.setVsyncSpacing() method. It takes as input a vsync_spacing parameter (what a surprise!) which has the following meaning:
-
vsync_spacing = -1. Do not synchronize display updates with screen refreshes (no vsync). Each new frame is drawn immediately onto the screen or saved into the internal framebuffer to be drawn asap if there is already an update in progress. If the internal framebuffer is in use, the frame is simply dropped... -
vsync_spacing = 0. Do not synchronize display updates with screen refreshes (no vsync). Each new frame is drawn immediately onto the screen or saved into the internal framebuffer to be drawn asap if there is already an update in progress. If the internal framebuffer is in use, the method waits for a buffer to become available before returning (same as above but no frame is ever dropped). -
vsync_spacing = N > 0. Synchronize uploads with screen refreshes to mitigate screen tearing. Perform upload every N screen refreshes so that the actual framerate is equal to framerate=refreshrate/N (provided, of course, that frames are pushed fast enough to the driver to achieve this rate).
In practice, vsync_spacing=-1 will give the fastest apparent framerate but will usually provide very poor visual quality. Setting vsync_spacing=-0 will give slightly better results (but still with screen tearing) and still leaves the responsibility to the user of setting a stable framerate by pushing frames at regular intervals... In most cases, the best choice is to set vsync_spacing = 2 and then adjust the refresh rate so that uploads can be performed at refreshrate/2 FPS... Using vsync_spacing = 1 should be reserved for drawing very simple frames which can be uploaded very quickly onto the screen (in less than a refresh period). Using vsync_pacing >= 3 can be used to artificially reduce the framerate but I do not know of a really compelling reason to do so.
So, we select the framerate and vsync mode with:
tft.setVSyncSpacing(2); // enable vsync and set framerate = refreshrate/2 (typical choice)
That's it, the driver's configuration is now complete and we can start displaying frames !
The method update() is used to push a framebuffer onto the screen:
tft.update(fb); // push our memory framebuffer fb to be displayed on the screen
What actually happens when the method is called depends on the buffering and vsync mode but, as a general rule, the method will try to return to the caller as soon as possible. It will use its internal framebuffer (if present) to save a copy of fb and return while uploading the frame asynchronously via DMA. So, when the method returns, fb may, or not, already be displayed on the screen but, in any case, the framebuffer can be immediately reused for drawing the next frame, changing its content will not affect the display on the screen !.
Putting everything together. A simple code for drawing an animation on the screen should look something like this:
#include <ILI9341Driver.h>

// this is the main screen driver object.
ILI9341_T4::ILI9341Driver tft(CS_PIN, DC_PIN, SCK_PIN, MOSI_PIN, MISO_PIN, RST_PIN, TOUCH_CS_PIN, TOUCH_IRQ_PIN);

uint16_t fb[240*320]; // our memory framebuffer. The screen has size 240 x 320 with color in 16 bits - RGB565 format.

DMAMEM uint16_t fb_internal[240*320];  // the 'internal' frame buffer

ILI9341_T4::DiffBuffStatic<4096> diff1; // a first diff buffer with 4K memory (statically allocated)
ILI9341_T4::DiffBuffStatic<4096> diff2; // and a second one


void draw_something_onto(uint16_t * fb)
  {
  ...
  // here we must add the code that does the drawing on the memory framebuffer.
  ...
  }


void setup()
  {
  tft.output(&Serial); // info/warning/error messages should be sent to Serial.

  while(!tft.begin(SPI_WRITE_SPEED, SPI_READ_SPEED)); // intialization

  tft.setRotation(0);                  // use orientation 0 : portrait mode 240x320
  tft.setFramebuffer(fb_internal);     // register the internal framebuffer: this activates double buffering
  tft.setDiffBuffers(&diff1, &diff2);  // registers 2 diff buffers: this activates differential updates
  tft.setRefreshRate(120);             // set the display refresh rate around 120Hz
  tft.setVSyncSpacing(2);              // enable vsync and set framerate = refreshrate/2 = 60Hz (typical choice)
  }


void loop()
  {
  draw_something_onto(fb);             // draw the next frame onto fb
  tft.overlayFPS(fb);                  // optional: draw the current FPS on the top right corner of the framebuffer
  tft.update(fb);                      // push the framebuffer to  the screen. That's it !
  }
Complete examples can be found in the /examples sub-directory of the library.
-
The
output(Stream * ). By default, the driver is completely silent. To output debug/error messages, you can provide a pointer to the Stream object to use (for example&Serial) Setting the stream pointer tonullptrdisables all messages. -
The
setDiffGap()method. When using differential updates, the driver tries to be smart and find a compromise between skipping unchanged pixels but also not fragmenting spi transactions too much because issuing a re-positioning commands also takes times. To adjust this behaviour, thesetDiffGap()can be used to specify the number of consecutive unchanged pixels required to break a spi transaction. Typical value should range between 3 and 40. Smaller gaps can provide a speed bump but will require larger diff buffers (possibly up to 10K when using a gap of size 4). It is possible to get statistics on diff buffer memory consumption with theprintStats()method. If the diff buffer overflows too often, its size should be increased. -
Disabling differential update for a given frame. Differential updates are beneficial in most cases unless almost all pixels change in the frame. In this case, there will be no increase in upload speed. Yet, calculating the diff log takes around 300us to 1ms of CPU time per frame. When using two diff buffers, this computation is done during DMA transfer so it will not slow down the framerate but it can still be beneficial to skip this computation if you already know for sure that the diff will be mostly trivial. You can tell the driver to upload the full frame as is, without computing the diff, by setting the second (facultative) parameter in the update method to true:
tft.update(fb, true); // fb will be uploaded without computing the diff (but just for this upload).
-
Printing statistics. Several methods are available to provide detailed statistics about the performance of the driver. All these methods take the form
statsXXX. Also, there is a very convenient method for debugging/optimization callprintStats()that will print out all the statistics of the driver onto the output stream (set with theoutput()method). -
Drawing text on the framebuffer The
overlayText()method can be used to draw some text onto the framebuffer. This is useful for displaying basic informations or debugging. Similarly, the methodoverlayFPS()draws the current instantaneous framerate onto a given framebuffer. Both methodsoverlayText()andoverlayFPS()are typically called just before callingupdate(). -
diff buffer and memory allocation. The library performs no memory allocation. All the memory needed (framebuffer and diff buffers) are to be provided by the user which keeps complete control over memory allocation. For diff buffers, the
StaticDiffBuffer<>template class provides a convenient way to create diff buffers with statically allocated memory. However, if more control is needed, one can use the baseDiffBufferclass which is similar but requires the user to provide the memory space at construction time. See the fileDiffBuff.hfor additional details. -
Getting information, additional methods. There are several other methods that can be used to fine tune the driver performance. In particular:
resync(),setDiffCompareMask,setLateFrameRatio()... Details about these methods (and more) can be found in the header file ILI9341Driver.h. Each method has a detailed docstring above its declaration explaining its purpose. -
Using the touchscreen. If a touchscreen is present and connected to the same spi bus, then additional methods become available to read the touch screen status.
lastTouched()will return the number of milliseconds elapsed since the screen was last touched (only available if the touch_irq pin is set). ThereadTouch()method will return the currently touched position and pressure. Finally, 'calibrateTouch()' provides an interactive method to calibrate the touchscreen andsetTouchCalibration()can subsequently be used to load calibration data at the beggining of a script.
The wiring for the touchscreen should be such that:
| ILI9341 SCREEN | TEENSY 4/4.1 |
|---|---|
T_CLK |
same pin on the Teensy as SCK |
T_CS |
any available digital pin |
T_DIN |
same pin on the Teensy as SDI (MOSI) |
T_DO |
same pin on the Teensy as SDO (MISO) |
T_IRQ |
(optional) any available digital pin |
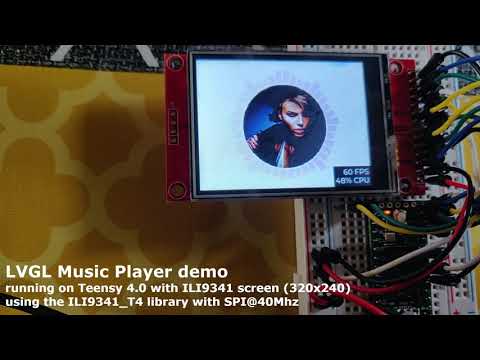
- Last but not least: drawing things on the frame buffer. The library itself provides no drawing primitive. It simply pushes/mirror a memory frame buffer onto the screen. You can draw on the framebuffer directly 'by hand' or use any library you wish to do so... If you want a lightweight, fast, full featured 2D and 3D graphics library optimized for microcontrollers, you should check out my tgx library 😃. If you want to create a GUI, you can use the powerful LVGL library. It can be easily combined with ILI9341, c.f. this example and this one.
-
This library was inspired by Kurte's ILI93451_t3n library which is where I learned all the 'fun' stuffs about DMA and SPI low level configuration...
-
The code for driving the touchscreen is borrowed from Paul Stoffregen's XPT2046 touch screen library.