Clarinet is a Clarity runtime packaged as a command line tool, designed to facilitate smart contract understanding, development, testing and deployment. Clarinet consists of a Clarity REPL and a testing harness, which, when used together allow you to rapidly develop and test a Clarity smart contract, with the need to deploy the contract to a local devnet or testnet.
Clarity is a decidable smart contract language that optimizes for predictability and security, designed by Blockstack. Smart contracts allow developers to encode essential business logic on a blockchain.
brew install clarinetThe easiest way to install Clarinet on Windows is to use the MSI installer, that can be downloaded from the releases page.
Clarinet is also available on Winget, the package manager that Microsoft started including in the latest Windows updates:
winget install clarinetTo install Clarinet from pre-built binaries, download the latest release from the releases page.
Unzip the binary, then copy it to a location that is already in your path, such as /usr/local/bin.
unzip clarinet-linux-x64.zip -d .
chmod +x ./clarinet
mv ./clarinet /usr/local/bin
On MacOS, you may get security errors when trying to run the pre-compiled binary. You can resolve the security warning with with command
xattr -d com.apple.quarantine /path/to/downloaded/clarinet/binaryInstall Rust for access to cargo, the Rust package manager.
On Debian and Ubuntu-based distributions, please install the following packages before building Clarinet.
sudo apt install build-essential pkg-config libssl-devYou can build Clarinet from source using Cargo with the following commands:
git clone git@github.com:hirosystems/clarinet.git --recursive
cd clarinet
cargo install --path . --lockedThe following sections describe how to create a new project in Clarinet and populate it with smart contracts. Clarinet also provides tools for interacting with your contracts in a REPL, and performing automated testing of contracts.
Once installed, you can use clarinet to create a new project:
clarinet new my-project && cd my-projectClarinet will create a project directory with the following directory layout:
.
├── Clarinet.toml
├── README.md
├── contracts
├── settings
│   └── Devnet.toml
│   └── Testnet.toml
│   └── Mainnet.toml
└── tests
The Clarinet.toml file contains configuration for the smart contracts in your project. When you create contracts in
your project, Clarinet will add them to this file.
The settings/Devnet.toml file contains configuration for accounts in the Clarinet console, including the seed
phrases and initial balances. Initial balances are in microSTX.
Clarinet can handle adding a new contract and its configuration to your project with the following command:
$ clarinet contract new bbtcClarinet will add 2 files to your project, the contract file in the contracts directory, and the contract test file
in the tests directory.
.
├── Clarinet.toml
├── README.md
├── contracts
│   └── bbtc.clar
├── settings
│   └── Devnet.toml
│   └── Mainnet.toml
│   └── Testnet.toml
└── tests
    └── bbtc_test.ts
Clarinet will also add configuration to the Clarinet.toml file for your contract. You add entries to the depends_on
field for each contract to indicate any contract dependencies a particular contract may have. This can be useful for
contracts that implement standard traits such as for fungible tokens.
[project]
name = "my-project"
requirements = []

[contracts.bbtc]
path = "contracts/bbtc.clar"
depends_on = []
You can add contracts to your project by adding the files manually, however you must add the appropriate configuration
to Clarinet.toml in order for Clarinet to recognize the contracts.
Clarinet provides a syntax checker for Clarity. You can check if your Clarity code is valid with the command:
$ clarinet checkIf the Clarity code is valid, the command will return no output. If there are errors in the code, the output of the command will indicate where the errors are present.
Clarinet provides a testing harness based on Deno that can allow you to create automated unit tests or pseudo-integration tests using Typescript. Create tests in the appropriate test file, then execute them with the command:
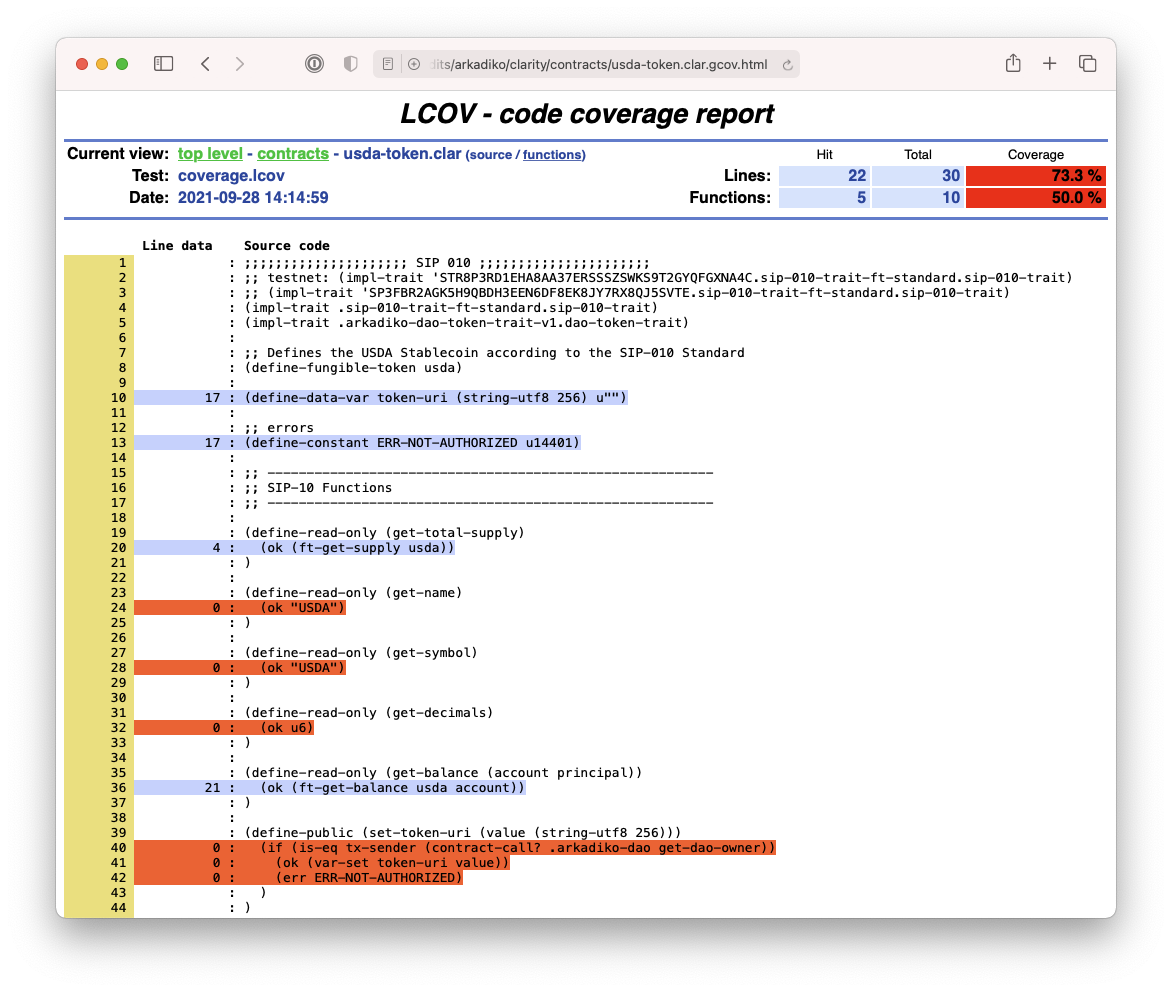
$ clarinet testTo help developers maximizing their test coverage, Clarinet can produce a lcov report, using the following option:
$ clarinet test --coverageFrom there, developers can use the lcov tooling suite to produce HTML reports:
$ brew install lcov
$ genhtml coverage.lcov
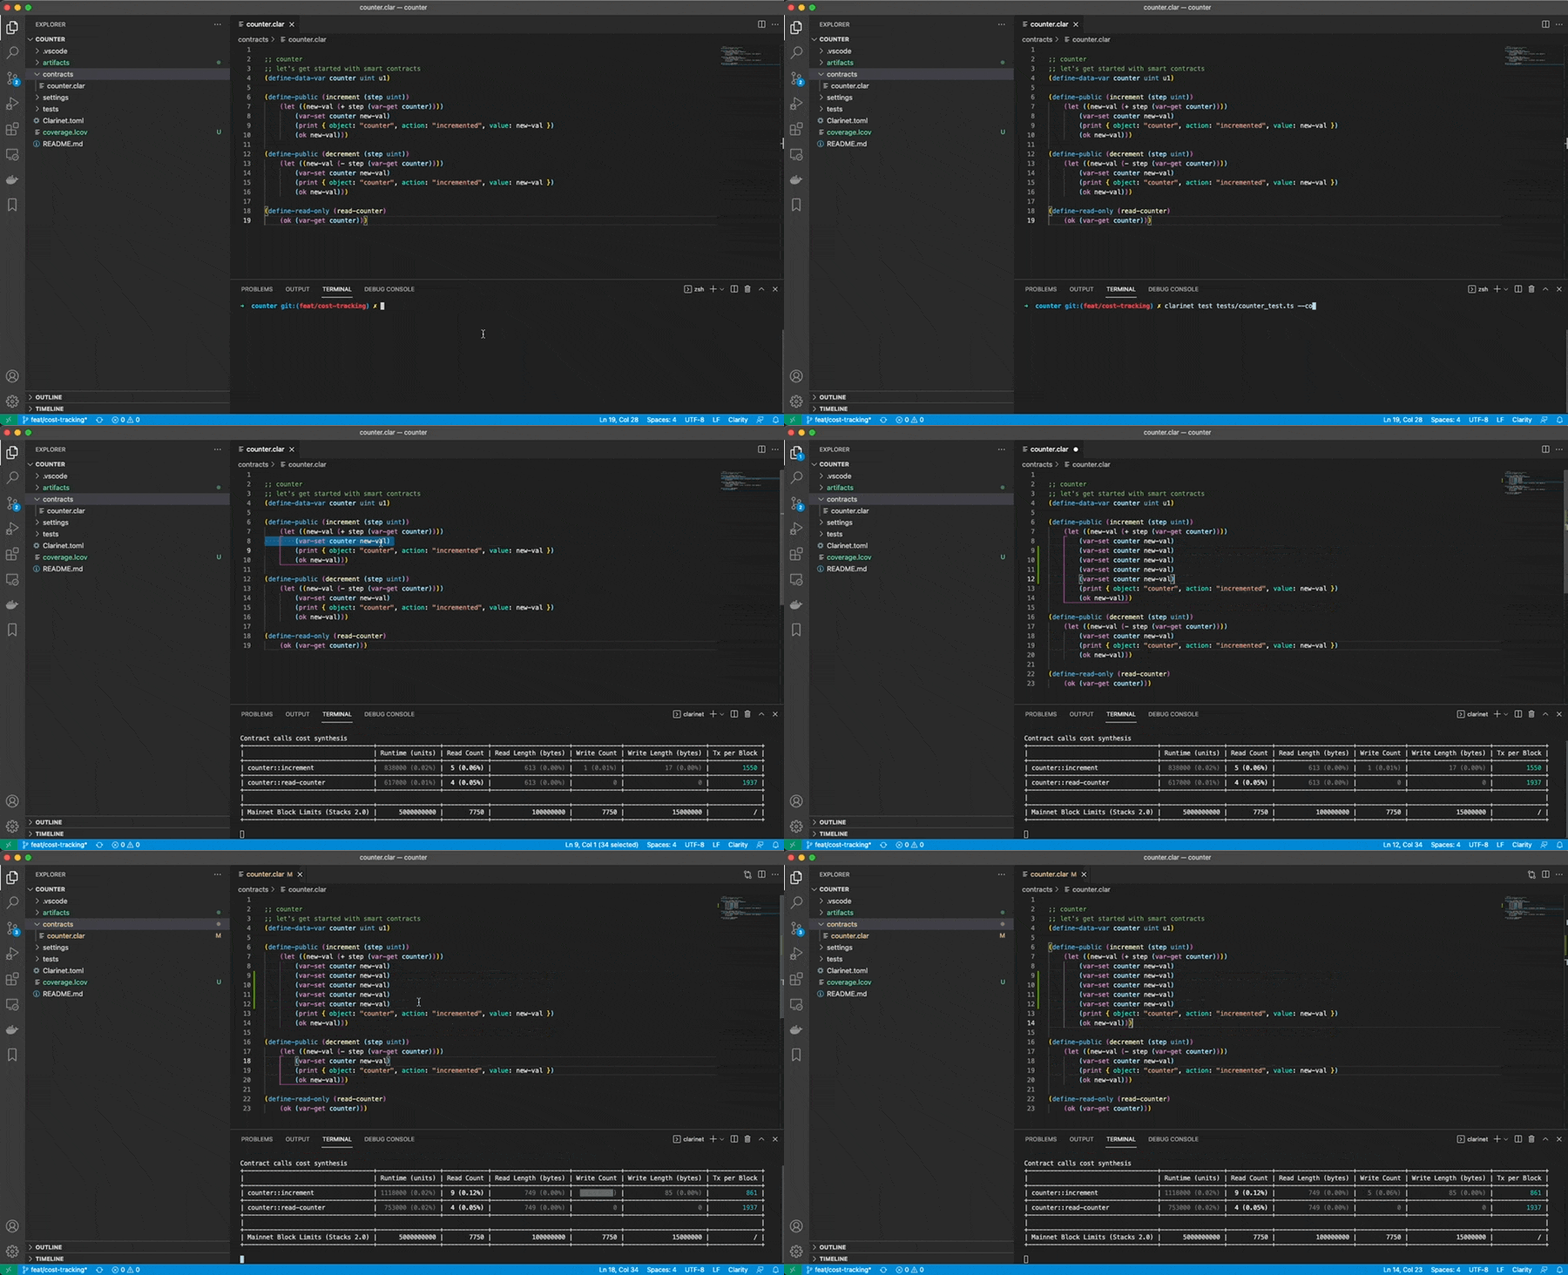
$ open index.htmlClarinet can also be use for optimizing costs. When executing a test suite, Clarinet will keep track of all the costs being computed when executing the contract-call, and display the most expensive ones in a table:
$ clarinet test --costThe --cost option can be used in conjunction with --watch and filters to maximize productivity, as illustrated here:
The Clarinet console is an interactive Clarity REPL that runs in-memory. Any contracts in the current project are automatically loaded into memory.
$ clarinet consoleYou can use the ::help command in the console for a list of valid commands, which can control the state of the
REPL chain, and let you advance the chain tip. Additionally, you can enter Clarity commands into the console and observe
the result of the command.
You can exit the console by pressing Ctrl + C twice.
Changes to contracts are not loaded into the console while it is running. If you make any changes to your contracts you must exit the console and run it again.
You can use Clarinet to deploy your contracts to your own local offline environment for testing and evaluation on a blockchain. Use the following command:
$ clarinet integrateMake sure that you have a working installation of Docker running locally.
You can use Clarinet to deploy your contracts to the public Testnet environment for testing and evaluation on a blockchain. Use the following command:
$ clarinet deploy --testnetClarinet can easily be extended by community members: open source contributions to clarinet are welcome, but developers can also write their own clarinet extensions if they want to integrate clarity contracts with their own tooling and workflow.
| Name | wallet access | disk write | disk read | Deployment | Description |
|---|---|---|---|---|---|
| stacksjs-helper-generator | no | yes | no | https://deno.land/x/clarinet@v0.16.0/ext/stacksjs-helper-generator.ts | Facilitates contract integration by generating some typescript constants that can be used with stacks.js. Never hard code a stacks address again! |
Extensions are ran with the following syntax:
$ clarinet run --allow-write https://deno.land/x/clarinet@v0.15.4/ext/stacksjs-helper-generator.ts
An extension can be deployed as a standalone plugin on Deno, or can also just be a local file if it includes sensitive / private setup informations. As illustrated in the example above, permissions (wallet / disk read / disk write) are declared using command flags. If at runtime, the clarinet extension is trying to write to disk, read disk, or access wallets without permission, the script will end up failing.
We welcome contributions to Clarinet! The following sections provide information on how to contribute.
- rust (>=1.52.0)
- cargo (>=1.52.0)
- node (>=v14.16.0) - Used for git commit hook
- npm (>=7.18.0) - Used for git commit hook
This repo follows the Conventional Commit spec when writing commit messages. It's important any pull requests submitted have commit messages which follow this standard.
To start contributing:
-
Fork this repo and clone the fork locally.
-
Create a new branch
git checkout -b <my-branch>
-
Run
npm iin the local repo to install and initializehuskyandcommitlint.npm i
-
These tools will be used in a git commit hook to lint and validate your commit message. If the message is invalid,
commitlintwill alert you to try again and fix it.Bad message:
$ git commit -m "bad message"
$ ⧗   input: bad message
$ ✖   subject may not be empty [subject-empty]
$ ✖   type may not be empty [type-empty]
$
$ ✖   found 2 problems, 0 warnings
$ ⓘ   Get help: https://github.com/conventional-changelog/commitlint/#what-is-commitlint
$
$ husky - commit-msg hook exited with code 1 (error)
Good message:
$ git commit -m "fix: added missing dependency"
$ [my-branch 4c028af] fix: added missing dependency
$ 1 file changed, 50 insertions(+)
-
-
After making your changes, ensure the following:
cargo buildruns successfullycargo testruns successfully- You've formatted your code with
cargo fmt --all -- - All functional tests in the
examplesdirectory pass.for testdir in $(ls examples); do pushd examples/${testdir} ../../target/debug/clarinet test . popd done
-
Submit a pull request against the
developbranch for review.


