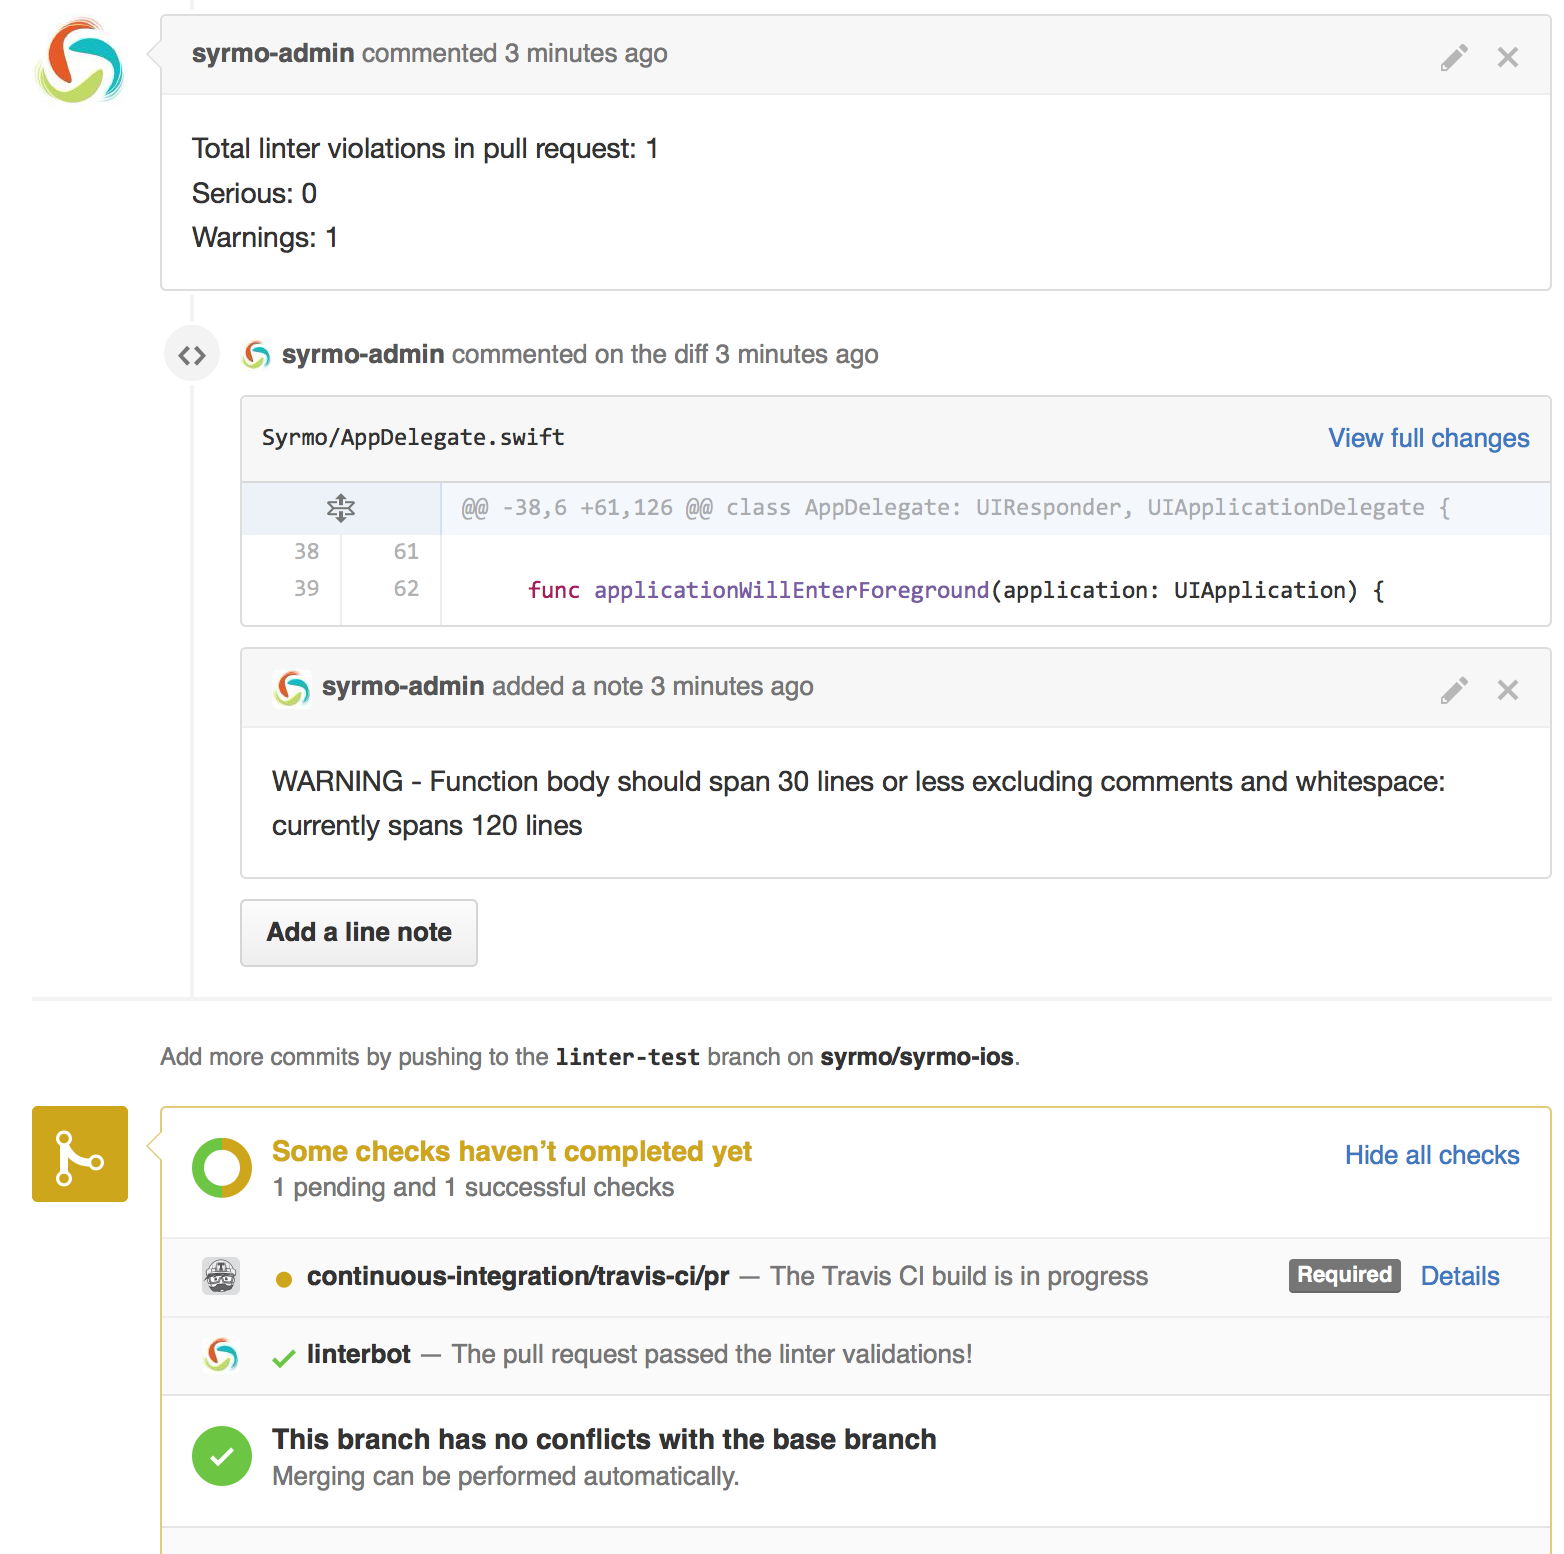
A bot that parses SwiftLint output and analyzes a GitHub pull request. Then for each linter violation it will make comment in the pull request diff on the line where the violation was made.
Add this line to your application's Gemfile:
gem 'linterbot'And then execute:
$ bundle
Or install it yourself as:
$ gem install linterbot
If you want to try it locally:
swiftlint lint --reporter json | linterbot REPOSITORY PULL_REQUEST_NUMBER
If you want to run it in TravisCI for every pull request triggered build you can create a script (with execution permission) called linter with the following content:
#!/bin/bash

if [ "$TRAVIS_PULL_REQUEST" != "false" ]
then
  swiftlint --reporter json > swiftlint-report.json || false
  linterbot $TRAVIS_REPO_SLUG $TRAVIS_PULL_REQUEST < swiftlint-report.json
fi
|| false avoids a build fail if there are severe lint error
Finally in your .travis.yml file:
language: objective-c
osx_image: xcode7.2
before_install:
- gem install bundler
- gem install linterbot
- brew install swiftlint
script:
- linter
- xcodebuild clean build test -project YourProject.xcodeproj -scheme YourProject
For more help run:
linterbot -h
and if you want to check all the available options for the run command (which is the default command to be run if none is provided) then run:
linterbot help run
In order for linterbot to be able to comment on your pull request it needs write access to the specified repository. Remember to add the repo scope when you create the GitHub access token. If you don't lintebot won't be able to run. For more information on how to create an access token check this tutorial. If you want to know more about GitHub's OAuth scopes check this section in their documentation.
You can provided an access token by either using the environmental variable GITHUB_ACCESS_TOKEN or using the .linterbot.yml (which should not be committed to your git repository).
You can define some configuration parameters in configuration file. By default linterbot will try to load .linterbot.yml from the current working directory. You can change it using the --config-file-path option.
The following are the supported parameters you can configure in the .linterbot.yml file:
github_access_token: 'YOUR_GITHUB_ACCESS_TOKEN'
linter_report_file: 'PATH/TO/SWIFTLINT/JSON/OUTPUT/FILE'
project_base_path: 'BASE/PROJECT/PATH'
By default linterbot will read from the standard input the JSON output of the swiftlint lint --reporter json command. You can tell linterbot to read the swiftlint output from a specific file either using the --linter-report-file-path option or through the .linterbot.yml file.
The base path of project must be provided. By default the current working directory where linterbot was executed is used. You can change it either using the --project-base-path or through the .linterbot.yml file.
After checking out the repo, run bin/setup to install dependencies. Then, run rake spec to run the tests. You can also run bin/console for an interactive prompt that will allow you to experiment.
To install this gem onto your local machine, run bundle exec rake install. To release a new version, update the version number in version.rb, and then run bundle exec rake release, which will create a git tag for the version, push git commits and tags, and push the .gem file to rubygems.org.
Bug reports and pull requests are welcome on GitHub at https://github.com/guidomb/linterbot.
The gem is available as open source under the terms of the MIT License.
