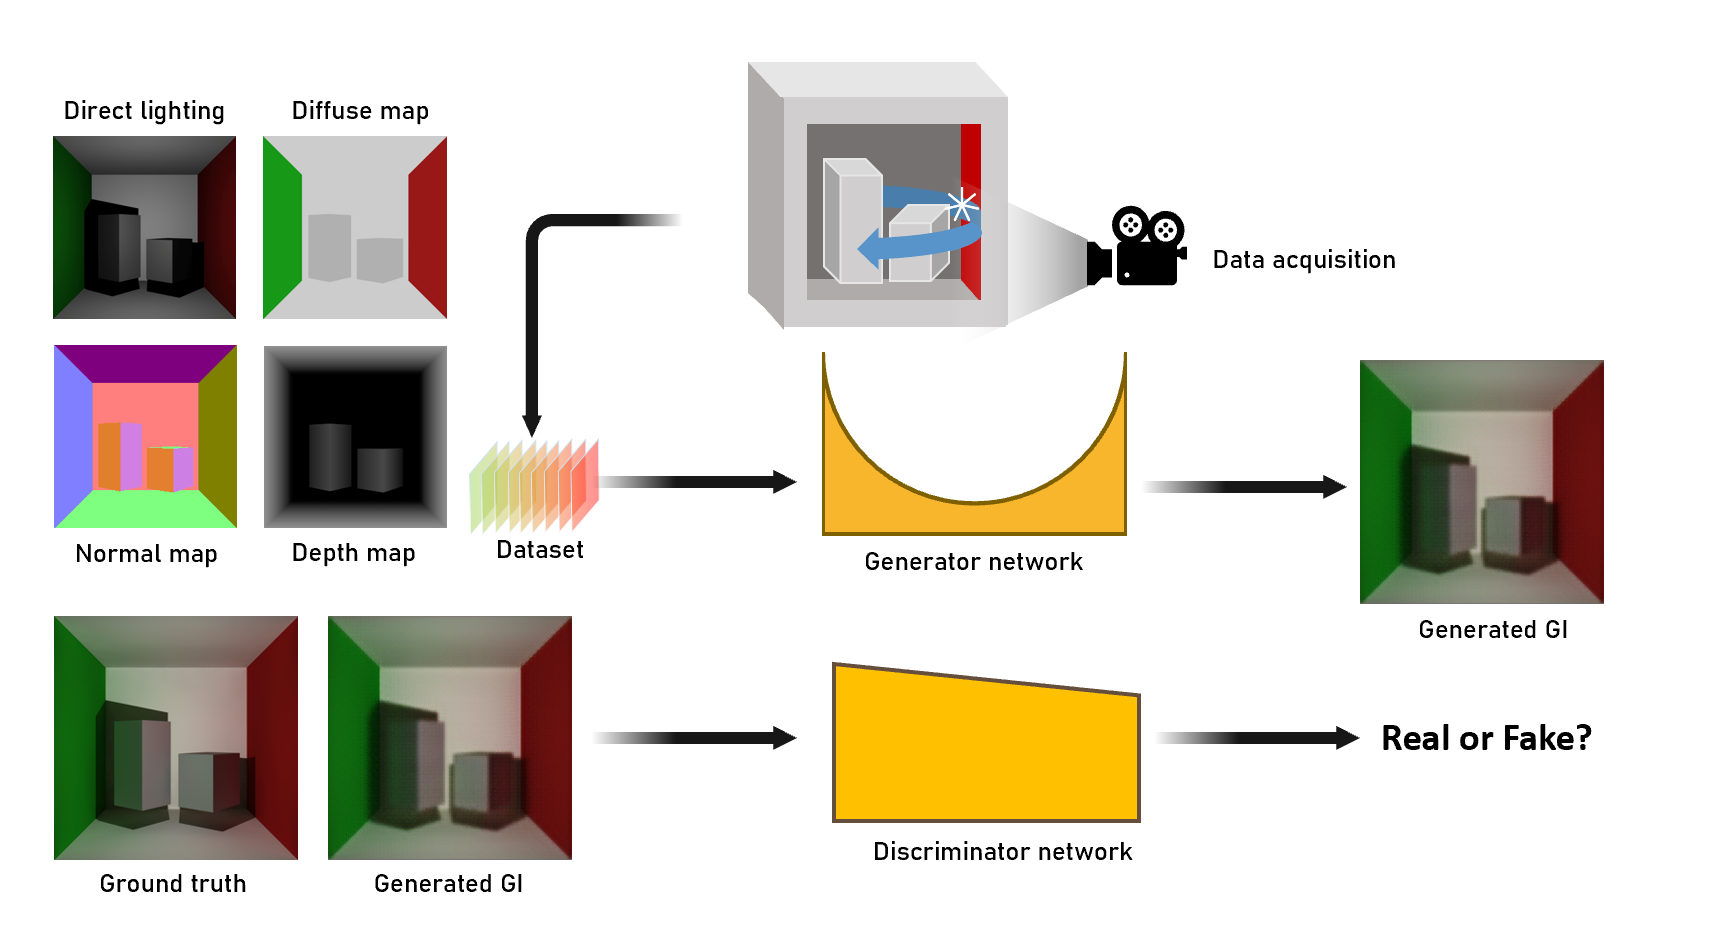
SRDGI:Real-time Global Illumination via deep learning
This is the SRDGI project code for the cs337 course. This project proposes a method to further improve the performance of the network, balancing rendering quality with prediction time, to obtain a new network SRDGI, while regenerating a more diverse dataset, using which the SRDGI is trained with further enhanced generalization capabilities to meet a wider range of hardware and latency requirements.
Dataset
Download Datasets
The training images dataset we used can be downloaded from (https://jbox.sjtu.edu.cn/l/t1cKmu).
You will download two directory
- dataset : the datset which have been divided into train, validate and test dataset in different scenes
- output : the raw data we get by some rendering engine (Unity VXGI, C4D Octane)
Create your own dataset
We also provide a simple way to create your own dataset from the raw data in the output directory.
What you need to is follow 3 simple steps:
- Build the local directory
outputand build a subdirectory named of yout own scene - Put your own G-buffer images (aledo,direct,depth,normal) and ground truth images into this subdirectory.
- Choose one proper sricpt file in the directory
dataset_generatorto divide your images and verify the script of your own scene's name
Then execute the whole script below:(we use dataset_move_oc.py as a example)python dataset_move_oc.py
Usage
SRDGI
Train model
python train.py --dataset PATH_TO_DATASETDIR --n_epoch 50 \
                --resume_G PATH_TO_RESUME_GENERATER --resume_D PATH_TO_RESUME_DISCRIMINATOR \
                --lamda 100 --lamda_F 1
--dataset: path to dataset.--n_epoch: number of training epochs.--resume_G: path to generator checkpoints to resume.--resume_D: path to discriminator checkpoint to resume.--lamda: the parameter lambda in the loss function--lamda_F: the parameter lambda_F in the loss function
test model (show the MSE and SSIM)
python test_compare.py --dataset PATH_TO_DATASETDIR --model PATH_TO_MODEL
--dataset: path to dataset.--model: path to model.
test model I(show the result image)
python test.py --dataset PATH_TO_DATASETDIR --model PATH_TO_MODEL
--dataset: path to dataset.--model: path to model.
The output of the images will be shown in the directory result/{your scene's name}
Dynamic Channels
Before you train or test the dynamic channels model, you should prepare the dataset file directory first and be located in the directory Dynamic-channels
cd Dynamic-channels/
Train model
python train.py --dataset PATH_TO_DATASETDIR --n_epoch 50 --dynamic_channels 1
--dataset: path to dataset.--n_epoch: number of training epochs.--dynamic_channels: set it to 1 for running with dynamic channel, 0 for full channel.
Render image
python test.py --model PATH_TO_MODEL --dataset PATH_TO_DATASETDIR --accuracy 1
--model: path to model.--dataset: path to dataset.--accuracy: an integer between 1 and 4, the larger the rendering accuracy the higher.
Acknowledge
- SRGAN : https://github.com/leftthomas/SRGAN
- Deep illumination: https://github.com/CreativeCodingLab/DeepIllumination
- anycost-gan: https://github.com/mit-han-lab/anycost-gan
Group
Members:
- Xinhao Zheng : void_zxh@sjtu.edu.cn
- Yutian Liu : stau7001@sjtu.edu.cn
Mentor: Ran Yi
