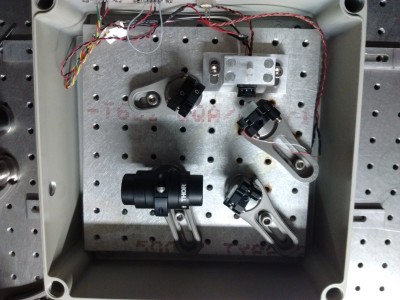
This is a design for a traditional-syyle external cavity diode laser, based on commercial off-the-shelf parts. A separate parts list and drawings can be found in this repository.
-
Drill holes in the box for feeding through the current controller, temperature controller and piezo driver.
-
Glue a thermistor into the diode mount using a thermally conductive epoxy. Place a TEC between the two pieces of the diode mount. Put the diode in a collimation tube, power it up and collimate it. Slide the diode + collimation tube into the diode mount.
-
Rotate the diode collimation tube so that the wider axis of its elliptical output is horizontal (in the plane of the breadboard). Fix the collimation tube in the mount using 4-40 nylon screws.
-
Glue the grating onto a kinematic mount. Make sure that the grating is oriented correctly: the grating should diffract in the horizontal plane.
-
Adjust the grating angle so that the first-order beam is diffracted back into the diode. You may need to align the vertical overlap carefully, and iterate between vertical and horizontal alignment a few times. The specular reflection is the output beam.
-
Put in a couple of mirrors on kinematic mounts to give you enough degrees of freedom to send the output beam through an isolator.
-
(Optional) Put in an anamorphic prism pair to circularize the output beam, before the isolator. Put pads of sorbothane underneath the breadboard. Add foam padding around the box for acoustic isolation.

